
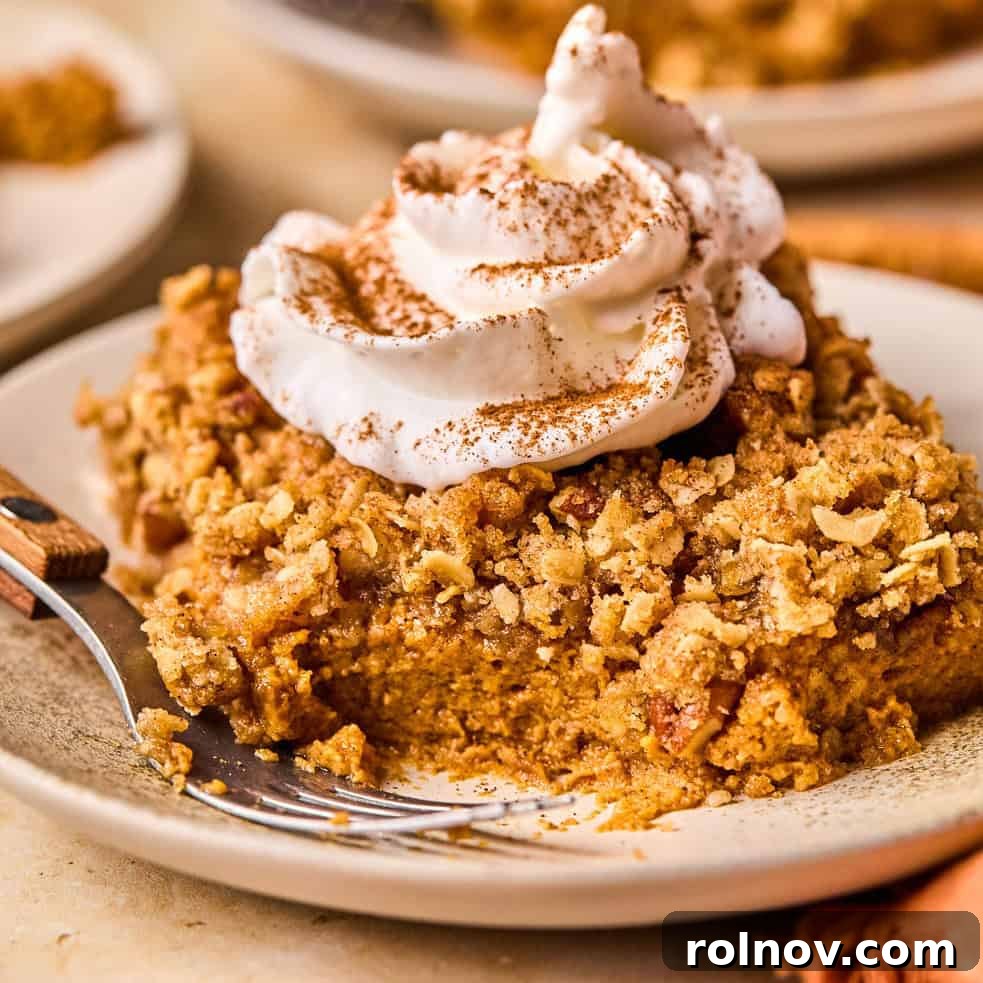
Ultimate Pumpkin Crumble Recipe: Your New Favorite Fall Dessert
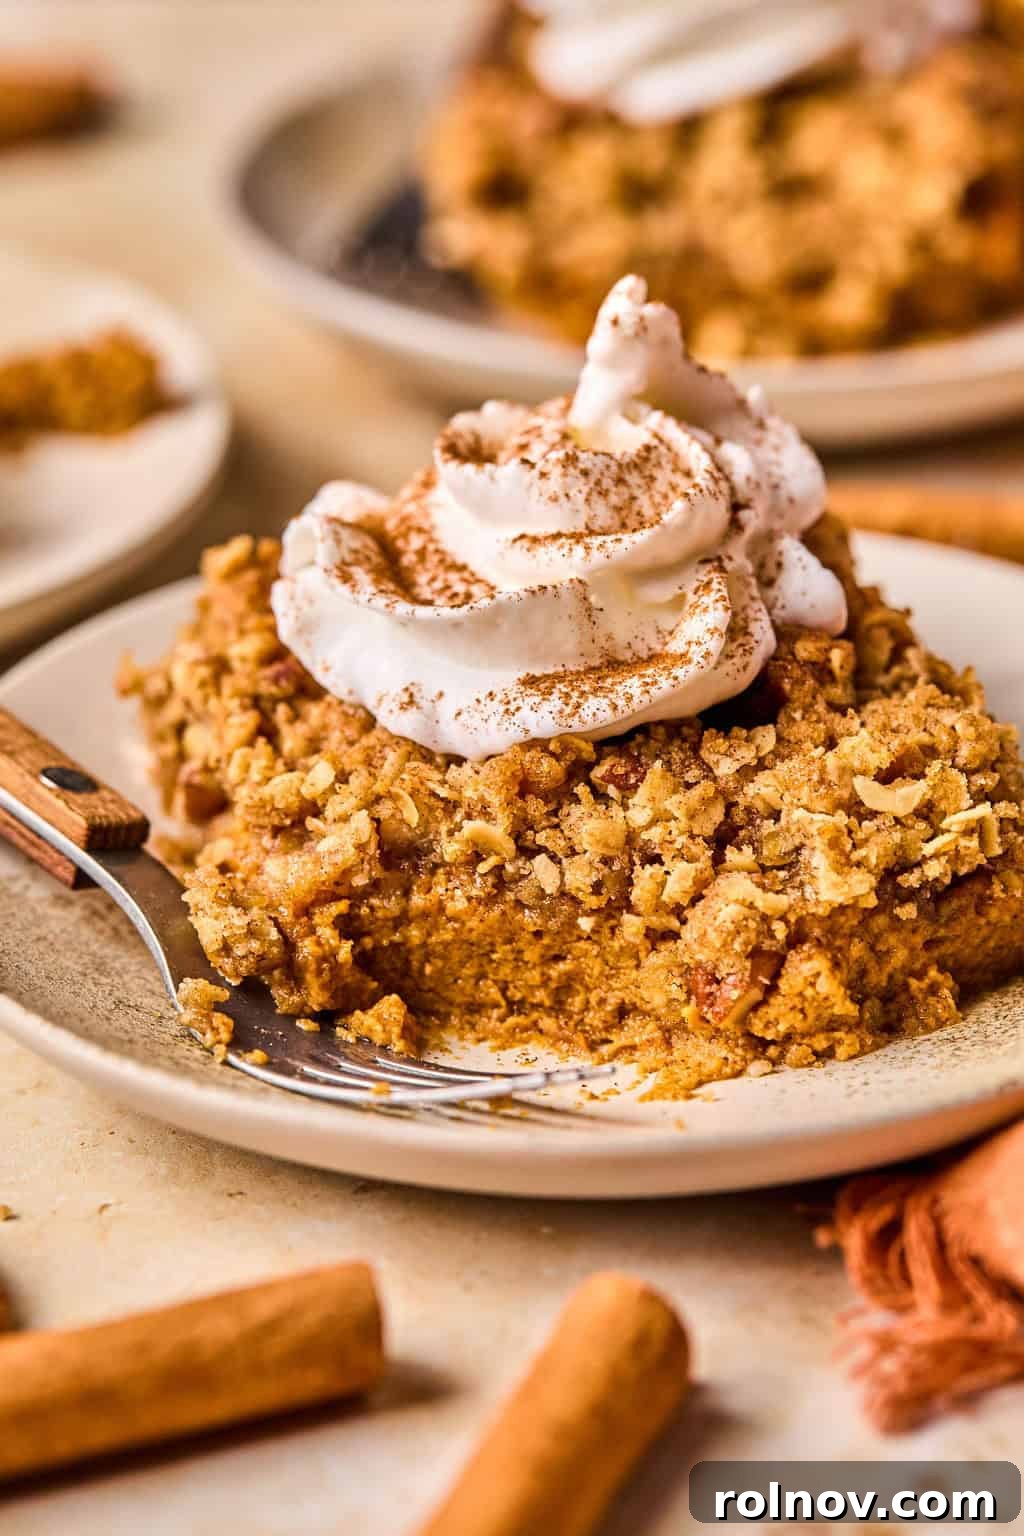
Welcome to the ultimate fall dessert that perfectly marries the cozy comfort of classic pumpkin pie with the irresistible crunch of a fruit crisp: the Pumpkin Crumble. Imagine a rich, creamy pumpkin pie filling, bursting with warm spices, all topped with a buttery, golden oat streusel. This easy-to-make dessert requires only about 10 minutes of active prep time, making it an ideal choice for busy holiday seasons or any autumn gathering. Whether you prefer to serve it chilled in neat slices like a traditional pie or warm and spooned out like a rustic crisp, this recipe is designed to quickly become your go-to fall favorite.
First published in November 2014, this recipe has been a beloved staple for nearly a decade, and it received an update in November 2019 to ensure it remains as delightful and effortless as ever. We’ve refined the flavors and simplified the steps, guaranteeing a perfect pumpkin crumble every time. Say goodbye to the fuss of making a pie crust and embrace the simplicity and incredible taste of this sensational dessert.
Why You’ll Fall in Love with This Easy Pumpkin Pie Crumble
This Pumpkin Crumble stands out from other fall desserts for several compelling reasons. It ingeniously combines the best elements of two classic treats: the smooth, spiced indulgence of pumpkin pie and the textural delight of a crispy, buttery crumble. While crisps traditionally feature oats and crumbles might not, the terms are often used interchangeably, and our recipe proudly incorporates oats for that perfect texture.
Effortless Preparation for Maximum Enjoyment

Minimal Prep Time: One of the greatest advantages of this pumpkin crumble is its incredible ease and speed. With only minutes of hands-on preparation, you can whip up the luscious pumpkin filling and the irresistible crumble topping. Simply whisk together the pumpkin layer ingredients, then quickly mix the streusel components. The majority of the work involves baking and patiently waiting for your kitchen to fill with the most inviting autumnal aromas. Forget complex recipes; this is a straightforward path to pure dessert bliss.
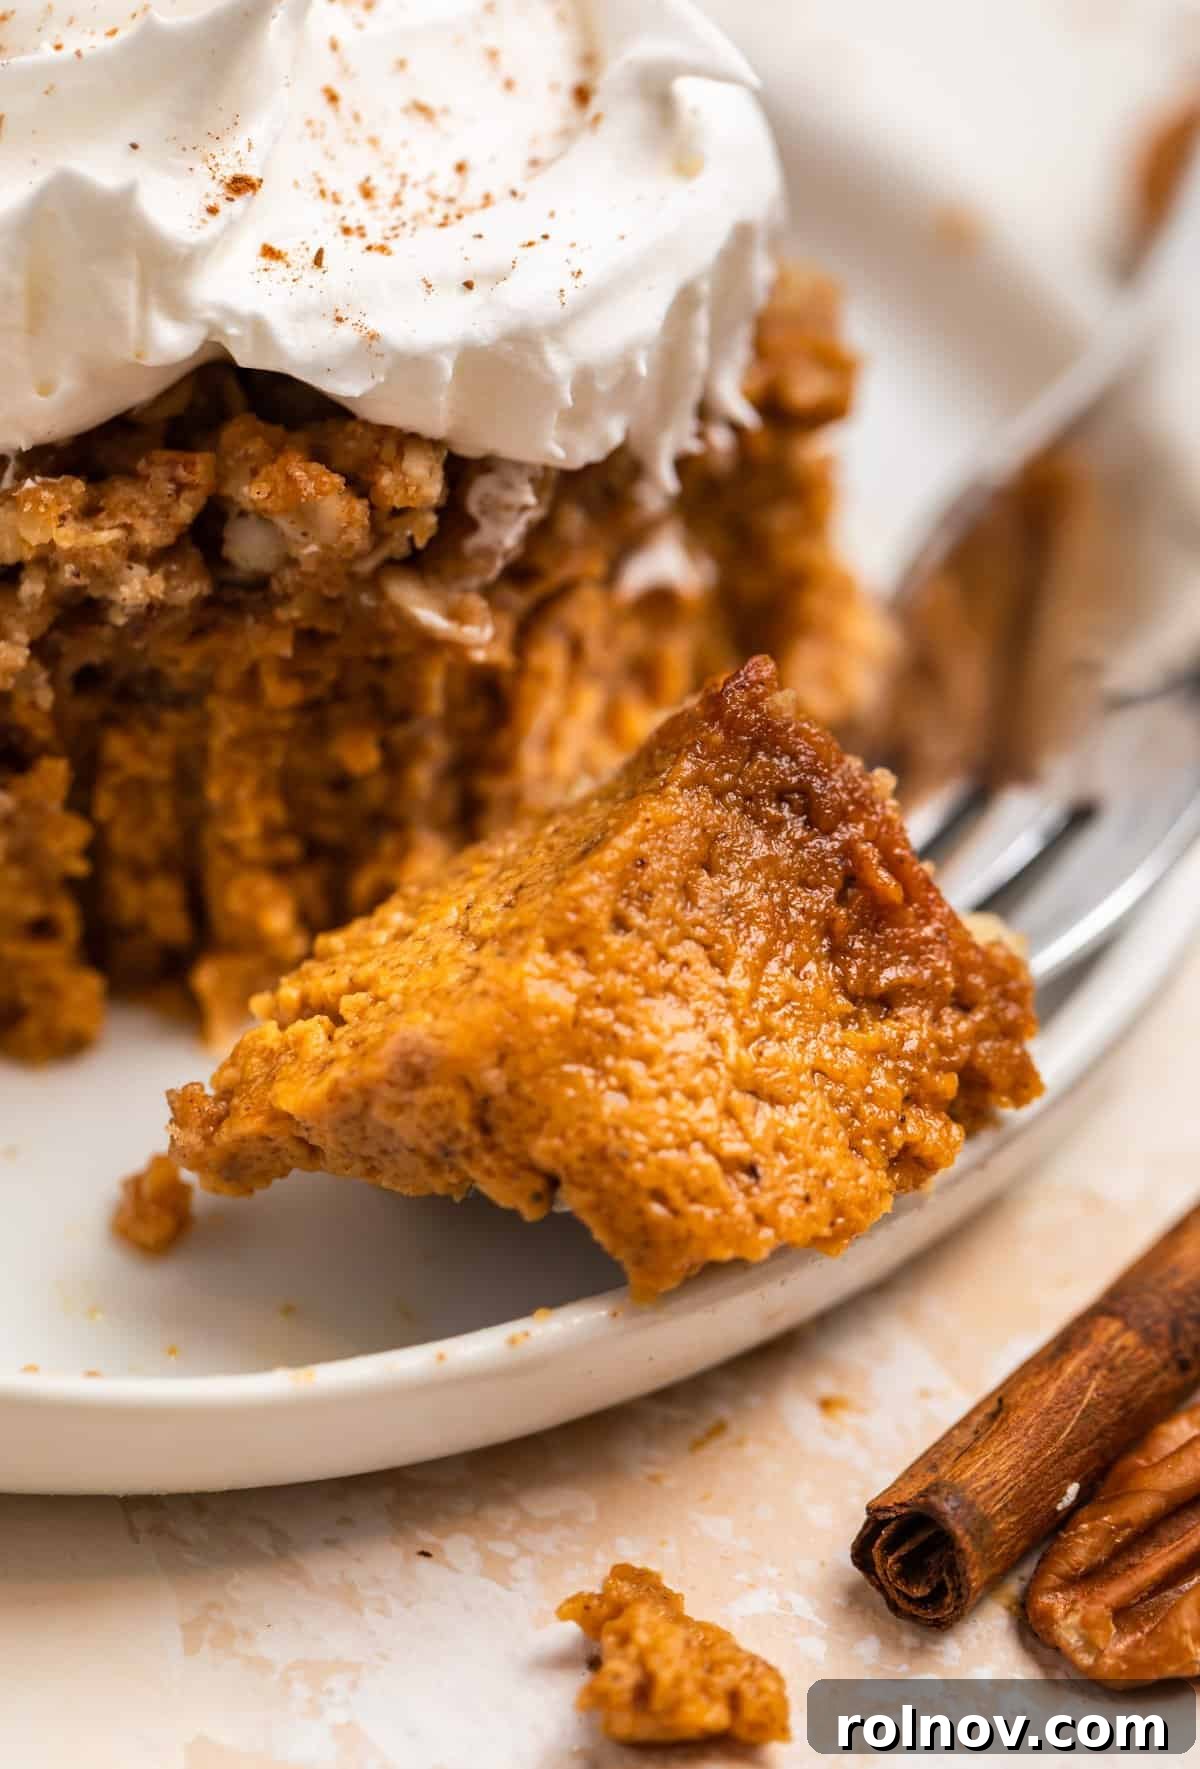
A Symphony of Textures and Flavors: This dessert delivers a truly divine experience with every spoonful. It features a rich, velvety pumpkin base that’s reminiscent of your favorite pumpkin pie, but without the need for a fussy pie crust. Crowned with a generously buttery, golden oat topping, it offers a delightful contrast in textures – creamy and smooth below, crunchy and crumbly on top. This harmonious blend makes it an absolute dream for any pumpkin enthusiast and a guaranteed showstopper during the holiday season.
Perfect for Making Ahead: Planning a holiday feast or a large gathering? This pumpkin crumble is your secret weapon. It can be easily prepared a day in advance, freeing up valuable time on the day of your event. In fact, many people find that the flavors deepen and the pumpkin layer sets even more beautifully when chilled overnight, making for perfectly firm slices. Whether served warm from the oven or cool from the refrigerator, its convenience is unmatched.
Our family has cherished this recipe for almost a decade, making it a beloved tradition. We are confident it will become a cherished part of your family’s fall celebrations too!
Essential Ingredients for Your Perfect Pumpkin Crumble
Crafting this delightful pumpkin crumble starts with selecting the right ingredients. Each component plays a vital role in achieving that perfect balance of creamy filling and crunchy topping.
For the Irresistible Pumpkin Layer:
- Pumpkin Purée: Be sure to use pure pumpkin purée, not pumpkin pie filling. Pumpkin pie filling comes pre-sweetened and spiced, and using it in this recipe would result in an overly sweet and intensely spiced dessert, disrupting the delicate flavor balance we aim for.
- Evaporated Milk: This ingredient is key to achieving a luxuriously creamy pumpkin layer. Double-check that you’re grabbing evaporated milk, not condensed milk, which is heavily sweetened and much thicker. They are often found near each other in the grocery store.
- Eggs: You’ll need 2 large eggs. For the best texture and consistency, allow your eggs to come to room temperature before mixing. This helps them incorporate more smoothly into the batter.
- Brown Sugar: Whether you opt for light or dark brown sugar is a personal preference; I typically use light. The brown sugar not only adds a wonderful sweetness but also imparts a rich, deep flavor profile to the pumpkin pie crumble.
- Warm Spices: Instead of relying on a pre-mixed pumpkin pie spice blend, I prefer to create my own custom blend for a nuanced flavor. My preferred combination includes cinnamon, ground ginger, and ground cloves. If you love nutmeg, feel free to add a pinch; however, I often omit it as I’m not its biggest fan. If convenience is key, a good quality pumpkin pie spice blend can certainly be used as a substitute for the individual spices.
- Vanilla Extract: A touch of vanilla enhances all the other flavors, adding depth and warmth to the pumpkin filling.
- Sea Salt: Just a half teaspoon of sea salt balances the sweetness and highlights the complex spice notes, bringing all the flavors into harmony.
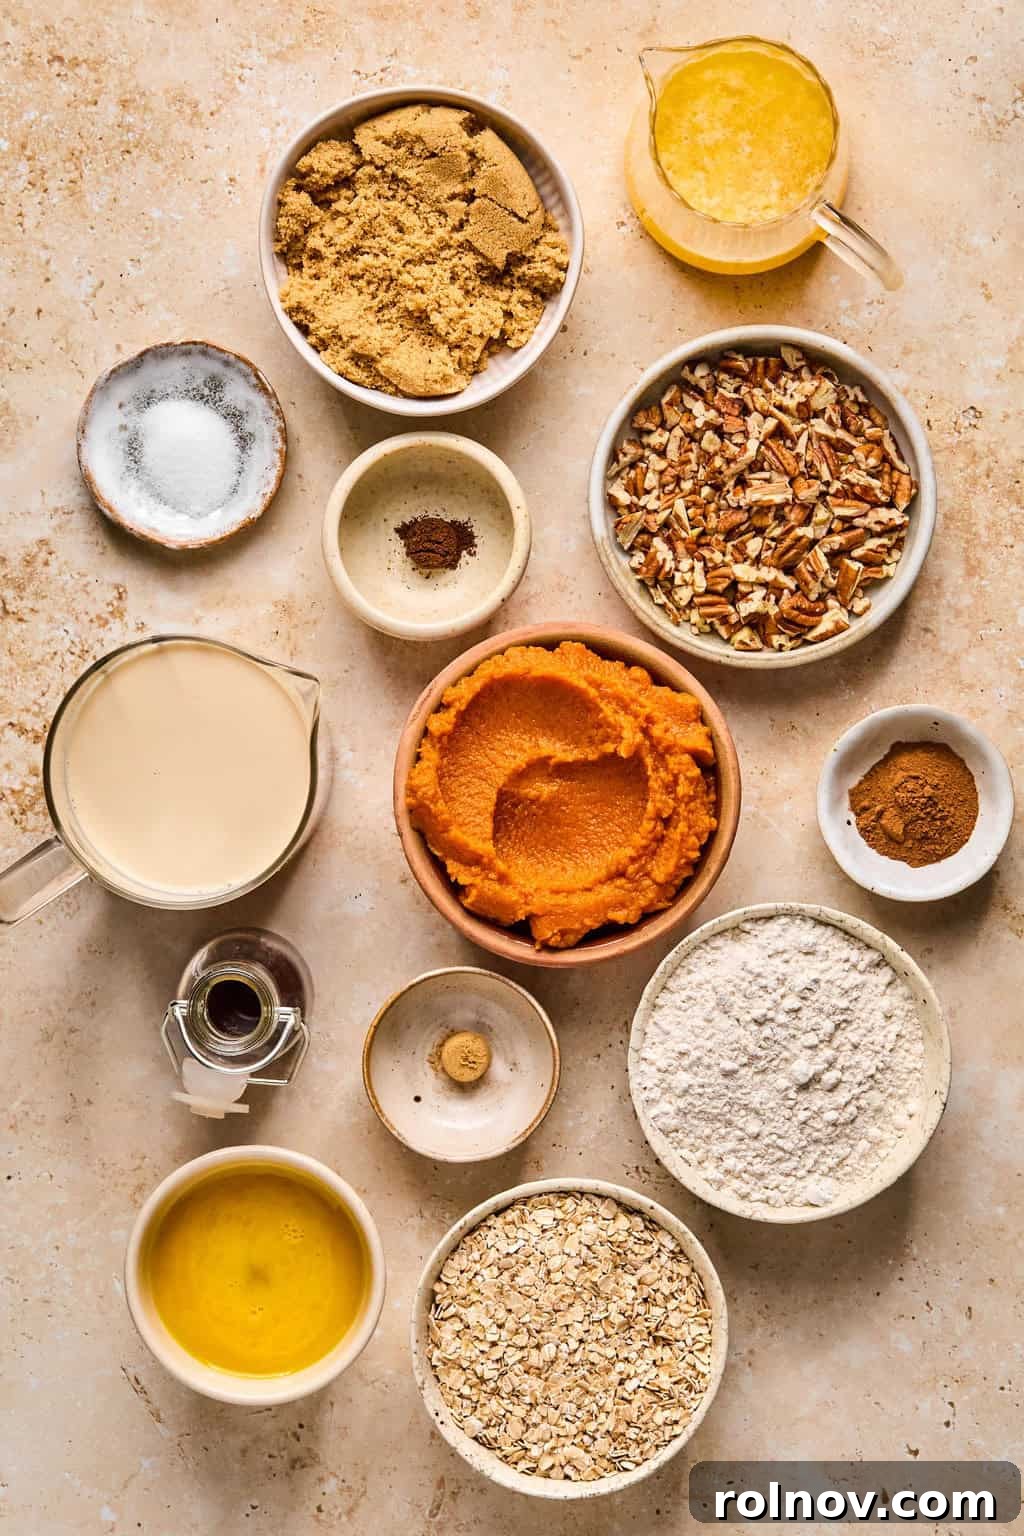
For the Golden Crumble Topping:
- Butter: Use unsalted melted butter. If you only have salted butter on hand, simply reduce or omit the additional salt called for in the topping ingredients to avoid an overly salty taste.
- Quick Oats: While old-fashioned or rolled oats can technically be used, quick oats are highly recommended for this recipe. They contribute to a more cohesive crumble layer that blends seamlessly and achieves a more uniform crispness.
- All-Purpose Flour: Standard all-purpose flour forms the base of our crumble. For those with dietary restrictions, a 1:1 gluten-free all-purpose flour blend can be successfully substituted.
- Brown Sugar: Another half cup of brown sugar for the topping adds that characteristic caramelized sweetness and contributes to the golden-brown crust.
- Cinnamon: A generous amount of cinnamon for the topping ties into the warm spices of the pumpkin filling, creating a cohesive flavor profile.
- Vanilla Extract: A small amount of vanilla extract in the crumble enhances its overall richness.
- Pecans (Optional): Chopped pecans are an optional addition that provides an extra layer of crunch and nutty flavor. If you have nut allergies or simply prefer not to include them, feel free to omit them entirely. Walnuts also make an excellent substitute if you prefer their flavor.
- Dash of Sea Salt: A tiny dash of sea salt in the topping is crucial for bringing out the sweetness and complementing the butteriness of the crumble.
Step-by-Step Guide to Baking Your Pumpkin Crumble
Follow these simple steps to create a show-stopping pumpkin crumble that will impress everyone.
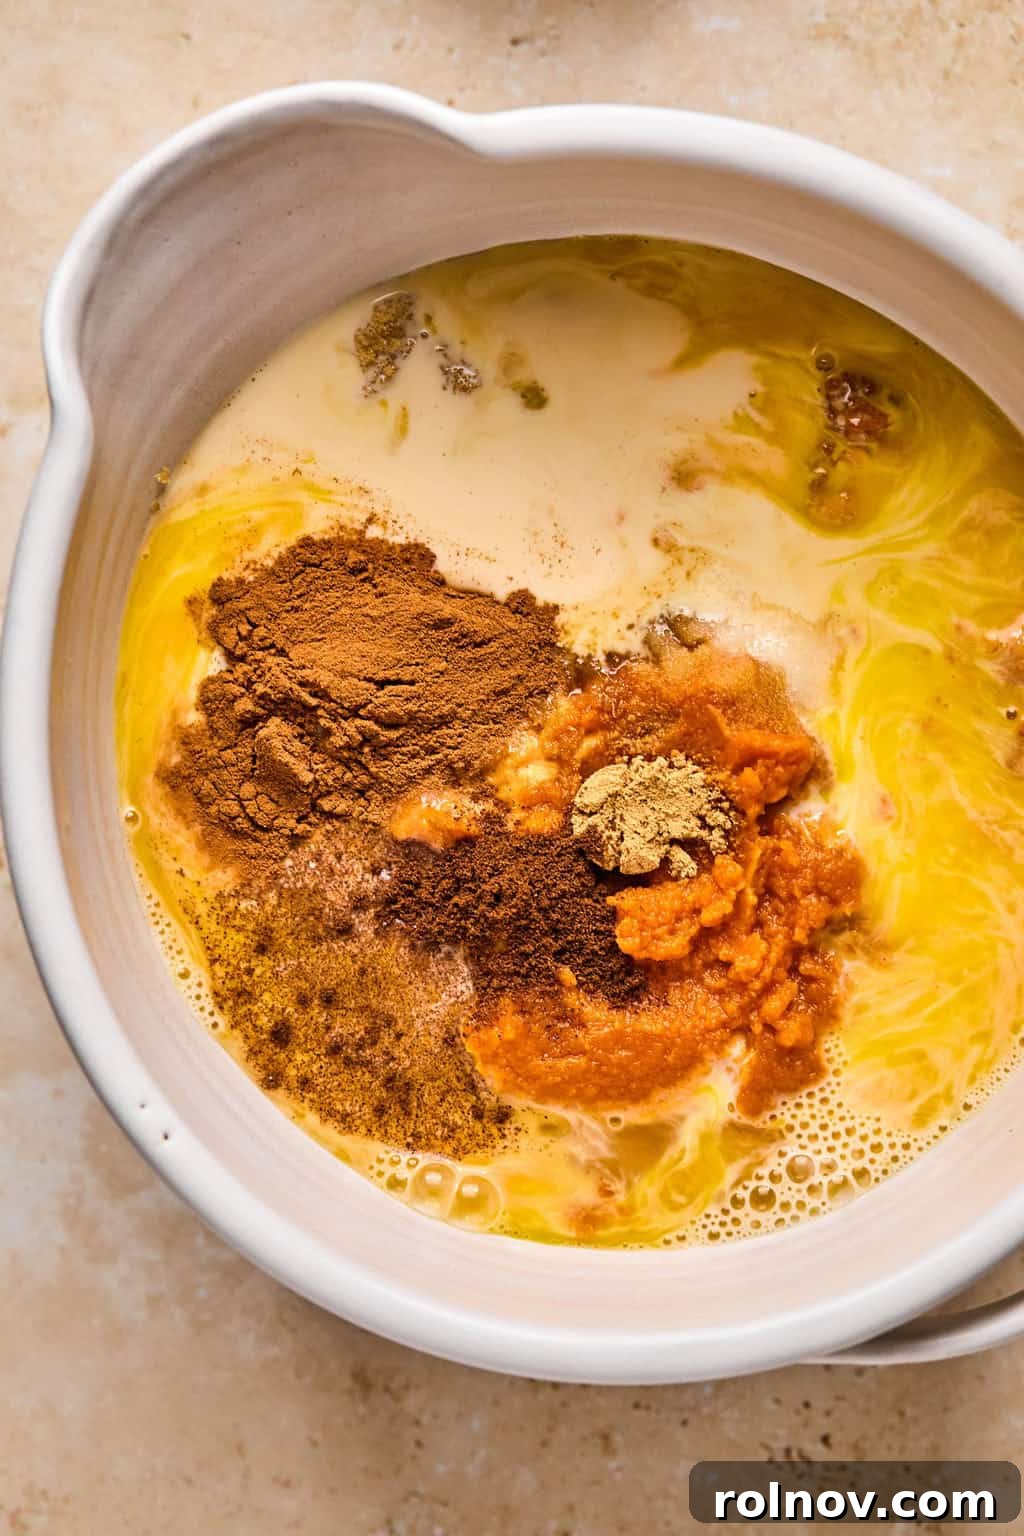
Step 1: Prepare the Pumpkin Filling. Begin by preheating your oven to 375°F (190°C). In a large mixing bowl, combine all the ingredients for the pumpkin layer: pumpkin purée, brown sugar, lightly beaten eggs, cinnamon, ground cloves, ground ginger, vanilla extract, evaporated milk, and sea salt.
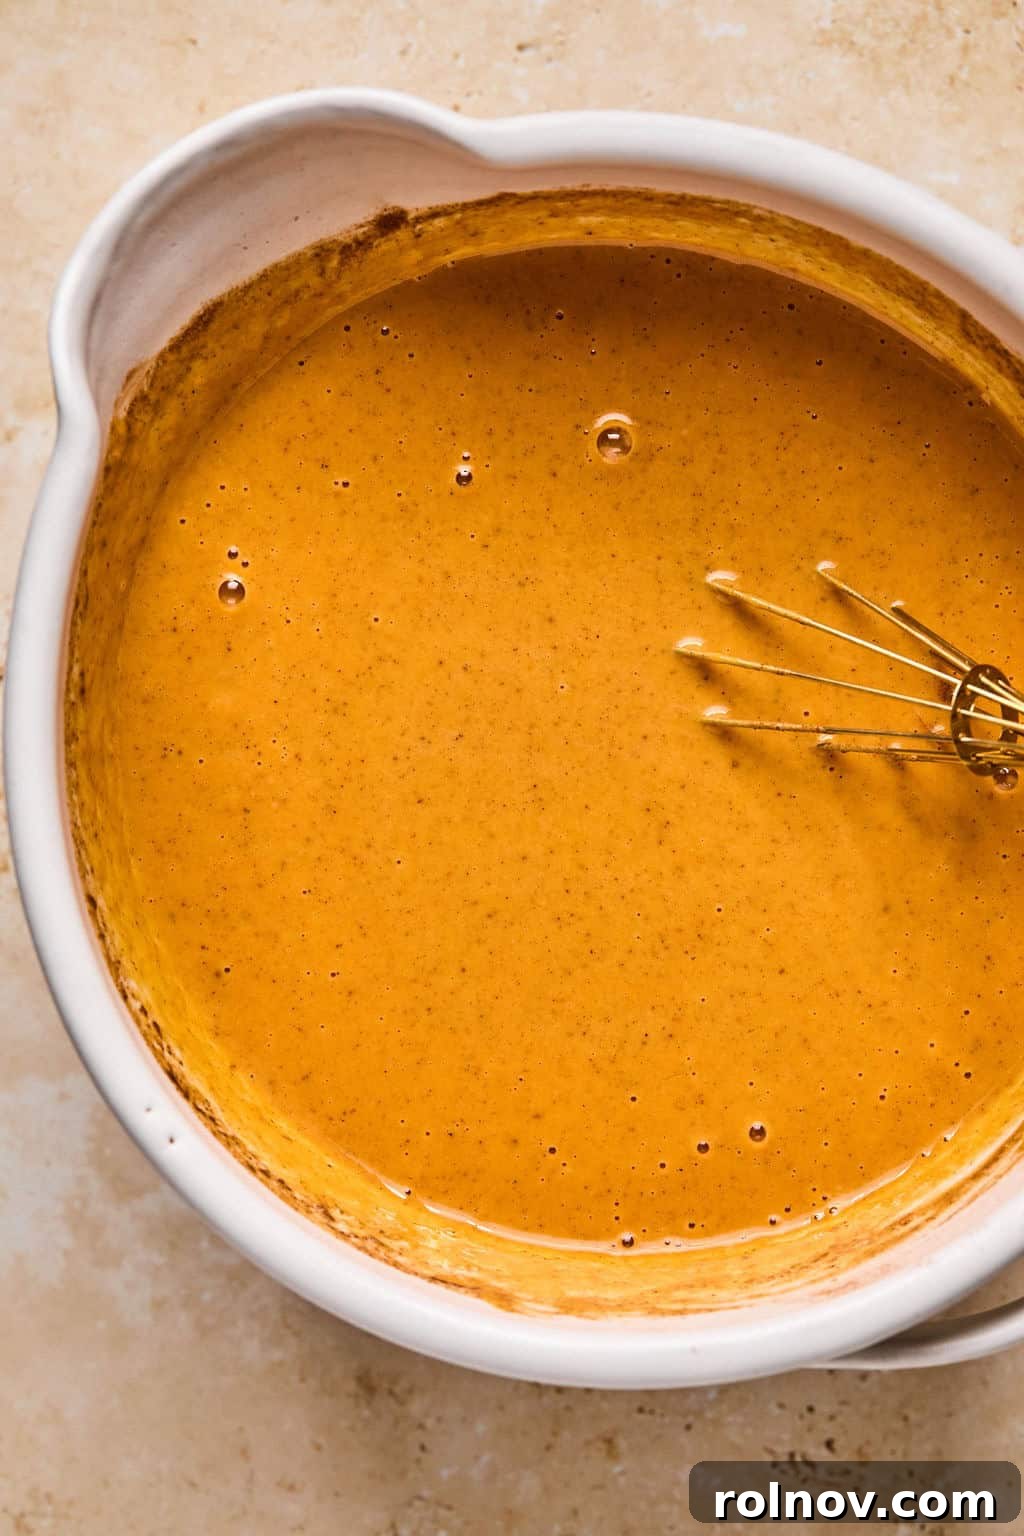
Step 2: Whisk Until Smooth. Whisk the pumpkin filling ingredients vigorously until the mixture is completely smooth and well combined. Ensure there are no lumps of brown sugar or unincorporated spices, as this will result in a uniform, creamy texture.
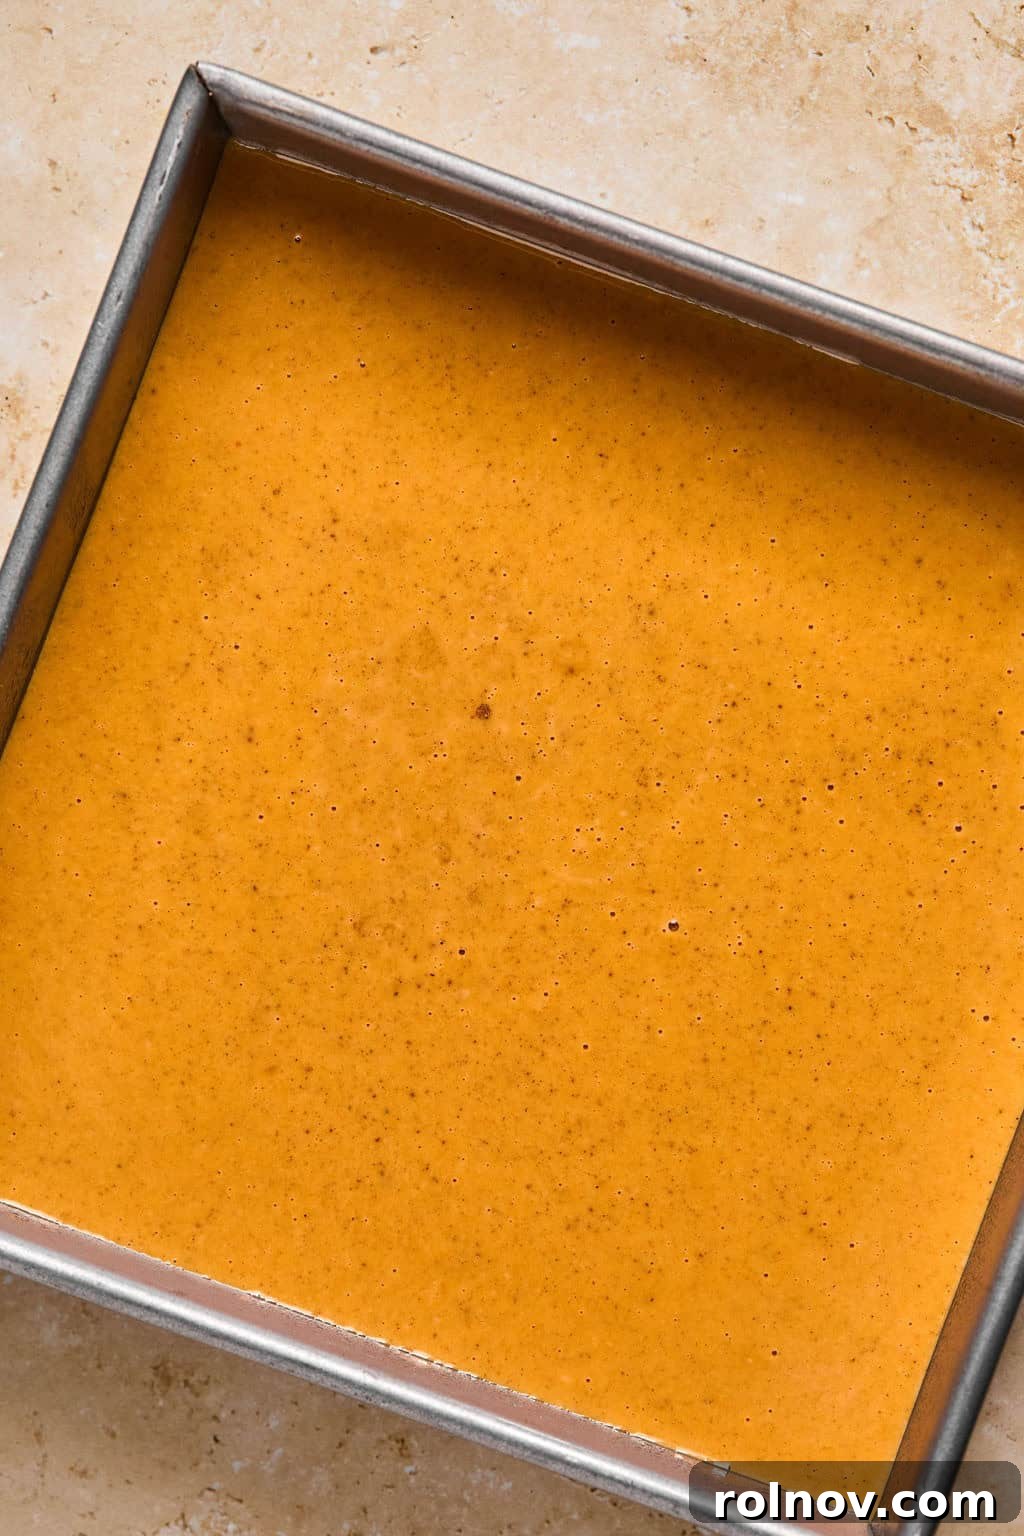
Step 3: Initial Bake of the Pumpkin Layer. Lightly grease an 8×8 inch baking pan. While a 9×9 inch pan can be used, an 8×8 inch pan yields a thicker, more satisfying pumpkin layer. A round 8-9 inch cast iron skillet also works beautifully. Pour the pumpkin mixture evenly into the prepared pan. Bake for approximately 20-25 minutes in the preheated oven. This initial bake helps the pumpkin layer set partially before the crumble topping is added.
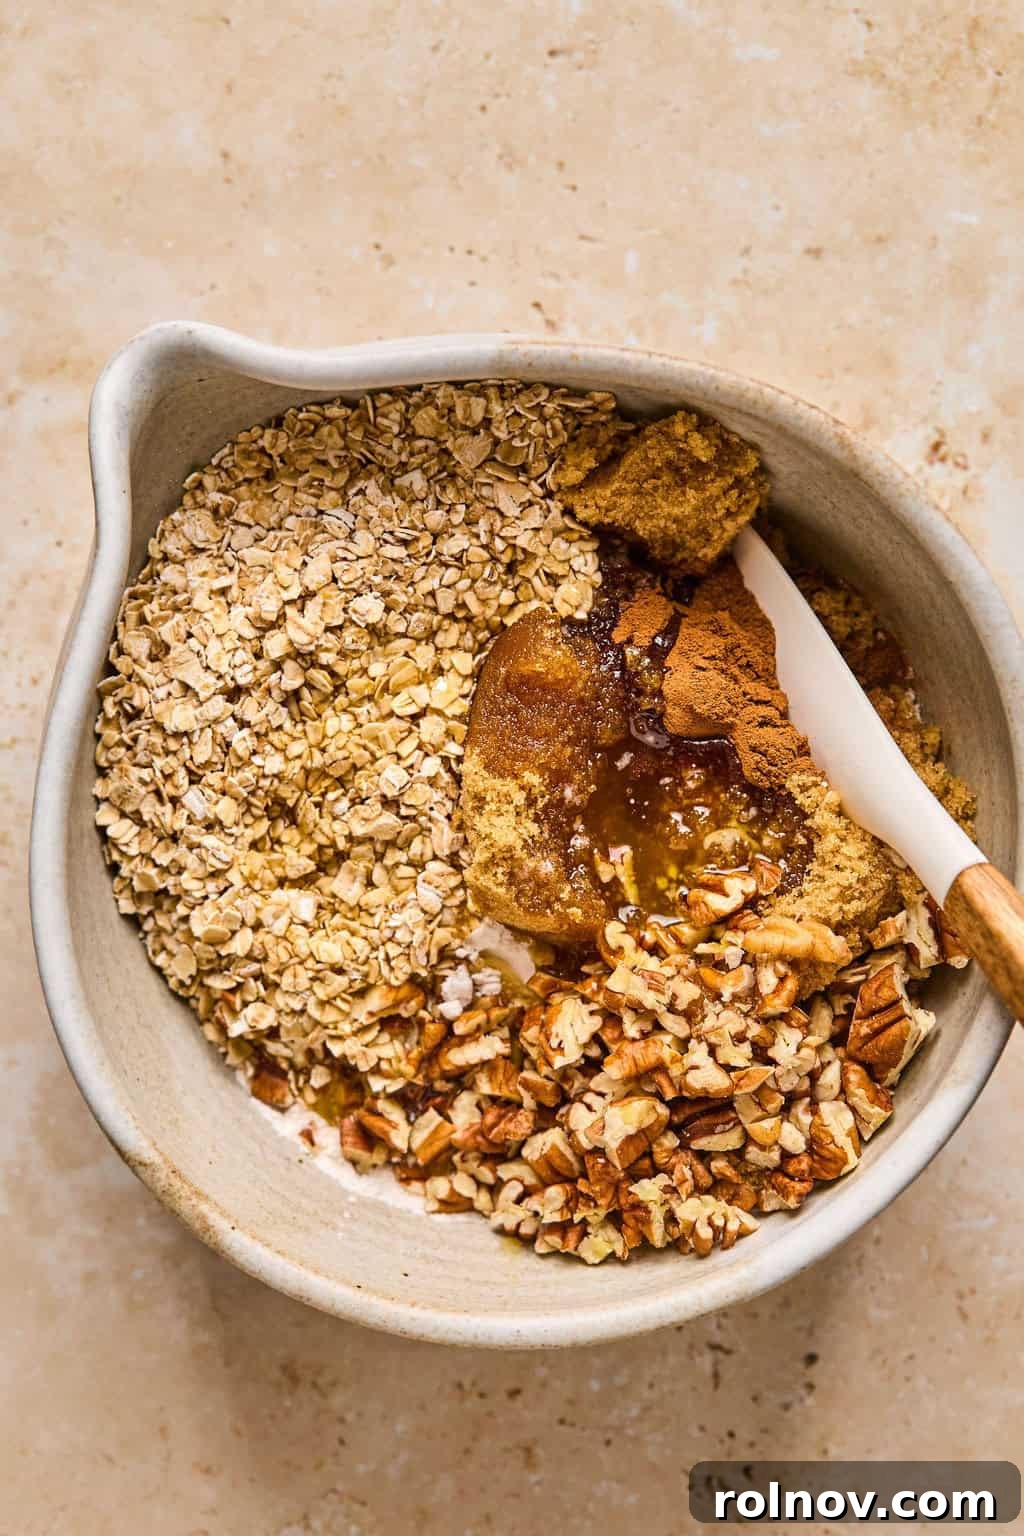
Step 4: Prepare the Crumble Topping. While the pumpkin filling is undergoing its initial bake, prepare the crumble topping. In a separate mixing bowl, combine the flour, quick oats, brown sugar, cinnamon, vanilla extract, chopped pecans (if using), and a dash of sea salt. Start by adding about half of the melted butter, stirring with a spoon or your fingers.
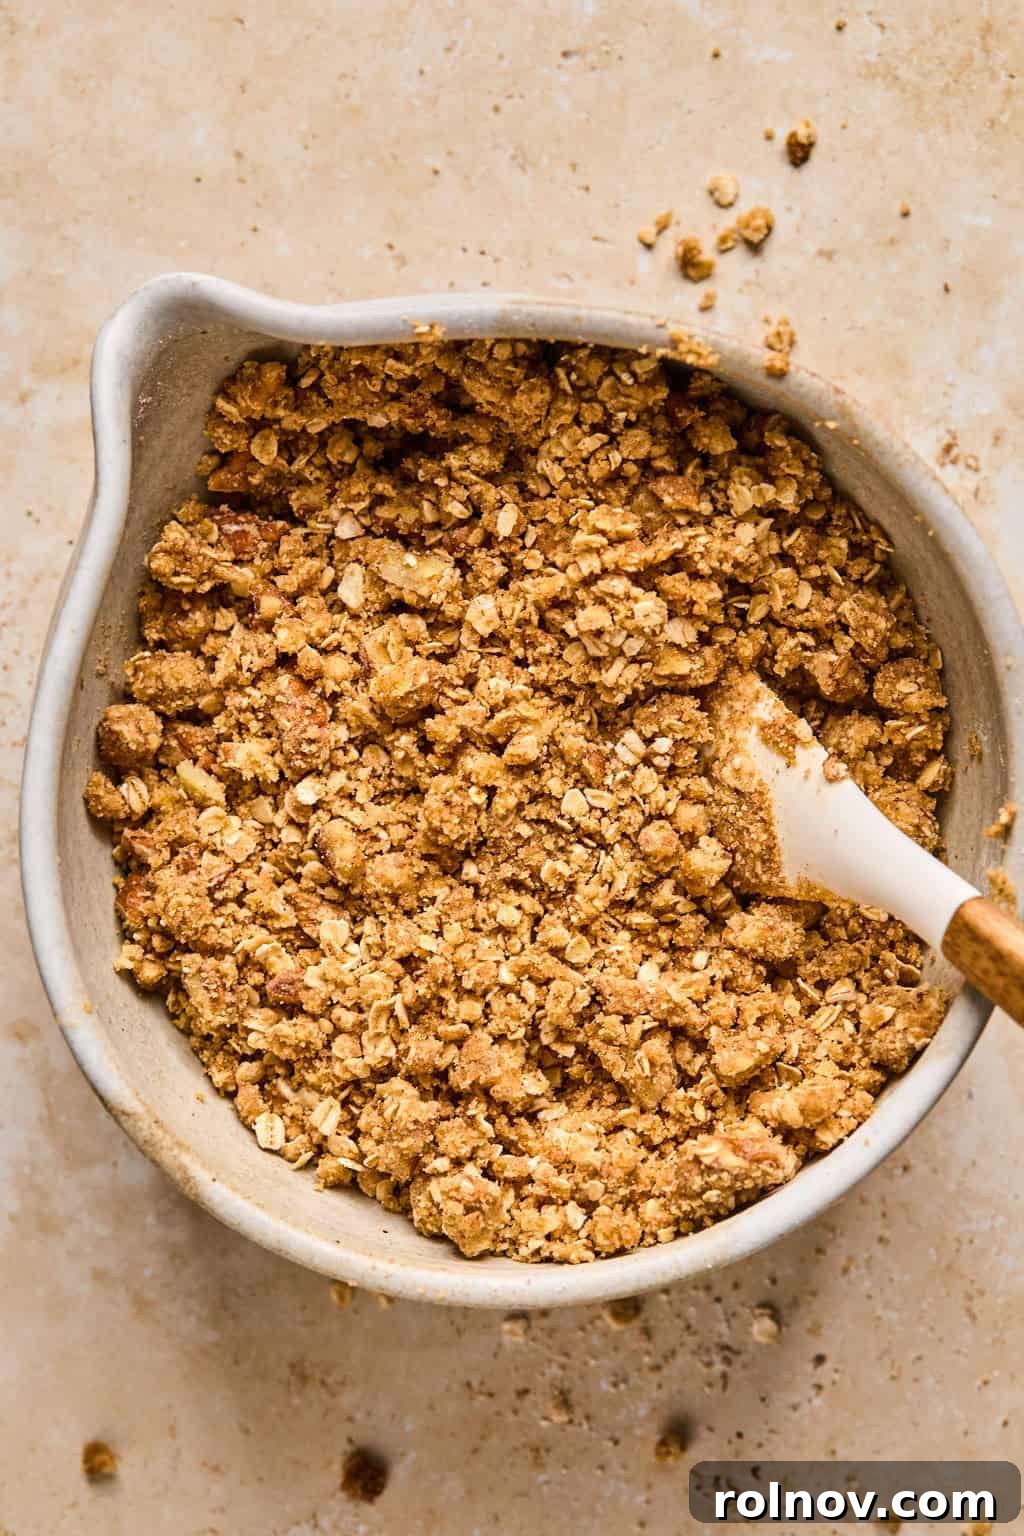
Step 5: Achieve the Perfect Crumbly Texture. Gradually add more melted butter to the dry ingredients, mixing until the mixture is moist enough to clump together but still retains a distinctly crumbly texture. You might not need to use all of the butter; stop once the desired consistency is achieved. The goal is a mixture that resembles coarse crumbs.
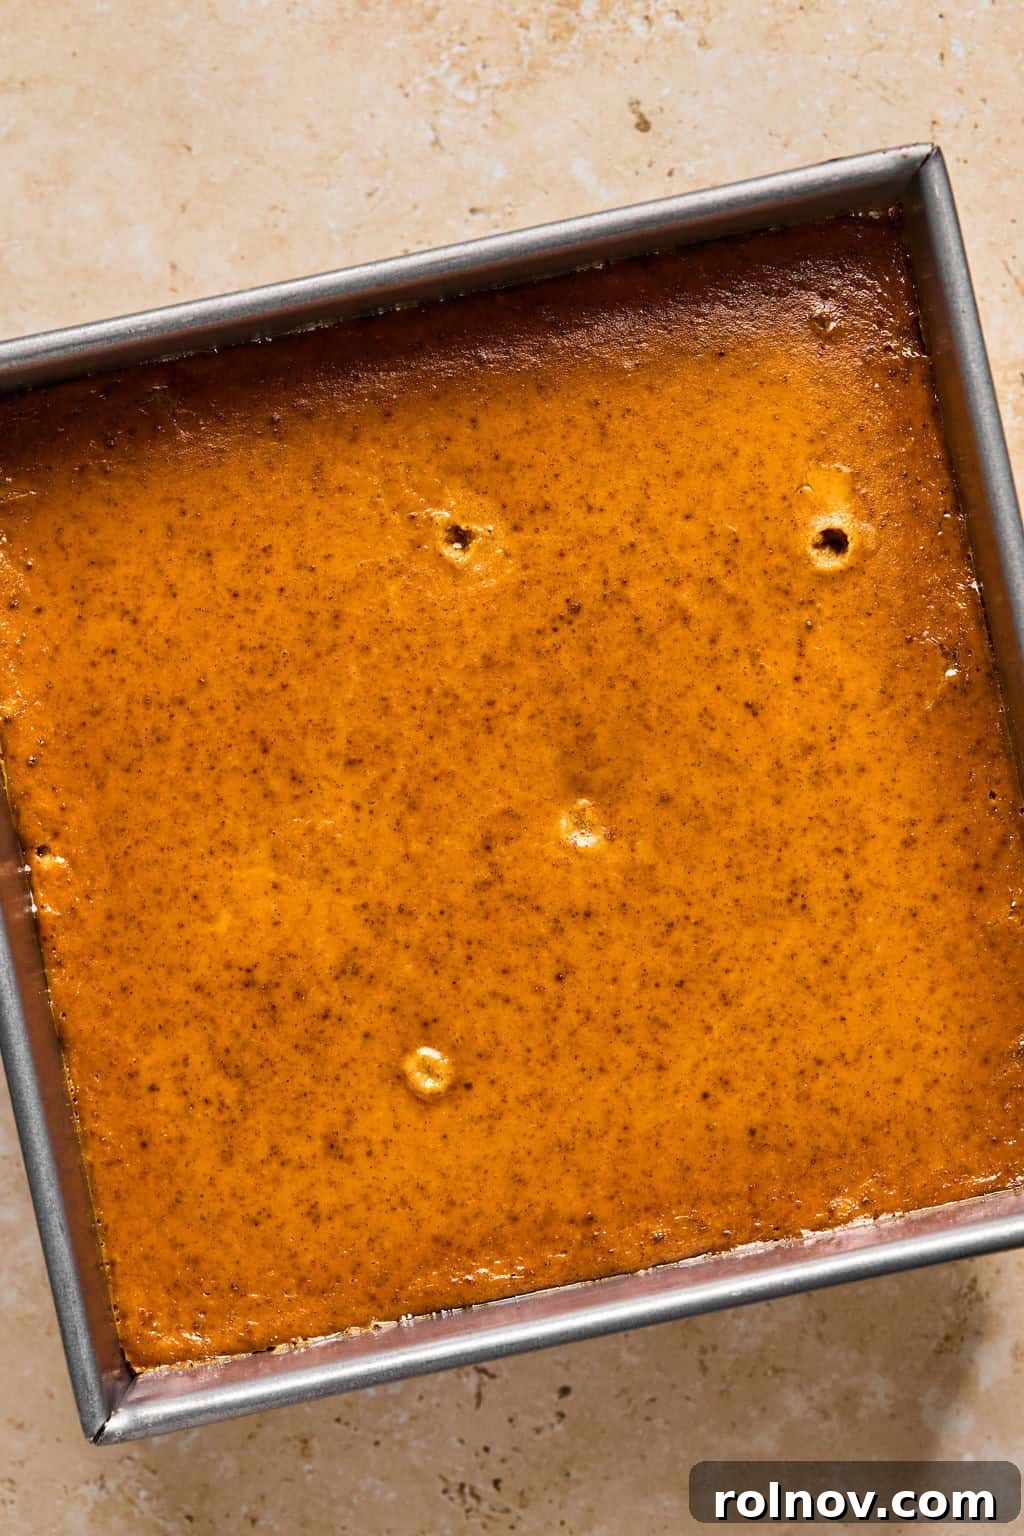
Step 6: Remove Pumpkin from Oven. After 20-25 minutes, the pumpkin layer should have set up slightly, appearing firm around the edges but still a bit soft in the center. Carefully remove the baking pan from the oven.
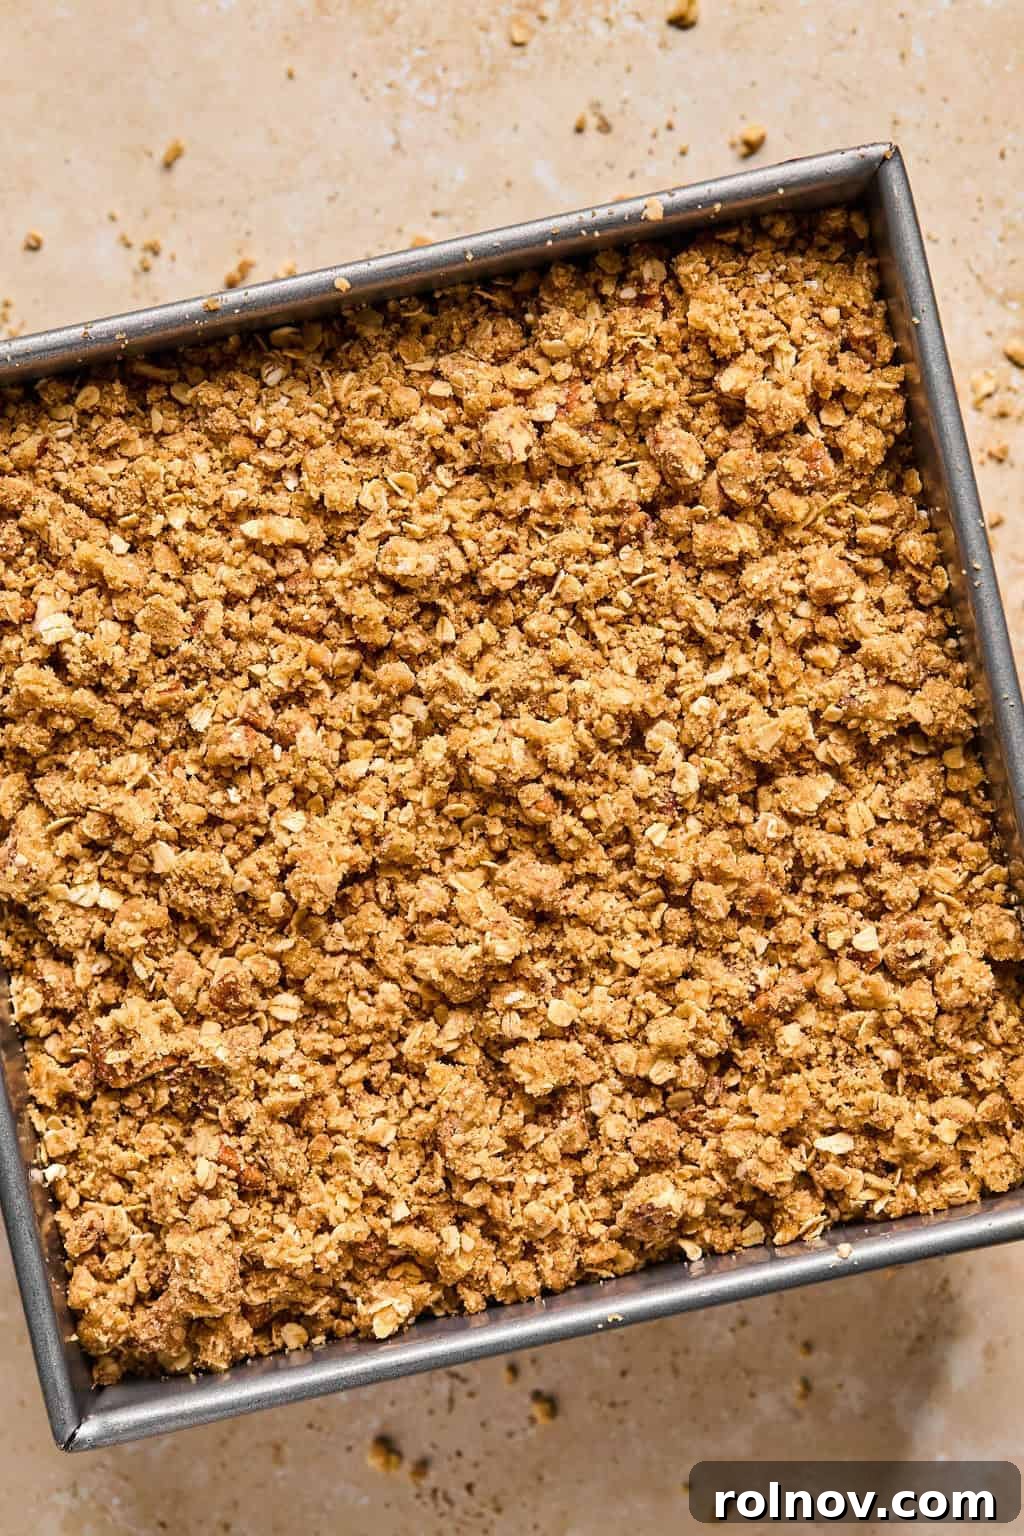
Step 7: Add the Crumble Topping. Gently and evenly sprinkle the prepared oat crumble topping over the partially baked pumpkin layer. To ensure it stays on top and distributes well, use your fingers to lightly crumble and scatter the mixture rather than dumping it all in one large mass.
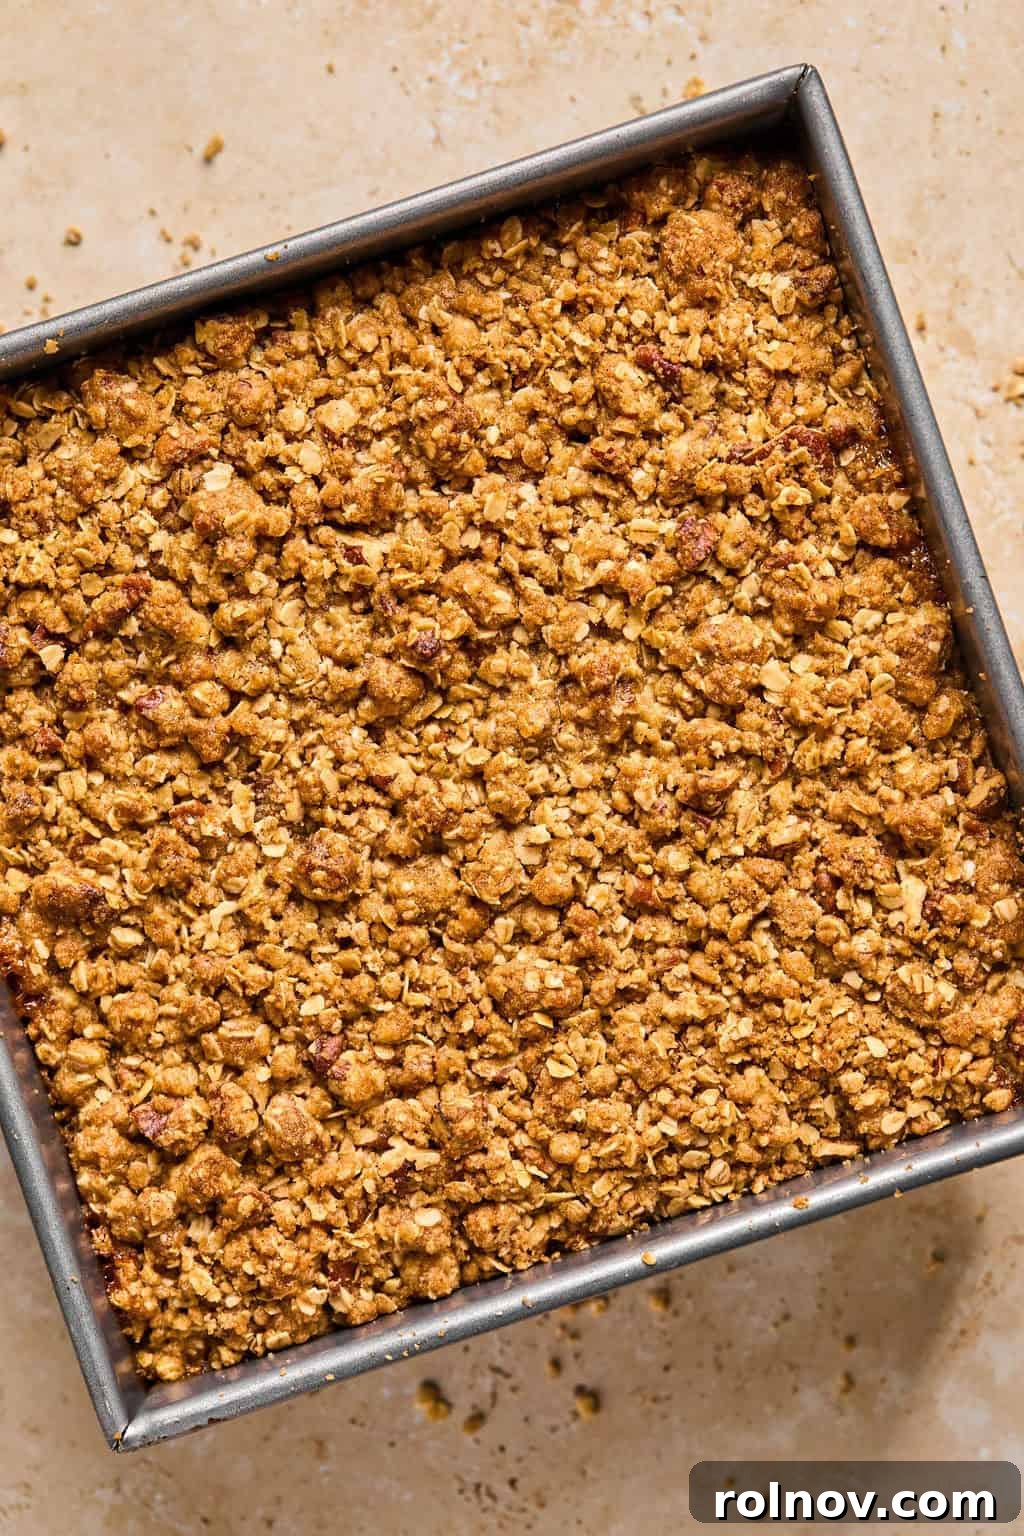
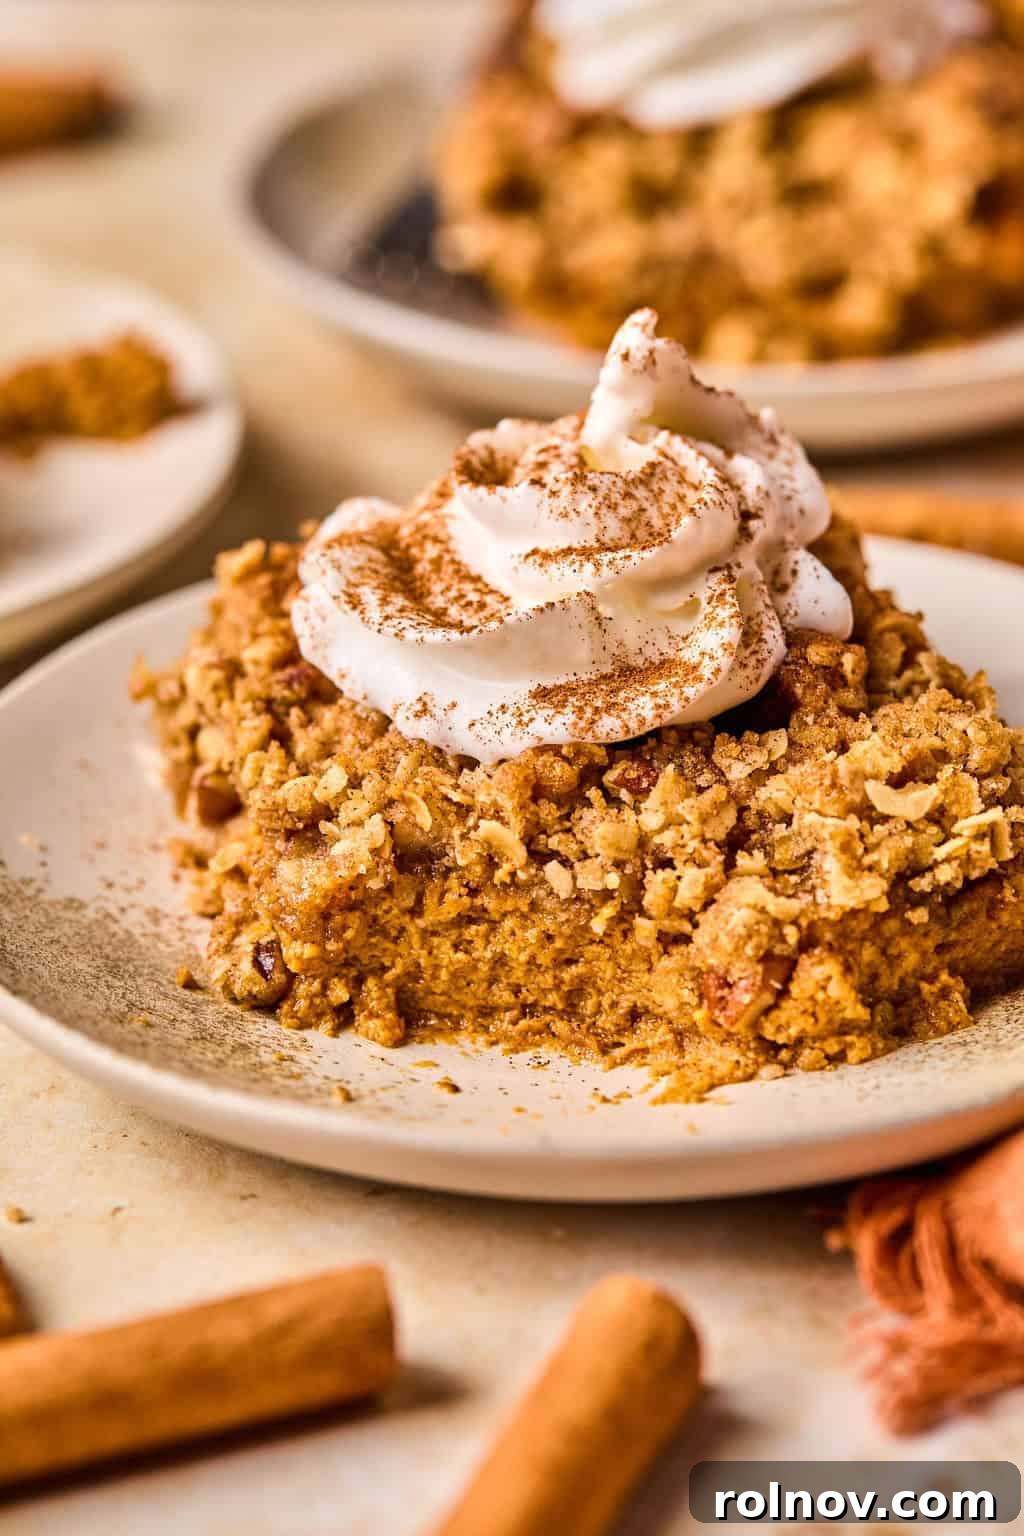
Step 8: Final Bake and Cooling. Return the pan to the oven and bake for an additional 25-35 minutes, or until the crumble topping is a beautiful golden brown and the pumpkin filling is fully set. You can test the pumpkin layer by inserting a toothpick into the center; if it comes out clean, your crumble is ready. Remove from the oven and allow it to cool completely before serving. For the best texture and clean slices, let it set for several hours at room temperature, or even better, chill it in the refrigerator until firm. This allows the pumpkin layer to solidify, making it easier to cut into neat squares. If serving warm, it will be softer and better suited for spooning directly from the pan.
Recipe Tips & Tricks for Success
Achieving Perfection with Every Batch
- Choosing Your Baking Pan: I personally prefer using an 8×8 inch baking pan for this pumpkin crumble. This size ensures a wonderfully thick and generous pumpkin layer, which is my ideal consistency. While a 9×9 inch pan will also work, the layers will be slightly thinner and more even. A round 8-9 inch cast iron skillet is another excellent option for a rustic presentation. If you plan to double the recipe, a 9×13 inch pan is the perfect size to accommodate the increased volume.
- Customizing the Crumble Layer: I love a substantial, buttery crumble topping, but everyone has their preference. The ingredient measurements provided for the crumble are generous and designed to work for both 8-inch and 9-inch pans. If you are using an 8-inch pan, you might find that you have more topping than you desire. Feel free to use less if you prefer a thinner crumble layer—there’s no need to use it all if it feels excessive for your liking! The joy of this dessert lies in its adaptability.
- For Effortless Slicing: If you aim for picture-perfect, clean slices, chilling the pumpkin crumble overnight is highly recommended. This extended cooling period allows the pumpkin filling to set firmly, similar to a traditional pumpkin pie. When cutting, use a very sharp knife and wipe the blade clean between each slice to prevent sticking and maintain crisp edges. Be aware that the crumble topping can sometimes press down into the pumpkin layer during slicing, which might make it a little less neat—but rest assured, it will still taste absolutely incredible! If aesthetics aren’t your top priority, simply scoop and serve it warm; it’s a crumble, after all, and meant to be enjoyed rustic-style!
- Spice It Your Way: While I’ve provided a specific blend of cinnamon, ginger, and cloves for the pumpkin filling, you can easily substitute it with a pre-mixed pumpkin pie spice blend if that’s what you have on hand or prefer. Adjust the quantity to your taste.
- Gluten-Free Adaptation: Making this pumpkin crumble gluten-free is straightforward. Simply substitute the all-purpose flour in the crumble topping with a 1:1 all-purpose gluten-free flour blend. Additionally, ensure you use certified gluten-free quick oats to maintain the recipe’s integrity for those with gluten sensitivities.
- Sweetness Level: The pumpkin layer in this recipe is designed to be moderately sweet, allowing the natural pumpkin flavor and warm spices to shine. If you prefer a sweeter dessert, you can add an extra ⅓ cup of brown sugar to the pumpkin filling, or even up to ½ cup for a truly indulgent treat. Adjust according to your personal taste.
Storage and Freezing Instructions
Proper storage ensures your pumpkin crumble remains fresh and delicious for days.
To Store: Once the pumpkin crumble has cooled completely, transfer it to an airtight container. It can be refrigerated for up to 4-5 days. You can enjoy it straight from the fridge (it’s delicious cold!), gently warmed in the oven or microwave, or served at room temperature.
To Freeze: For longer storage, make sure the entire dish is thoroughly cooled before preparing it for the freezer. Place it in a freezer-safe, airtight container or wrap individual portions tightly in plastic wrap and then aluminum foil. It can be frozen for up to 3 months. When you’re ready to enjoy it, thaw the crumble overnight in the refrigerator before warming or serving.
Serving Suggestions for Your Pumpkin Crumble
While this pumpkin crumble is absolutely divine on its own, here are a few ideas to elevate your serving experience:
- Classic Whipped Cream: A dollop of freshly whipped cream is always a perfect companion, adding a light, airy contrast to the rich pumpkin. For an extra festive touch, try homemade Pumpkin Spice Whipped Cream!
- Vanilla Ice Cream: A scoop of creamy vanilla bean ice cream melting over a warm slice of pumpkin crumble is pure bliss, creating a delightful hot-and-cold sensation.
- Caramel Drizzle: A generous drizzle of salted caramel sauce can add another layer of rich sweetness and sophistication.
- Candied Pecans: If you love nuts, a sprinkle of extra candied pecans or walnuts can enhance the crunch and flavor profile of the topping.
- Dusting of Spices: A light dusting of ground cinnamon or a touch of nutmeg over the top before serving adds an aromatic finish.
More Delicious Pumpkin Recipes to Try
If you’re a true pumpkin lover, you’ll want to explore these other fantastic recipes that celebrate the flavors of fall:
- Pumpkin Chip Banana Bread
- Pumpkin Pie Overnight Oats
- No Bake Caramel Apple Cheesecake
- No Bake Pumpkin Crumble Bars
- Pumpkin Ricotta Pasta Bake
- Cinnamon Streusel Pumpkin Coffee Cake
- Pumpkin Carrot Muffins
- Pumpkin Pie Baked Oatmeal
HUNGRY FOR MORE? Subscribe to my newsletter and follow me on Facebook, Instagram and Pinterest for all the latest!
Pumpkin Pie Crumble
By: Lorie Yarro
Think crumble/crisp meets pumpkin pie in this simple, warm buttery Pumpkin Pie Crumble. Thick pumpkin layer topped with a buttery oat topping. Change up your favorite fall recipe for this version!
Pin Recipe |
Print Recipe
Prep Time: 15 minutes
Cook Time: 50 minutes
Total Time: 55 minutes
Servings: 9
Ingredients
Filling:
- 1 can pumpkin purée (15 oz.)
- ½ cup brown sugar, packed (up to ⅓ cup more for added sweetness*)
- 2 eggs, lightly beaten
- 1 ½ tsp. cinnamon (can opt for all pumpkin pie spice in place of cinnamon, cloves and ginger)
- ¼ tsp ground cloves
- ¼ tsp ground ginger
- 1 tsp. vanilla extract
- 1 can evaporated milk (12 oz.)
- ½ tsp sea salt
Topping:
- ¾ cup all-purpose flour
- ¾ cup quick oats
- ½ cup butter, melted
- ½ cup brown sugar
- 1 – 1½ tsp cinnamon
- 1 tsp vanilla extract
- ½ cup chopped pecans (optional)
- Dash of sea salt
Instructions
- Preheat oven to 375°F (190°C).
- Combine all pie filling ingredients (pumpkin purée, brown sugar, eggs, cinnamon, cloves, ginger, vanilla extract, evaporated milk, sea salt) and stir well until smooth. Grease an 8×8 inch baking pan (a 9×9 inch pan will also work, but the pumpkin layer will be thinner).
- Pour the filling into the prepared pan and place in the preheated oven to bake for 20-25 minutes.
- While the filling is baking, prepare the topping. In a separate bowl, combine flour, quick oats, brown sugar, cinnamon, vanilla extract, chopped pecans (if using), and a dash of sea salt. Start by adding about half of the melted butter. Slowly add more butter, mixing until a moist but still crumbly texture is achieved. You may not need all the butter.
- After about 20-25 minutes, the pumpkin filling should be partially set and firm enough to hold the crumble topping. Remove the pan from the oven.
- Evenly cover the partially baked pumpkin filling with the crumbly oat topping. For best distribution, use your fingers to gently sprinkle and crumble it over the surface.
- Return to the oven and bake for another 25-35 minutes, or until the topping is golden brown and a toothpick inserted into the pumpkin filling comes out clean.
- Allow to cool completely before serving. For optimal texture and easier cutting, let it cool for 3-4 hours at room temperature, or chill in the refrigerator until the pumpkin layer is fully set. Store any leftovers in the refrigerator.
Video
Watch how to make this delicious Pumpkin Pie Crumble:
Click here to watch the Pumpkin Pie Crumble video.
Notes
- *The pumpkin layer is not overly sweet on its own. If you prefer a sweeter dessert, consider adding an extra ⅓ cup of brown sugar to the filling, or up to ½ cup if desired.
- Pan Size: An 8×8 inch pan yields a thick pumpkin layer. A 9×9 inch pan also works, resulting in slightly thinner layers. For a doubled recipe, use a 9×13 inch baking dish.
- Crumble Amount: The topping recipe is generous. Feel free to use less if you prefer a thinner crumble layer.
- Setting for Slicing: Chilling overnight allows the pumpkin to set, making for much easier and cleaner slices.
- Spice Preference: If you prefer the convenience, feel free to use a pre-mixed pumpkin pie spice instead of individual spices.
- Gluten-Free Option: Use a 1:1 all-purpose gluten-free flour and gluten-free quick oats for a gluten-free version.
Nutrition
Nutrition information is automatically calculated, so should only be used as an approximation:
Calories: 334 kcal, Carbohydrates: 47g, Protein: 6g, Fat: 14g, Saturated Fat: 9g, Cholesterol: 57mg, Sodium: 149mg, Potassium: 307mg, Fiber: 3g, Sugar: 31g, Vitamin A: 8909IU, Vitamin C: 3mg, Calcium: 159mg, Iron: 2mg
Did you enjoy this recipe or have a question? Leave a comment below! We love hearing from you.
Shop Essential Baking Tools and Ingredients:
Enhance your baking experience with these recommended products:
Canned Pumpkin
Buy Now →
Baking Pan, 8×8 Inch
Buy Now →
Rolled Oats
Buy Now →
Mixing Bowls
Buy Now →