

Unlock the secret to effortless weeknight dining with this incredible one-pan cheesy ground turkey taco skillet. This isn’t just a meal; it’s a culinary experience waiting to become your family’s new favorite. Boasting incredibly simple preparation, utilizing common pantry staples, and bursting with rich, savory, cheesy flavors, this hearty dish is designed for ultimate convenience. Forget the endless pile of dishes – everything comes together in a single pan, offering a complete and satisfying meal that perfectly embraces all your cherished taco night toppings. Prepare to redefine your taco experience and think deliciously beyond the traditional tortilla!
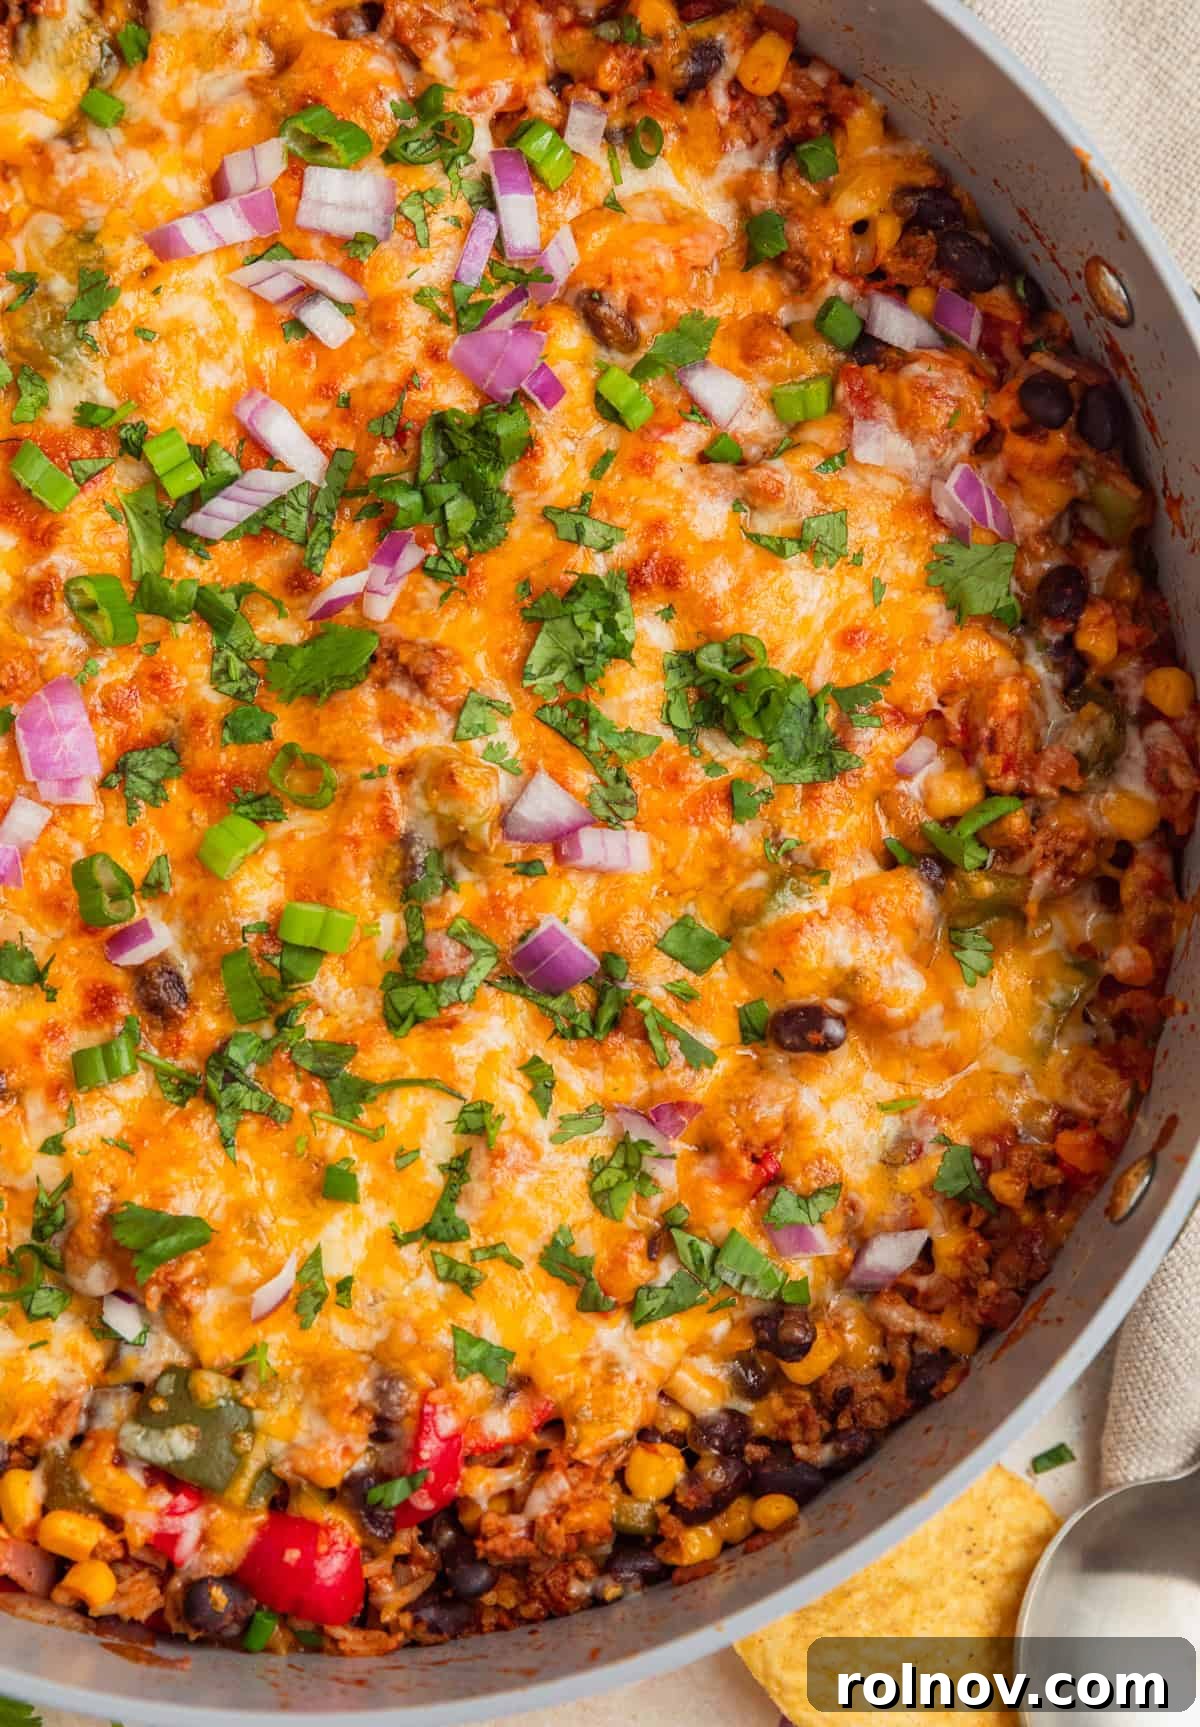
Taco night just received a spectacular upgrade with this irresistibly easy and cheesy taco skillet dinner. Imagine all the vibrant, zesty flavors of your favorite Mexican-inspired meal, masterfully combined into a wholesome, single-dish creation. From the savory ground turkey to the perfectly seasoned rice and melted cheese, every spoonful is an invitation to delight. We are absolutely thrilled for you to discover the simplicity and incredible taste of this one-pan wonder!
If you’re a connoisseur of stress-free cooking and appreciate the magic of one-pan and one-pot dinner recipes, you’ll undoubtedly adore this recipe. Explore more of our beloved single-dish meals that make busy evenings a breeze:
- Comforting Ground Turkey Stroganoff
- Simple One Pan Chicken and Rice
- Hearty One-Pot Chili Mac and Cheese
- Wholesome Ground Turkey Pot Pie
- Flavorful Ground Turkey Egg Roll Bowls
Why This Cheesy Turkey Taco Skillet Will Become Your Go-To Dinner

One-pot meals hold a special place in our kitchen, truly making them our absolute favorite dinner recipes. This fantastic cheesy turkey taco skillet dinner was initially crafted with the intention of being kid-friendly, but its rich flavors and comforting appeal quickly won over every adult at the table. It’s truly a rare gem: a recipe that is equally adored by kids and grown-ups alike. What’s not to love about a meal that simplifies your life and satisfies everyone?
This cheesy ground turkey taco skillet stands out for many reasons:
- It’s a truly effortless one-pan dinner, ensuring minimal cleanup while delivering maximum flavor and a hearty meal. Perfect for busy weeknights!
- This dish is a guaranteed crowd-pleaser and a perfect family-friendly weeknight meal. Its familiar and comforting taco flavors are universally loved by both children and adults.
- You have complete control over the spice level by using your favorite taco seasoning. Whether your family prefers it mild or enjoys an extra kick, this recipe adapts beautifully.
- It provides a complete, well-rounded meal all in one pan, thoughtfully combining lean protein, essential veggies, wholesome rice, and delectable cheese for balanced nutrition.
- More than just a meal, it’s a comforting, well-balanced dinner that’s also incredibly practical for meal prepping or enjoying as delicious leftovers throughout the week.
Even my husband, who rarely opts for leftovers, eagerly enjoys this meal several days in a row whenever I prepare it – a testament to its irresistible taste and versatility!
Essential Ingredient Insights
For a complete list of ingredients and their precise measurements, please refer to the detailed recipe card below.
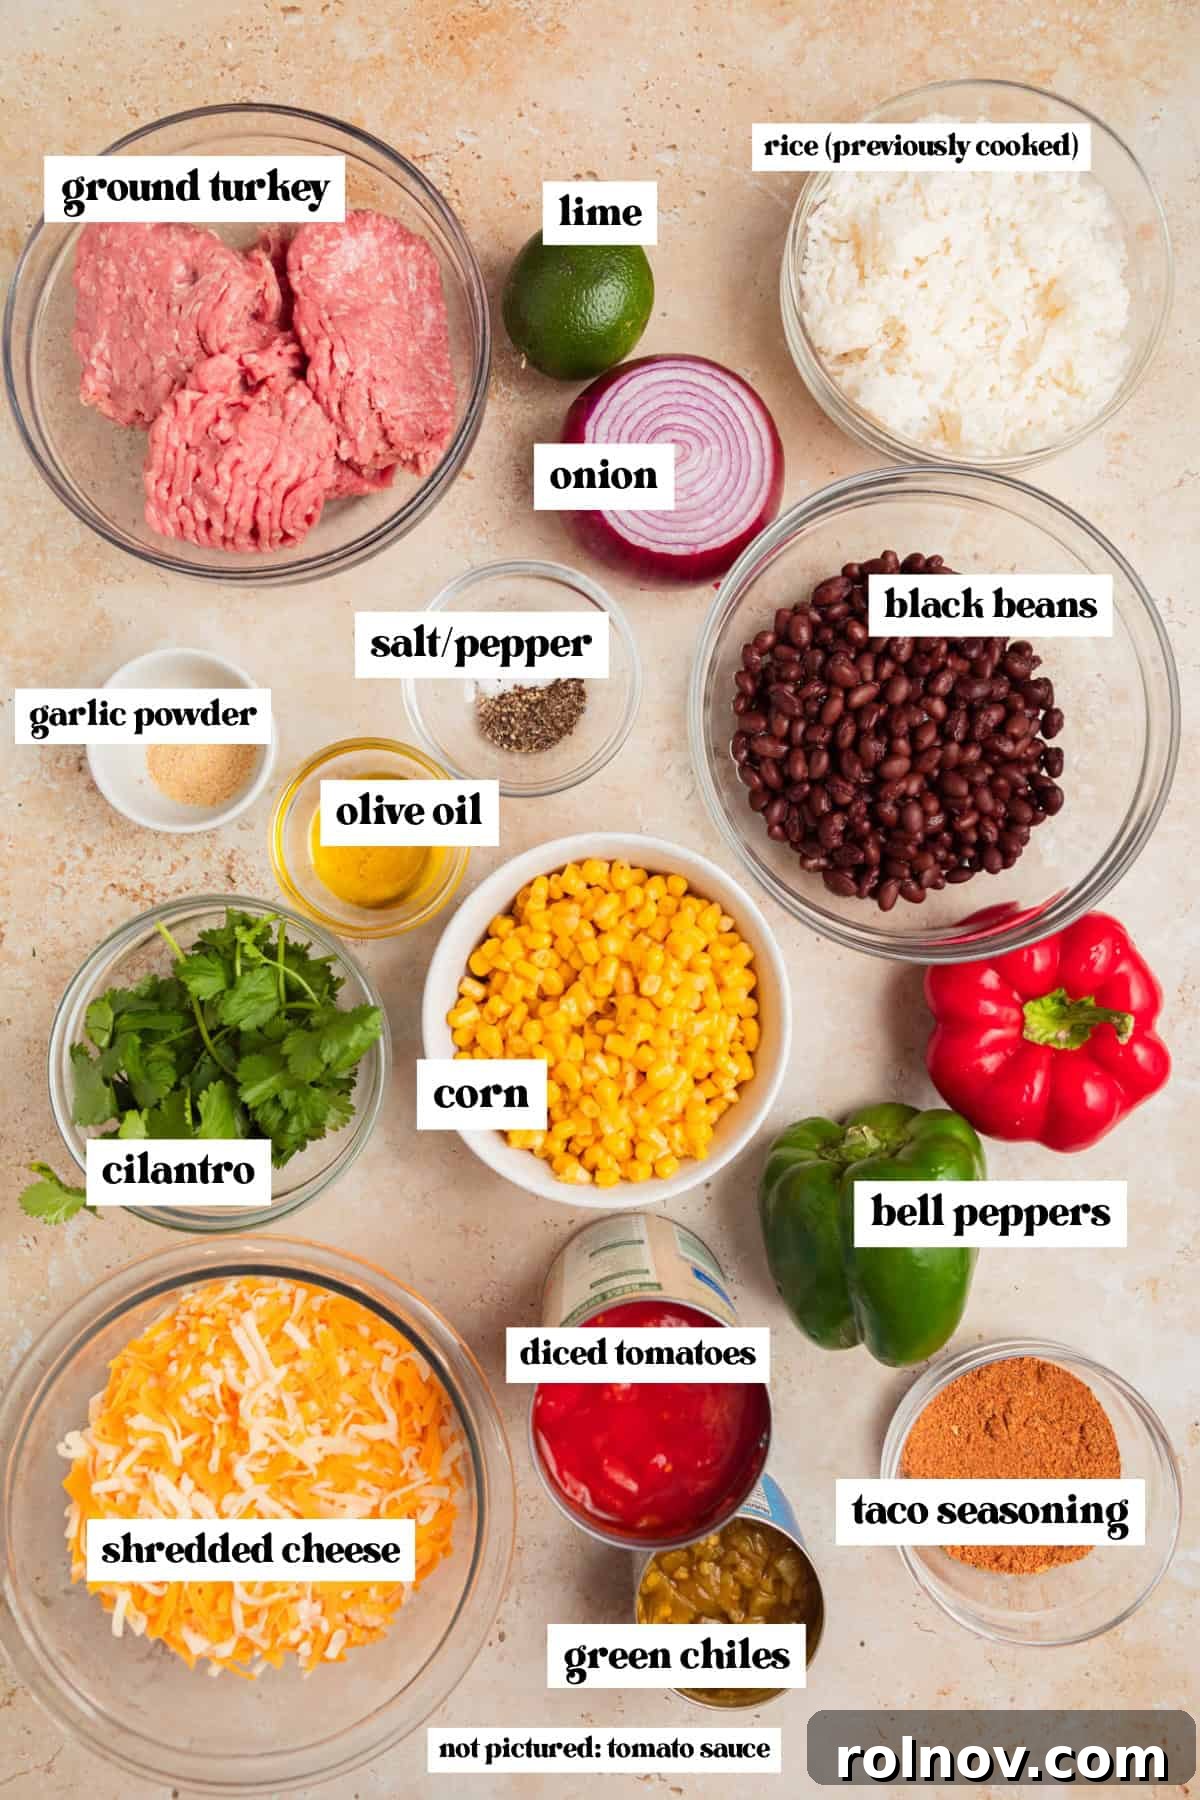
- When selecting your ground turkey, aim for a blend that’s not excessively lean, typically 93% lean or 85%. This slight fat content is crucial for achieving optimal flavor and ensuring the turkey remains juicy and tender throughout cooking. Super lean options (like 99%) often lack the depth of flavor and can dry out more easily.
- The beauty of this recipe lies in its adaptability with rice. Any variety of previously cooked rice will integrate seamlessly. Whether you have leftover white rice or brown rice from the fridge, a convenient pouch of pre-cooked rice, or even frozen rice (just add a couple of extra minutes to the simmering time for thawing and reheating), it all works. Utilizing pre-cooked rice is a brilliant shortcut, significantly reducing the amount of extra liquid needed and ensuring a perfectly textured skillet.
- For the corn, we typically use a can of corn kernels as it’s a pantry staple we often have on hand. However, feel free to substitute with frozen corn if that’s your preference – both yield excellent results.
- Elevate the flavor profile of your cheesy taco skillet by opting for a can of fire-roasted diced tomatoes instead of plain diced tomatoes. The subtle smoky depth from fire-roasting adds an extra layer of complexity that truly enhances the dish.
- While pre-shredded cheese is convenient, shredding your own cheese will always yield the most gooey, melt-in-your-mouth texture. Pre-shredded varieties often contain anti-caking agents that can hinder their melt. However, rest assured, either option will still result in a delicious and cheesy skillet!
Exciting Ways to Customize Your Taco Skillet
This ground turkey taco skillet is wonderfully versatile, allowing you to easily adapt it to your taste preferences or whatever ingredients you have on hand. Get creative and make it your own!
- Spice it Up (or Down!): If you’re looking to skip the pre-packaged taco seasoning, you can create your own robust blend using a combination of smoked paprika, chili powder, cumin, oregano, and a pinch of garlic and onion powder. This DIY approach gives you full control over the flavor profile, allowing you to adjust the heat to your family’s liking. For those who crave extra heat, easily make it spicier by selecting a hot taco seasoning mix, incorporating a dash of your favorite hot sauce or sriracha, or sprinkling in some crushed red pepper flakes.
- Protein Power: While ground turkey is a fantastic lean option, feel free to use a different meat. Ground beef offers a richer flavor, but remember to drain any excess grease after browning. Ground chicken is another excellent poultry alternative, providing a lighter texture.
- Cheese Please! The cheese possibilities are truly endless. Beyond cheddar, consider using pepper jack cheese for a mild kick, a vibrant habanero cheese for adventurous palates, or crumbled queso fresco for an authentic Mexican touch. A Monterey Jack or a Mexican blend would also melt beautifully and add a delightful creaminess.
- Veggie Boost/Low-Carb Option: For a lighter, more vegetable-forward meal or a low-carb alternative, substitute the rice with riced cauliflower. The key here is to avoid overcooking the cauliflower rice, which can lead to a mushy texture. For optimal results, sauté the cauliflower rice separately in a bit of olive oil for about 5-6 minutes until tender-crisp. Then, gently stir it into the turkey taco skillet along with the tomato sauce, cheese, and cilantro during the final stages of cooking to ensure it maintains its texture. This adds a fantastic nutritional boost without sacrificing flavor.
- Add More Vegetables: Beyond bell peppers and corn, consider adding diced zucchini, chopped spinach (stirred in at the very end), or even sweet potato cubes (sautéed with the onions and peppers) for extra nutrients and flavor.
Easy Step-By-Step Cooking Guide
Follow these straightforward steps to create your delicious cheesy ground turkey taco skillet:
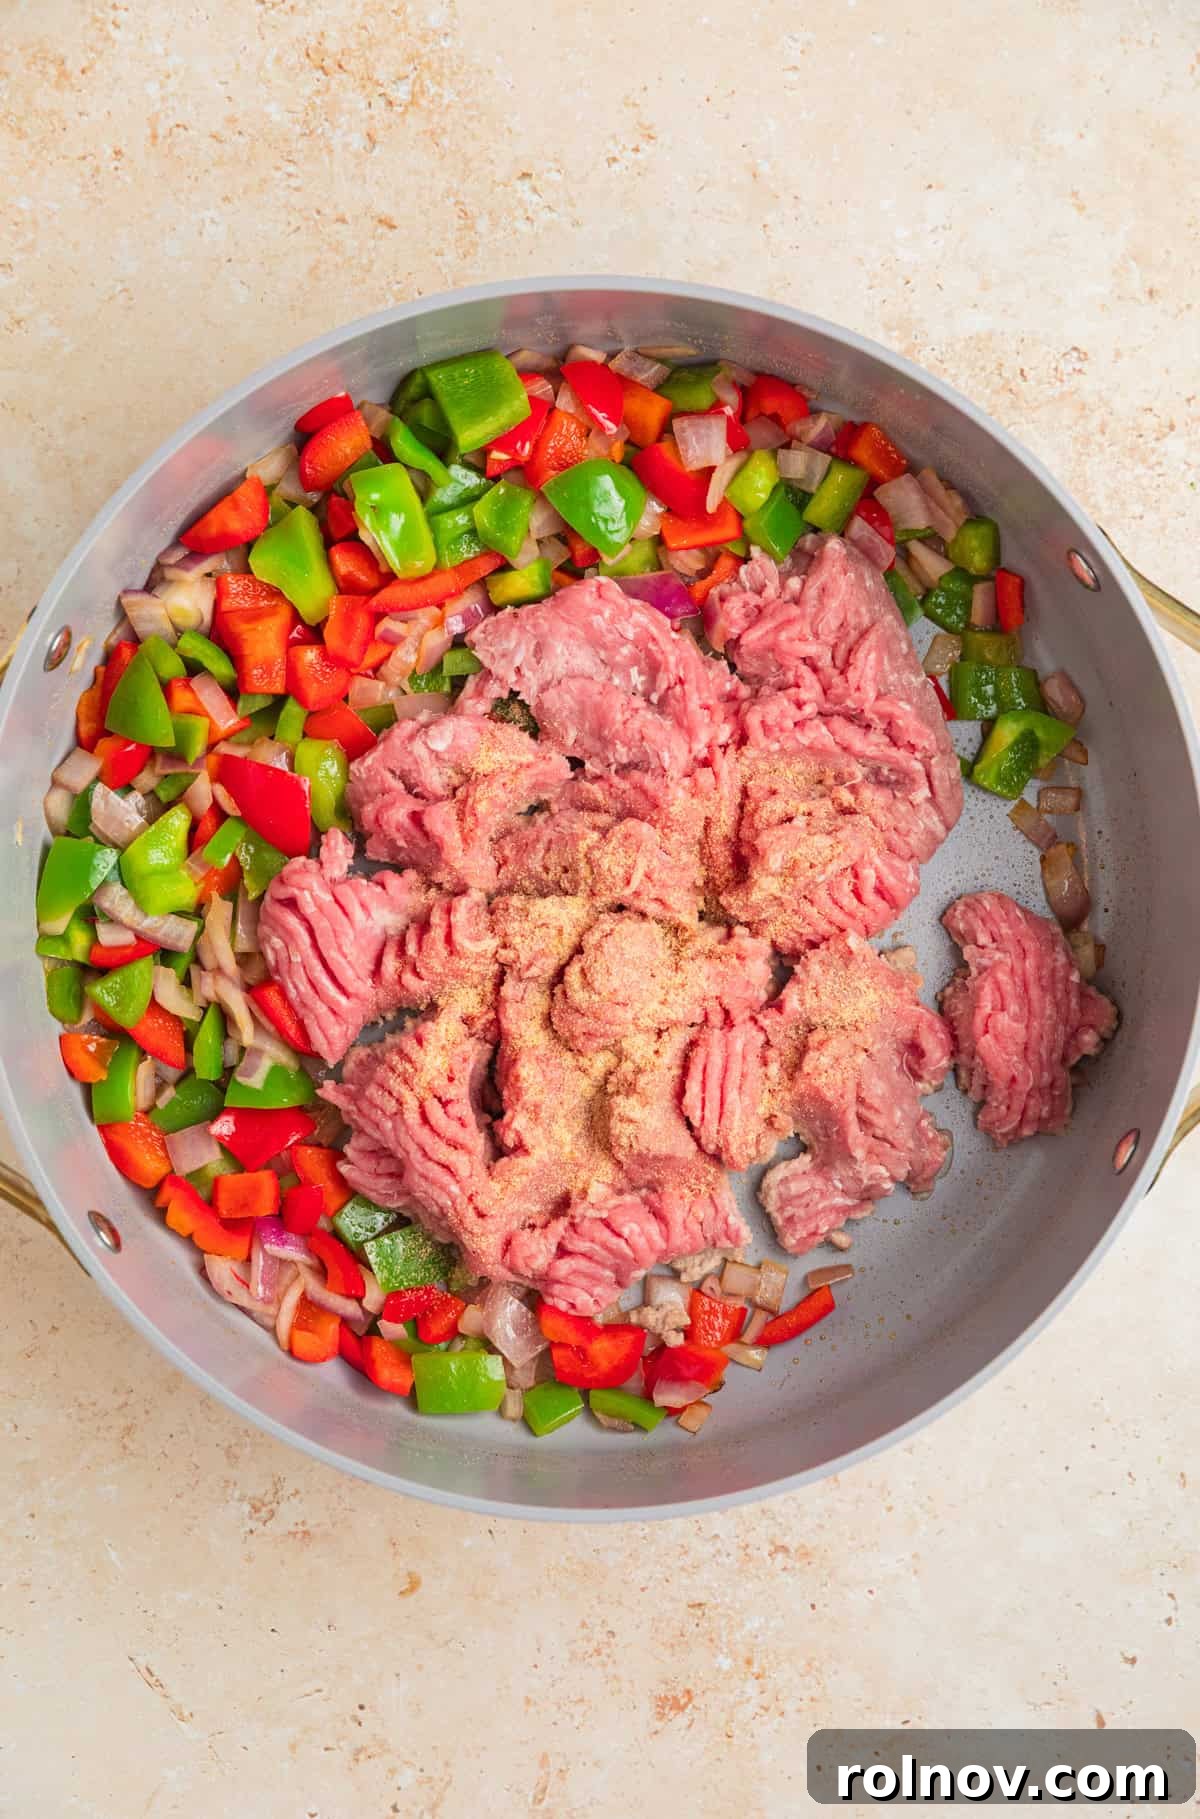
Step 1: Sauté Aromatics and Brown Turkey. Begin by heating a spacious sauté pan, a reliable skillet, or a shallow Dutch oven over medium-high heat. Add 1-2 tablespoons of olive oil, allowing it to heat until it shimmers. Introduce the diced onion and bell peppers, sautéing them, stirring occasionally, until the onions become beautifully translucent and tender. Gently push the softened vegetables to one side of the pan and add the ground turkey to the cleared space. Sprinkle 1 teaspoon of garlic powder evenly over the turkey. Allow the turkey to sear undisturbed for approximately 2-3 minutes to develop a nice crust, then break it apart into smaller, uniform pieces with a spoon or spatula.
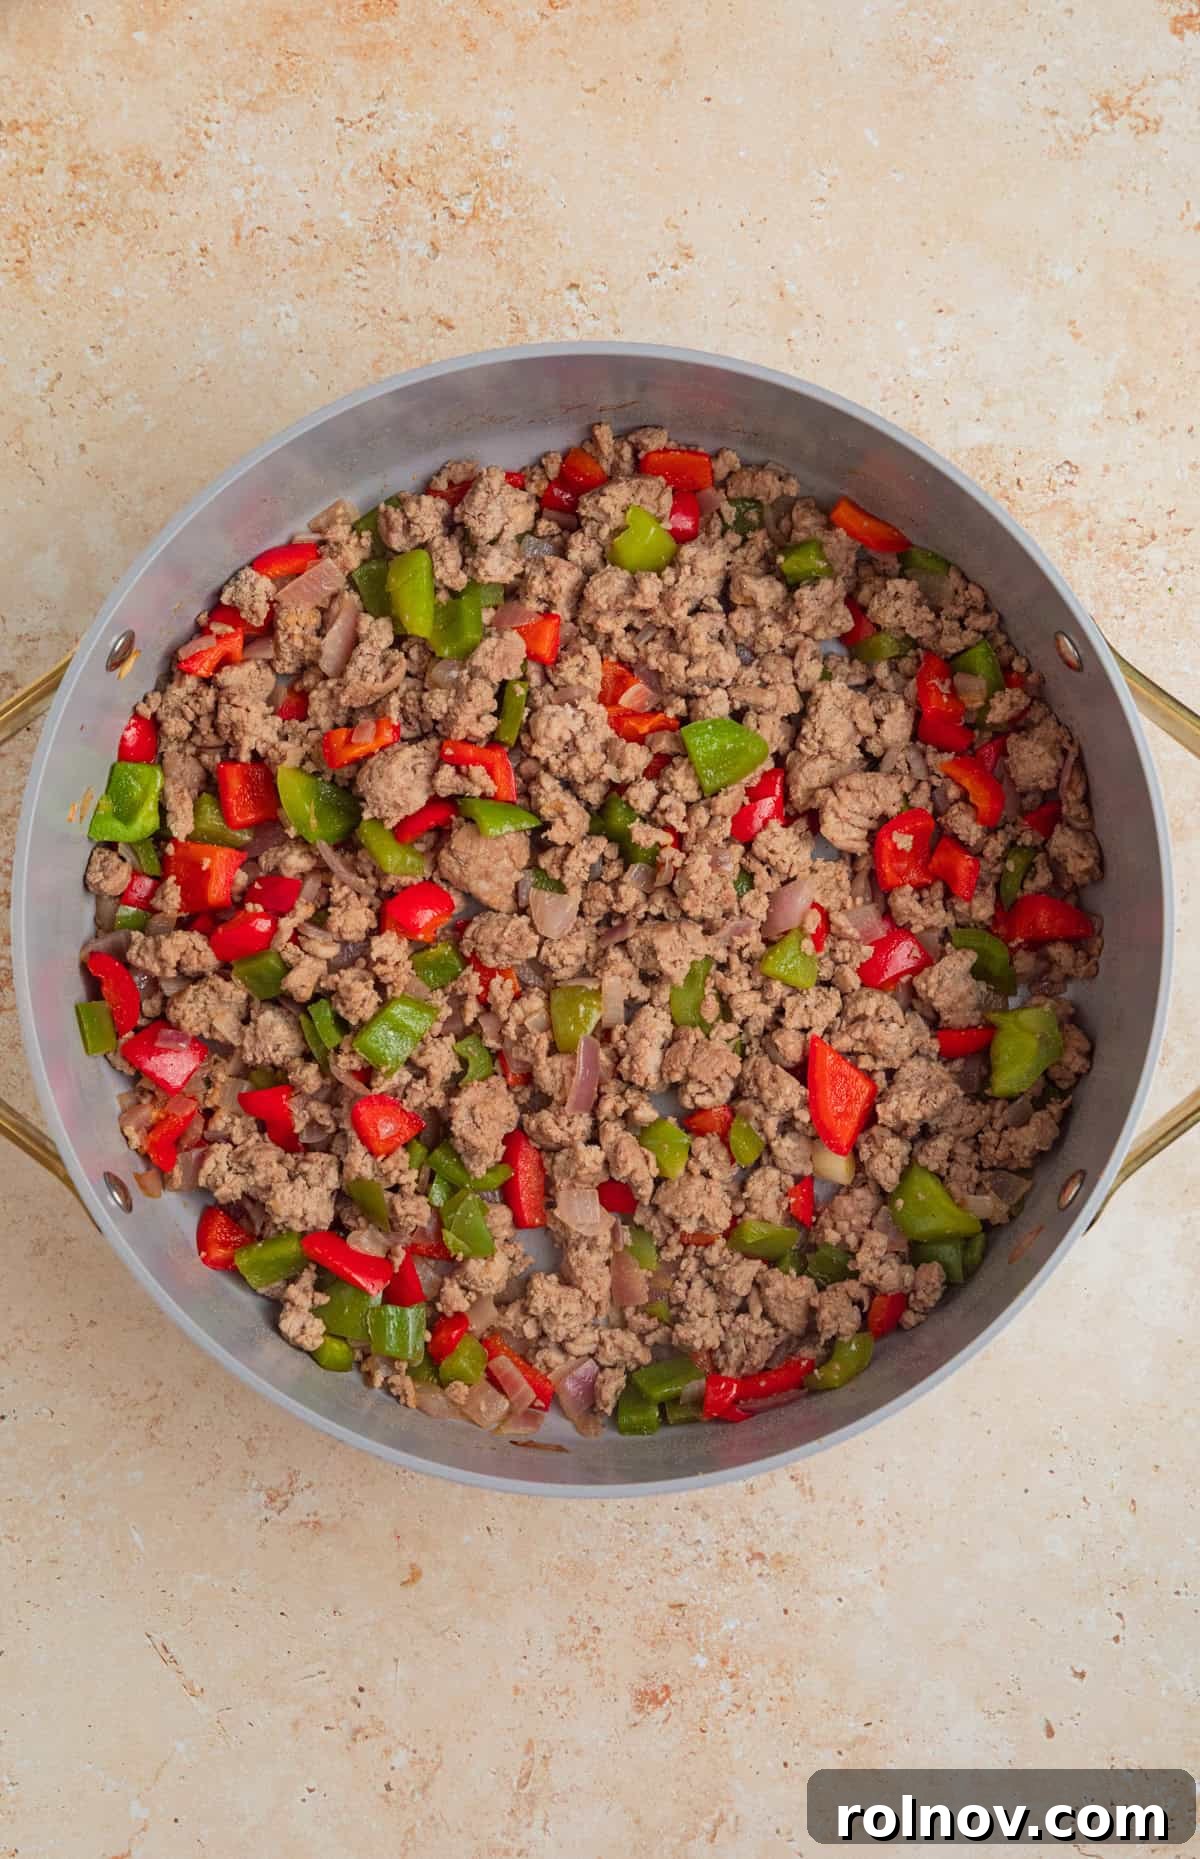
Step 2: Cook Through. Continue cooking the ground turkey and vegetables together, stirring as needed, until the turkey is fully cooked through and shows no signs of pink. Break up any large clumps to ensure even cooking and browning. This step ensures all the flavors meld together beautifully.
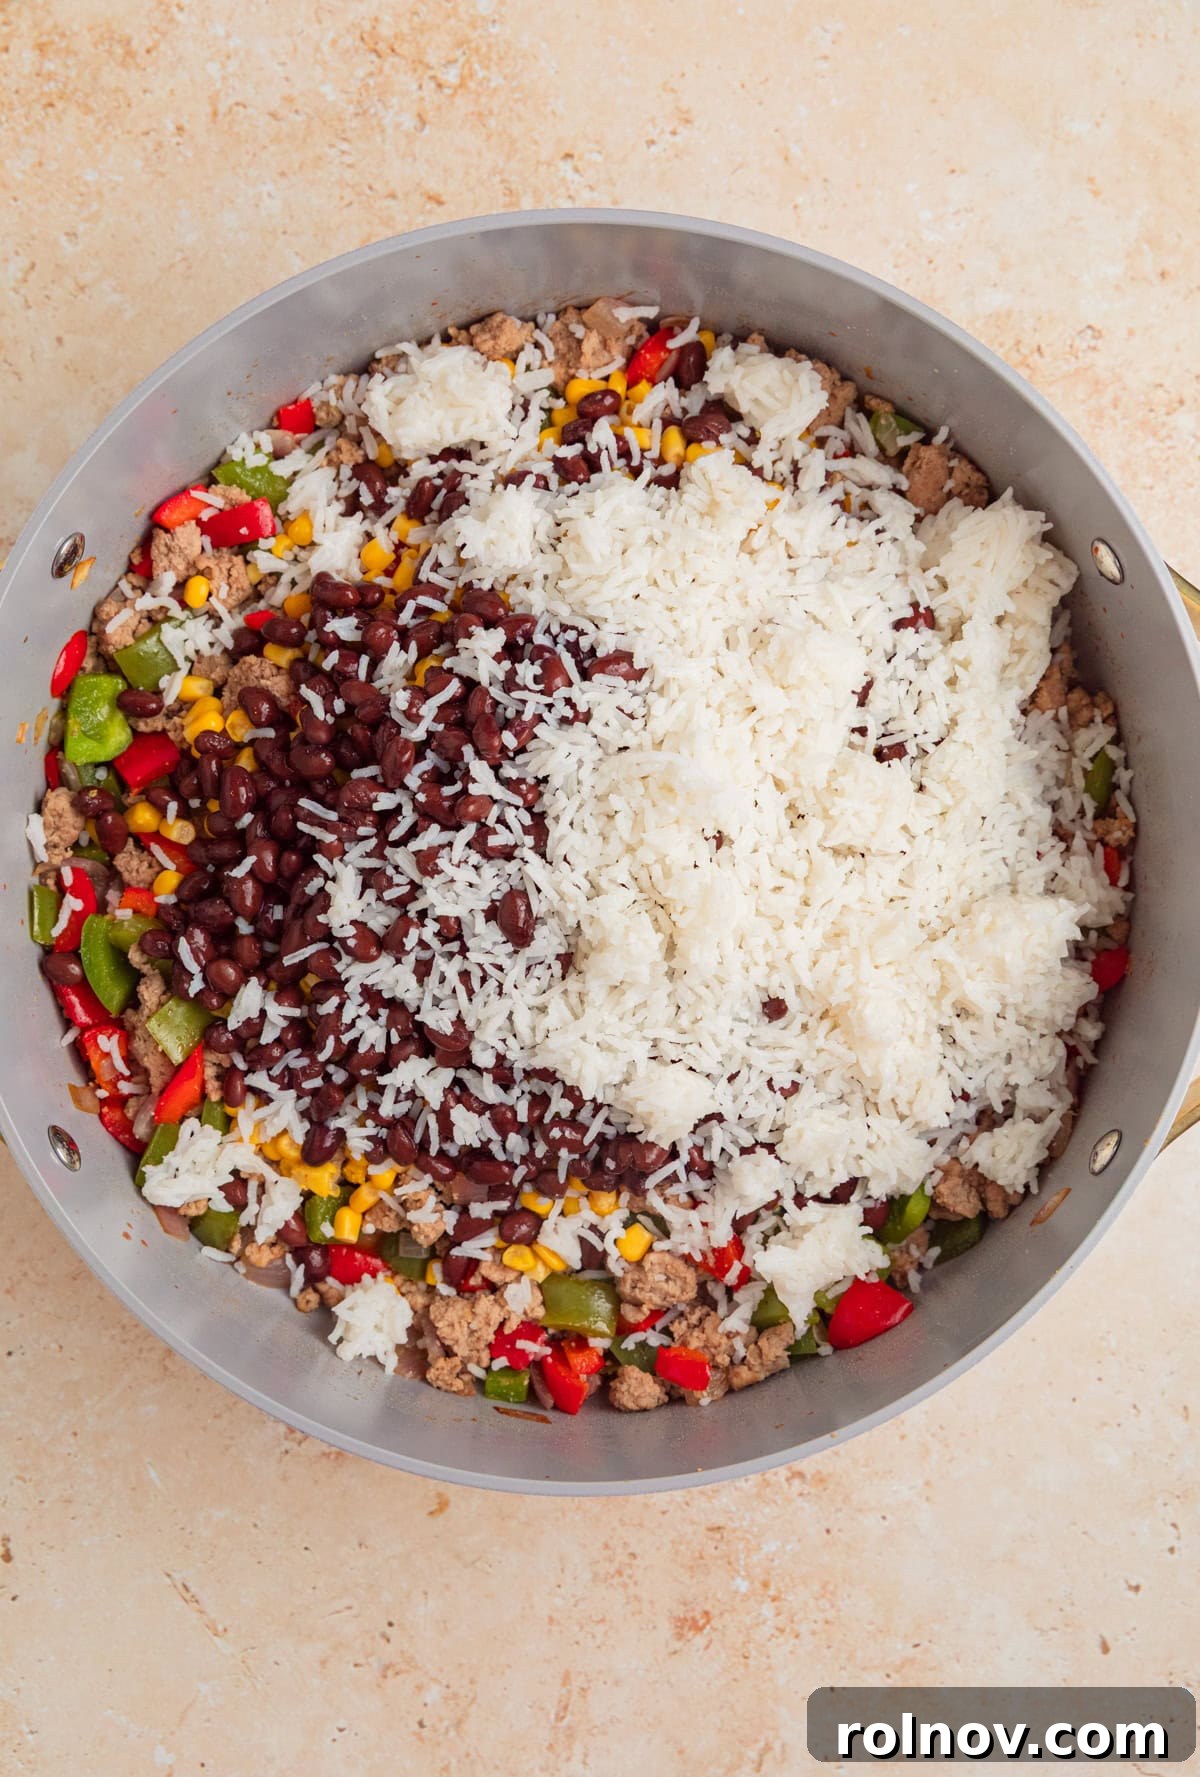
Step 3: Combine and Simmer. Reduce the heat to medium. Now, add the diced tomatoes (with their juices for extra moisture and flavor), canned green chilies, rinsed black beans, drained corn kernels, pre-cooked rice, the full packet of taco seasoning, the remaining garlic powder, salt, and pepper. Stir all these ingredients thoroughly to combine them well, ensuring the seasoning is evenly distributed. Allow the mixture to gently simmer for about 4-6 minutes. This simmering period is crucial for allowing all the ingredients to heat through, and for the flavors to fully meld into a harmonious blend.
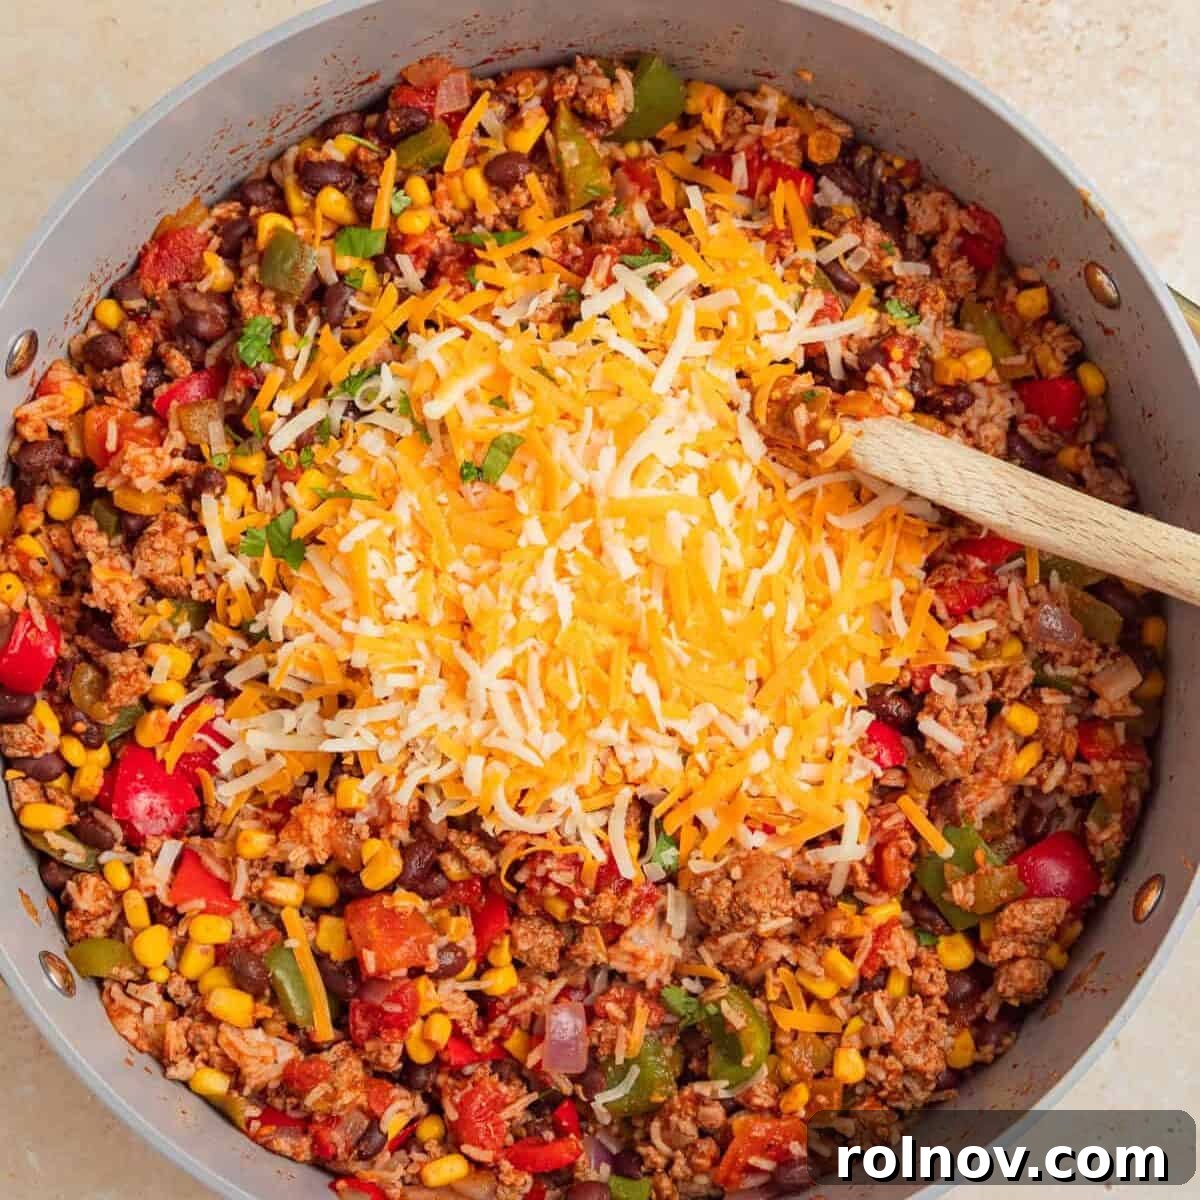
Step 4: Melt the First Layer of Cheese. Ensure the rice is thoroughly heated. Once satisfied, stir in 1 cup of the shredded cheese, the tomato sauce, fresh lime juice, and the chopped cilantro. Continue stirring gently until the cheese has completely melted into the mixture, creating a rich, creamy, and irresistible texture throughout the skillet. The lime juice adds a bright, fresh counterpoint to the savory flavors.
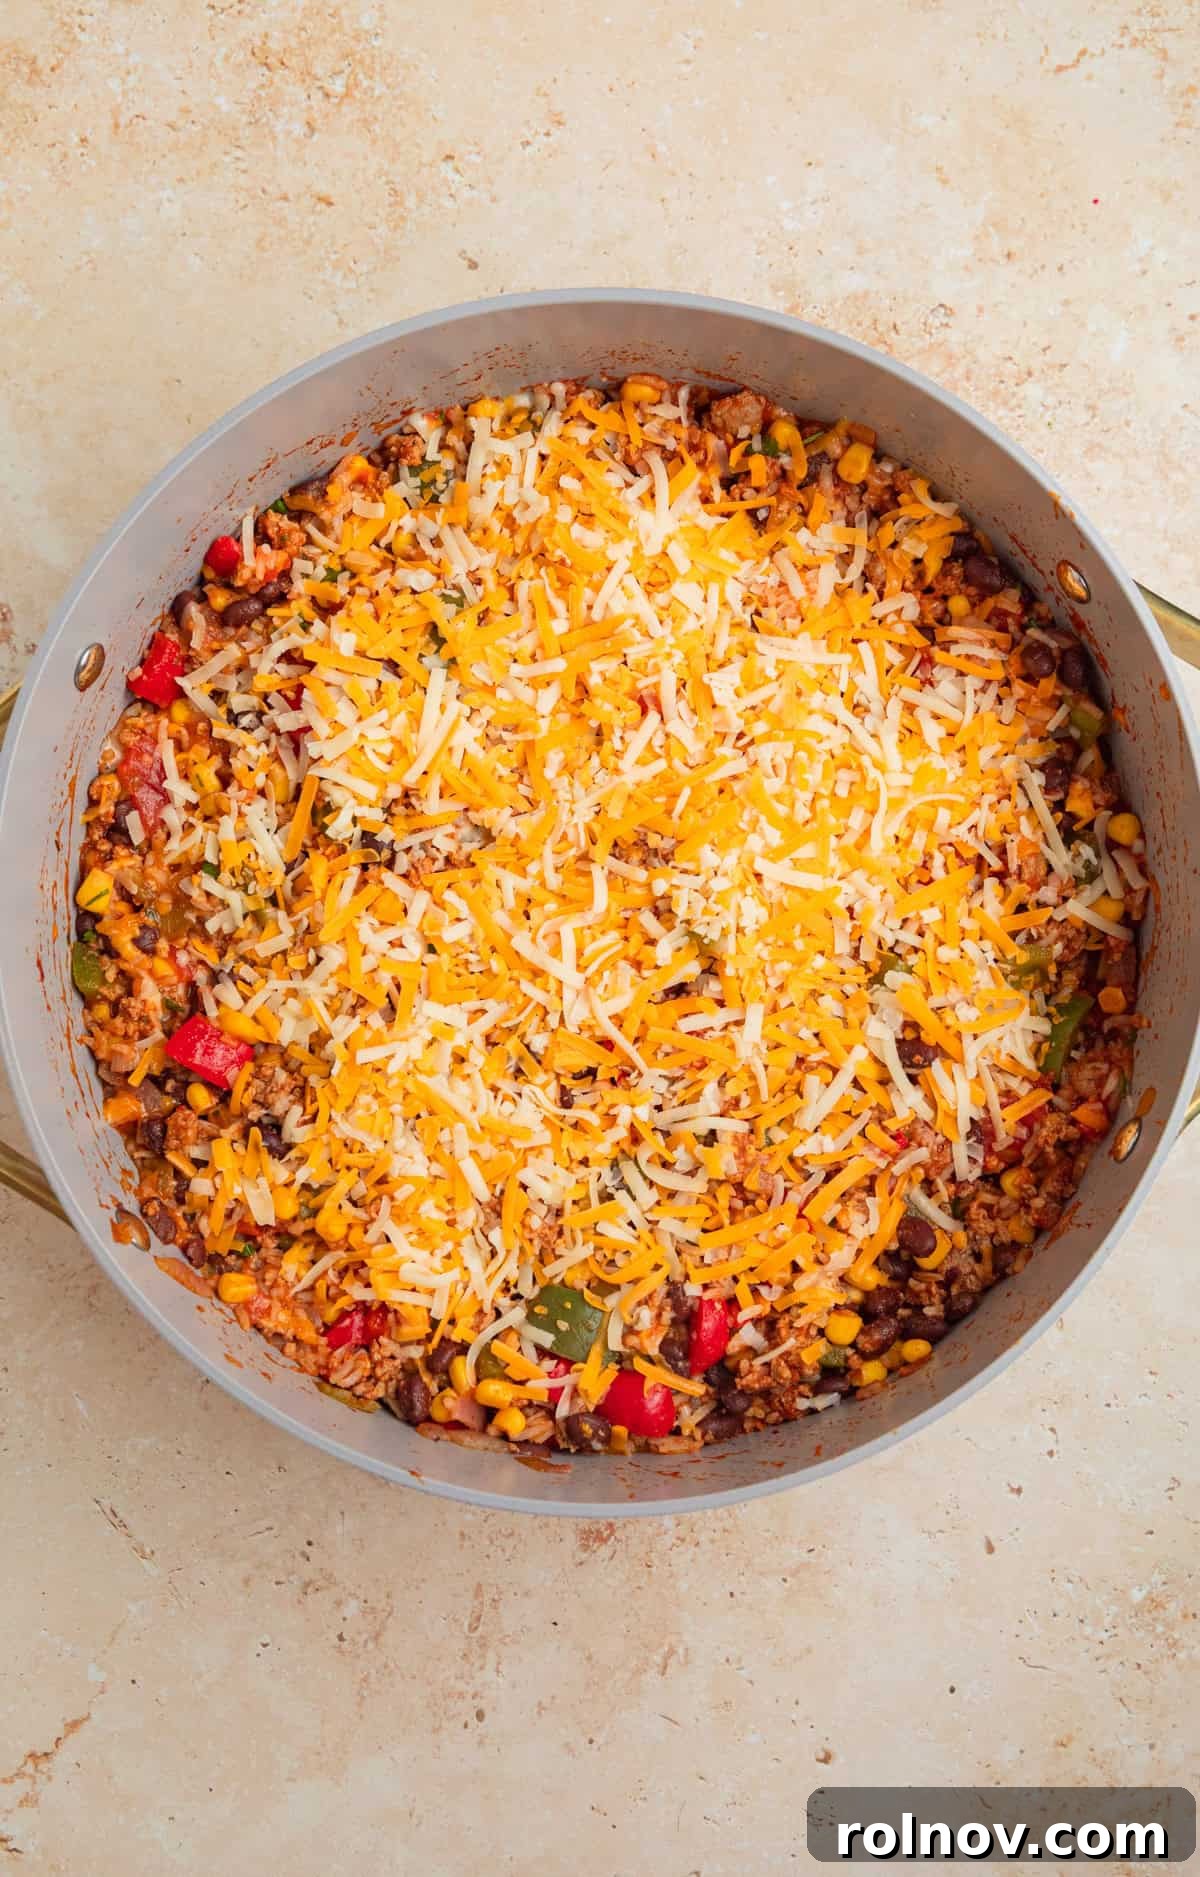
Step 5: Achieve Golden Perfection. As soon as the cheese is melted into the skillet, remove the pan from the heat. Generously sprinkle the remaining cheddar cheese evenly over the entire top surface of the skillet mixture. Carefully transfer the skillet to your oven and place it under the broiler. Broil on high for approximately 2-3 minutes. Keep a close eye on it to prevent burning; the goal is for the cheese to become beautifully melted, bubbly, and just starting to turn golden brown and slightly crispy at the edges.

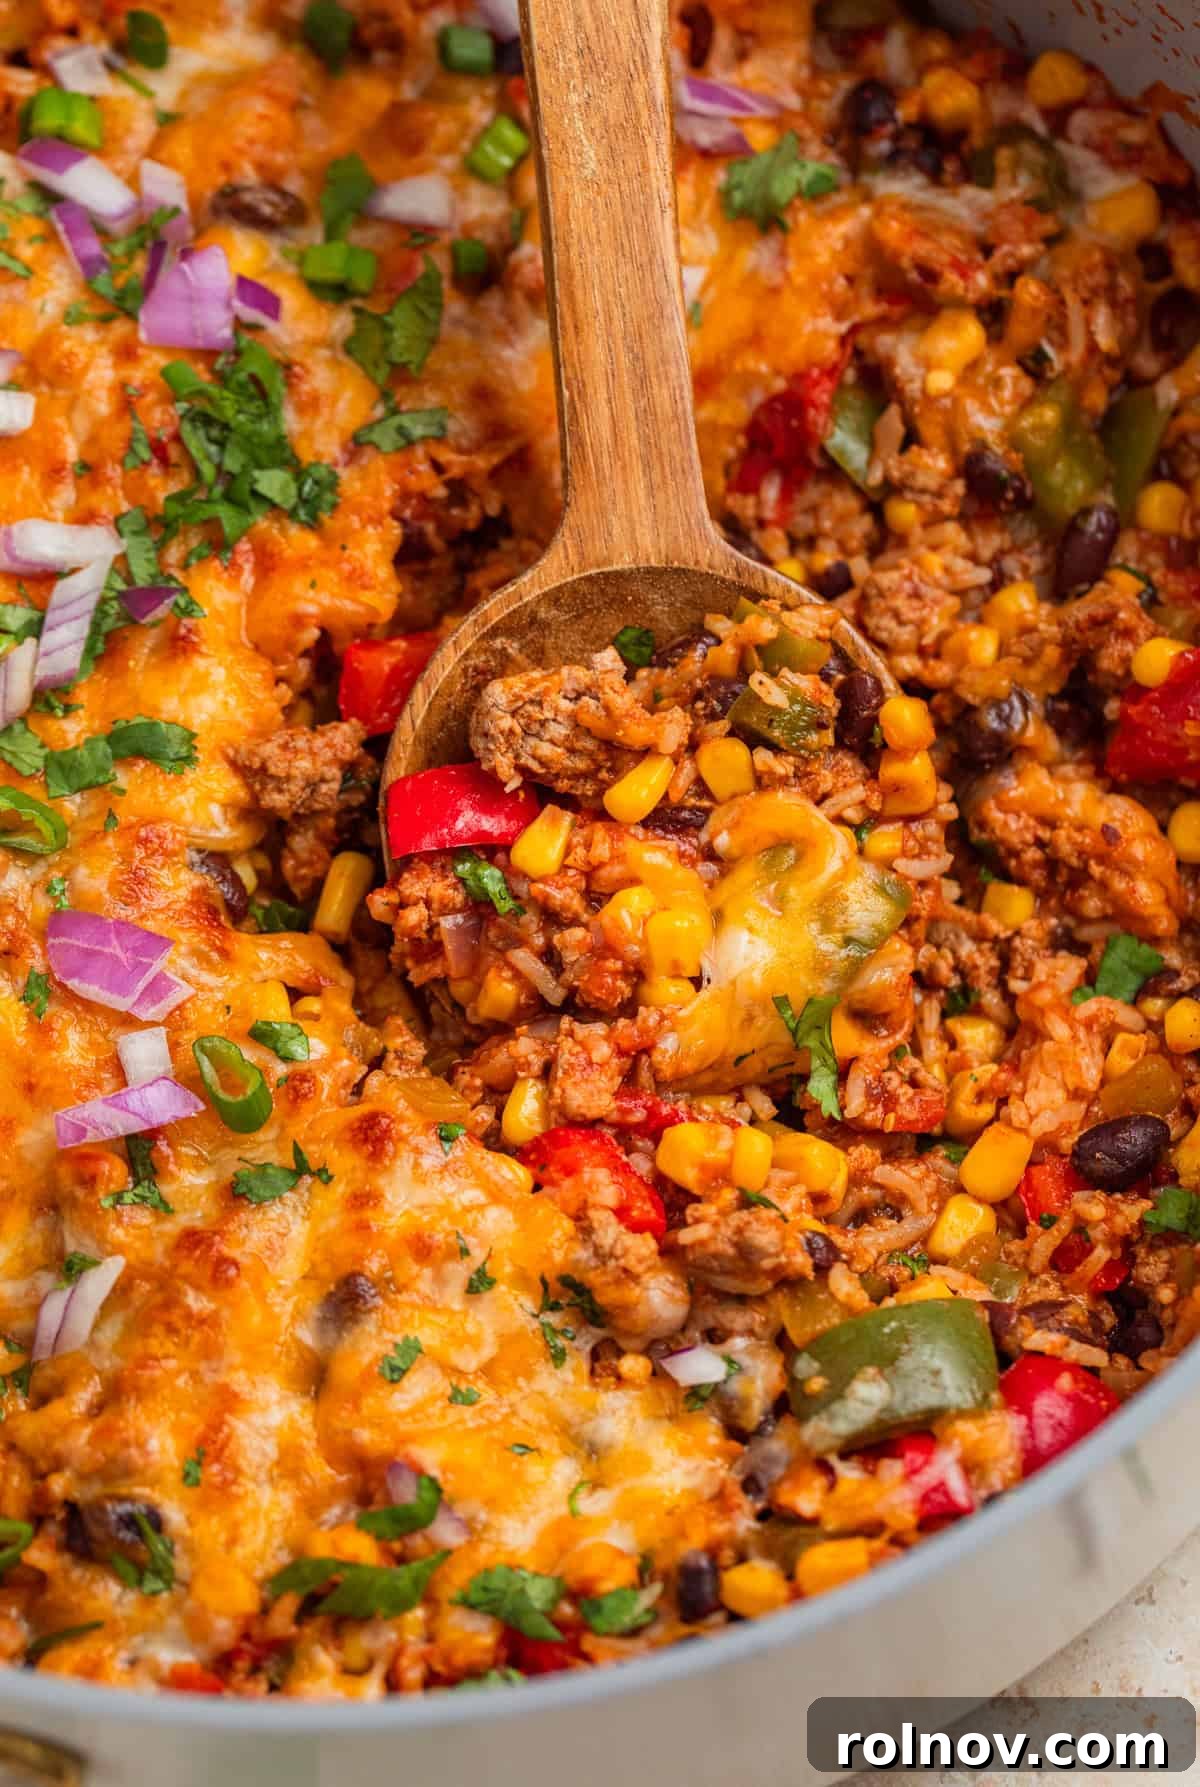
Step 6: Garnish and Serve. Once perfectly broiled, carefully remove the skillet from the oven. Allow it to cool for about 5-10 minutes before serving – this resting period allows the flavors to settle and prevents you from burning your mouth! Garnish generously with additional fresh cilantro for a pop of color and freshness. Elevate your dish further by adding any of your favorite taco toppings: think creamy diced avocado, vibrant diced tomatoes, zesty pickled jalapeños, cool sour cream or Greek yogurt, a dollop of fresh salsa, or even a sprinkle of crumbled cotija cheese. Serve directly from the skillet for a rustic, inviting presentation!
Pro Tips for the Perfect Skillet
Choose the Right Pan: To effortlessly achieve that perfectly bubbly, golden-brown cheese topping, it’s essential to use an oven-proof pan or skillet. This allows you to smoothly transition your dish from stovetop cooking directly into the oven for the broiling step. If you don’t own an oven-safe skillet, simply transfer the entire mixture to an oven-safe baking dish before adding the final layer of cheese and broiling. Alternatively, if broiling isn’t an option, you can achieve melted cheese by simply allowing the cheese to sit on top of the hot taco skillet after removing it from the heat, covering it loosely for a few minutes until it melts from the residual warmth.
Adjust Moisture Levels: The ideal consistency for this skillet is moist and flavorful, not dry. If the mixture appears a bit too dry, or if you notice that too much liquid from the diced tomatoes has evaporated during simmering, don’t hesitate to adjust. Add a splash of chicken broth (or vegetable broth for a vegetarian option) or a bit of extra tomato sauce. Start with a quarter cup and add more gradually, stirring until you reach your desired consistency. This ensures every bite is succulent and perfectly balanced.
Creative Serving Suggestions: While spooning this delicious skillet directly onto a plate is always a great option, this dish is incredibly versatile and can be served in a multitude of exciting ways! Think outside the bowl:
- Stuffed Sweet Potatoes: Spoon the taco skillet mixture into baked sweet potatoes for a nutritious and hearty meal.
- Lettuce Wraps: Create fresh and crunchy lettuce wraps using large lettuce leaves (like butter lettuce or romaine) as your vessel.
- Burrito or Quesadilla Filling: Roll it into warm tortillas for classic burritos or press it between tortillas with extra cheese for an amazing quesadilla.
- Nacho Topping: Use it as a decadent topping for a platter of crispy tortilla chips, creating instant nachos.
- Salad Topper: Serve a scoop over a bed of fresh greens for a vibrant and satisfying taco salad.
These creative serving ideas make this recipe perfect for entertaining or keeping weeknight meals fresh and exciting.
Storage and Reheating Made Easy
This cheesy turkey taco skillet is not only delicious freshly made but also fantastic for meal prep and leftovers, making your week even easier. Properly stored, you can enjoy its flavors days later or save it for future meals.
Refrigerator Storage: Store any leftover skillet mixture in an airtight container in the refrigerator for approximately 3-4 days. Ensure it cools completely before transferring to the container to maintain freshness and prevent condensation.
Freezer Storage: This dish freezes exceptionally well, making it a perfect candidate for batch cooking. Once the skillet has cooled entirely, transfer it into a freezer-safe sealed container or heavy-duty freezer bags. It can be stored in the freezer for up to 3 months. For best results, consider freezing in individual portions for quick and easy meal solutions.
Reheating Instructions:
- From the Refrigerator: To reheat larger portions, place the mixture in a baking dish and bake at 350°F (175°C) for about 15-20 minutes, or until thoroughly heated through. For an extra touch of deliciousness, consider sprinkling fresh cheese over the top during the last few minutes of baking. Individual servings can be quickly reheated in the microwave for about 90 seconds to two minutes, stirring halfway, until piping hot.
- From the Freezer: For frozen portions, you can often reheat them directly from frozen in the oven at 350°F (175°C), which will take longer (around 30-45 minutes), or thaw in the refrigerator overnight before reheating as above. Microwaving frozen individual portions will also work, but increase the time significantly, stirring frequently to ensure even heating.
HUNGRY FOR MORE? Don’t miss out on our latest delicious creations! Subscribe to our newsletter and connect with us on Facebook, Instagram, and Pinterest for daily recipe inspiration and updates!
Cheesy Turkey Rice Taco Skillet
Lorie Yarro

10 minutes
20 minutes
30 minutes
6
Ingredients
- 1-2 Tbsp olive oil
- 1 lb ground turkey
- 1½ tsp garlic powder, divided
- 2 bell peppers (we use 1 red and 1 green), diced
- ½ medium red onion, diced
- 1 packet taco seasoning (1 – 1.3 oz.), we use Siete
- ½ tsp each: salt and pepper, less salt if desired
- 1½ cup rice, pre-cooked
- 1 can of diced green chilies , (4 oz.)
- 1 can corn kernels, drained, (15.25 oz.) approx. 1½ cups corn
- 1 can black beans, (15 oz.)
- can diced tomatoes (with juices), (14.5 oz.)
- juice of 1 lime
- ½ cup tomato sauce
- ¼ cup cilantro, chopped
- 2 – 2½ c shredded cheddar cheese
Instructions
-
Heat a large sauté pan, skillet or shallow dutch oven over medium-high heat. Add 1-2 tablespoons olive oil and allow to heat up until glistening.
-
Add the diced onion and bell peppers. Sauté, stirring regularly until the onions begin to become translucent. Scoot the veggies to the side of the pan and add the ground turkey. Sprinkle 1 teaspoon of the garlic powder over top of the turkey and let it sit unbothered for about 2-3 minutes before breaking apart the meat into smaller pieces.
-
Cook the ground turkey and vegetables together until the turkey is cooked through and no longer pink.
-
Shift the heat to medium and add in the diced tomatoes, green chiles, black beans, corn, rice, taco seasoning, remaining garlic powder, salt and pepper. Stir to combine and allow to simmer for about 4-6 minutes to allow the ingredients to heat up.
-
Test that the rice is heated and once it’s cooked, stir in 1 cup of the shredded cheese, tomato sauce, lime juice and chopped cilantro. Stir until cheese is melted.
-
Once cheese is melted, remove the skillet from the heat and sprinkle remaining cheddar cheese over top. Transfer to the oven and broil on high for about 2-3 minutes or until cheese is melted and beginning to brown.
-
Remove from heat and allow to cool for about 5-10 minutes before serving topped with more cilantro and any other desired taco toppings.
Notes
If the mixture seems a bit dry, or too much of the liquid from the tomatoes evaporates, add a bit of chicken broth or extra tomato sauce to help balance it a bit.
You can serve this in a variety of ways beyond just spooning it on a plate. We stuff baked sweet potatoes, lettuce wraps, burritos, or use chips and spoon it onto them.
Storage: Store any leftovers in an airtight container for about 3-4 days in the refrigerator. You can freeze this dish quite easily as well as long as you allow it to cool completely first. Then add to a freezer-safe sealed container for up to 3 months. To reheat, you can bake in a baking dish at 350°F for about 15-20 minutes, adding fresh cheese over top or microwave single servings for about 90 seconds to two minutes.
Nutrition
Carbohydrates: 52g,
Protein: 36g,
Fat: 20g,
Saturated Fat: 10g,
Polyunsaturated Fat: 1g,
Monounsaturated Fat: 6g,
Trans Fat: 0.01g,
Cholesterol: 89mg,
Sodium: 681mg,
Potassium: 636mg,
Fiber: 6g,
Sugar: 2g,
Vitamin A: 789IU,
Vitamin C: 36mg,
Calcium: 378mg,
Iron: 3mg
Nutrition information is automatically calculated, so should only be used as an approximation.
Did you enjoy this recipe? Have a question?
Leave a comment below!
Shop Essential Kitchen Tools for This Recipe
Caraway Sauté Pan
Buy Now →
Citrus Juicer
Buy Now →
Cast Iron Skillet – 12 inch
Buy Now →
Box Grater
Buy Now →