

Irresistible Red Velvet Blossom Cookies: Your Easy Guide to Perfect Holiday Treats
Discover the ultimate shortcut to decadent baking with these incredibly simple and utterly delicious Red Velvet Blossom Cookies. Crafted with just 6 common ingredients and requiring only about 10 minutes of prep time, these cookies are a dream come true for any baker. Their vibrant red hue, soft, chewy texture, and the delightful chocolate kiss in the center make them an instant favorite. Perfect for Valentine’s Day celebrations, cozy holiday gatherings, or simply a spontaneous baking session, these blossom cookies offer endless possibilities for customization with your favorite Hershey’s Kisses or other delightful chocolate candies. Prepare to impress everyone with these show-stopping treats!

There’s a special kind of joy in creating something amazing with minimal effort, and these red velvet blossom cookies embody that spirit perfectly. Starting with a boxed cake mix, they deliver a wonderfully chewy and rich flavor that tastes completely homemade. It’s a testament to how convenience ingredients can elevate your baking experience, especially when time is precious.
If you’re a fan of smart baking shortcuts and the versatility of cake mixes, you’ll love exploring other popular recipes that leverage this secret weapon. Don’t miss out on these fantastic treats: Chocolate Cake Mix Cookies for intense cocoa flavor, Brownie Mix Cookies for that fudgy delight, Red Velvet Cake Mix Cookies with Cream Cheese Icing for an extra touch of indulgence, the incredibly easy Blueberry Lemon Dump Cake, or this moist and flavorful Easy Carrot Cake From Cake Mix Recipe!
Why These Red Velvet Blossom Cookies Will Become Your New Go-To Recipe

Many years ago, I discovered the magic of using a simple cake mix to create one of my most beloved dessert recipes: my famous Apple Dump Cake! Since then, harnessing the power of a boxed cake mix has become my secret weapon for whipping up fantastic treats, especially when I’m pressed for time, want to involve the kids in baking, or simply crave something delicious without the fuss of starting from scratch.
These Red Velvet Blossom Cookies exemplify everything wonderful about smart, convenient baking. Here’s why they’ll quickly become a staple in your recipe collection:
- Minimal Ingredients: You’ll only need 6 basic ingredients, making this recipe incredibly accessible and budget-friendly.
- Effortlessly Simple: The straightforward instructions ensure a smooth baking process, perfect for beginners and seasoned bakers alike.
- Endless Customization: Easily switch up the chocolate center by using any flavor of Hershey’s Kisses or other small candies, allowing for new variations every time.
- Versatile for Any Occasion: Their vibrant red color and festive appearance make them an excellent choice for Valentine’s Day, Galentine’s Day celebrations, or even as delightful additions to your Christmas cookie platter.
- Deliciously Chewy Texture: Despite their simplicity, these cookies boast a perfectly soft and chewy texture that melts in your mouth.
- Quick Prep Time: With only about 10 minutes of hands-on prep, you can have these beauties in the oven in no time, leaving you more time to enjoy them!
I truly can’t wait to hear your thoughts on this delightful cookie recipe. It’s bound to bring a smile to every face!
Essential Ingredient Insights for Perfect Red Velvet Blossom Cookies
While the full list of exact measurements can be found in the recipe card below, understanding a few key details about your ingredients can make all the difference in achieving bakery-quality red velvet blossom cookies. Each component plays a crucial role in developing their irresistible flavor and texture.
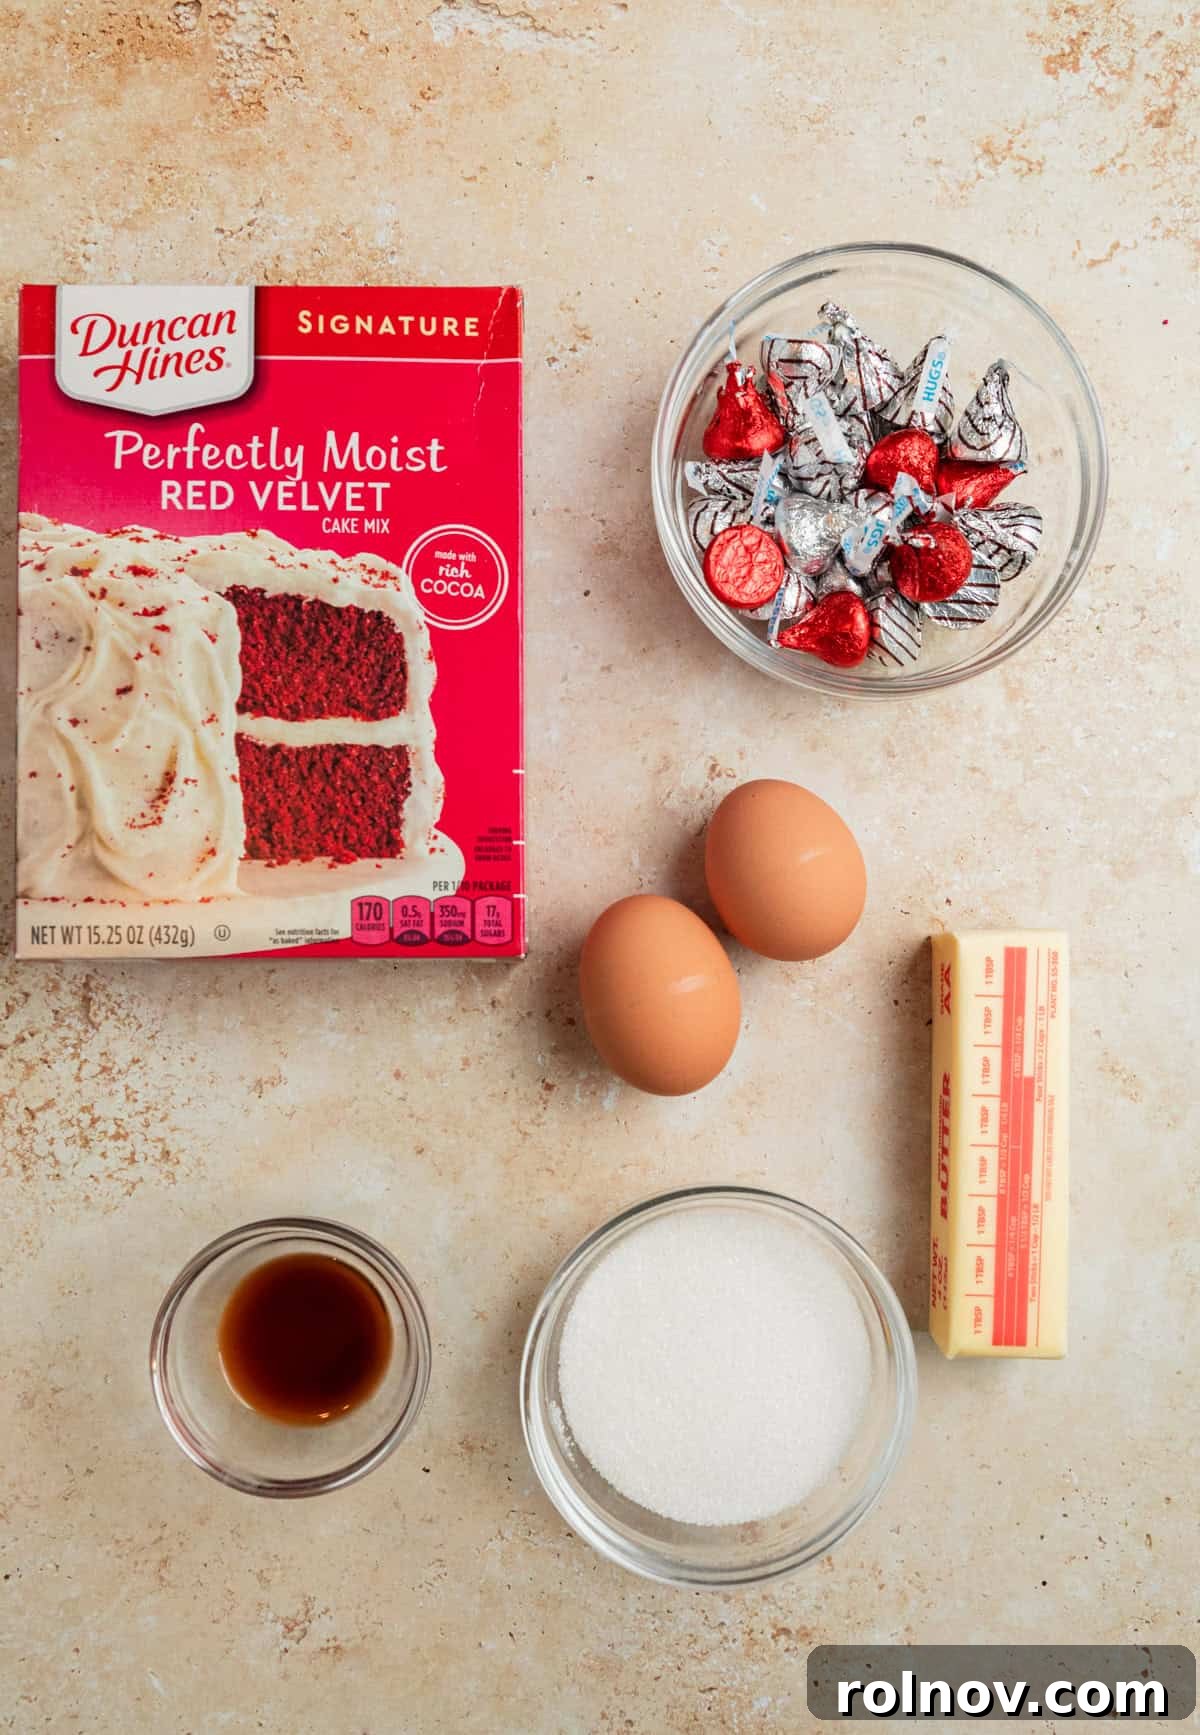
- Red Velvet Cake Mix: This is your primary shortcut ingredient, providing the signature flavor and color. Be aware that cake mix amounts are constantly changing. While I used a box that was 15.25 oz., many brands now offer smaller boxes, often 13.25 oz. The recipe is quite forgiving, so it should still work well with a slightly smaller box. However, if you notice your cookies spreading too much during baking, adding a tablespoon or two of all-purpose flour to the dough can help achieve the perfect consistency.
- Eggs: Large eggs act as a binder, providing structure and moisture to the cookies. Ensure they are at room temperature for better incorporation into the batter.
- Unsalted Butter: Using melted butter is key for these cookies. Unlike softened butter which creates a cake-like crumb, melted butter contributes to a chewier, denser cookie texture. Unsalted butter allows you to control the overall saltiness of the recipe.
- Vanilla Extract: A touch of pure vanilla extract enhances the overall sweetness and complements the subtle chocolate notes of the red velvet. Don’t skip it!
- Sugar for Coating: You have options here!
- Regular Granulated Sugar: Provides a classic, sparkling exterior and a slight crunch.
- Coarse or Raw Sugar: If you desire a more pronounced crunch and a rustic appearance, coarse turbinado or demerara sugar is an excellent choice.
- Nonpareil Sprinkles: For a fun, festive look, especially during holidays like Valentine’s Day or Christmas, roll the dough balls in red, pink, or holiday-themed nonpareils.
- Powdered Sugar: To achieve a “crinkle” cookie effect, powdered sugar is ideal. We’ll discuss this more in the variation section.
- Hershey’s Kiss Candies: These iconic chocolates are what make a “blossom” cookie. You’ll need about 24 for a batch. Feel free to use classic milk chocolate, Hugs (milk chocolate with white creme), special dark, or any of the numerous seasonal flavors to match your preference or occasion.
- Optional Ingredient: Espresso Powder: For those who love a deeper, richer chocolate flavor, adding ½ tsp of espresso powder is a game-changer. It doesn’t make the cookies taste like coffee; instead, it subtly intensifies the chocolate notes, making the red velvet even more decadent. It’s completely optional, but highly recommended for an elevated taste experience.
Creative Ways to Customize and Elevate Your Red Velvet Blossom Cookies
One of the most exciting aspects of these red velvet blossom cookies is how incredibly adaptable they are. With just a few simple tweaks, you can transform them into a completely new treat, perfectly suited for any palate or occasion. Get ready to unleash your inner baker and personalize your batch!
- Easily Vary by Changing Up the Candy Centers: The chocolate kiss in the center is the defining feature, but why stop at just one kind?
- Different Hershey’s Kiss Flavors: Explore the vast array of Hershey’s Kiss varieties! Try milk chocolate, special dark, cherry cordial, mint truffle, or even peppermint Kisses for a festive holiday twist.
- Rolo Caramel Candies: For a gooey, caramel-filled surprise, press a Rolo into the center instead of a Kiss.
- Mini Reese’s Peanut Butter Cups: If you love the chocolate-peanut butter combination, mini Reese’s cups are an excellent choice. The salty-sweet contrast is divine.
- Dove Chocolate Squares: These offer a smoother, richer chocolate experience. Their flat bottom makes them easy to press into the cookie.
- White Chocolate or Dark Chocolate Chunks: For a rustic, gourmet touch, small chunks of your favorite baking chocolate can also be used.
- Seasonal Candies: Consider M&M’s, seasonal Hershey’s Kisses, or other small candies that match your holiday theme (e.g., green/red for Christmas, pink/white for Easter).
- Achieve the “Crinkle” Effect with Powdered Sugar: To make these more like classic red velvet crinkle blossom cookies, simply replace the granulated sugar coating with powdered sugar. Roll the dough balls generously in powdered sugar before baking. As the cookies bake and spread, the powdered sugar will create beautiful cracks, giving them that signature crinkle appearance and a melt-in-your-mouth texture. For an extra dramatic crinkle, roll the dough in granulated sugar first, then roll in powdered sugar.
- Add Citrus Zest: For a bright, fresh note, incorporate 1-2 teaspoons of orange or lemon zest into the cookie dough. Citrus pairs wonderfully with red velvet and chocolate.
- Introduce Extracts: Experiment with different flavor extracts! A touch of almond extract can add a sophisticated nutty undertone, while a hint of peppermint extract makes them perfect for the winter holidays.
- Incorporate Chocolate Chips: Stir ½ cup of mini chocolate chips (white, milk, or dark) into the dough along with the cake mix for an extra layer of chocolatey goodness.
Step-By-Step Perfection: Crafting Your Red Velvet Blossom Cookies
Creating these delightful red velvet blossom cookies is a straightforward process, making them perfect for bakers of all skill levels. Follow these simple steps to ensure a batch of perfectly chewy, chocolate-kissed treats every time.

Step 1: Combine Wet Ingredients. In a large mixing bowl, whisk together the eggs, melted unsalted butter, and vanilla extract until they are well combined and smooth. This creates the essential moist base for your cookie dough. Ensure your butter is cooled slightly after melting so it doesn’t cook the eggs.
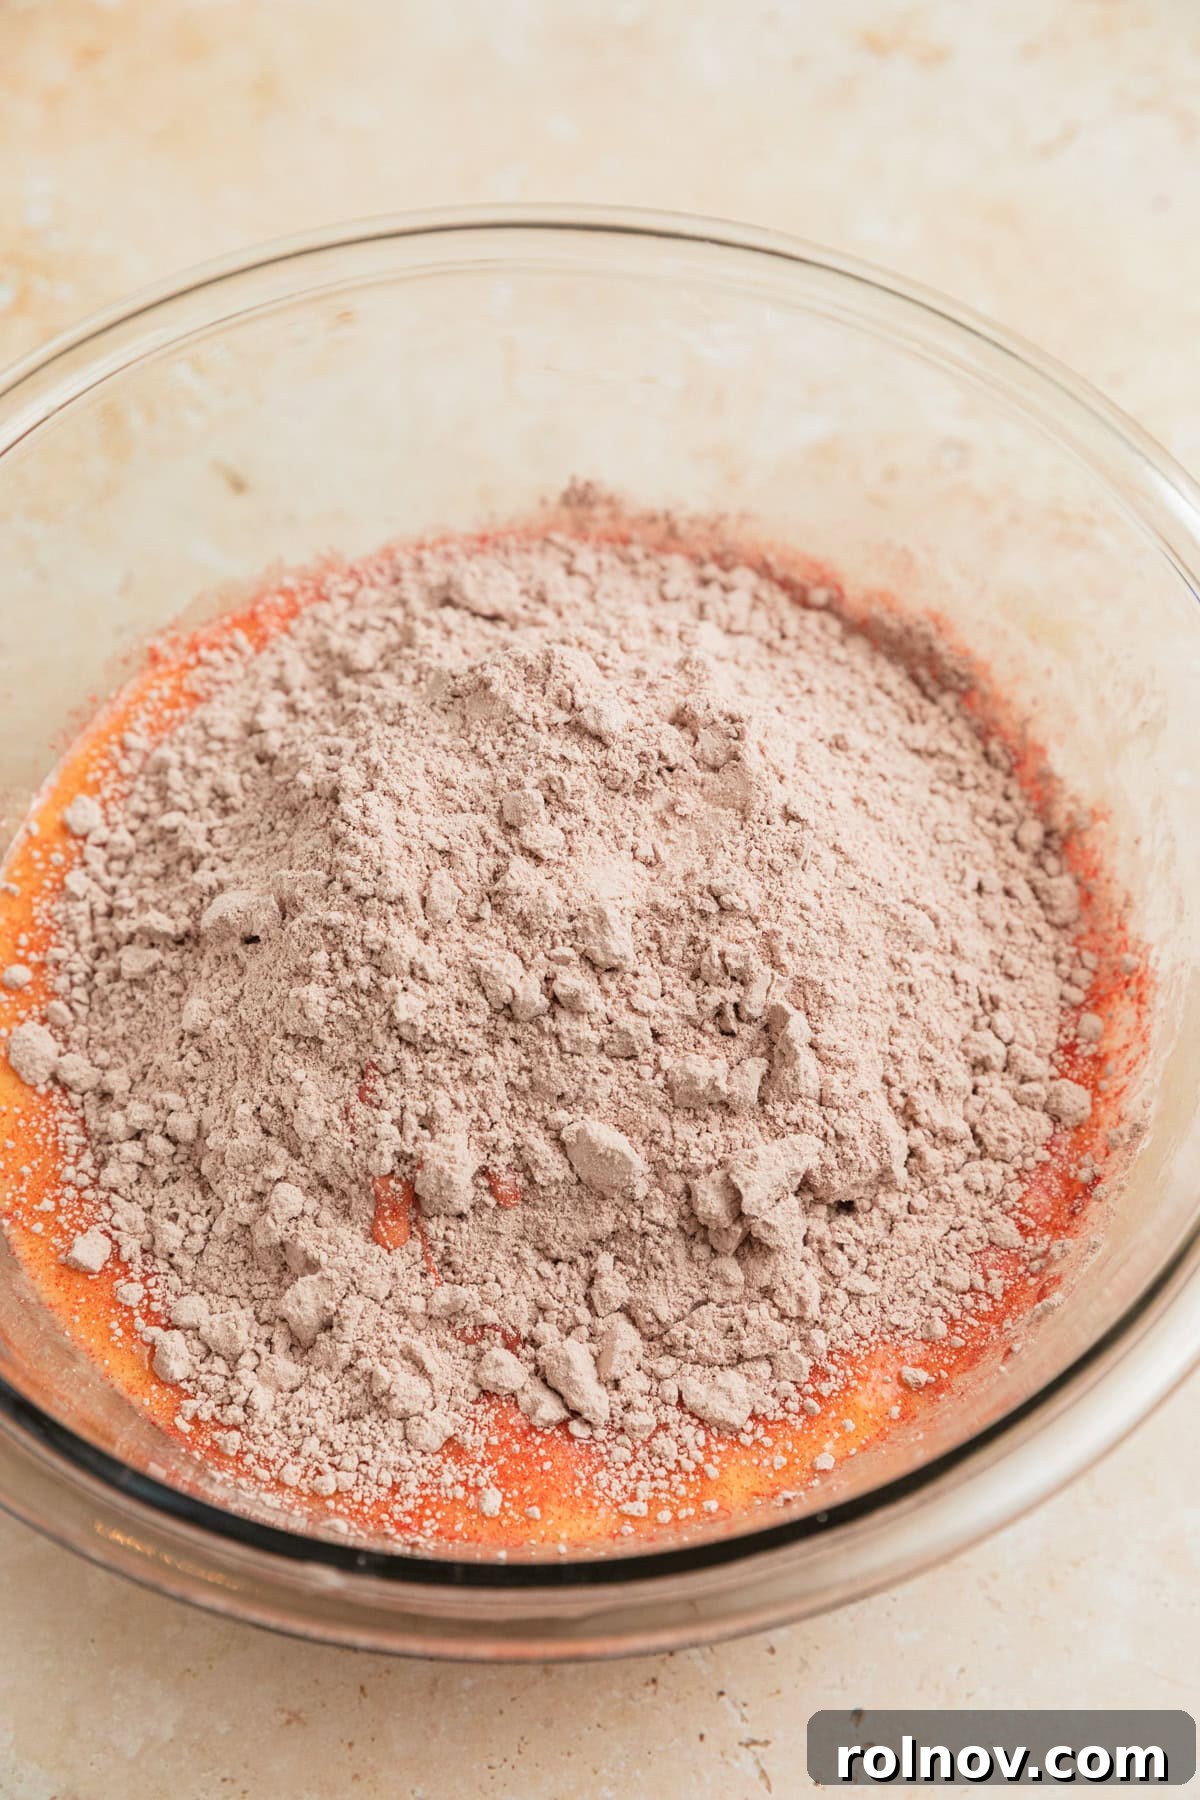
Step 2: Incorporate Dry Ingredients. Add the entire box of red velvet cake mix to the wet ingredients. If you’re using it, now is also the time to add the optional espresso powder. Stir the mixture until all ingredients are fully incorporated and a cohesive dough forms. Be careful not to overmix; stop once no streaks of dry cake mix remain.
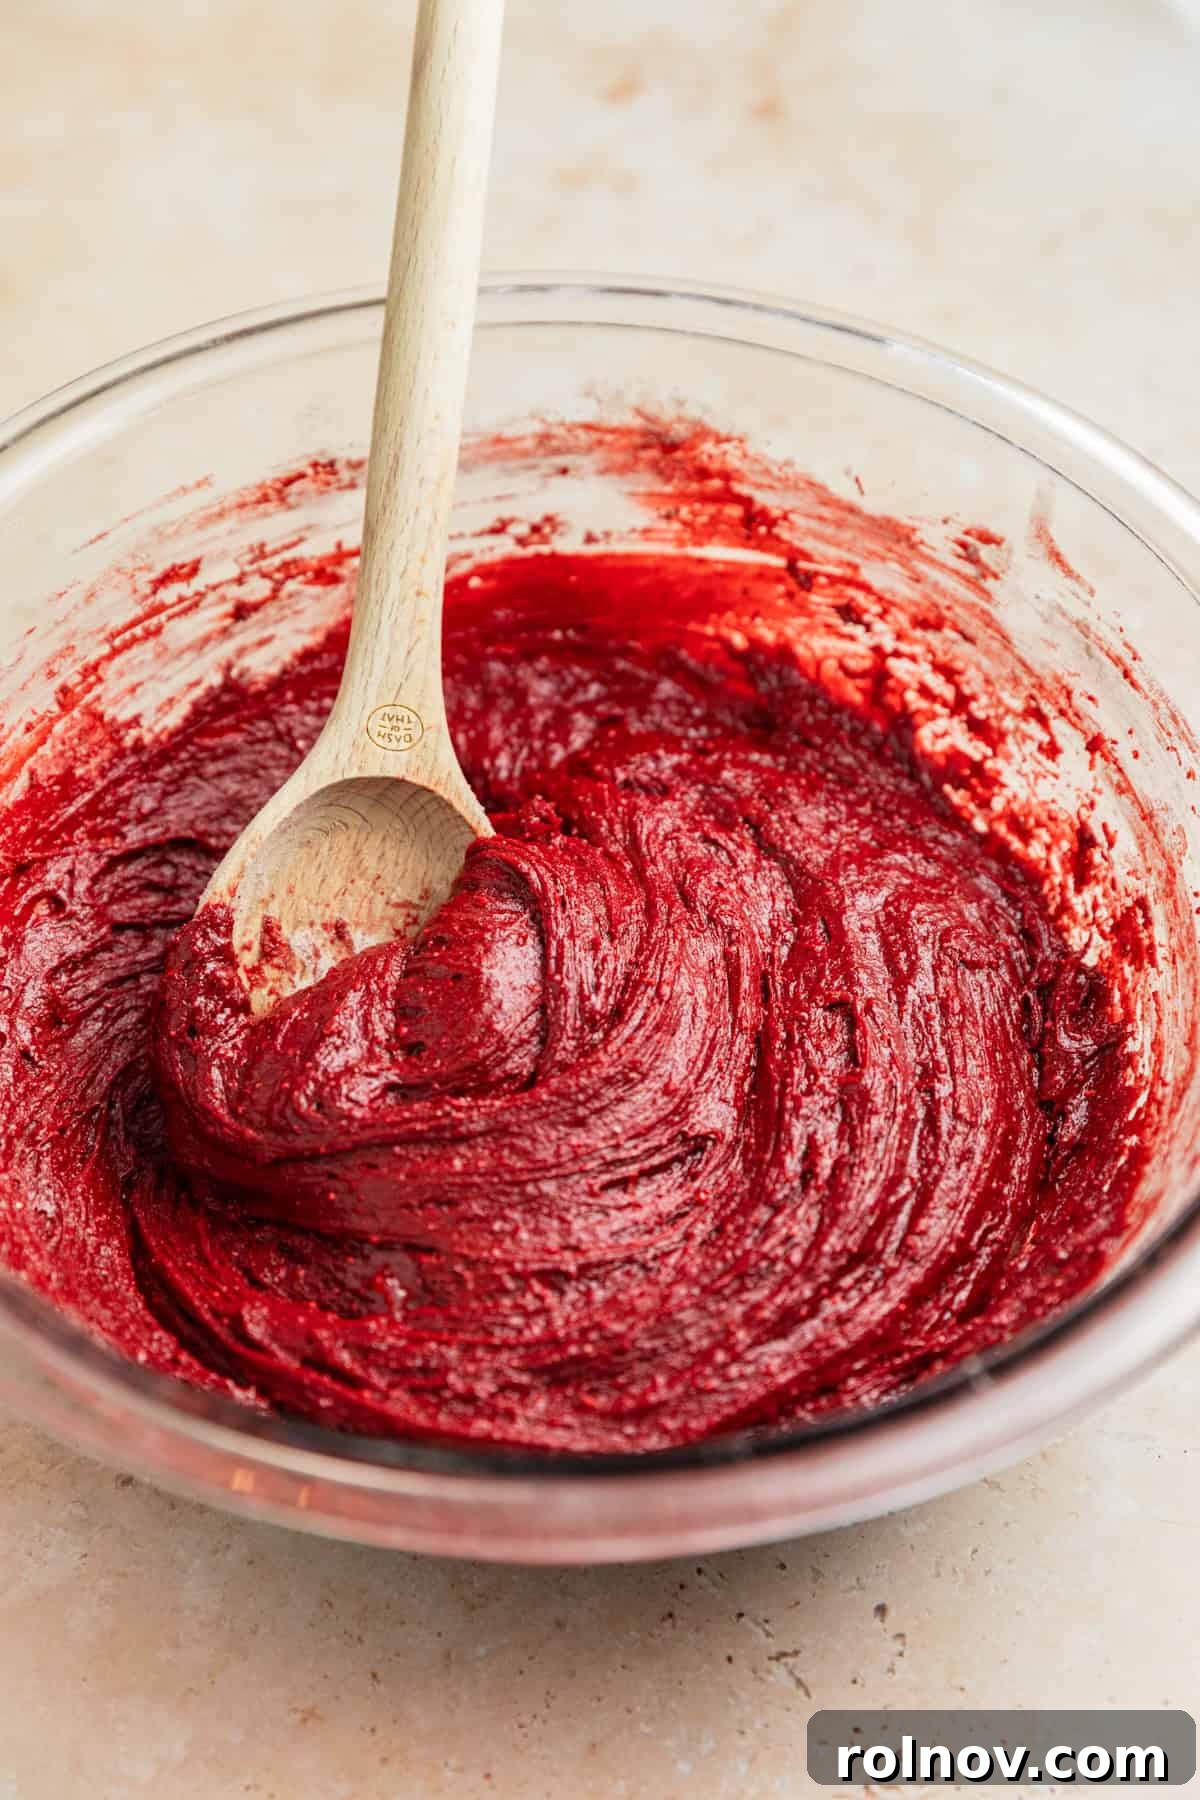
Step 3: Chill the Dough. Cover the bowl with plastic wrap and chill the cookie dough for approximately 30 minutes in the refrigerator. This crucial step helps prevent the cookies from spreading too much during baking, makes the dough easier to handle and roll, and allows the flavors to meld beautifully. While tempting to skip, chilling ensures a better texture and shape.
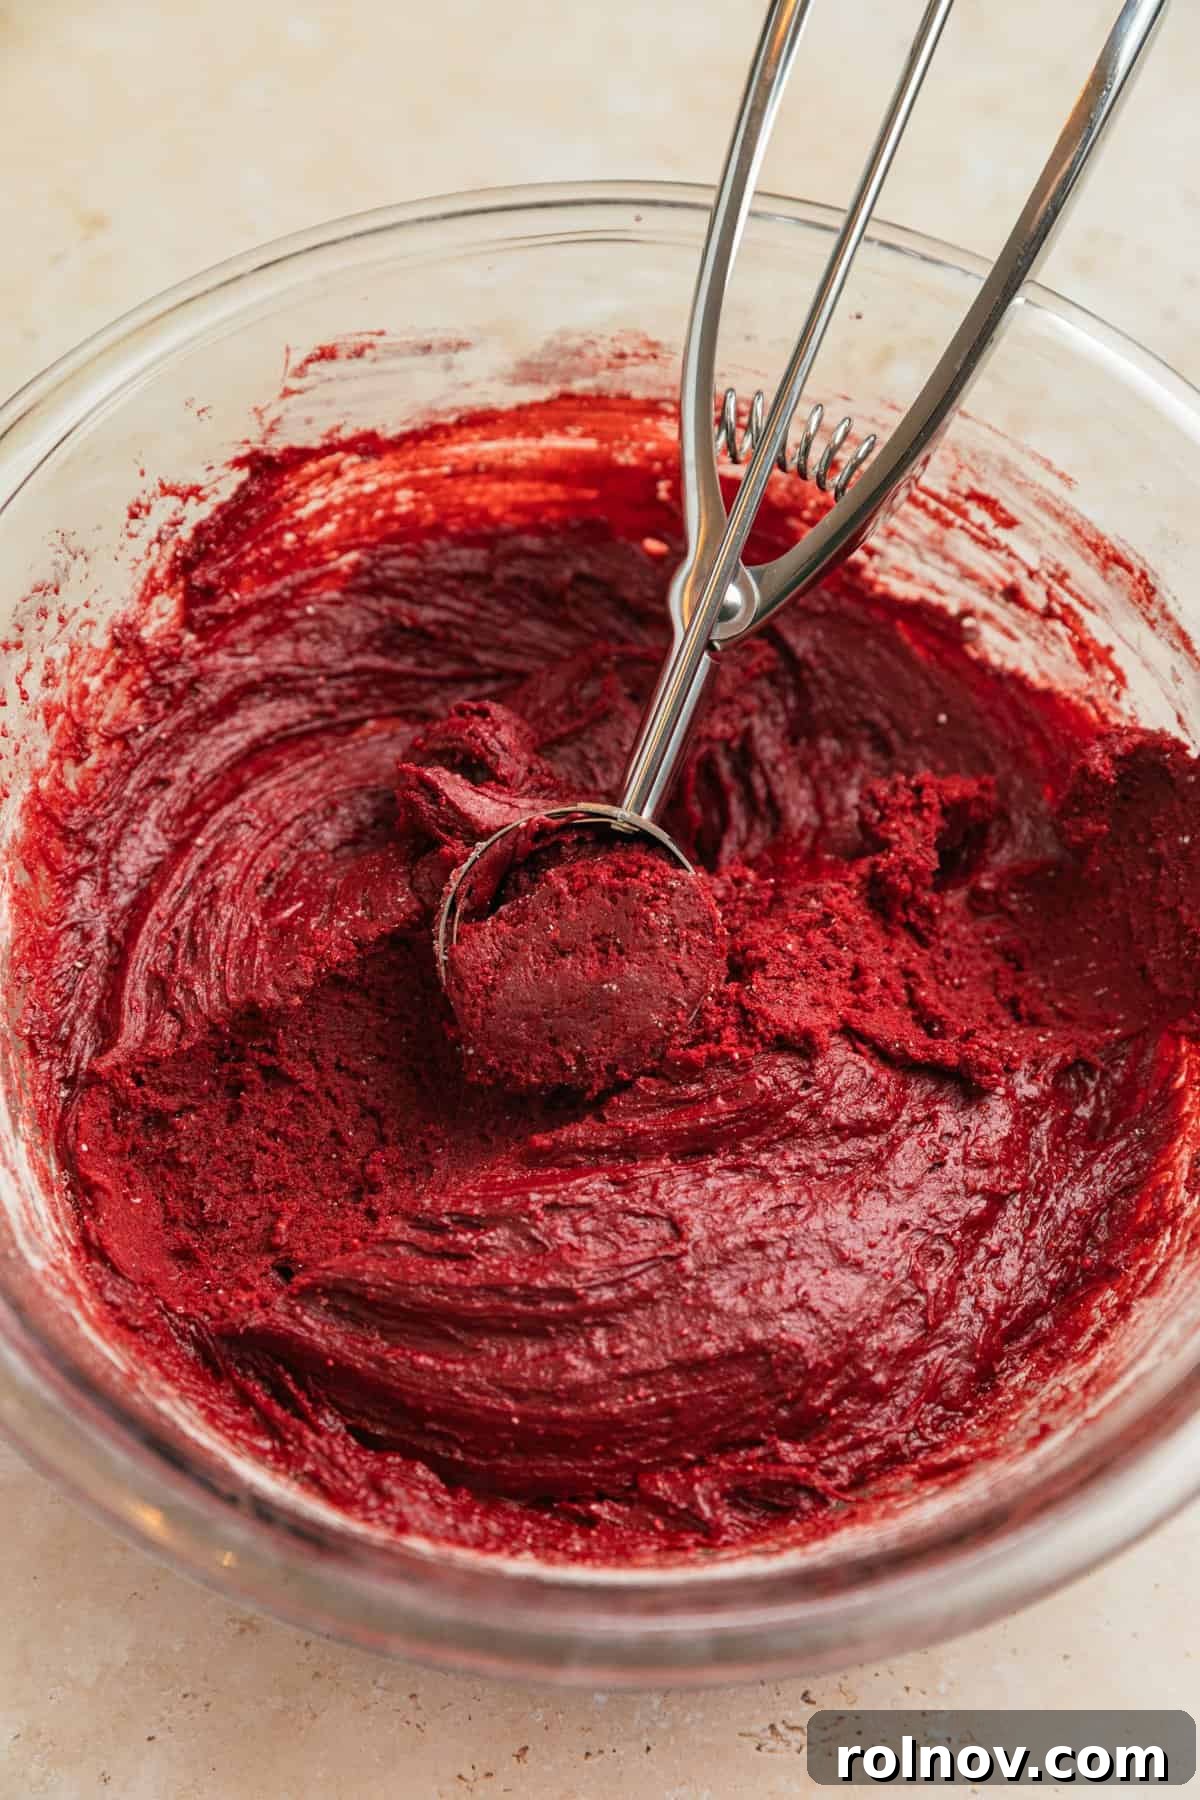
Step 4: Form and Coat Cookies. Once the dough is sufficiently chilled and can be easily rolled, use a cookie scoop (about 1½ tablespoons) to portion out the dough. Roll each portion into smooth, 1½-inch balls. Then, roll each dough ball generously in your chosen sugar (regular, coarse, or powdered) to coat it completely. This sugar coating adds sparkle, texture, and helps with the outer crispness.
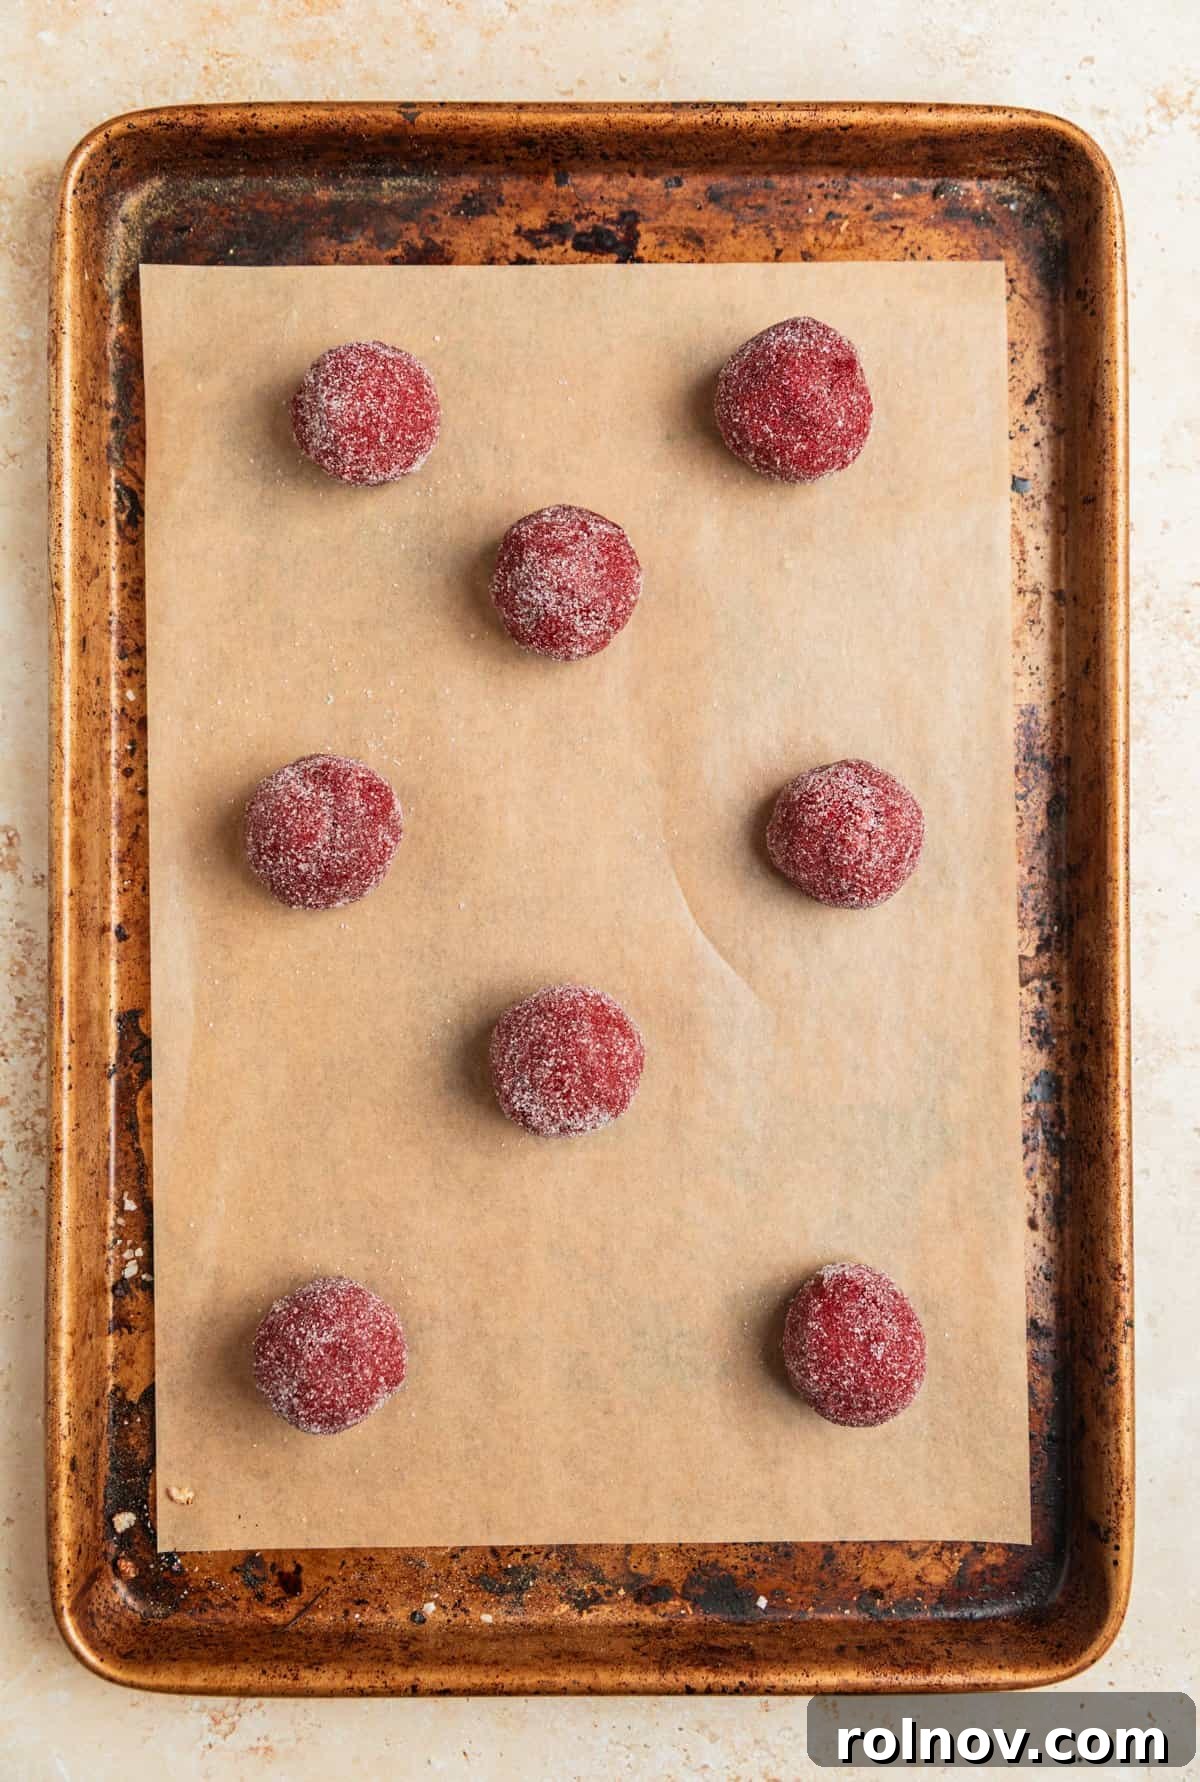
Step 5: Bake to Perfection. Preheat your oven to 350°F (175°C). Place the sugar-coated dough balls onto a baking sheet lined with parchment paper, spacing them about 2 inches apart. Bake for approximately 8-10 minutes, or until the edges begin to set, the cookies look slightly puffed, and you can see them just barely starting to crinkle on top. Be careful not to overbake, as this can lead to dry cookies; a slightly underbaked center ensures chewiness.

Step 6: Add the Chocolate Blossom. Immediately upon removing the cookies from the oven, gently but firmly press a chocolate candy kiss (or your chosen candy) into the center of each warm cookie. The residual heat from the cookie will slightly melt the chocolate, allowing it to adhere and create that signature “blossom” effect. Allow the cookies to cool completely on the baking sheet or a wire rack before handling or eating. This allows the chocolate to set and the cookies to firm up. If using a Hershey’s Hugs candy kiss, note that the white creme portion tends to melt more significantly and may not fully hold its shape. If you prefer the Hugs to retain more definition, transfer the cookies to the fridge or freezer for a few minutes until the chocolate sets.

Expert Tips for Flawless Red Velvet Blossom Cookies
Even with an easy recipe, a few insider tips can make your baking experience even smoother and your results even more spectacular:
- Managing Melting Chocolate: Be aware that Hershey’s Kisses with white chocolate, like Hugs, tend to melt a lot more than the traditional milk or dark chocolate varieties due to their different composition. If you prefer the kisses to maintain a more distinct shape, especially the Hugs, you can take a couple of approaches:
- Quick Chill: After pressing the candy into the warm cookies, transfer the baking sheet to the fridge or freezer for 5-10 minutes. This rapid cooling will help the chocolate set quickly and prevent excessive melting.
- Hands-Off Approach: Alternatively, simply let the cookies sit undisturbed on the baking sheet until the chocolate has completely set on its own. Avoid touching or moving them until then. This method works well for all chocolate varieties.
- Pressing Kisses into Sugar-Coated Cookies: The sugar coating, while beautiful, can sometimes make it a touch challenging to press the chocolate kisses firmly into the baked cookies without breaking the cookie or making a mess. Here’s a helpful trick: take a very sharp paring knife and make a small, shallow slit or indentation in the center of each warm cookie before pressing in the Hershey’s Kiss. This small incision creates a perfect pocket for the candy, allowing it to sit snugly and neatly without much effort. You’ll find this technique incredibly helpful for a clean finish.
- Don’t Overbake: These cookies are meant to be soft and chewy. Overbaking will result in a dry, crumbly texture. Keep an eye on them; remove them from the oven as soon as the edges are set and the centers look slightly soft. They will continue to cook slightly on the hot baking sheet.
- Cool Completely: Allow the cookies to cool completely on a wire rack before storing or stacking. This ensures the chocolate centers are fully set and the cookie texture is optimal.
Storage & Freezing Instructions for Freshness
To keep your red velvet blossom cookies tasting fresh and delicious, proper storage is key. Store these delightful cookies in an airtight container at room temperature for approximately 3-4 days. For the absolute best texture and flavor, we recommend enjoying them within the first two days after baking. If you want to extend their life even further, these cookies freeze exceptionally well. Place them in a freezer-safe airtight container or bag, separating layers with parchment paper to prevent sticking. They can be frozen for up to 3 months. Thaw at room temperature when ready to enjoy.
Frequently Asked Questions About Red Velvet Blossom Cookies
Have questions about making these easy and delicious red velvet blossom cookies? Here are answers to some common queries to help you bake with confidence:
- Can I use a different flavor of cake mix? Absolutely! While red velvet is classic, you can easily substitute with other cake mix flavors to create new variations. Chocolate fudge, vanilla, strawberry, or even lemon cake mixes would make fantastic blossom cookies. Just remember to adjust your candy center choices to complement the cake mix flavor.
- Why are my cookies spreading too much? Several factors can cause cookies to spread. Ensure your butter wasn’t too warm when added to the eggs, and most importantly, don’t skip the chilling step for the dough. Chilling solidifies the butter, which helps the cookies hold their shape. If your cake mix box was smaller than 15.25 oz (e.g., 13.25 oz), adding 1-2 tablespoons of all-purpose flour to the dough can help absorb excess moisture and prevent excessive spreading. Make sure your oven temperature is accurate as well.
- How far in advance can I make the cookie dough? You can prepare the cookie dough up to 2-3 days in advance. Store it covered tightly in the refrigerator. When you’re ready to bake, let it sit at room temperature for about 15-20 minutes to soften slightly, making it easier to roll into balls.
- What are the best chocolate kisses to use? Classic milk chocolate Hershey’s Kisses are always a hit. However, experimenting is encouraged! Consider Dark Chocolate Kisses for a richer flavor, Hugs for a white chocolate twist, or seasonal flavors like Peppermint Kisses for holidays. Rolo candies or mini Reese’s Peanut Butter Cups also make excellent centers for added variety.
- Can I use homemade red velvet cookie dough instead of cake mix? While this recipe specifically leverages the convenience of a cake mix, you can certainly adapt it to use your favorite homemade red velvet cookie dough recipe. Just ensure your homemade dough has a similar consistency for rolling and baking. The primary benefit of using a cake mix here is the incredible ease and consistent results.
- Can I add nuts to the cookie dough? Yes, for an extra crunch and flavor, you can fold in about ½ cup of chopped pecans or walnuts into the cookie dough along with the cake mix. Nuts complement the red velvet flavor beautifully.
Explore More Delightful Cookie Recipes
Desserts
Red Velvet Blossom Cookies
Cookies
Chocolate Lava Cookies
Desserts
Frosted Sugar Cookie Bars
Cookies
Cosmic Brownie Cookies
HUNGRY FOR MORE? Subscribe to my newsletter and follow me on Facebook, Instagram and Pinterest for all the latest recipes and baking tips!
Red Velvet Blossom Cookies

Print Recipe
Ingredients
- 1 box red velvet cake mix, 15.25 oz. (see notes for smaller box sizes)
- 2 large eggs
- ½ cup unsalted butter, melted and slightly cooled
- 1 tsp vanilla extract
- ½ tsp espresso powder (optional, for deeper chocolate flavor!)
- 1 cup regular, coarse, or powdered sugar (for rolling)
- 24 Hershey’s kiss candies, or other mini chocolate candy of your choice
Instructions
-
In a large bowl, whisk together the eggs, melted butter, and vanilla extract until thoroughly combined. Add the red velvet cake mix and espresso powder (if using) and stir until the mixture is fully incorporated and forms a cohesive dough. Be careful not to overmix.
-
Cover the dough and chill in the refrigerator for about 30 minutes. This helps prevent spreading during baking and makes the dough easier to handle.
-
Preheat oven to 350°F (175°C) and line a baking sheet with parchment paper. Once the dough is chilled and can be easily rolled, form it into 1½-inch balls. Roll each ball generously in your chosen sugar (regular, coarse, or powdered) to coat evenly.
-
Place the coated dough balls on the prepared baking sheet, spaced about 2 inches apart. Bake for approximately 8-10 minutes, or until the edges begin to set, the cookies are slightly puffed, and you notice faint crinkles on the surface. Avoid overbaking to maintain a chewy texture.
-
Remove the baking sheet from the oven. Immediately and gently press a chocolate candy kiss into the center of each warm cookie. Allow the cookies to cool completely on the baking sheet or a wire rack before handling, so the chocolate has time to set.
-
Note on Hugs Kisses: If using Hugs candy kisses (white chocolate variety), they tend to melt more readily and may not fully hold their distinct shape, slightly melting into the cookie. To help them set, you can briefly transfer the cookies to the fridge or freezer after pressing the candy. Regular milk or dark chocolate kisses usually set well without this extra step if left undisturbed until cool.
Notes
Hershey’s kisses with white chocolate seem to melt a lot more than the milk or dark chocolate varieties. You can transfer the cookies to the fridge or freezer briefly after pressing the candy into the cookie, or let them sit without touching at all until set. You can do this when using any chocolate if desired to keep them from melting much.
The sugar coating can make the cookies a touch challenging to press into the baked cookies. You can take a very sharp knife and make a small slit to help get the kiss into the cookie a bit more easily. I find that is really helpful.
Storage: Store these cookies in an airtight container at room temperature for about 3-4 days. They will be the best texture in the first two days. They can be frozen for up to 3 months.
Nutrition Information (per cookie)
Nutrition information is automatically calculated, so should only be used as an approximation.
Did you enjoy this recipe? Have a question?Leave a comment below!
Shop Essential Baking Tools for This Recipe
To help you create these irresistible red velvet blossom cookies with ease, here are some essential baking tools you might find useful. These are affiliate links, meaning I may earn a small commission at no extra cost to you if you make a purchase.
Durable Half Sheet Pan
Buy Now →
Comfortable Cookie Scoop
Buy Now →
High-Quality Silicone Spatulas
Buy Now →