
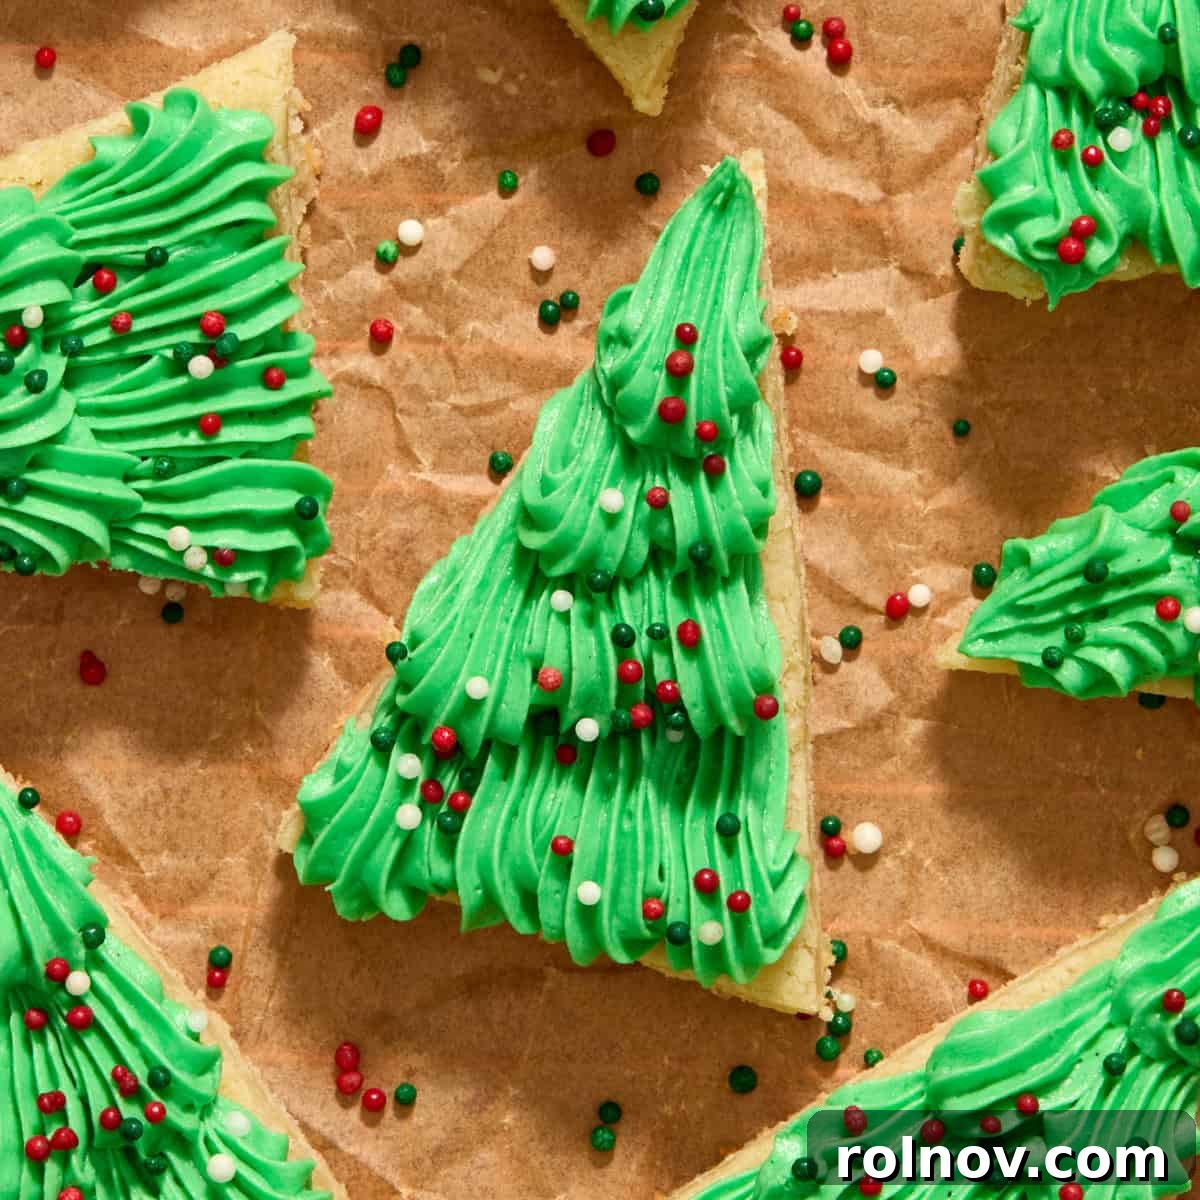
Irresistible No-Chill Christmas Sugar Cookie Bars: Your Easiest Holiday Treat!
Say goodbye to complicated holiday baking! These incredibly soft and chewy Christmas sugar cookie bars are the ultimate stress-free solution for your festive dessert table. Forget the endless chilling, messy rolling, and intricate cookie cutters. With this simple recipe, you can whip up a batch of deliciously frosted, holiday-themed treats in a fraction of the time, leaving more moments for joy and less for kitchen clean-up. Whether you choose to frost them traditionally or pipe adorable Christmas trees, these delightful bars are destined to become a beloved tradition in your home every holiday season!
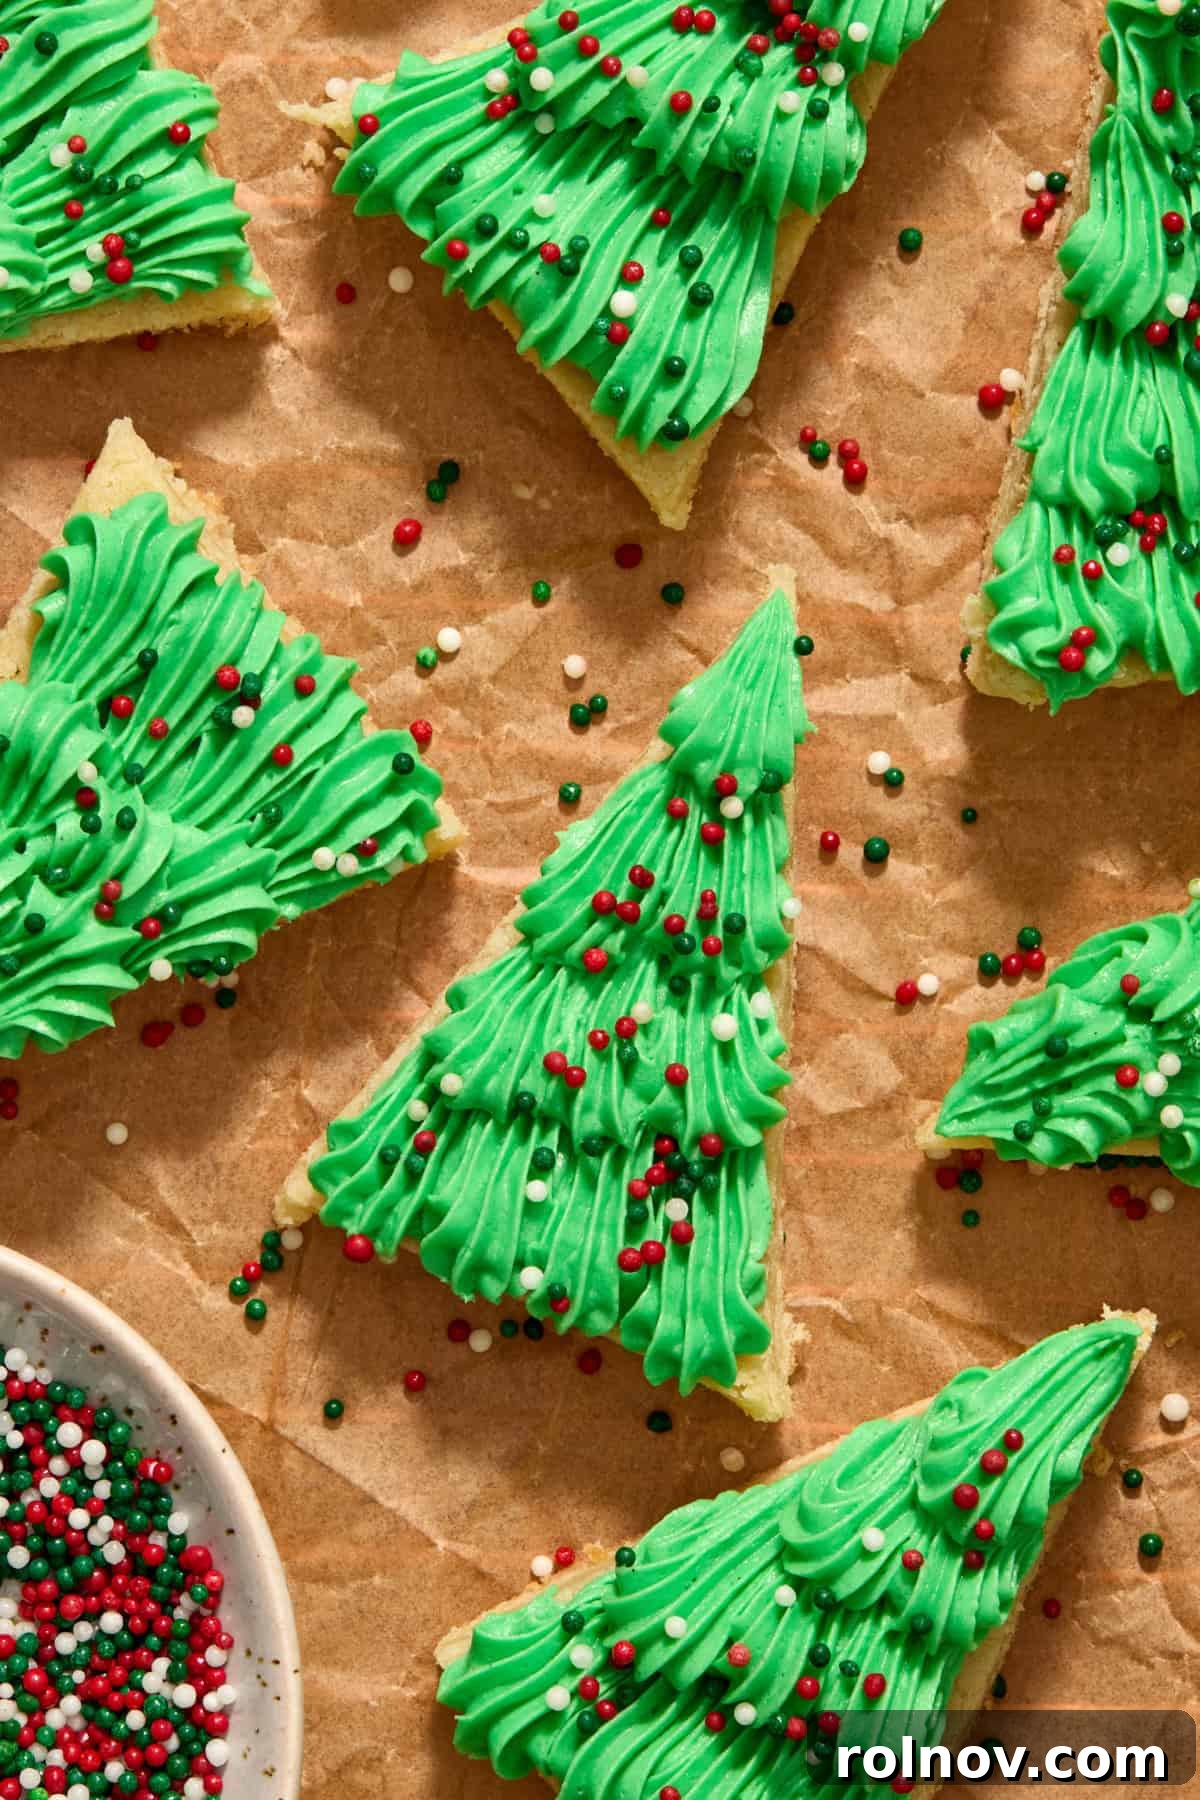
Frosted sugar cookies are a beloved classic when it comes to Christmas treat recipes. However, the traditional methods often involve a significant time commitment. That’s why these Christmas sugar cookie bars have become my new favorite way to enjoy all the deliciousness without the fuss!
If you’re looking for more delightful holiday recipes, be sure to try our Peppermint Mocha Cookies, Peppermint Chocolate Chip Cookies, Ginger Cream Cookies, or these Eggless Sugar Cookies!
Why These Christmas Sugar Cookie Bars Will Be Your New Holiday Favorite

I adore frosted sugar cookies, especially during Christmas cookie season. However, the traditional process often involves a significant time commitment – chilling dough, rolling it out, meticulously cutting shapes, and then the detailed decorating. As a busy parent with an enthusiastic little helper, I’ve found that sometimes the joy of baking can get lost in the labor. That’s why these Christmas sugar cookie bars have become my go-to!
They capture all the delightful flavor and chewiness of classic sugar cookies without any of the fuss. My little one still gets to do his favorite part – adding lots of icing and sprinkles – and I get to enjoy a soft, flavorful cookie that isn’t dry, which can sometimes be the case with traditional cutouts. This recipe is all about maximizing holiday cheer with minimal effort and creating a truly memorable treat. We even transformed them into cute Christmas tree shapes, which has been a huge hit!
These Christmas Sugar Cookie Bars:
- Are incredibly simple to prep, saving you precious time during the busy holiday season.
- Require absolutely no chilling, no rolling, and minimal wait time for frosting, making them perfect for spontaneous baking.
- Boast the perfect sugar cookie flavor profile and are wonderfully soft and chewy, never dry or crumbly.
- Are so much fun for everyone – kids and adults alike will love decorating these festive treats!
- Can be prepped and frozen for later, allowing you to get ahead of your holiday baking schedule.
We cannot get enough of these delightful bars and truly hope you love them as much as we do!
Essential Ingredients for Perfect Christmas Sugar Cookie Bars
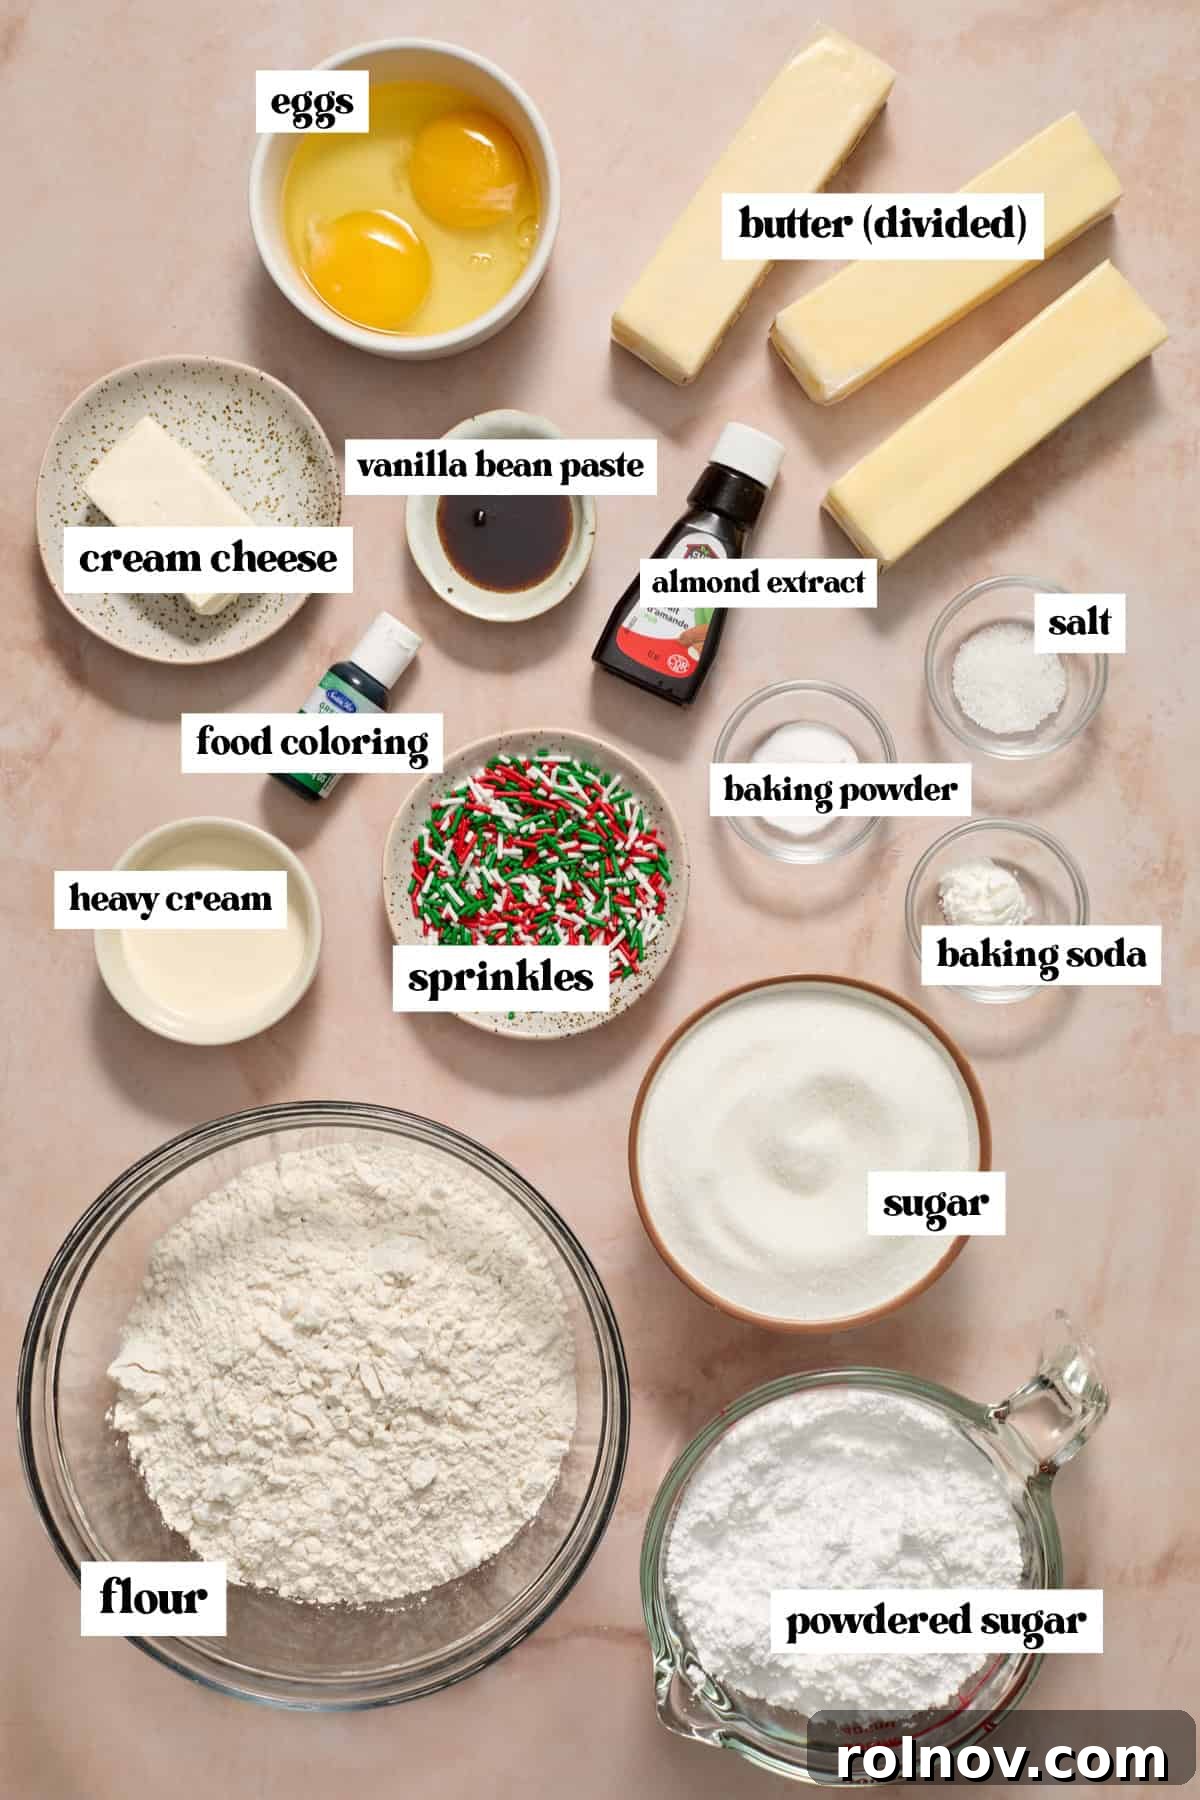
The secret to extraordinary sugar cookie bars lies in a few key ingredients and how they’re handled. Let’s delve into what makes these bars so special:
- I have recently become OBSESSED with vanilla bean paste. It adds a deeper, more complex vanilla flavor that is so much more profound than standard extract, often with visible flecks of vanilla bean. You can certainly use vanilla extract if you don’t have any paste, but if you do, I highly recommend using it to elevate your cookie bars!
- All-purpose flour is the foundation of these cookie bars. This recipe was specifically developed using standard all-purpose flour. While not tested with gluten-free flour alternatives yet, using precise measurements, ideally by weight, is crucial for the optimal texture.
- Use full-fat cream cheese when making these cookie bars for the best possible flavor and an incredibly soft, chewy texture. The richness of full-fat cream cheese contributes significantly to the delightful melt-in-your-mouth quality of these bars.
- Ensure your butter and eggs are at **room temperature**. This is vital for proper emulsification and a smooth, consistent dough. Room temperature butter should be soft enough to make a slight indentation when pressed, but not greasy or melted.
Creative Variations to Elevate Your Cookie Bars
While delicious on their own, these Christmas sugar cookie bars are also a fantastic canvas for your creativity. Here are some ideas to make them uniquely yours for any holiday gathering:
- Sprinkle Surprise: For an extra festive touch, fold 2-3 tablespoons of your favorite holiday sprinkles directly into the cookie bar dough before baking. This adds a delightful burst of color within each slice! (Just be mindful that some naturally dyed sprinkles can bleed colors during baking).
- Minty Fresh Twist: Swap out the almond extract for an equal amount of peppermint extract in both the cookie bar dough and the frosting for a refreshing, cool mint flavor that’s perfect for winter holidays.
- Chocolate Lover’s Dream: Stir in a handful of white chocolate chips, milk chocolate chips, or even mini semi-sweet chocolate chips into the sugar cookie dough before pressing it into the pan.
- Cookie Bar Decorating Party: Prepare several batches of frosting in different festive colors (red, green, white, blue!) and host a fun decorating party. Provide various sprinkles, candies, and edible glitter for guests to customize their own cookie bars.
- Citrus Zest: Add a teaspoon of fresh lemon or orange zest to the cookie dough for a brighter, more aromatic flavor profile that complements the vanilla beautifully.
Step-By-Step Instructions: Baking Your Perfect Christmas Sugar Cookie Bars
Creating these delightful bars is straightforward. Follow these simple steps for a holiday treat that’s sure to impress!
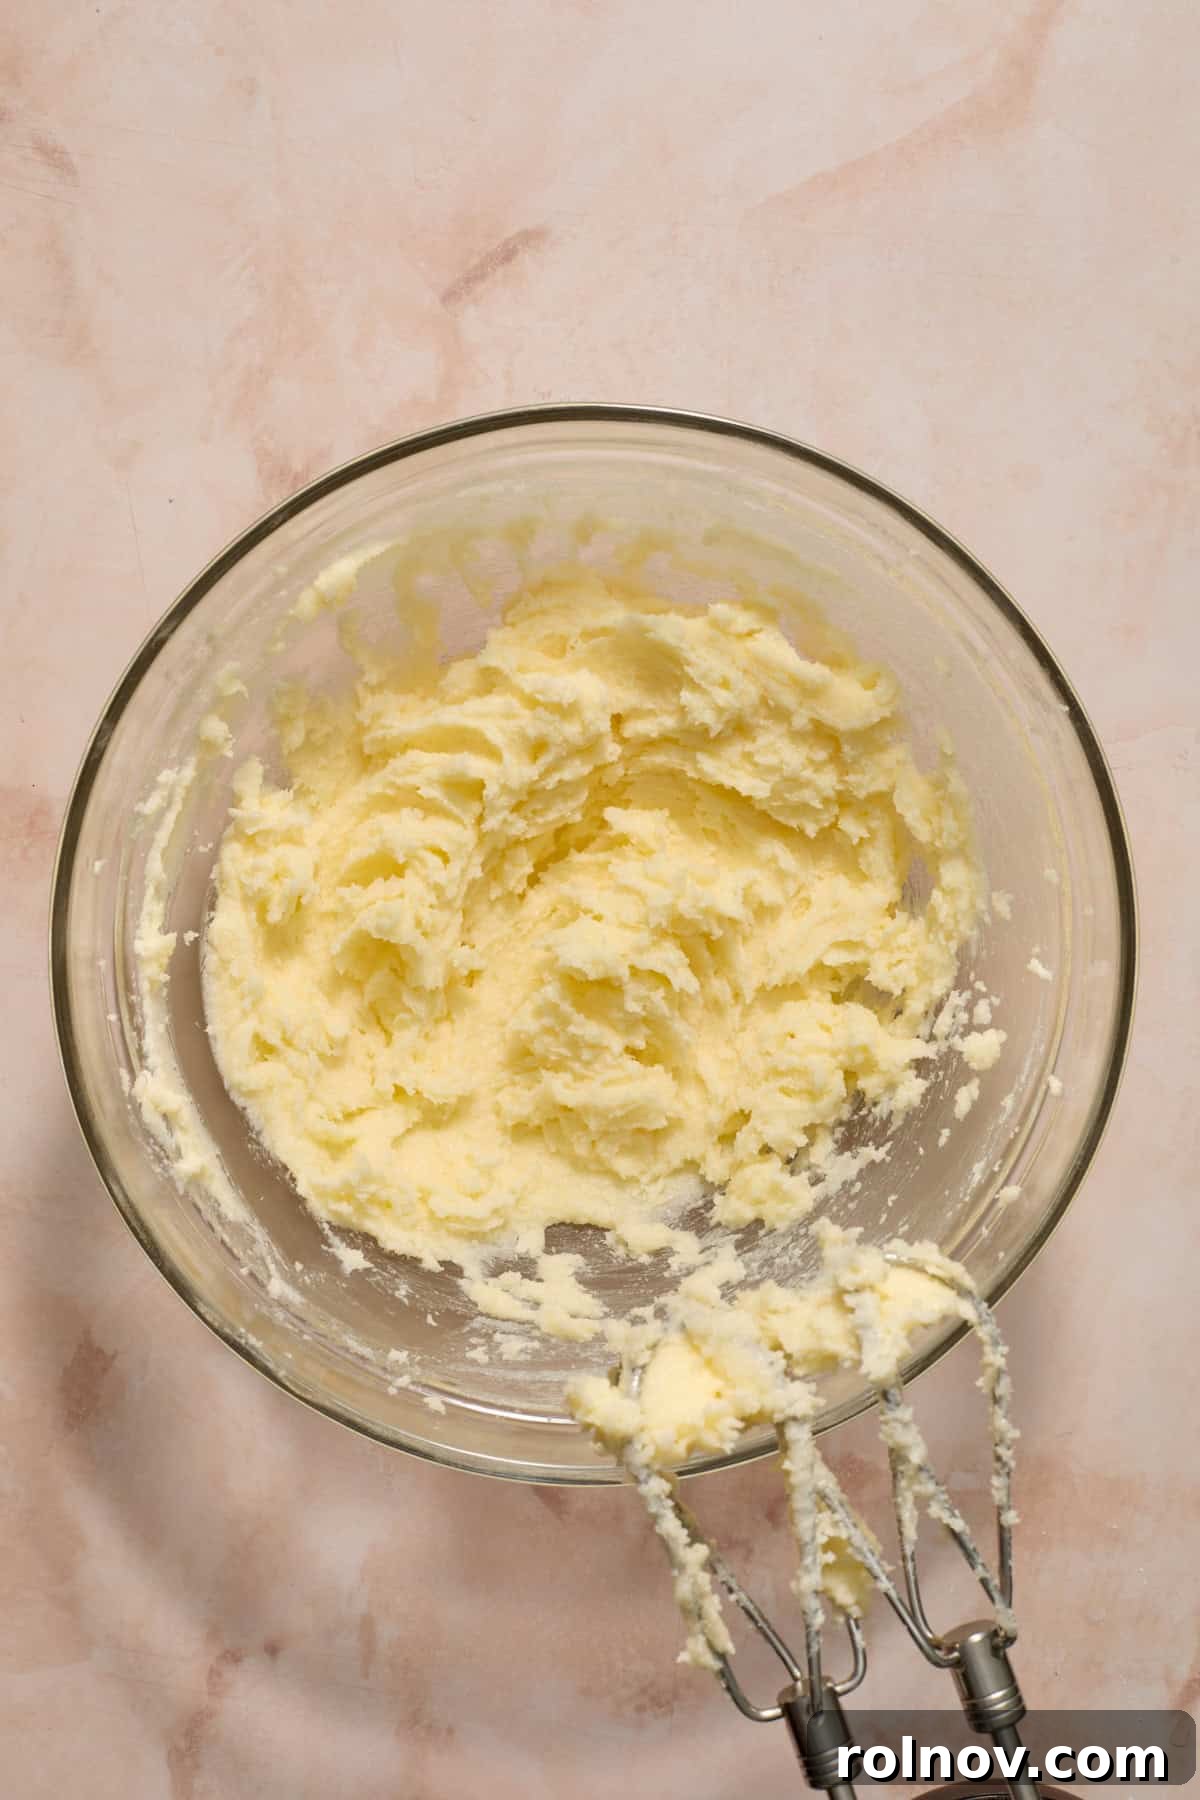
Step 1: Prepare & Cream. Preheat your oven to 350°F (175°C). In a small bowl, whisk together the flour, baking powder, baking soda, and salt; set aside. In a large mixing bowl, add the softened unsalted butter and granulated sugar. Use an electric mixer to beat them together on medium-high speed for 3-5 minutes, until the mixture is visibly light, fluffy, and pale in color. This essential creaming step incorporates air, contributing to the bars’ tender texture.
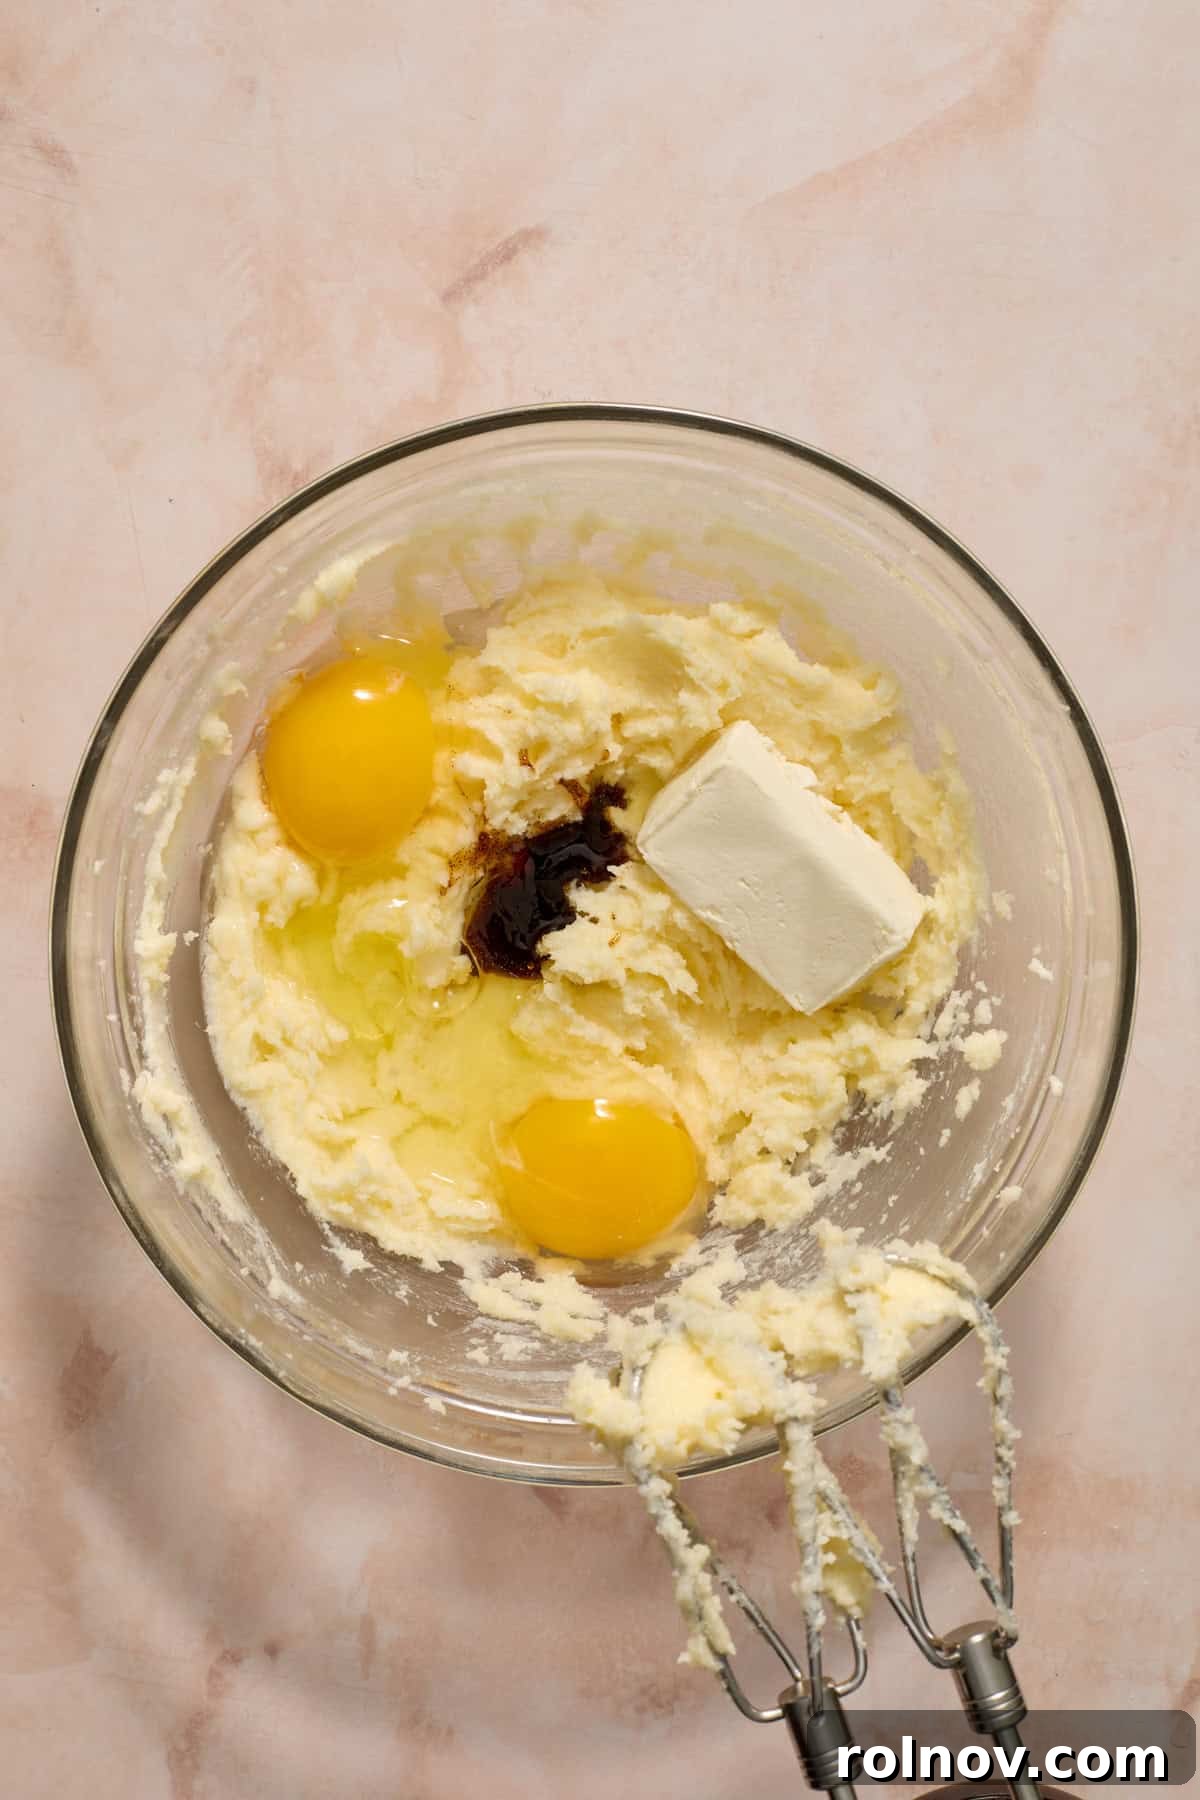
Step 2: Incorporate Wet Ingredients. To the creamed butter and sugar mixture, add the room temperature eggs, vanilla bean paste (or vanilla extract), almond extract, and softened full-fat cream cheese. Continue beating with the electric mixer until all these ingredients are thoroughly incorporated and the mixture is smooth and cohesive. Remember to scrape down the sides of the bowl as needed to ensure everything is evenly combined.
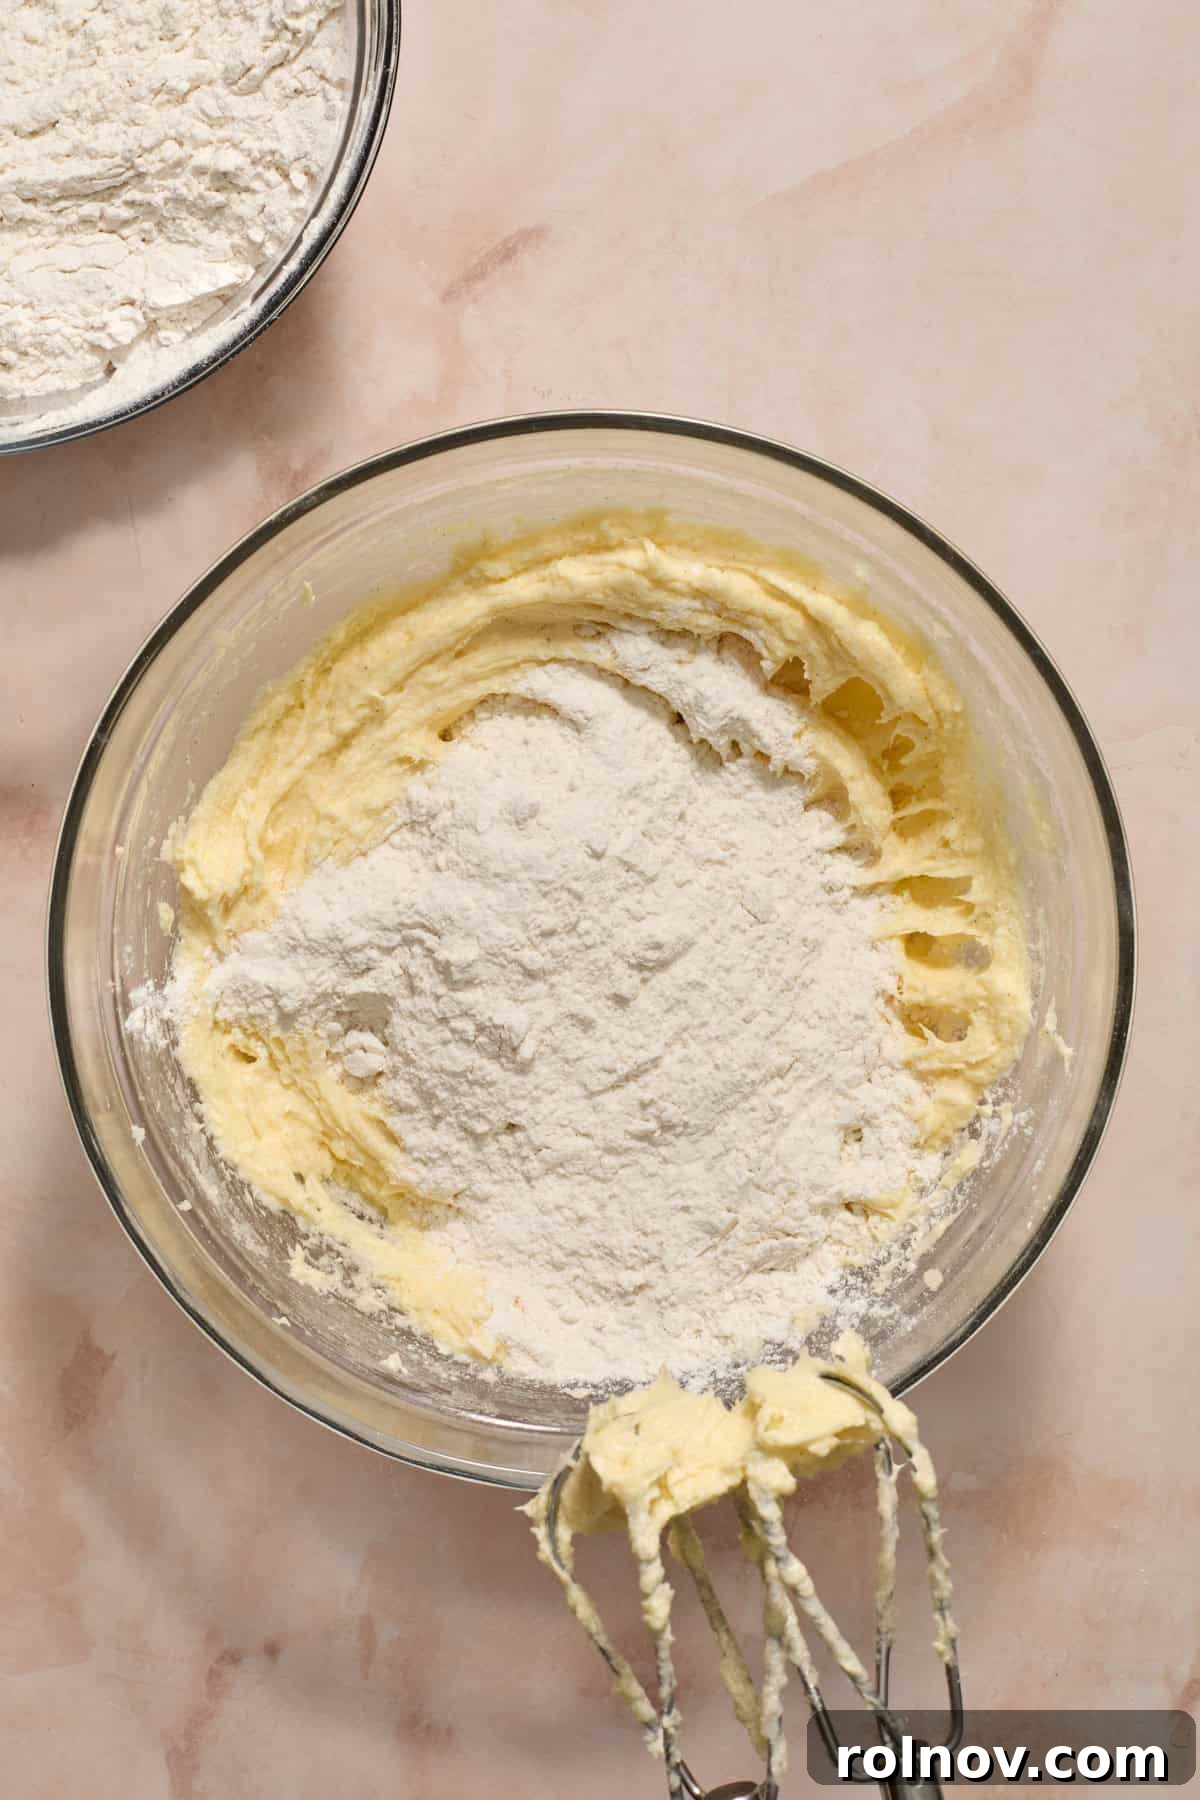
Step 3: Gradually Add Dry Ingredients. With your electric mixer set to low speed, slowly add the whisked dry ingredients (flour, baking powder, baking soda, salt) to the wet mixture. Mix only until no visible streaks of flour remain. It’s crucial not to overmix at this stage; overmixing can lead to tough, dry cookie bars. If you choose to add sprinkles to the dough, gently fold them in during this final mixing step with the last bit of dry ingredients.
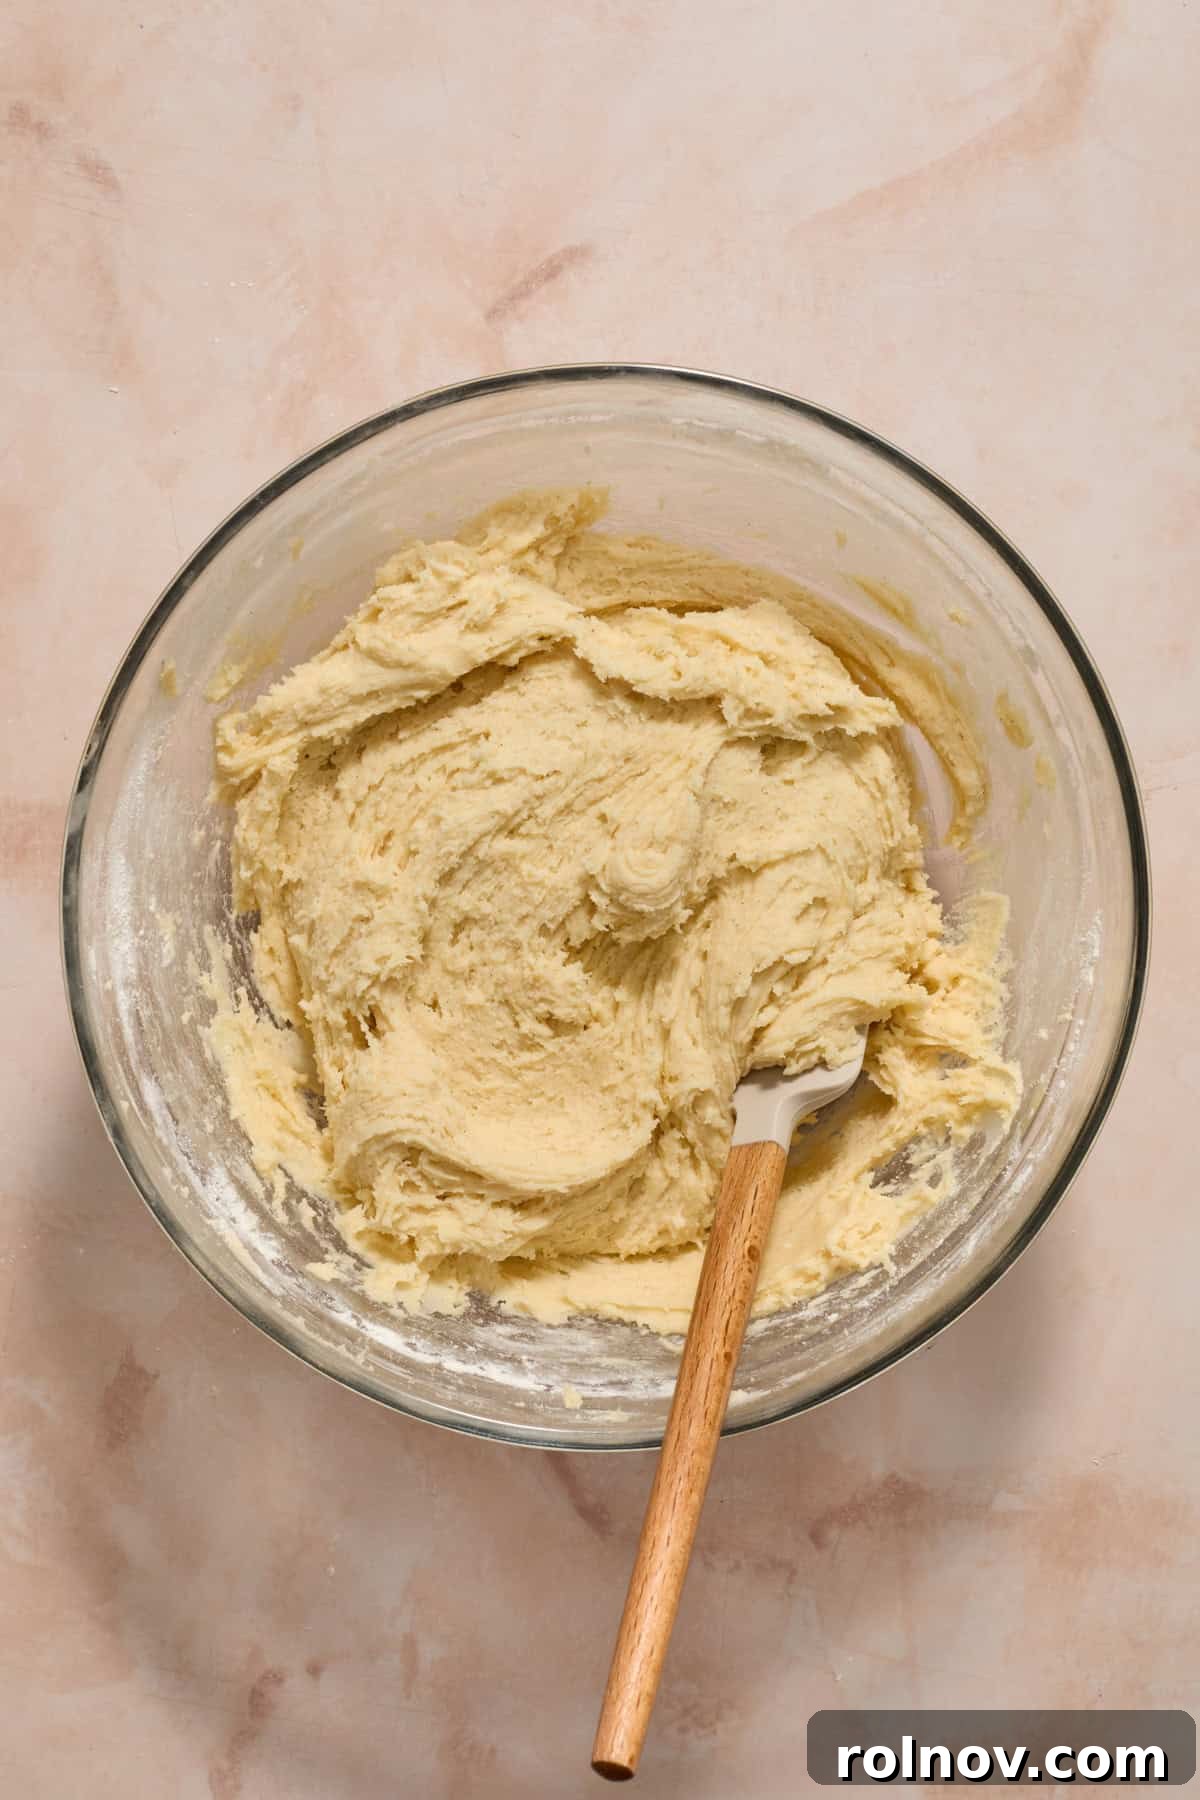
Step 4: Do Not Overmix! This step is so important it deserves a special mention. Once the dry ingredients are added, stop mixing as soon as the flour is just incorporated into the wet ingredients. The dough should be soft but not overly sticky. Overmixing develops the gluten in the flour, which can result in a tougher, more cake-like texture rather than the desired soft and chewy sugar cookie bar.
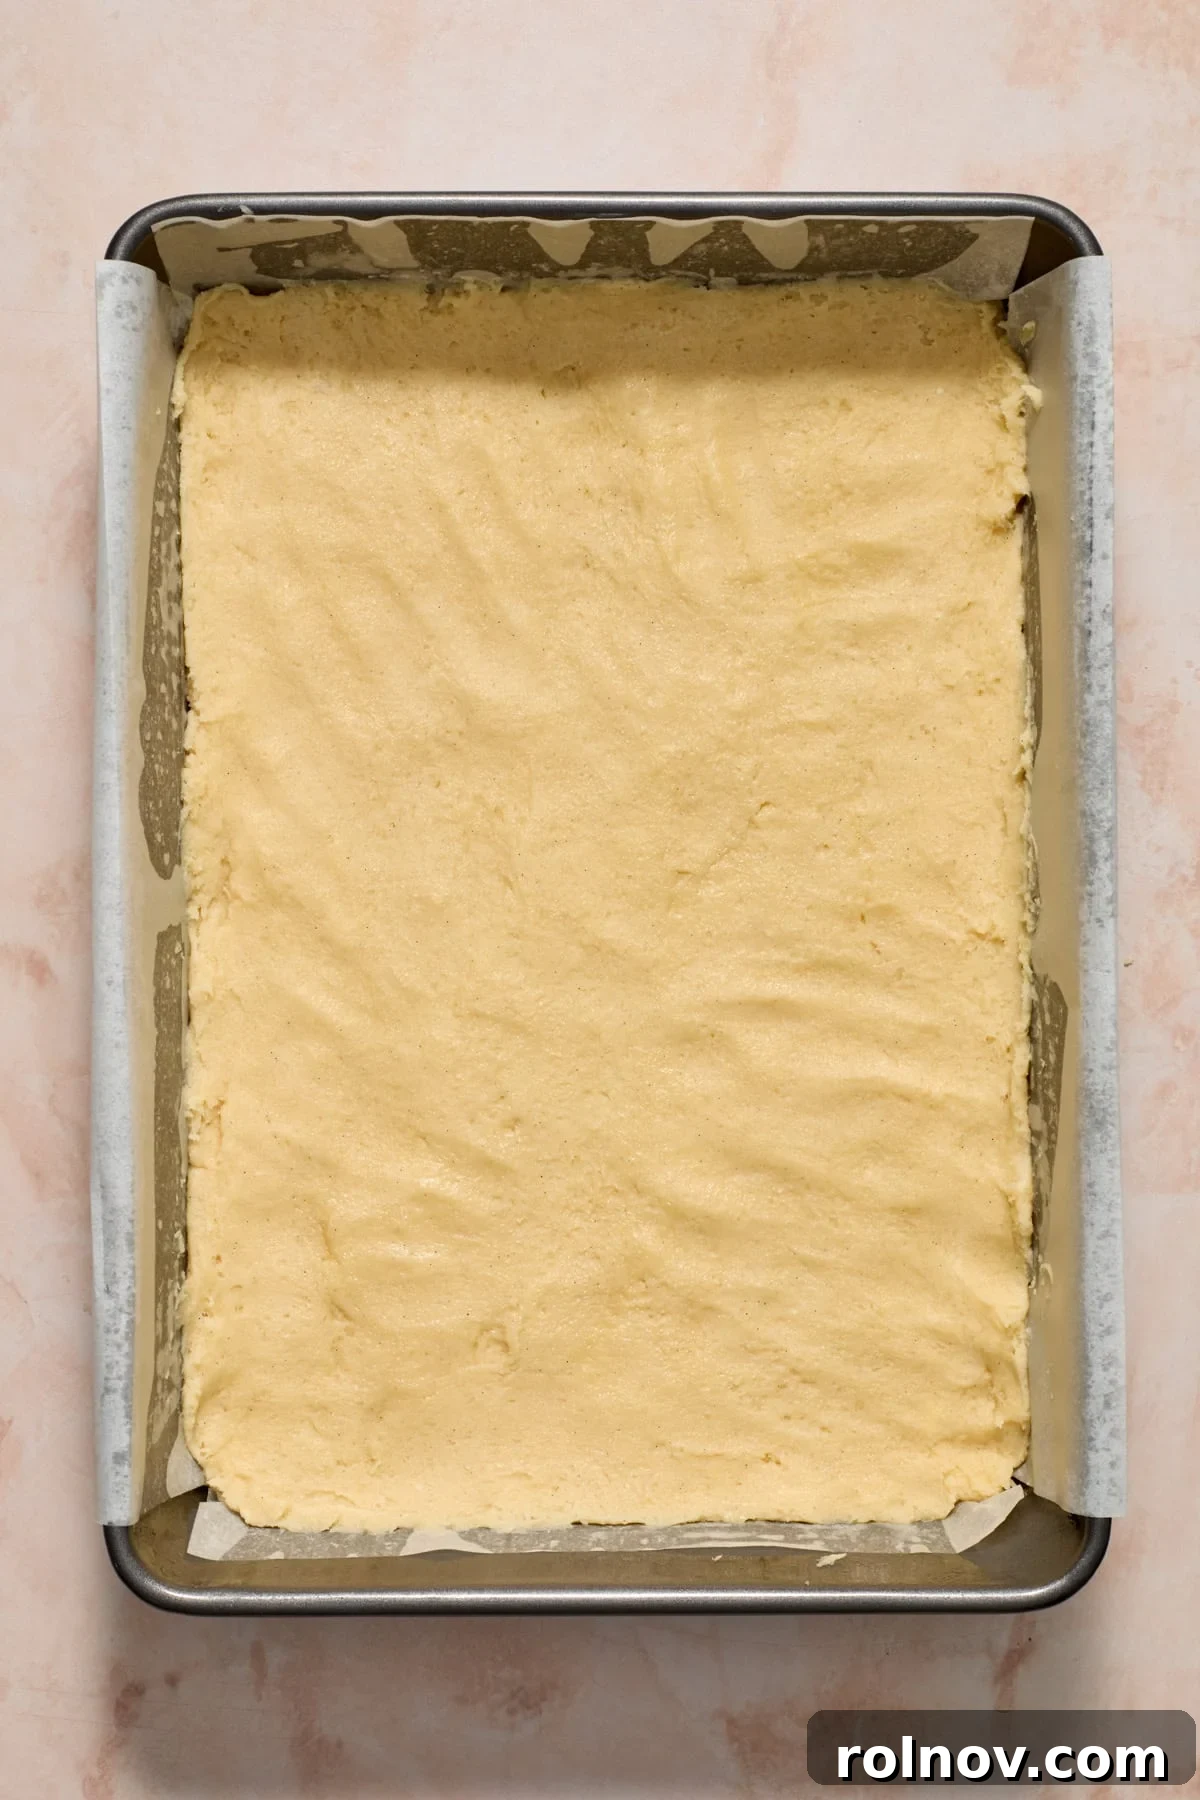
Step 5: Prepare for Baking. Line a 9×13 inch baking pan with parchment paper, ensuring that there’s an overhang on two sides. This overhang will serve as convenient “handles” to easily lift the cooled cookie slab out of the pan later. Press the cookie dough evenly into the prepared pan. The dough might feel a little sticky; for easier handling, you can lightly spray your hands with a bit of cooking oil or place another piece of parchment paper over the dough and press it down with your hands or a rolling pin.
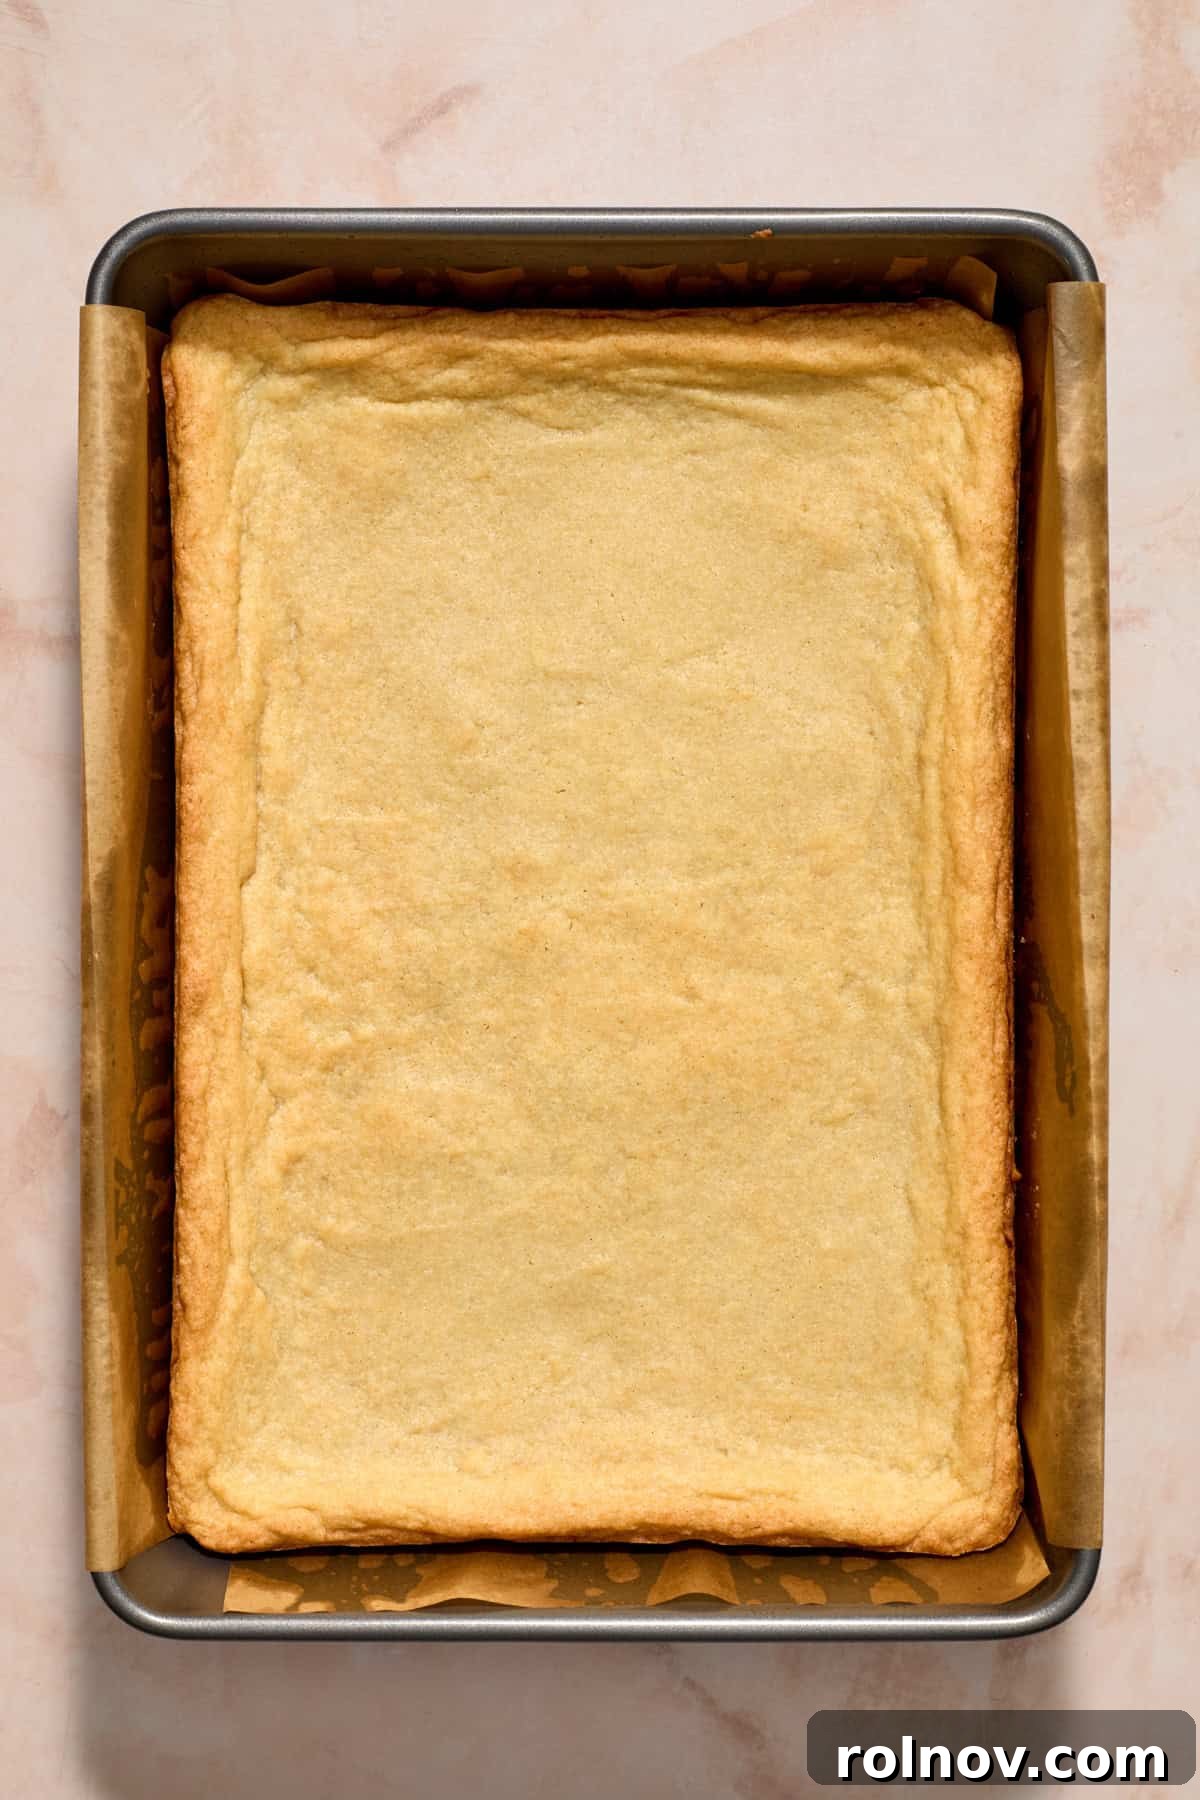
Step 6: Bake to Perfection. Bake the cookie bars in your preheated oven for approximately 17-22 minutes. The crucial indicator for doneness is when the edges turn a light golden brown and the center appears set, no longer wet or overly gooey. It’s perfectly normal and desirable for the very center to still seem a touch underdone; like brownies, these bars continue to set as they cool, ensuring a wonderfully soft and chewy interior. Overbaking is the enemy of chewiness! Once baked, remove the pan from the oven and allow the cookie bars to cool completely on a wire rack before attempting to frost them. This is vital for the frosting to set properly without melting.
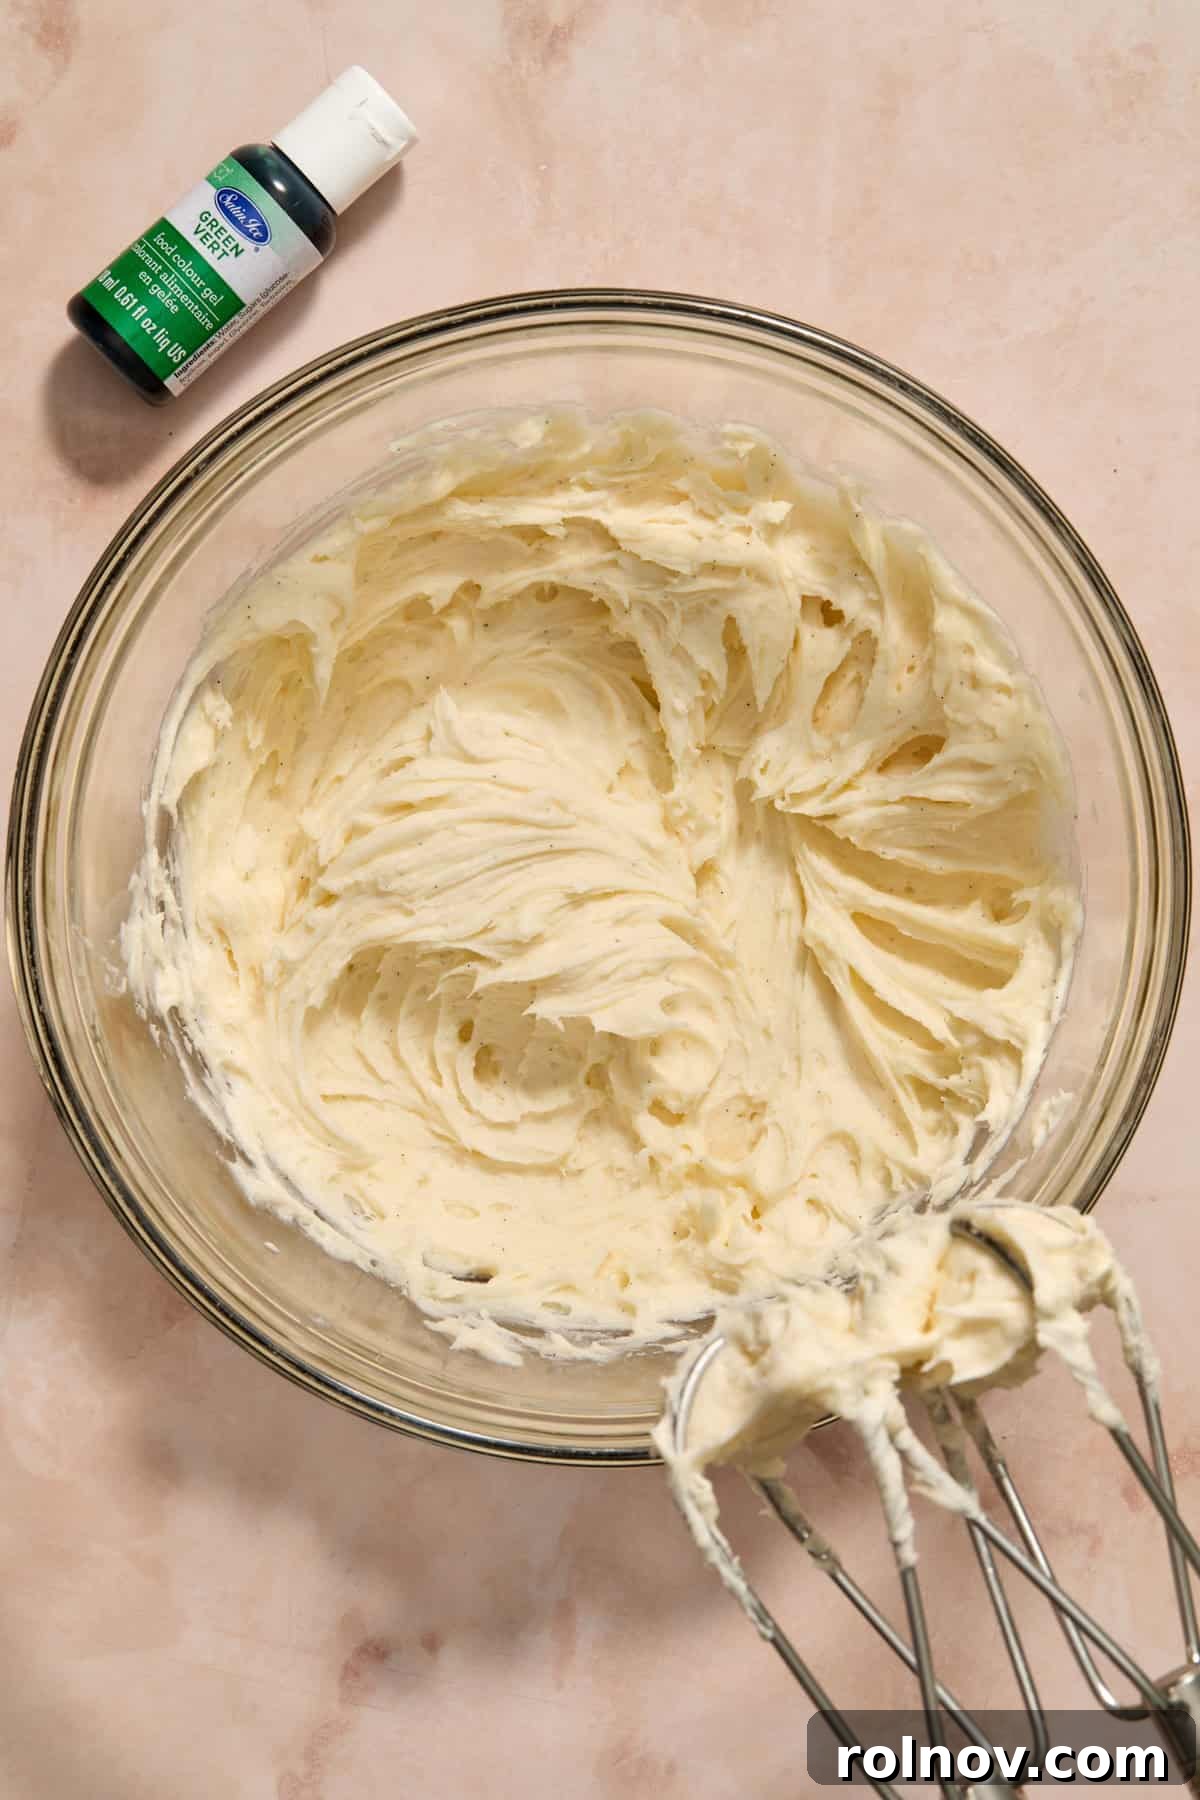
Step 7: Prepare the Luscious Frosting. While your cookie bars cool completely, it’s time to prepare the delicious buttercream frosting. In a large mixing bowl, beat the softened butter with an electric mixer until it is smooth and creamy. Next, add the vanilla bean paste (or vanilla extract), sea salt, and almond extract, mixing until these are well incorporated. Gradually add 2 cups of powdered sugar, beating slowly until fully combined and smooth. Finally, begin adding the heavy cream, one tablespoon at a time, beating until the frosting reaches your desired creamy, fluffy, and easily spreadable consistency.
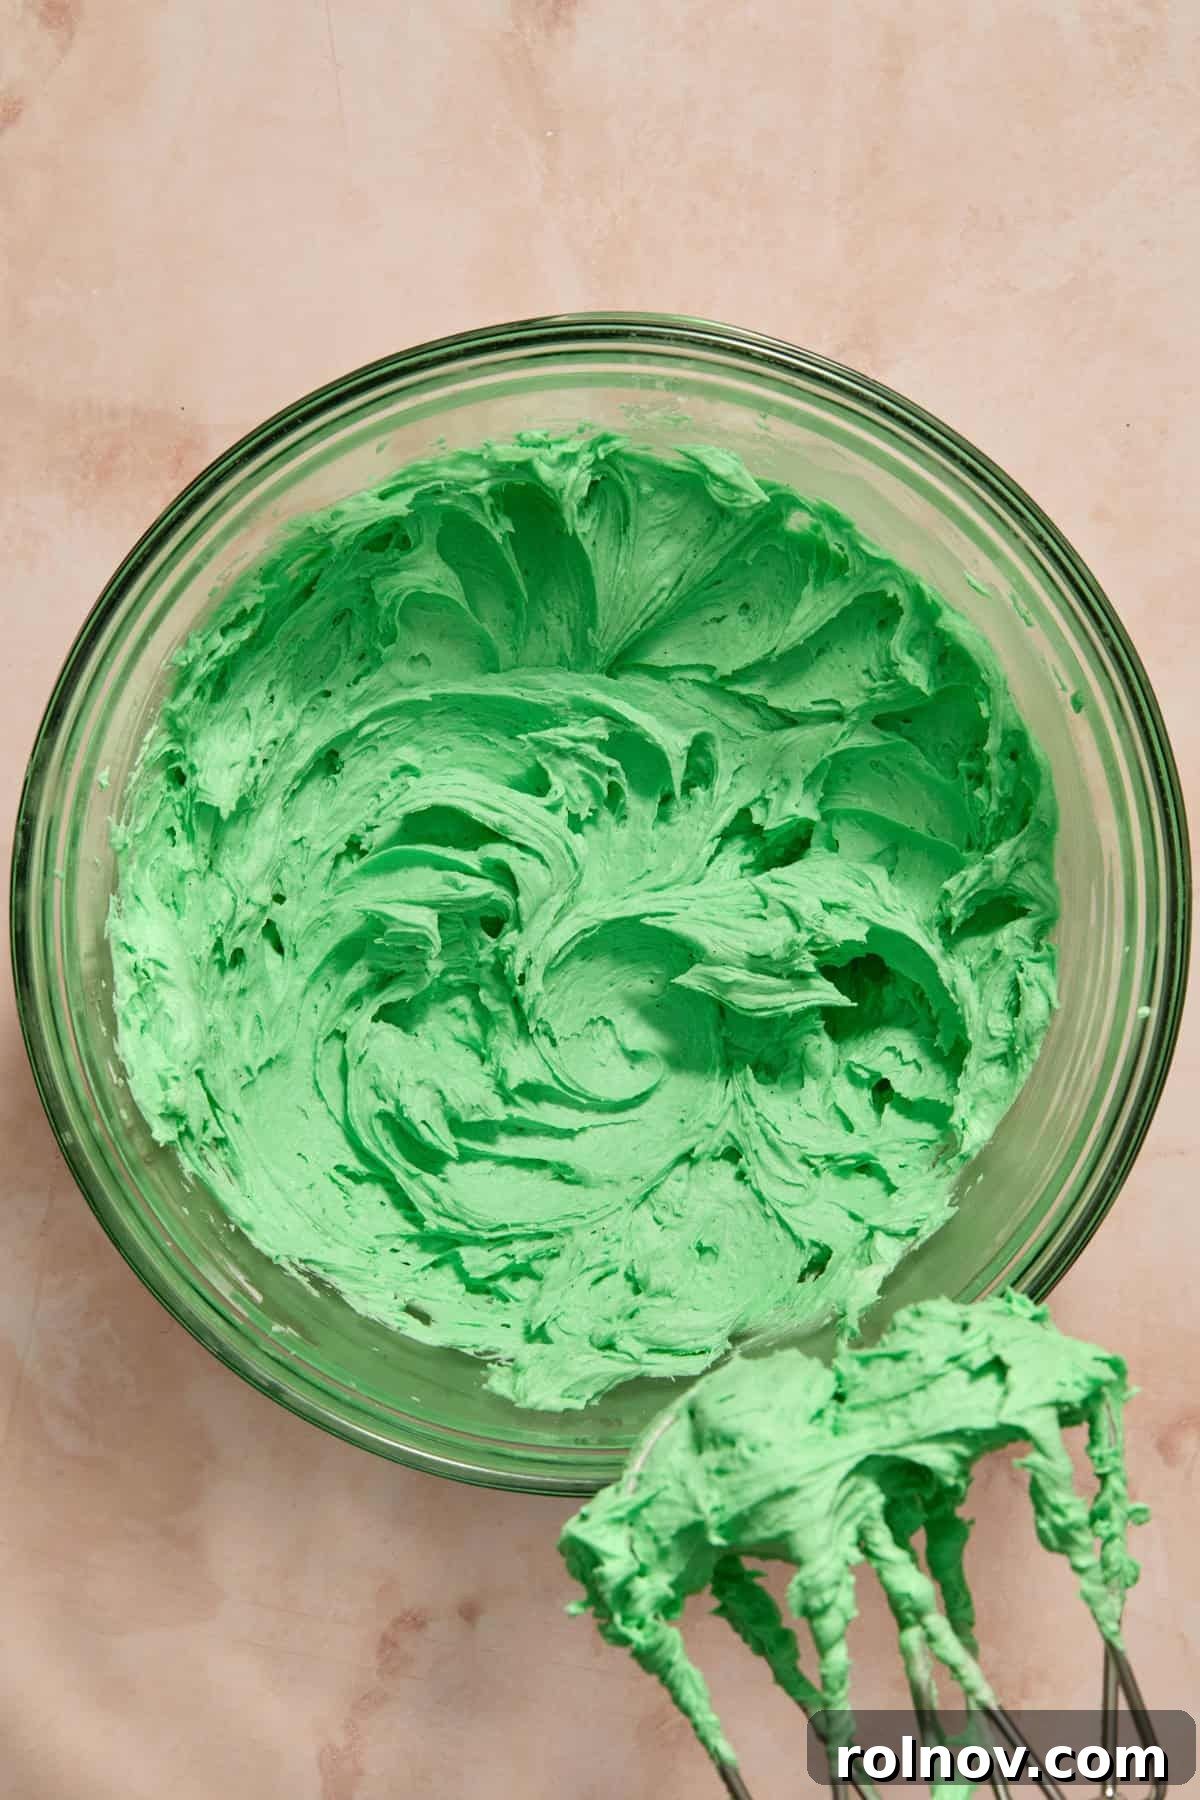
Step 8: Color and Customize the Frosting. Add green gel food coloring to achieve your desired festive shade. For the vibrant green shown in the photos, about 5 drops of green gel food coloring were used, but you can adjust this amount to your preference for a lighter or darker shade. If you are planning to pipe detailed Christmas trees or intricate designs, you may need to add a touch more heavy cream to ensure the frosting has a smoother, more pipeable consistency. (Keep in mind that if you’re making many piped trees, you might need to double the frosting recipe; see the “Recipe Notes” section for specific quantities).
Step 9: Frost and Cut Your Bars. There are two main ways to approach frosting and cutting:
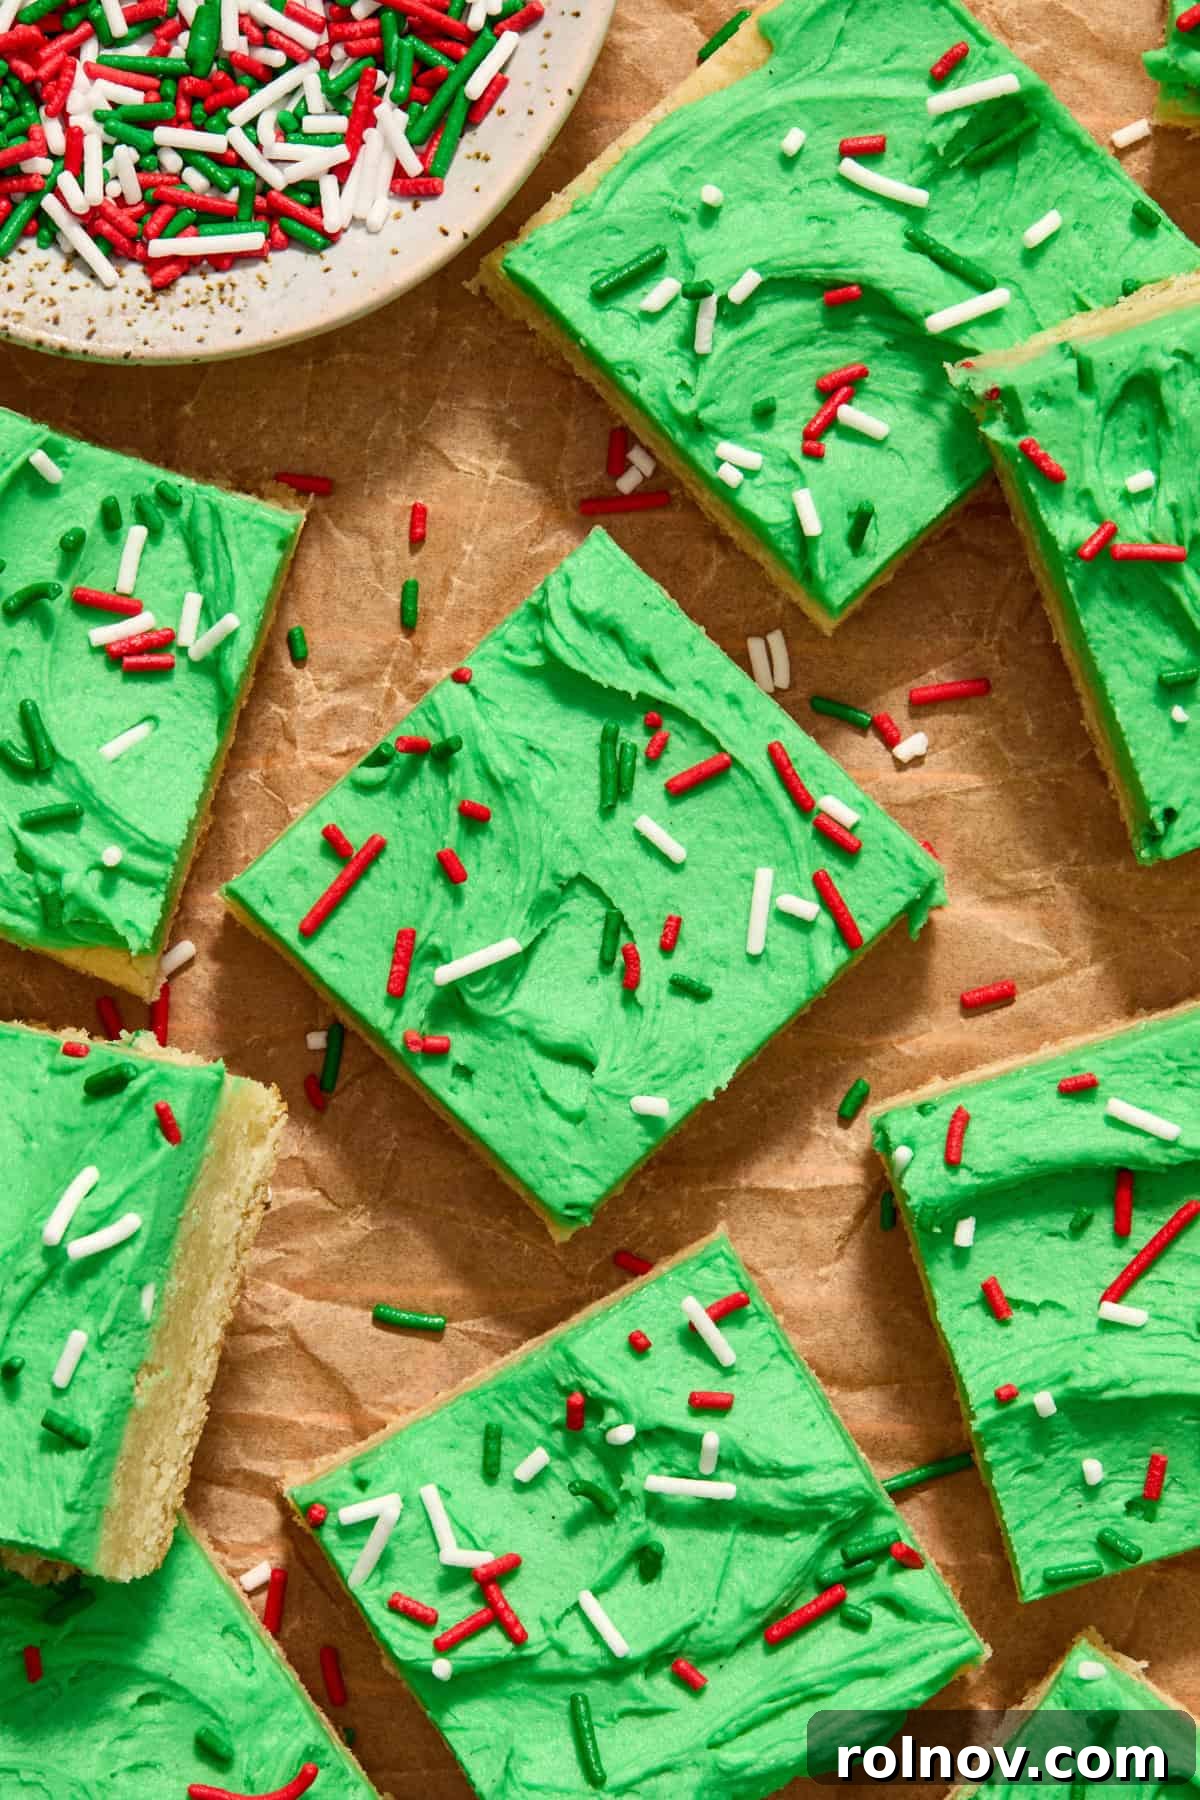
For classic cookie bars: Once your cookie bars are completely cooled, simply frost the entire surface evenly with your prepared buttercream. Generously add extra holiday sprinkles over the top for a festive finish. Allow the buttercream to set slightly before cutting into squares or rectangles of your desired size.
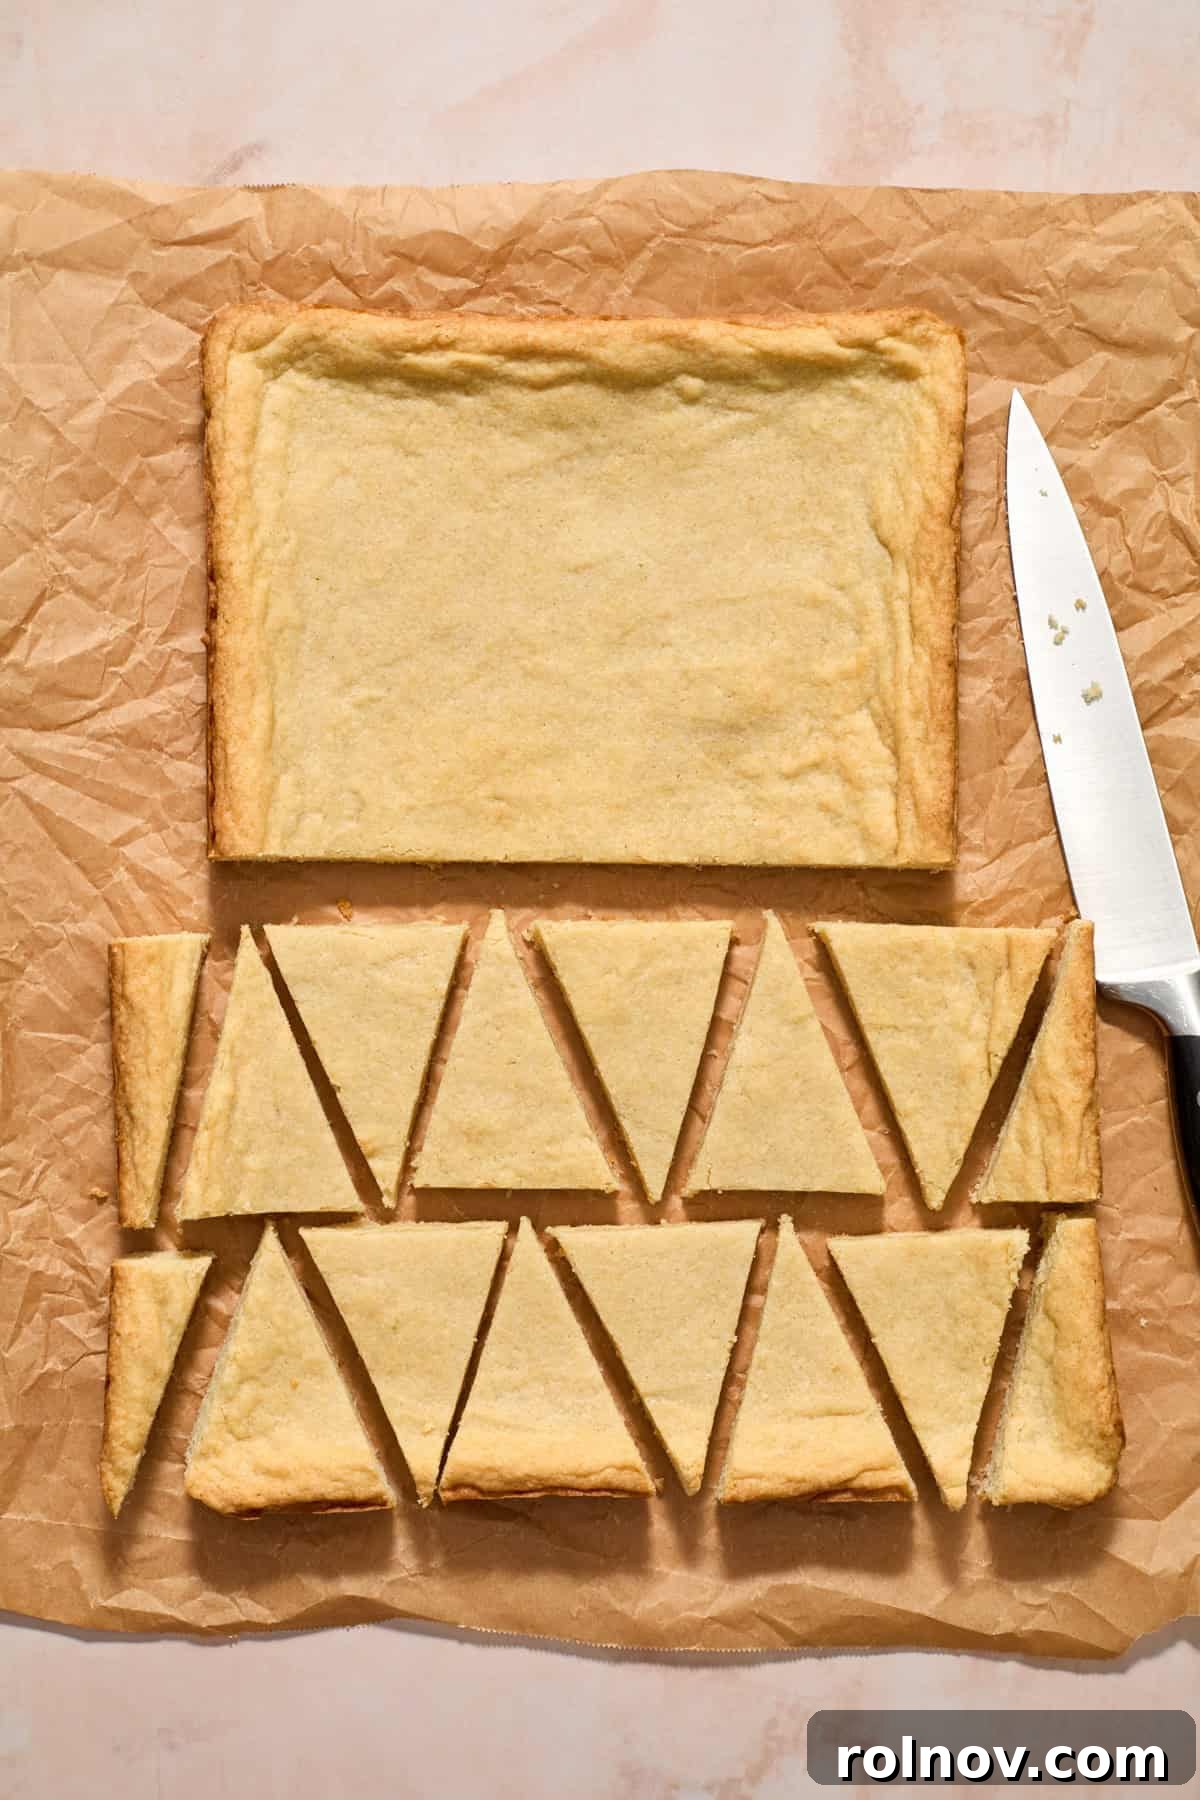
For Christmas tree bars: Carefully remove the fully cooled cookie bars from the baking pan by gently pulling on the excess parchment paper overhang, using it as tabs. Slice off any uneven ends to create a neat rectangular slab. Then, slice the slab into even rows. From these rows, cut back and forth at a diagonal to create adorable triangle “tree” pieces.
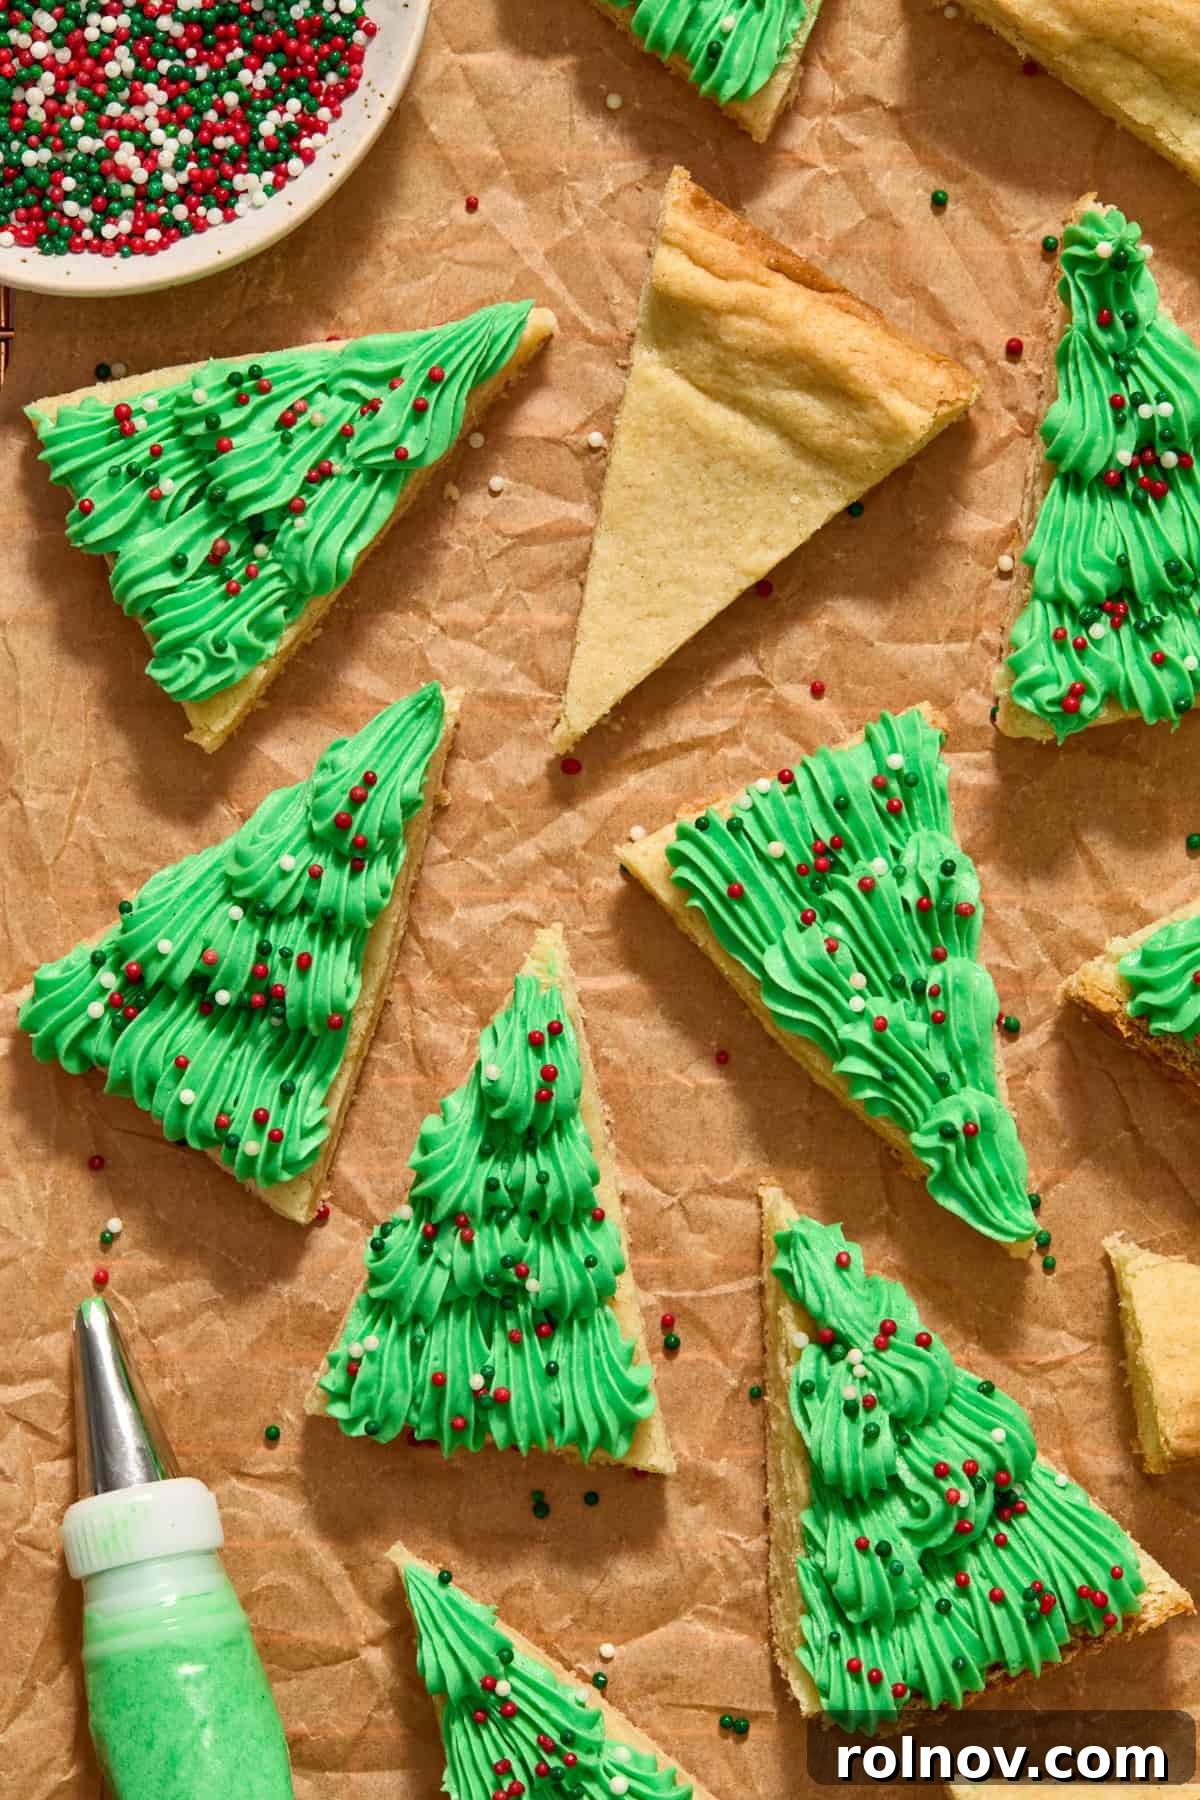
Step 10: Decorate and Serve. Transfer your prepared buttercream frosting into a piping bag fitted with your desired piping tip (a star tip works wonderfully for creating a textured “tree branch” effect). Decorate your cookie bars by piping in rows, creating swirls, or getting as creative as you like! For the Christmas tree shapes, pipe green frosting in zigzag patterns to mimic branches, then adorn them with holiday sprinkles to resemble ornaments. Allow the frosting to set slightly before serving these festive and delicious treats!
Expert Baking Tips for Ultimate Success
Achieving perfect Christmas sugar cookie bars is easy with these insider tips:
- Mind Your Room Temperature Ingredients: “Room temperature” butter and cream cheese shouldn’t be greasy or melted. They should still be cool to the touch, making a slight impression when pressed, but not sinking in. An internal temperature of about 65°F-67°F (18°C-19°C) is ideal – a bit cooler than you might think. This ensures proper emulsification and a consistent dough texture.
- Avoid Overbaking at All Costs: This is the most critical tip for soft, chewy bars! Bake only until the edges begin to turn a light golden brown. The center might still look slightly underdone or gooey, similar to how a brownie would appear. Trust the process; the bars will continue to set as they cool, resulting in that perfect soft interior. Overbaking will inevitably lead to dry, crumbly cookies.
- Weigh Your Flour for Precision: For the most accurate and consistent results, use a kitchen scale to weigh your flour. Measuring flour by scooping or spooning it into a measuring cup can lead to very different amounts, which is a common culprit for cookie bars that are either too dry (too much flour) or excessively greasy (not enough flour). Precision in baking truly pays off!
- Sprinkle Smartly: If you plan to add sprinkles directly into the cookie bar dough, be aware that some naturally dyed sprinkles can bleed their colors quite a bit during baking. Also, be mindful of the colors you choose. When I was testing, I used some silver and gold sprinkles, and the silver pieces sometimes looked almost like mold within the baked cookies, which wasn’t quite the festive look I was going for.
- Cool Completely Before Frosting: Patience is a virtue when it comes to frosting! Ensure the cookie bars are completely cool to the touch before applying any frosting. Frosting warm bars will cause the buttercream to melt, slide off, and create a messy presentation.
Storage & Freezing Instructions
Proper storage ensures your delicious Christmas sugar cookie bars stay fresh and delightful for as long as possible:
At Room Temperature: Store frosted sugar cookie bars in an airtight container at room temperature for about 3-4 days. I’ve noticed they actually become a bit softer and even more flavorful on the second day, making them a fantastic make-ahead treat!
Refrigeration: If you prefer, or for slightly longer storage, you can refrigerate the bars for about 5-6 days. For the best taste and texture, allow them to sit out at room temperature for approximately 15 minutes before serving.
Freezing Unfrosted Bars: For optimal freshness and texture, it’s ideal to freeze the cookie bars unfrosted. Once they are completely cooled, place them in a freezer-safe airtight container or heavy-duty freezer bag for up to 3 months. Thaw them at room temperature before frosting and serving.
Freezing Frosted Bars: You can also freeze frosted bars. To do this, arrange them in a single layer on a baking sheet and freeze for about an hour, or until the frosting is firm. Once firm, you can layer them in an airtight container, using parchment paper between each layer to prevent sticking. They will keep well for about 1-2 months. Thaw overnight in the refrigerator or at room temperature.
Common Questions About Christmas Sugar Cookie Bars
Dry or crumbly cookie bars are most likely a result of improper flour measurement, overmixing the dough after adding dry ingredients, or overbaking. The most accurate way to measure flour is by weight (312g for this recipe). If a kitchen scale isn’t an option, give your flour a good stir, then spoon it lightly into your measuring cup before leveling it off with a straight edge. This method helps prevent packing too much flour into the cup. Overbaking will also cause the bars to dry out; I recommend pulling them out of the oven when the edges just begin to show the slightest hint of golden brown. My oven sometimes runs hot, so this can be as early as the 17-minute mark. As for overmixing, once you’ve added the dry ingredients, mix only until they are just incorporated and no streaks of flour remain; anything more can develop gluten and lead to a tough, dry texture.
Greasy cookie bars typically indicate that your butter was too warm or excessively soft at the beginning of the recipe. Room temperature butter should still be cool to the touch and hold its shape, not be melted or greasy. Another common reason can be an under-measurement of the flour in the dough, which throws off the wet-to-dry ingredient balance. Ensure your butter is at the correct temperature and all ingredients are measured accurately.
If your cookie bars have a tough or more cake-like texture, it’s very likely due to overmixing after the dry ingredients have been incorporated into the wet ingredients. Overmixing develops the gluten in the flour, leading to a chewy, bread-like consistency rather than the desired tender, soft cookie bar. This can also sometimes be attributed to improper measurement of leavening agents (baking powder and baking soda), so always ensure these are measured precisely.
HUNGRY FOR MORE? Subscribe to our newsletter and follow us on Facebook, Instagram and Pinterest for all the latest recipes and baking inspiration!
Christmas Sugar Cookie Bars Recipe
By: Lorie Yarro
These soft and chewy Christmas sugar cookie bars are incredibly simple to prepare, requiring no chilling or rolling of dough. They can easily be transformed into adorable holiday-themed shapes, like festive Christmas trees, or simply frosted and topped with sprinkles. No matter how you decorate them, they are guaranteed to be a delicious favorite every holiday season!
Cook Time: 20 minutes
Total Time: 1 hour (includes cooling)
Yields: 24 bars
Ingredients
For the Cookie Bars:
- 2½ cups (312 g) all-purpose flour
- 1 tsp baking powder
- ½ tsp baking soda
- ¼ – ½ tsp salt
- 1 ⅓ cup (267 g) granulated sugar
- 1 cup (226 g) unsalted butter, room temperature
- 2 large eggs, room temperature
- 4 oz cream cheese, softened
- 1½ tsp vanilla bean paste, or vanilla extract
- ½ tsp almond extract
For the Frosting:
- ½ cup unsalted butter, softened, (double this if making piped Christmas trees – see notes below!)
- 2 cups powdered sugar, more for thicker frosting if needed
- 1 tsp vanilla bean paste, or vanilla extract
- ¼ tsp almond extract, you can use peppermint extract instead if desired for a minty flavor
- Pinch of sea salt
- 1-2 Tbsp heavy cream, more as desired for consistency
- Green gel food coloring
- Holiday sprinkles for topping
Instructions
- Preheat Oven: Preheat your oven to 350°F (175°C).
- Make the Cookie Bars – Dry Ingredients: In a small bowl, whisk together the flour, baking powder, baking soda, and salt. Set aside.
- Cream Butter & Sugar: Add the softened unsalted butter and granulated sugar to a large bowl. Use an electric mixer to beat until light and fluffy (3-5 minutes).
- Add Wet Ingredients: Add the room temperature eggs, vanilla bean paste (or vanilla extract), almond extract, and softened cream cheese. Beat until fully incorporated. Slowly add the dry ingredients and beat in until no streaks of flour are seen. If you want sprinkles in your cookie bars, add the sprinkles with the last bit of dry ingredients. Do not overmix at this time.
- Prepare Pan: Line a 9×13 inch baking pan with parchment paper, leaving an overhang on the sides for easy removal. Press the cookie dough evenly into the pan. The dough will be a bit sticky; lightly spraying your hands with oil or laying a piece of parchment over it helps with spreading.
- Bake: Bake for about 17-22 minutes, or until the edges are starting to turn a light golden brown. The center may still seem a touch underdone, but it will set as it cools. Allow to cool completely in the pan.
- Make the Frosting: (If you plan to make Christmas trees, consider doubling the frosting ingredients, see notes below!) To make the frosting, beat the softened butter until smooth and creamy. Add the vanilla, sea salt, and almond extract and mix to incorporate. Slowly add 2 cups of the powdered sugar and beat until combined. Add the heavy cream, one tablespoon at a time, and beat until creamy and fluffy. Add green food coloring (about 5 drops of green gel was used for the color in photos) and mix to incorporate. If making the trees for piping, you may need to add a touch extra cream to reach a pipeable consistency.
- Frost & Cut Options:
- For classic cookie bars: Frost the completely cooled cookie bars and add extra sprinkles over top. Allow the buttercream to set before cutting into squares.
- For Christmas tree bars: Remove the fully cooled cookie bars from the pan by pulling them out using the excess parchment tabs. Slice off the ends for neatness, then slice a row of bars, then cut back and forth at a diagonal to create triangle pieces.
- Decorate & Serve: Add the buttercream to a piping bag or plastic bag with your desired piping tip and decorate by piping in rows, zigzags (for trees), or get creative! Allow frosting to set and then serve!
Recipe Notes
- Baking Time Adjustment: The original recipe suggested 20-25 minutes, but this was causing these bars to come out a bit on the dry side for me. Aim for right when the edges start to become a light golden brown—about 17-18 minutes was perfect! If it takes a bit longer for the edges to start to brown, that’s okay—that is just a great indicator. If the top and center become brown, the cookie bars will most likely be too dry.
- Double Frosting for Piped Christmas Trees: If you are planning to create piped Christmas trees and want ample frosting for detailed designs, use the following doubled measurements:
- 2 sticks (1 cup) unsalted butter, softened
- 4 cups powdered sugar
- 2 tsp vanilla bean paste (or vanilla extract)
- ½ tsp almond extract
- 4-5 Tbsp heavy cream
- Pinch sea salt
- Green food coloring (about 10 drops, or to desired shade)
- Holiday sprinkles
This amount will provide more than enough frosting to pipe about 24 Christmas trees!
- Room Temperature Ingredients: Remember that “room temperature” butter and cream cheese should still be a bit cool to the touch – not greasy or melted at all. Each should make a slight impression when gently touched, but it won’t fully give. An internal temperature would ideally be about 65°F-67°F (18°C-19°C) – so a bit cooler than you may instinctively think.
- Weigh Your Ingredients for Best Results: Measuring flour by scooping or spooning it can result in very different amounts of flour, which can cause cookie bars to be very dry or, if not enough flour is used, super greasy. A kitchen scale offers the most accurate measurement.
- Adding Sprinkles to Dough: You can add sprinkles to the cookie bars dough. However, naturally dyed sprinkles will often bleed into the cookies a lot during baking. Also, be careful about the colors you choose. When I was testing, I used some silver and gold sprinkles, and the silver ones looked almost like mold in the cookies, which wasn’t appealing.
Nutrition Information
Nutrition information is automatically calculated and should be used as an approximation.
- Calories: 254kcal
- Carbohydrates: 33g
- Protein: 2g
- Fat: 13g
- Saturated Fat: 8g
- Polyunsaturated Fat: 1g
- Monounsaturated Fat: 3g
- Trans Fat: 0.5g
- Cholesterol: 47mg
- Sodium: 92mg
- Potassium: 37mg
- Fiber: 0.4g
- Sugar: 21g
- Vitamin A: 415IU
- Vitamin C: 0.004mg
- Calcium: 14mg
- Iron: 1mg
Did you enjoy this recipe or have any questions? We’d love to hear from you! Leave a comment below!