

Embrace the festive spirit with these incredibly soft and wonderfully chewy Peppermint Chocolate Chip Cookies! Far from your average cookie, these delightful treats are brimming with festive candy cane pieces and a generous helping of rich chocolate chips. Perfect for holiday cookie exchanges, a special gift, or simply to make Santa’s visit extra jolly, they’re destined to become your ultimate favorite Christmas cookie tradition. Their irresistible texture and refreshing minty twist on a classic chocolate chip cookie will undoubtedly leave everyone reaching for more.

The holiday season awakens a craving for the timeless combination of chocolate and peppermint that is simply unmatched. These delectable Peppermint Chocolate Chip Cookies offer that exact festive flavor profile in the most perfect form: a soft, chewy, and utterly satisfying cookie. For years, this recipe has stood out as a top favorite, and once you experience their magic, you’ll understand why they’re an indispensable part of our Christmas celebrations.
Every bite of these chewy mint chocolate chip cookies is a burst of holiday cheer, loaded with crunchy crushed candy cane pieces. They’ve become more than just a recipe; they’re a cherished tradition that brings warmth and joy to our home each Christmas. The perfect balance of sweet chocolate and cool peppermint makes them an unforgettable holiday treat that everyone anticipates year after year.
If your heart beats for peppermint treats and all things Christmas baking, you’ll love exploring these other festive recipes: No-Bake Peppermint Oreo Cheesecake, a dreamy dessert with minimal effort; Peppermint Dark Chocolate Pretzel Bark, an easy and addictive sweet and salty snack; Peppermint Bark Brownies, fudgy brownies topped with a minty crunch; and this charmingly simple Christmas Puppy Chow, ideal for holiday parties or cozy nights in.
Why These Peppermint Chocolate Chip Cookies Are a Holiday Must-Make

These **Peppermint Chocolate Chip Cookies** have held a special place in our holiday baking repertoire for nearly a decade. They consistently earn enthusiastic praise and are always the undisputed star at every cookie swap. Once you try them, you’ll instantly understand why they are simply the best holiday cookies around!
- A Festive Twist on a Beloved Classic: Who can resist the comforting allure of a classic chocolate chip cookie? This recipe takes that timeless favorite and infuses it with an irresistible holiday kick. These chewy, delightful peppermint chip cookies are the easiest and most delicious way to transform a standard chocolate chip cookie into something truly special and festive. The refreshing burst of peppermint flavor is an undeniable hallmark of the holiday season, making each bite feel like a celebration.
- Incredibly Kid-Friendly and Fun: Involve the little ones in the kitchen for a magical baking experience! The best part? Crushing candy canes! While we can’t promise a mess-free adventure, we can guarantee endless giggles and excitement. My own child absolutely adores helping to prepare the crushed candy canes every single time, making it a beloved family tradition that builds cherished memories.
- Simply Irresistible and Delicious: At the end of the day, isn’t the primary reason we bake cookies for their taste? These Peppermint Chocolate Chip Cookies are guaranteed to be the most sought-after treat at your holiday cookie exchange this year. They literally vanish from the plate moments after I set them out. Their harmonious blend of rich chocolate and cool peppermint creates a flavor profile that is both comforting and exhilarating, making them a true crowd-pleaser.
Essential Ingredient Notes for Perfect Peppermint Chocolate Chip Cookies
Understanding your ingredients is key to achieving baking success. Below you’ll find a detailed list of what you’ll need for these delicious Peppermint Chocolate Chip Cookies, along with important tips for each. For exact measurements, please refer to the comprehensive recipe card below.
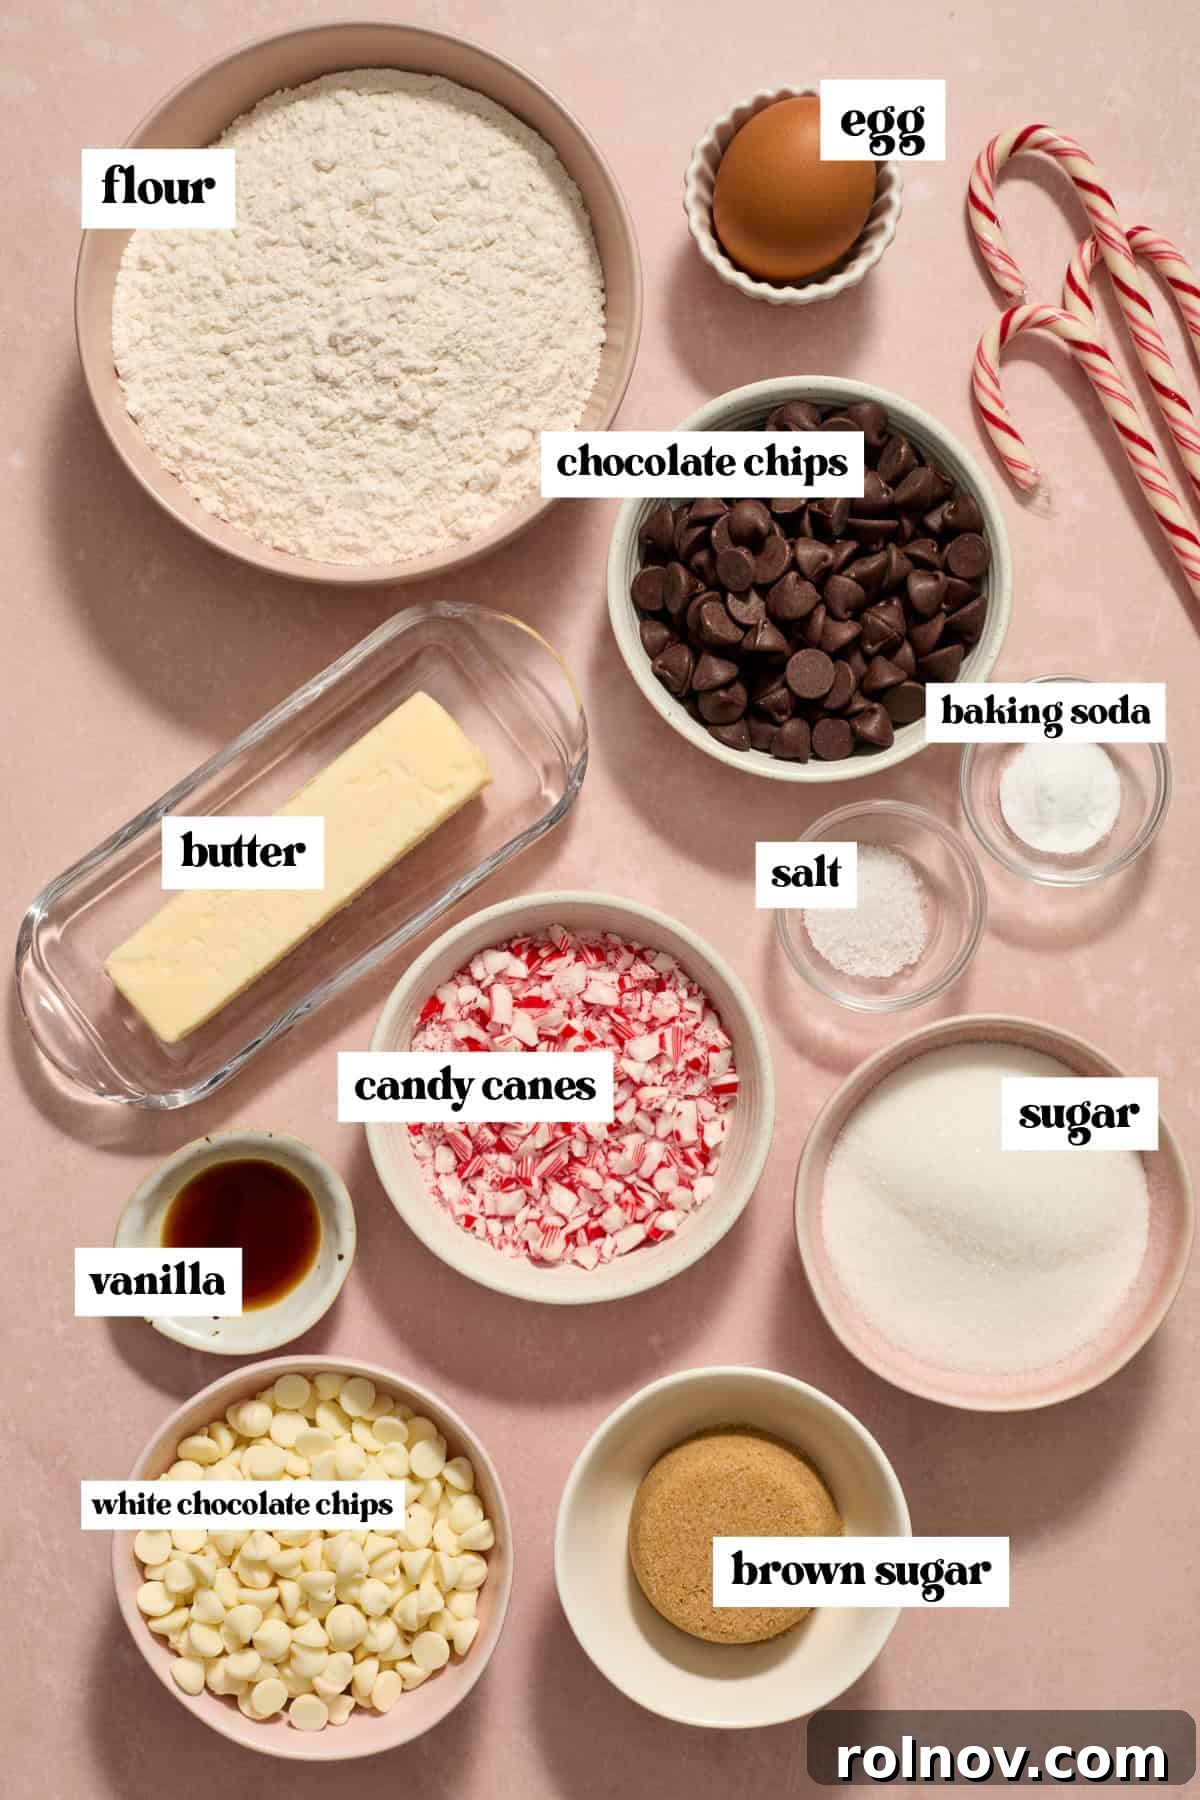
- Unsalted Butter: I always opt for unsalted butter to have full control over the salt content in the recipe. If salted butter is all you have on hand, simply reduce the amount of added salt by half. It’s crucial that your butter is softened to room temperature, but not melted or overly soft. The ideal consistency allows you to press a finger into it and leave a slight indentation without it becoming mushy. This proper temperature is vital for the creaming process, which incorporates air into your dough for lighter, chewier cookies.
- All-Purpose Flour: For the most precise results in baking, measuring flour by weight (using a kitchen scale) is highly recommended. If you’re measuring by volume, remember to stir the flour in its container to aerate it, then gently spoon it into your measuring cup and level it off with a straight edge. Never scoop the measuring cup directly into the flour bag, as this can compact the flour and lead to over-measurement, resulting in dense, dry cookies.
- Baking Soda: The freshness of your baking soda directly impacts the lift and spread of your cookies. Always ensure your baking soda is fresh and active. Expired or stale baking soda can lead to flat, unappealing cookies, so it’s a small detail that makes a huge difference in the outcome!
- Vanilla Extract: High-quality vanilla extract adds a wonderful depth of flavor to these cookies. For an intensified minty experience, consider adding an optional 1/4 to 1/2 teaspoon of peppermint extract. Be cautious not to overdo the peppermint extract, as its flavor can be quite potent.
- Candy Canes (or Peppermint Candies): Crushed candy canes are the star for that iconic holiday look and flavor. If candy canes aren’t in season, any hard peppermint candies will work just as well. For an extra touch of decadence, you can also press small pieces of peppermint bark into the tops of the cookies immediately after they come out of the oven, or even stir them into the cookie dough along with the other chips.
- Dark and White Chocolate Chips: My personal preference is a delightful mix of dark and white chocolate chips, which creates a beautiful contrast in both flavor and appearance. However, feel free to use your favorite chocolate chips! Milk chocolate chips or bittersweet chocolate chips are excellent alternatives. During the holidays, seasonal peppermint-flavored chips are also a fantastic option to boost the minty goodness even further.
Step-By-Step Guide: Crafting Your Peppermint Chocolate Chip Cookies
Follow these detailed steps to bake perfect batches of these festive Peppermint Chocolate Chip Cookies. Precision and patience are your best friends in the kitchen!
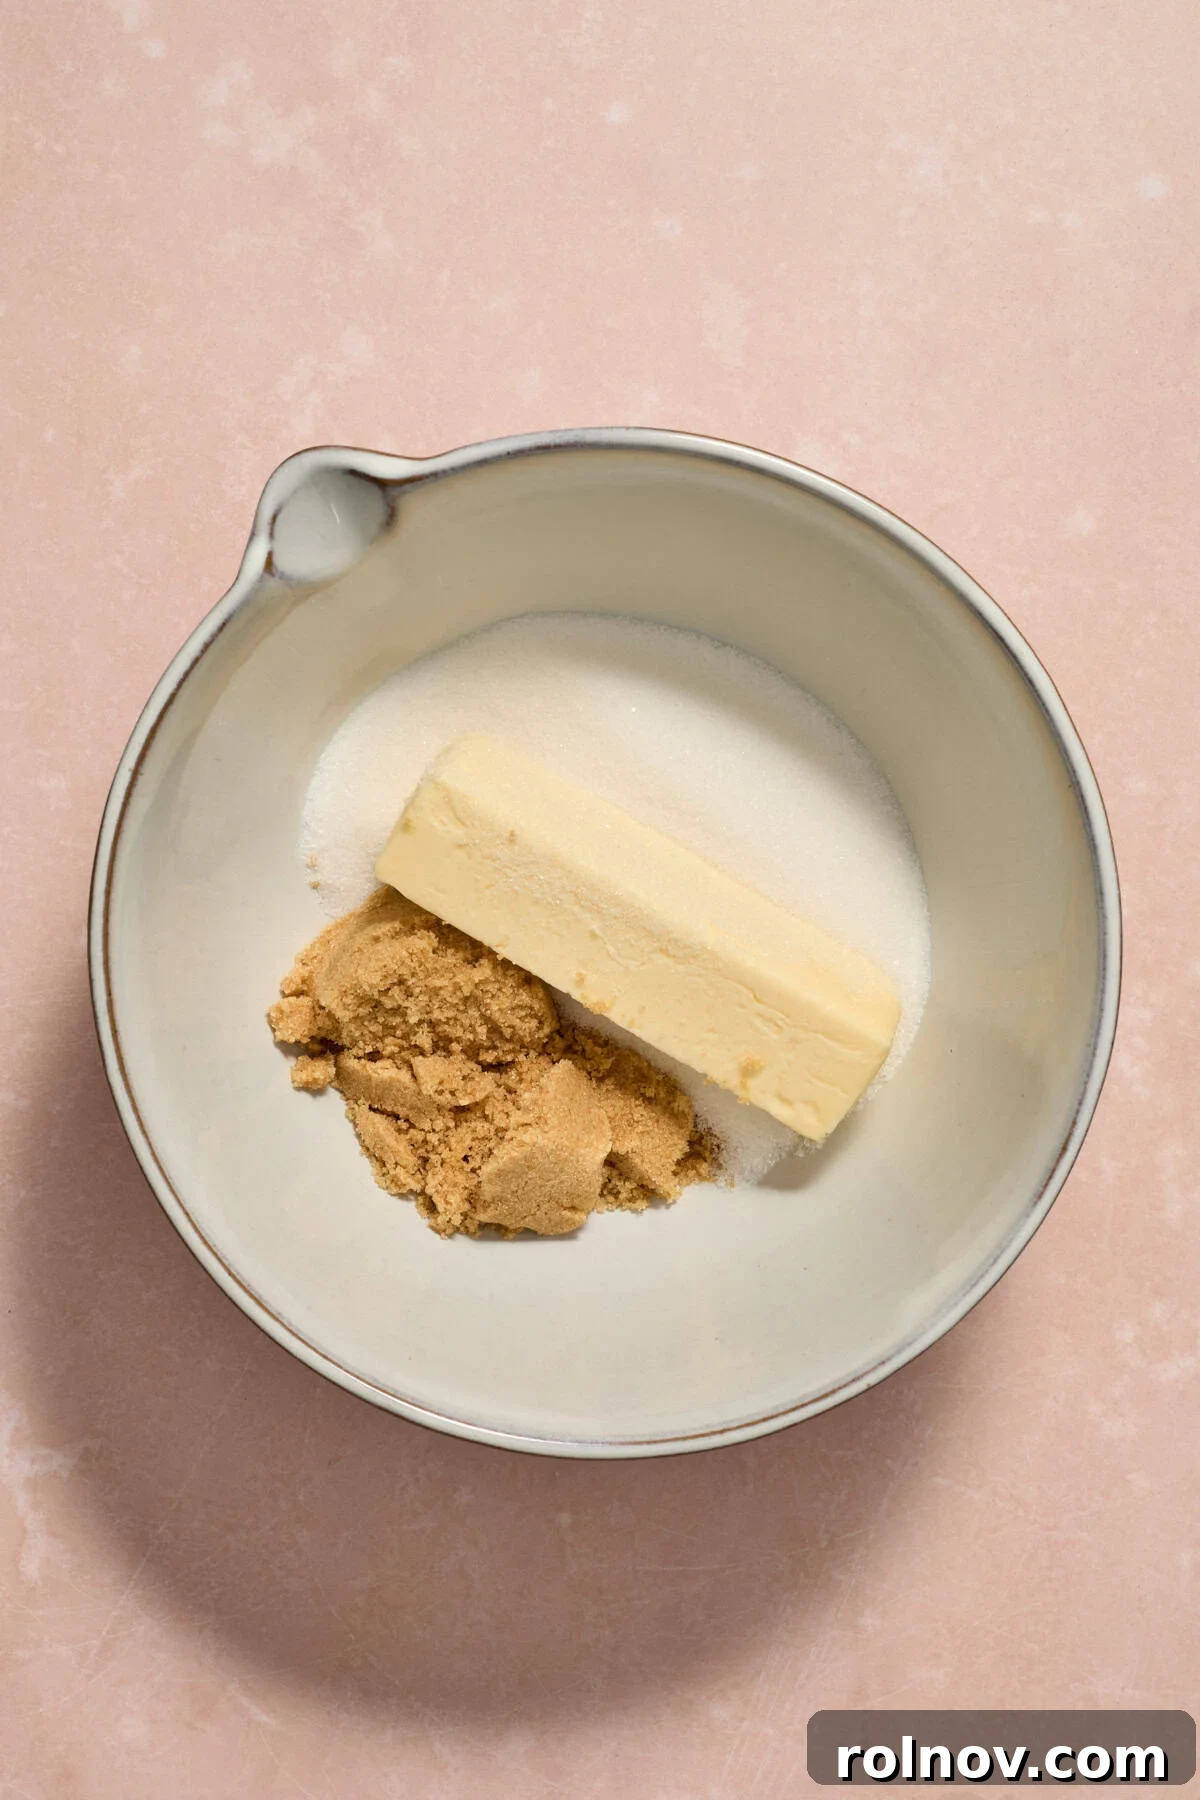
Step 1: In a large mixing bowl, using an electric hand mixer or a stand mixer, cream together the softened unsalted butter with both granulated sugar and light brown sugar. Beat until the mixture is visibly lightened in color and incredibly fluffy.
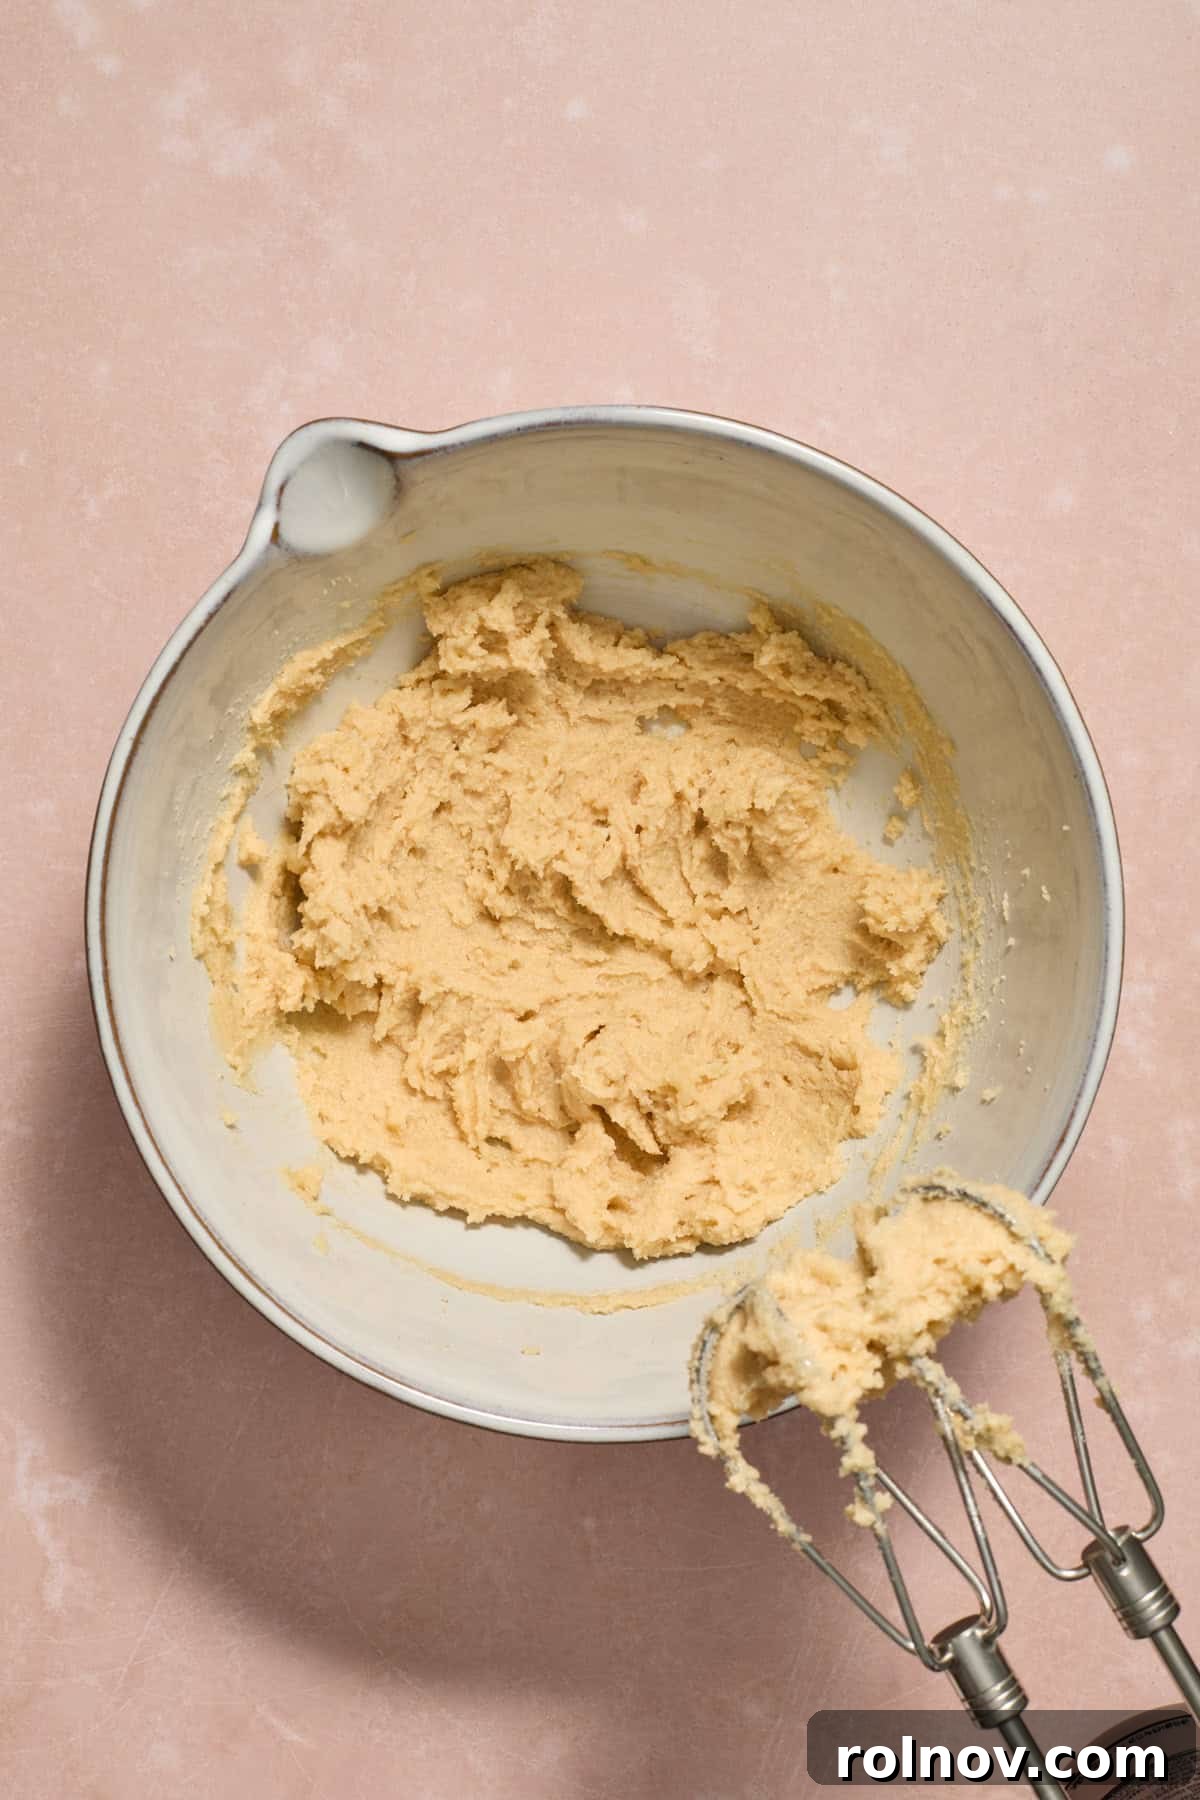
Step 2: Don’t rush this crucial step! Continue to cream the butter and sugars for approximately 3-4 minutes. This extended creaming process incorporates air into the mixture, which is essential for achieving optimal lift and a perfectly chewy texture in your baked cookies. You’ll know it’s ready when the mixture is pale and airy.
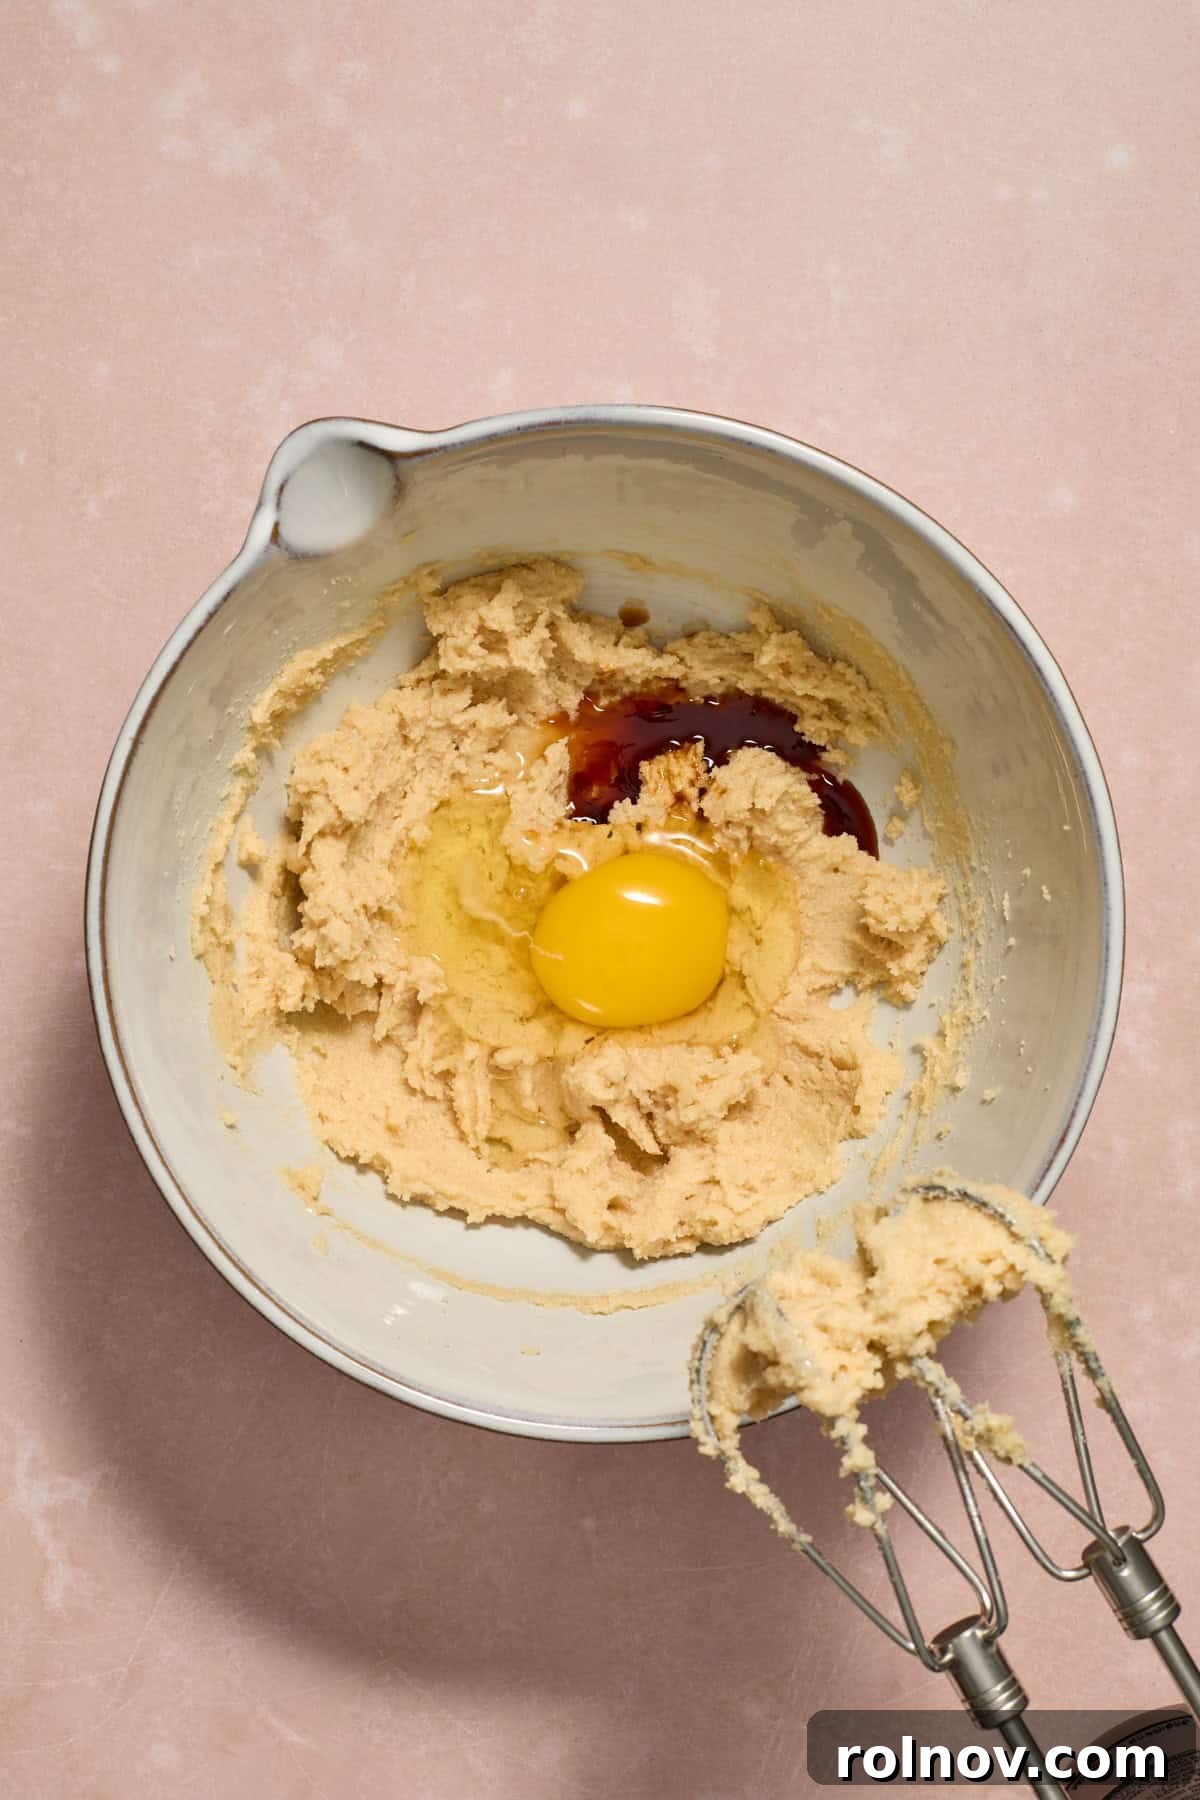
Step 3: Once your butter and sugar mixture is light and fluffy, crack in the large egg and pour in the vanilla extract. If you’re adding peppermint extract for extra minty flavor, now is the time to include it.
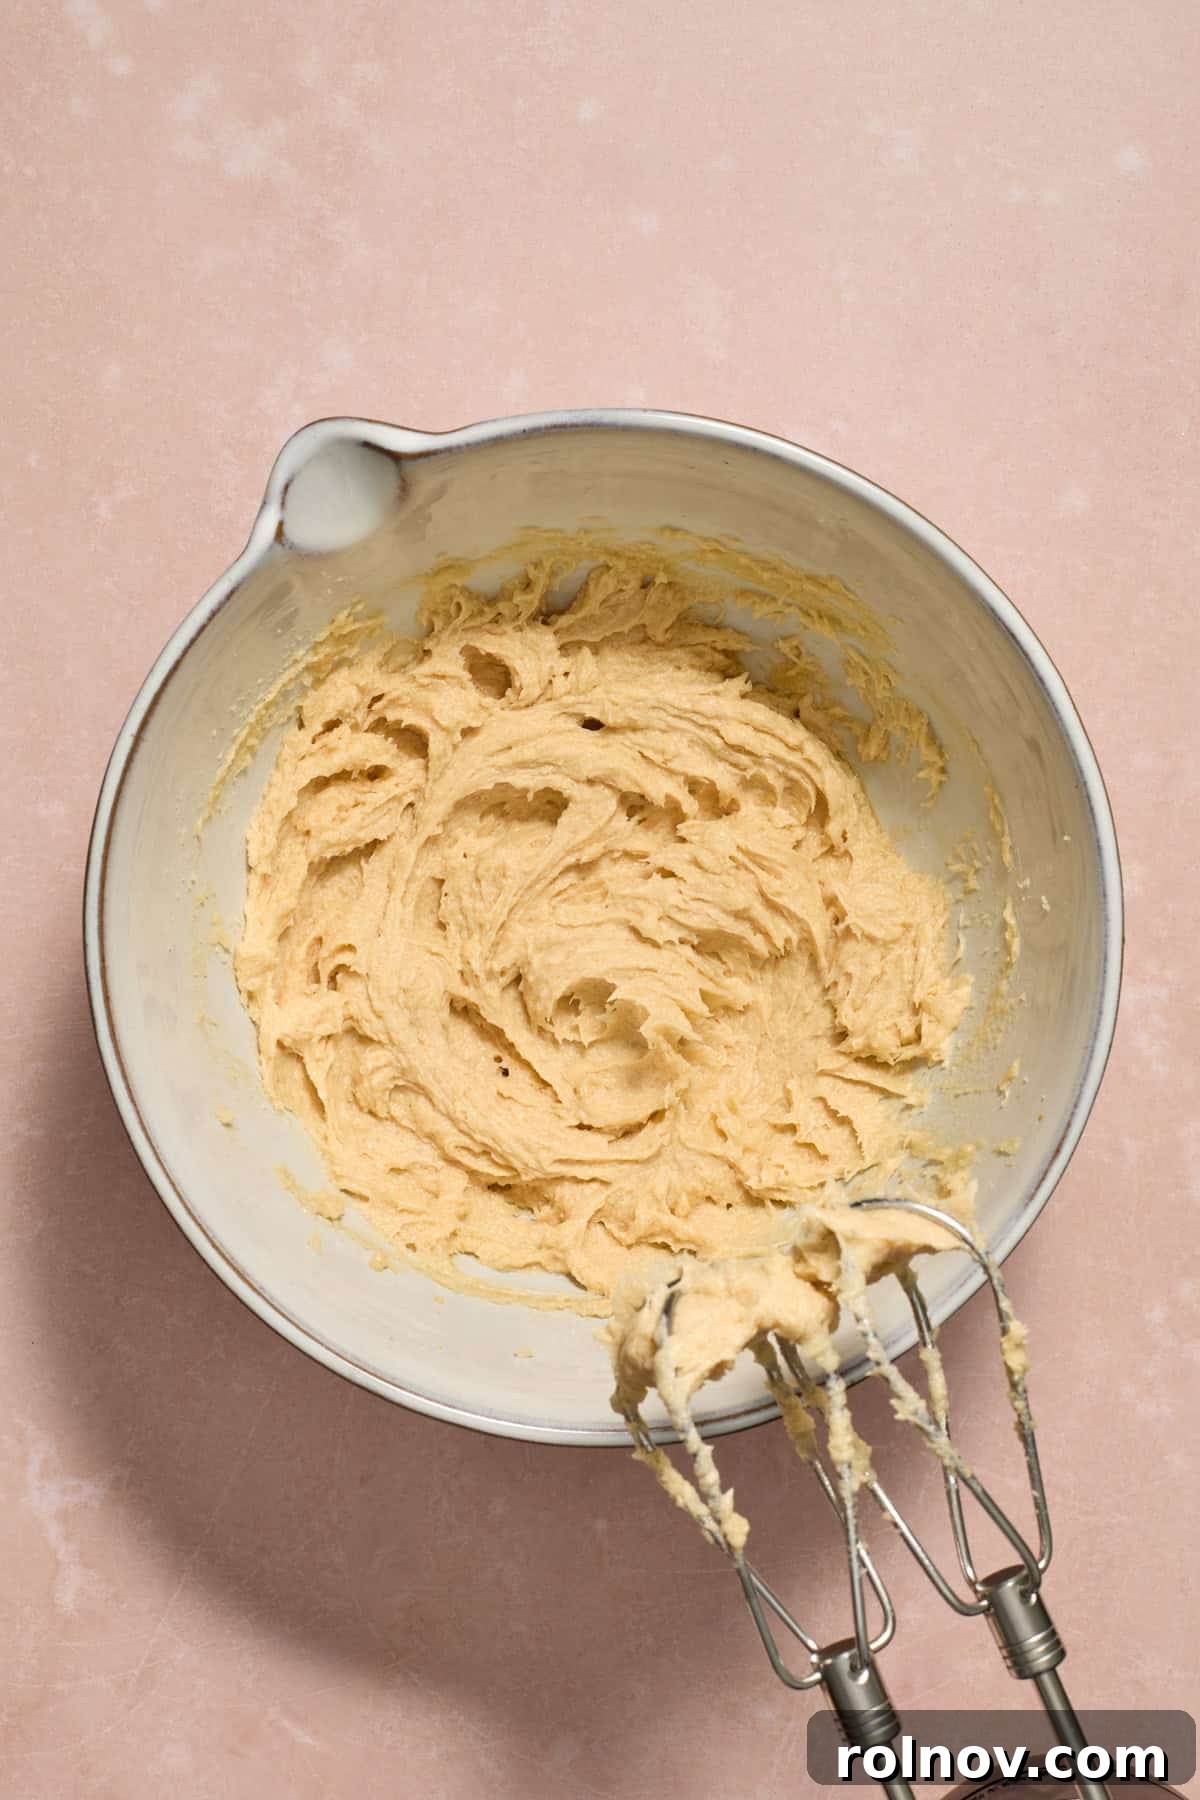
Step 4: Beat the egg and vanilla into the creamed mixture just until they are fully incorporated. This should only take about 20-30 seconds. Over-mixing at this stage can start to develop the gluten in the flour too early, which could result in a tougher cookie.
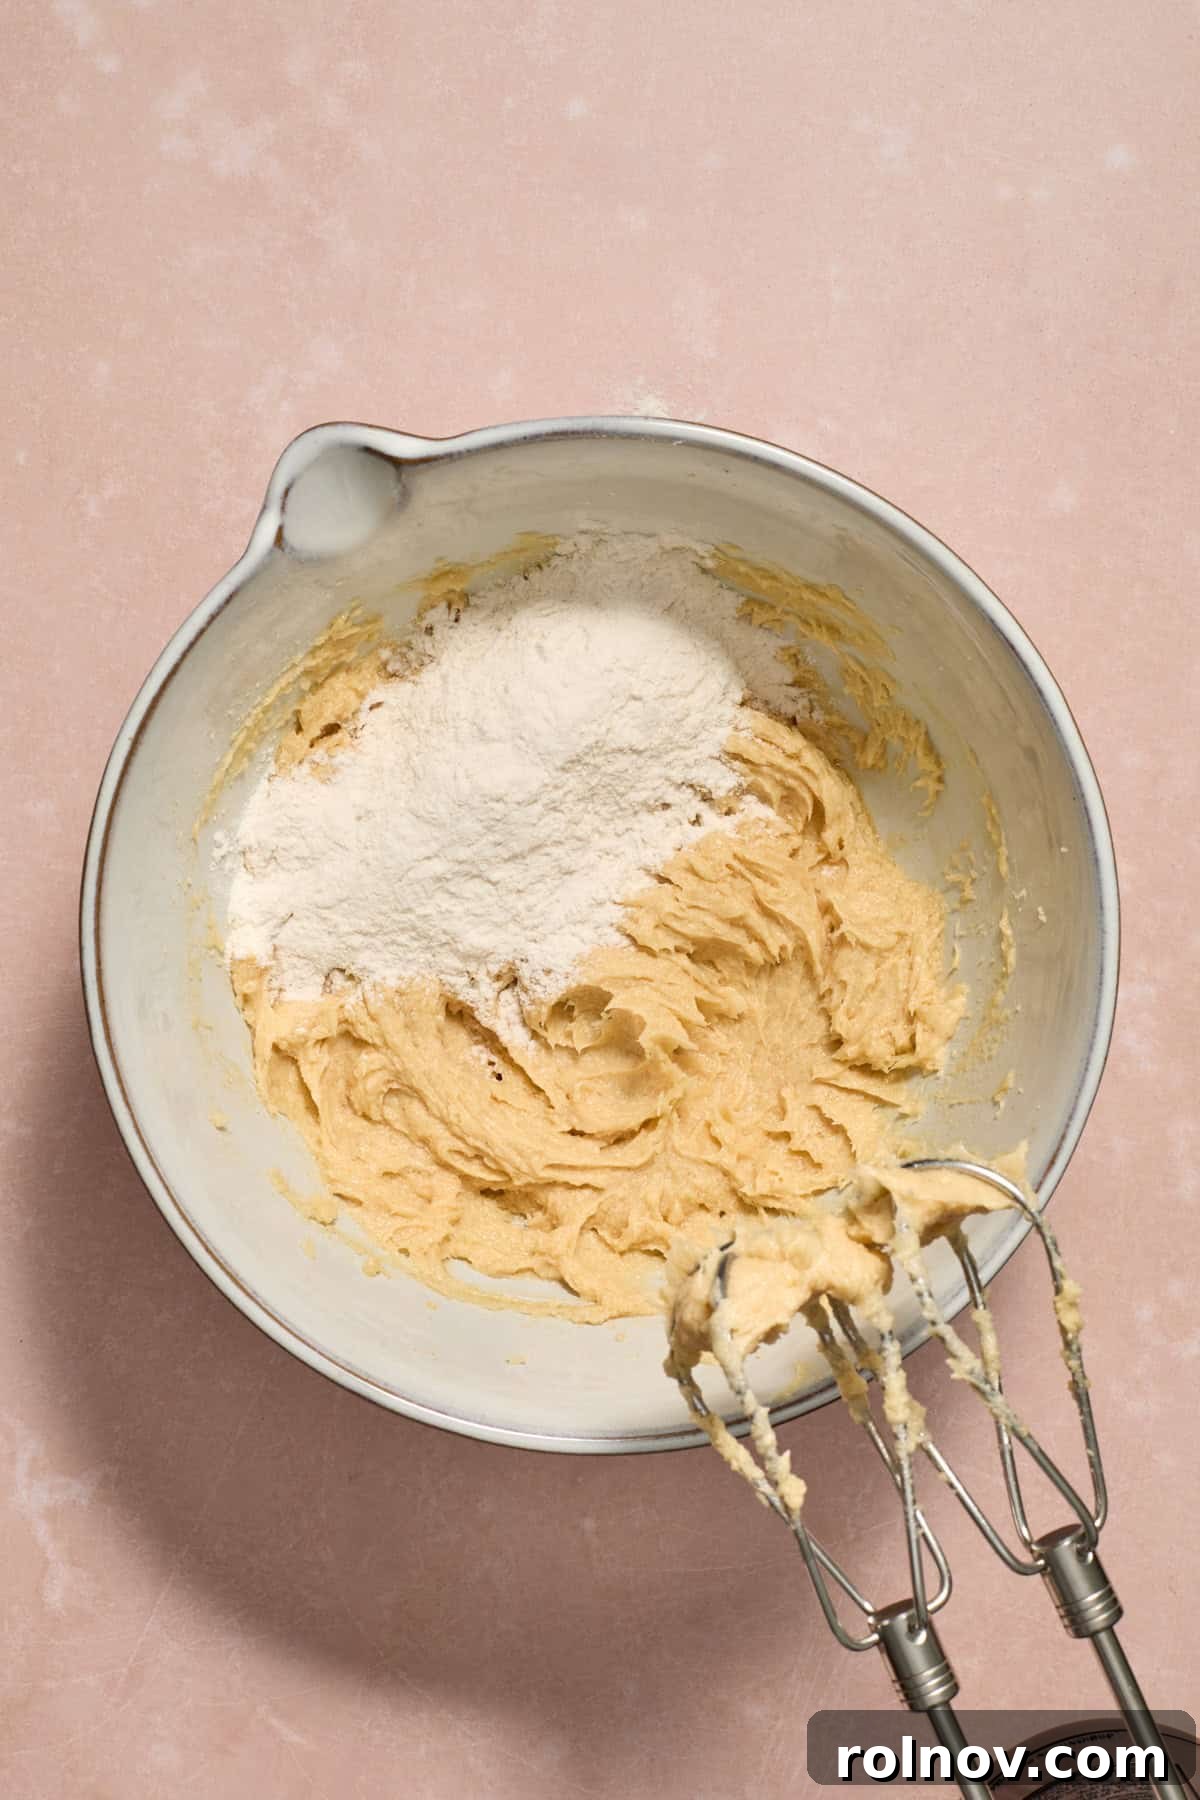
Step 5: In a separate medium-sized bowl, thoroughly whisk together the all-purpose flour, sea salt, and fresh baking soda until they are well combined. Gradually add these dry ingredients to the wet mixture, mixing on low speed only until just incorporated. A few streaks of flour are acceptable.
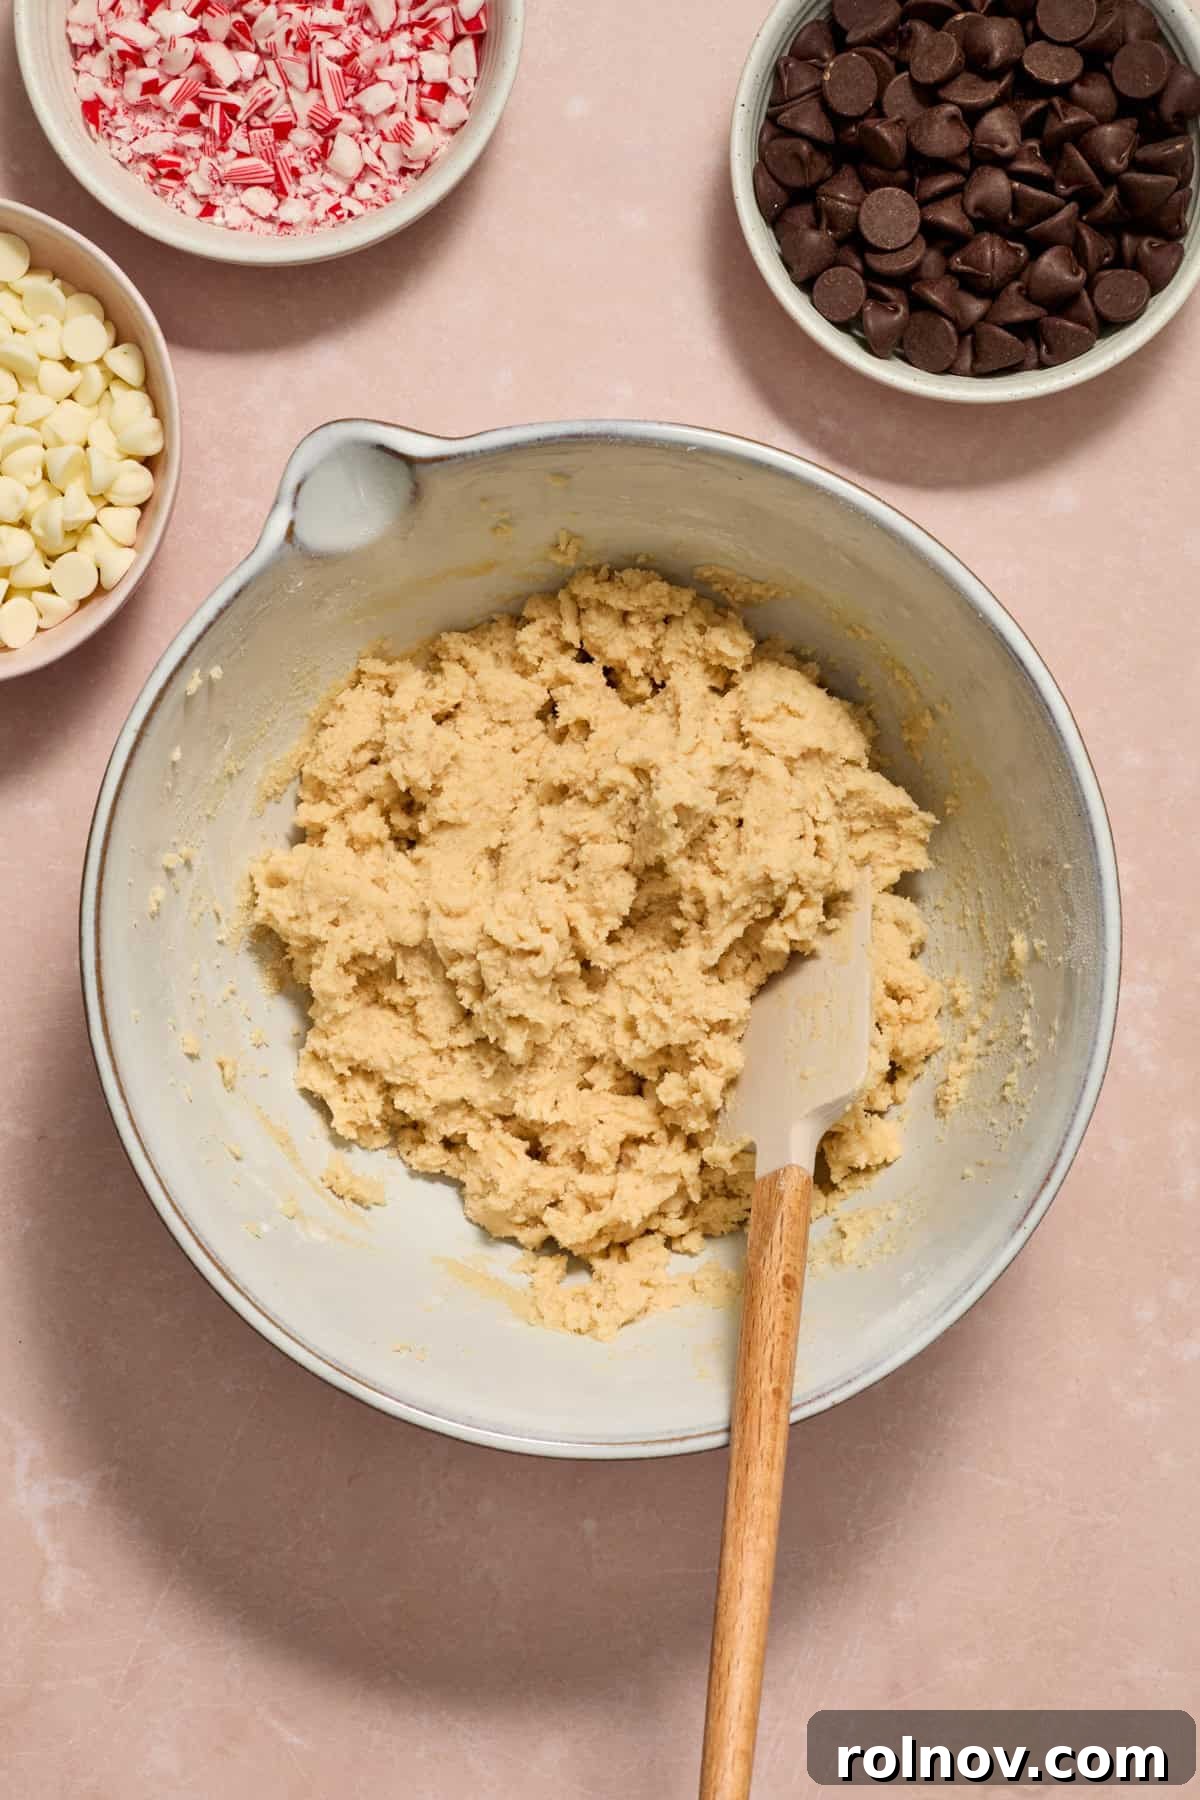
Step 6: It’s absolutely critical not to overmix the dough once the flour has been added. Over-mixing can over-develop the gluten, leading to cookies that are tough, flat, and overly dense instead of soft and chewy. Mix only until the flour streaks disappear.
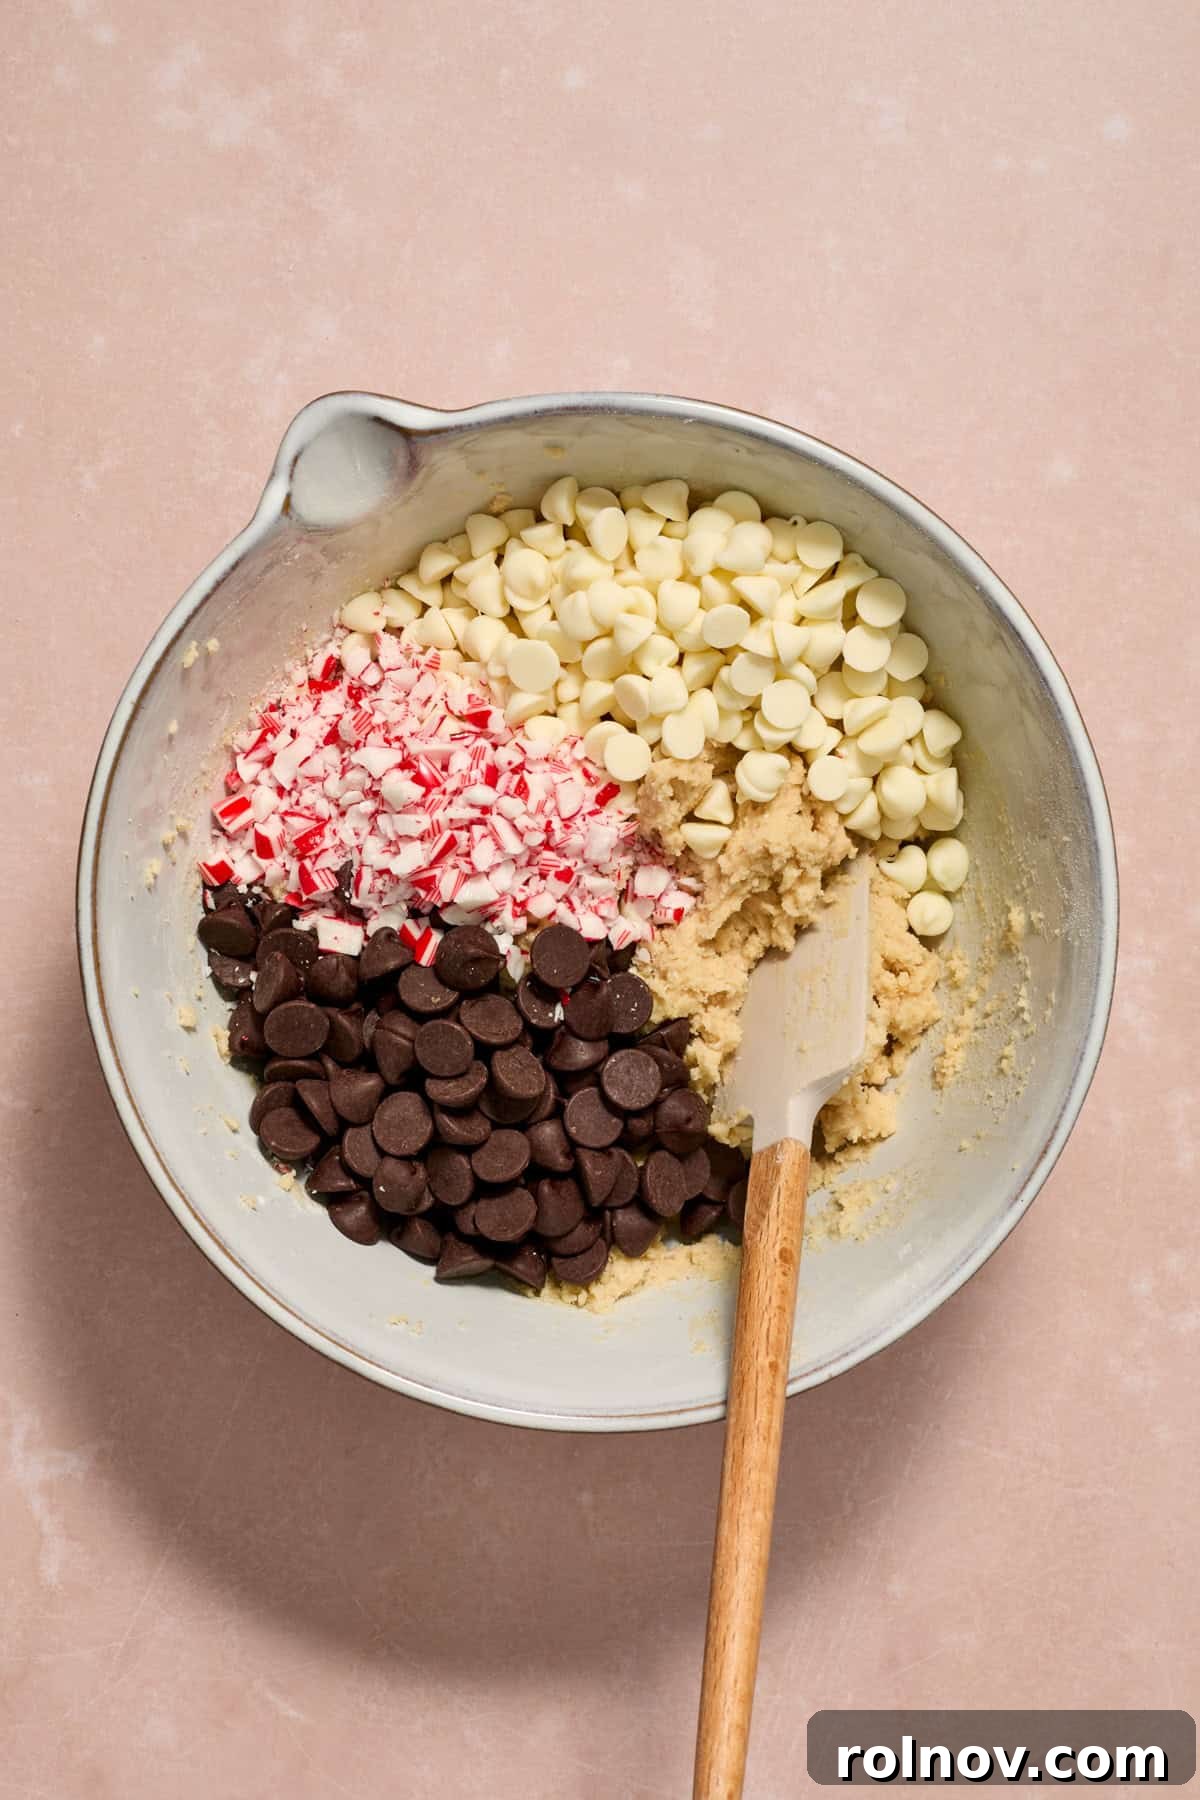
Step 7: Once the flour is just incorporated into the wet ingredients, gently fold in your chosen chocolate chips (dark and white, or your preference) and the finely crushed candy canes. Mix until they are evenly distributed throughout the dough, again taking care not to overmix.
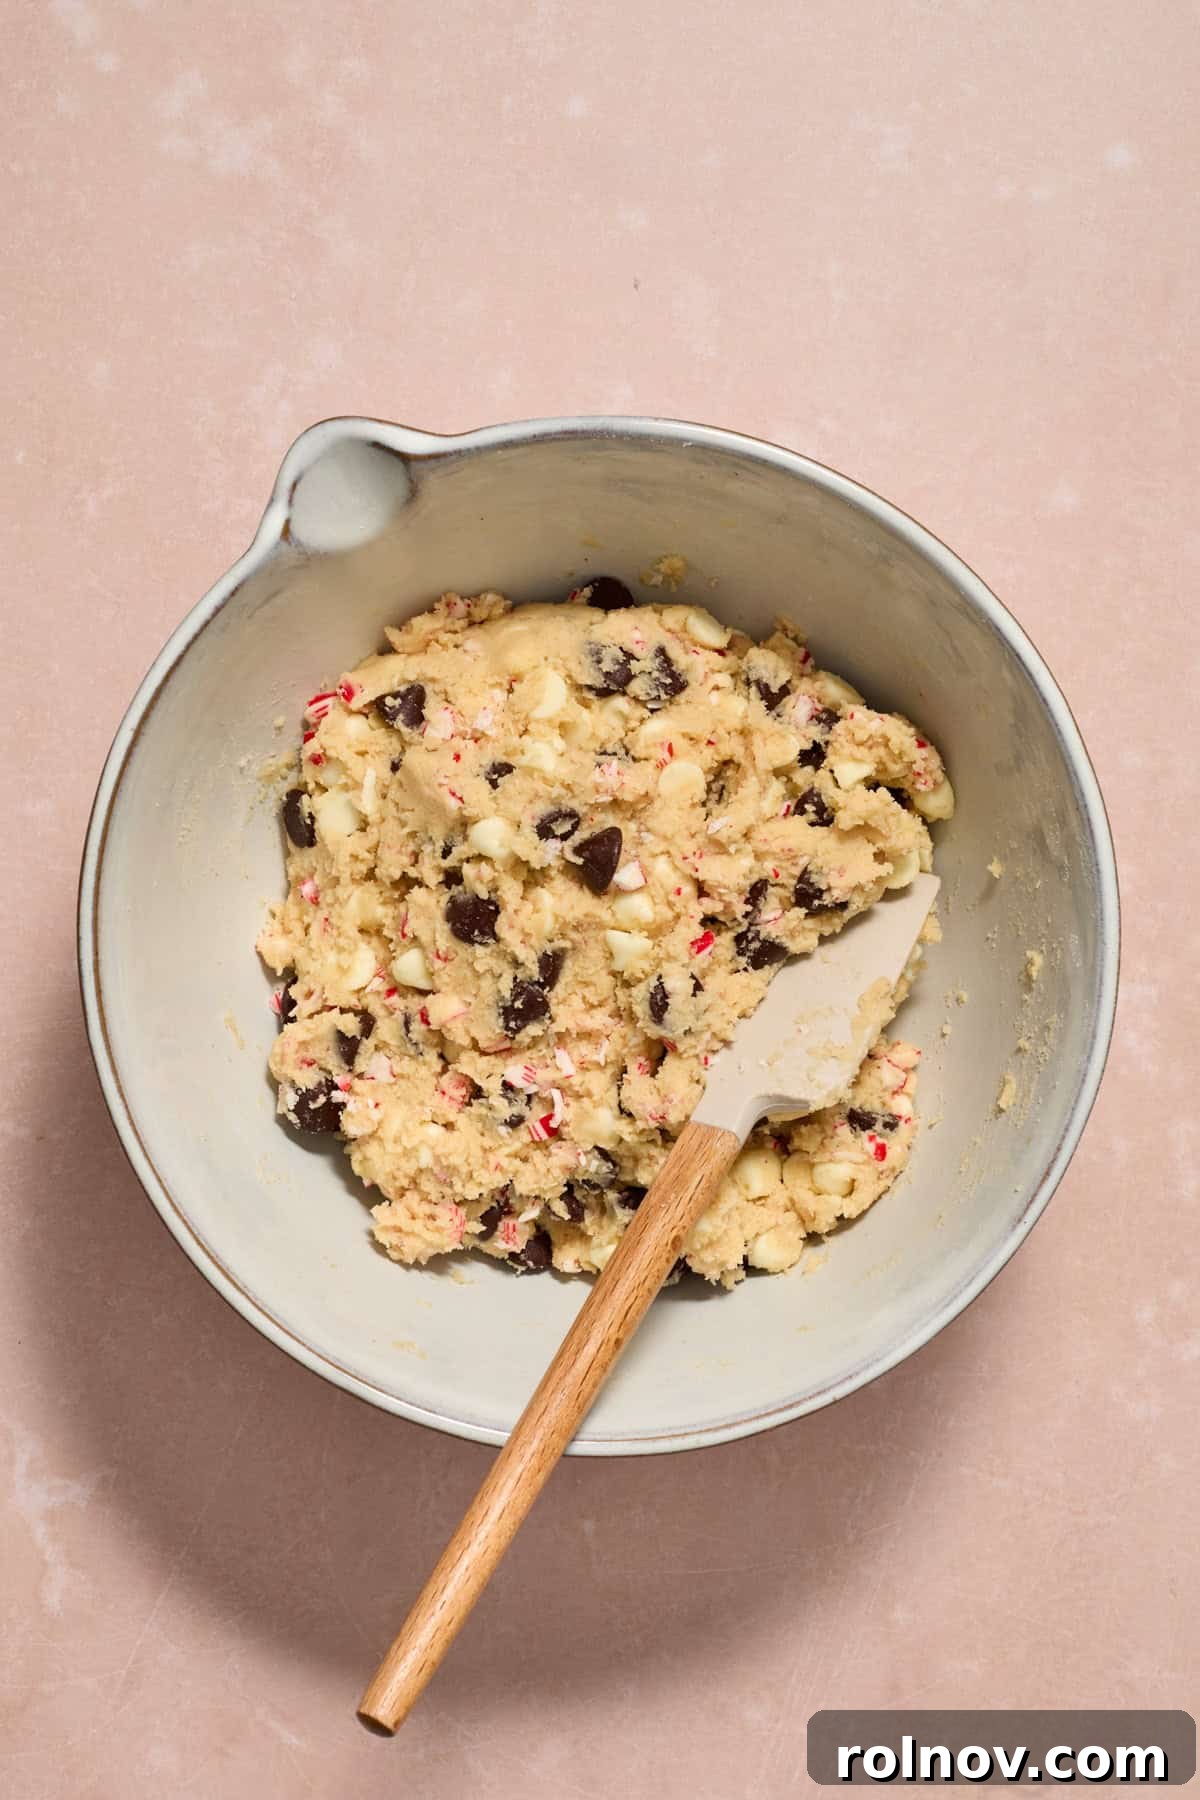
Step 8: Cover the cookie dough tightly with plastic wrap and chill it in the refrigerator for a minimum of 30-60 minutes. Chilling the dough helps to solidify the fats, which prevents excessive spreading during baking and contributes to a chewier cookie. If chilling longer than 2 hours (up to 3 days), let the dough sit at room temperature for about 10-15 minutes before baking to make it easier to scoop.

Step 9: When you’re ready to bake, preheat your oven to 350°F (175°C). Using a cookie scoop or a spoon, roll the chilled dough into approximately 1½-inch balls. Arrange them about 2 inches apart on a baking sheet lined with parchment paper. Bake for 9-12 minutes, or until the edges are lightly golden brown and the centers still look slightly soft.
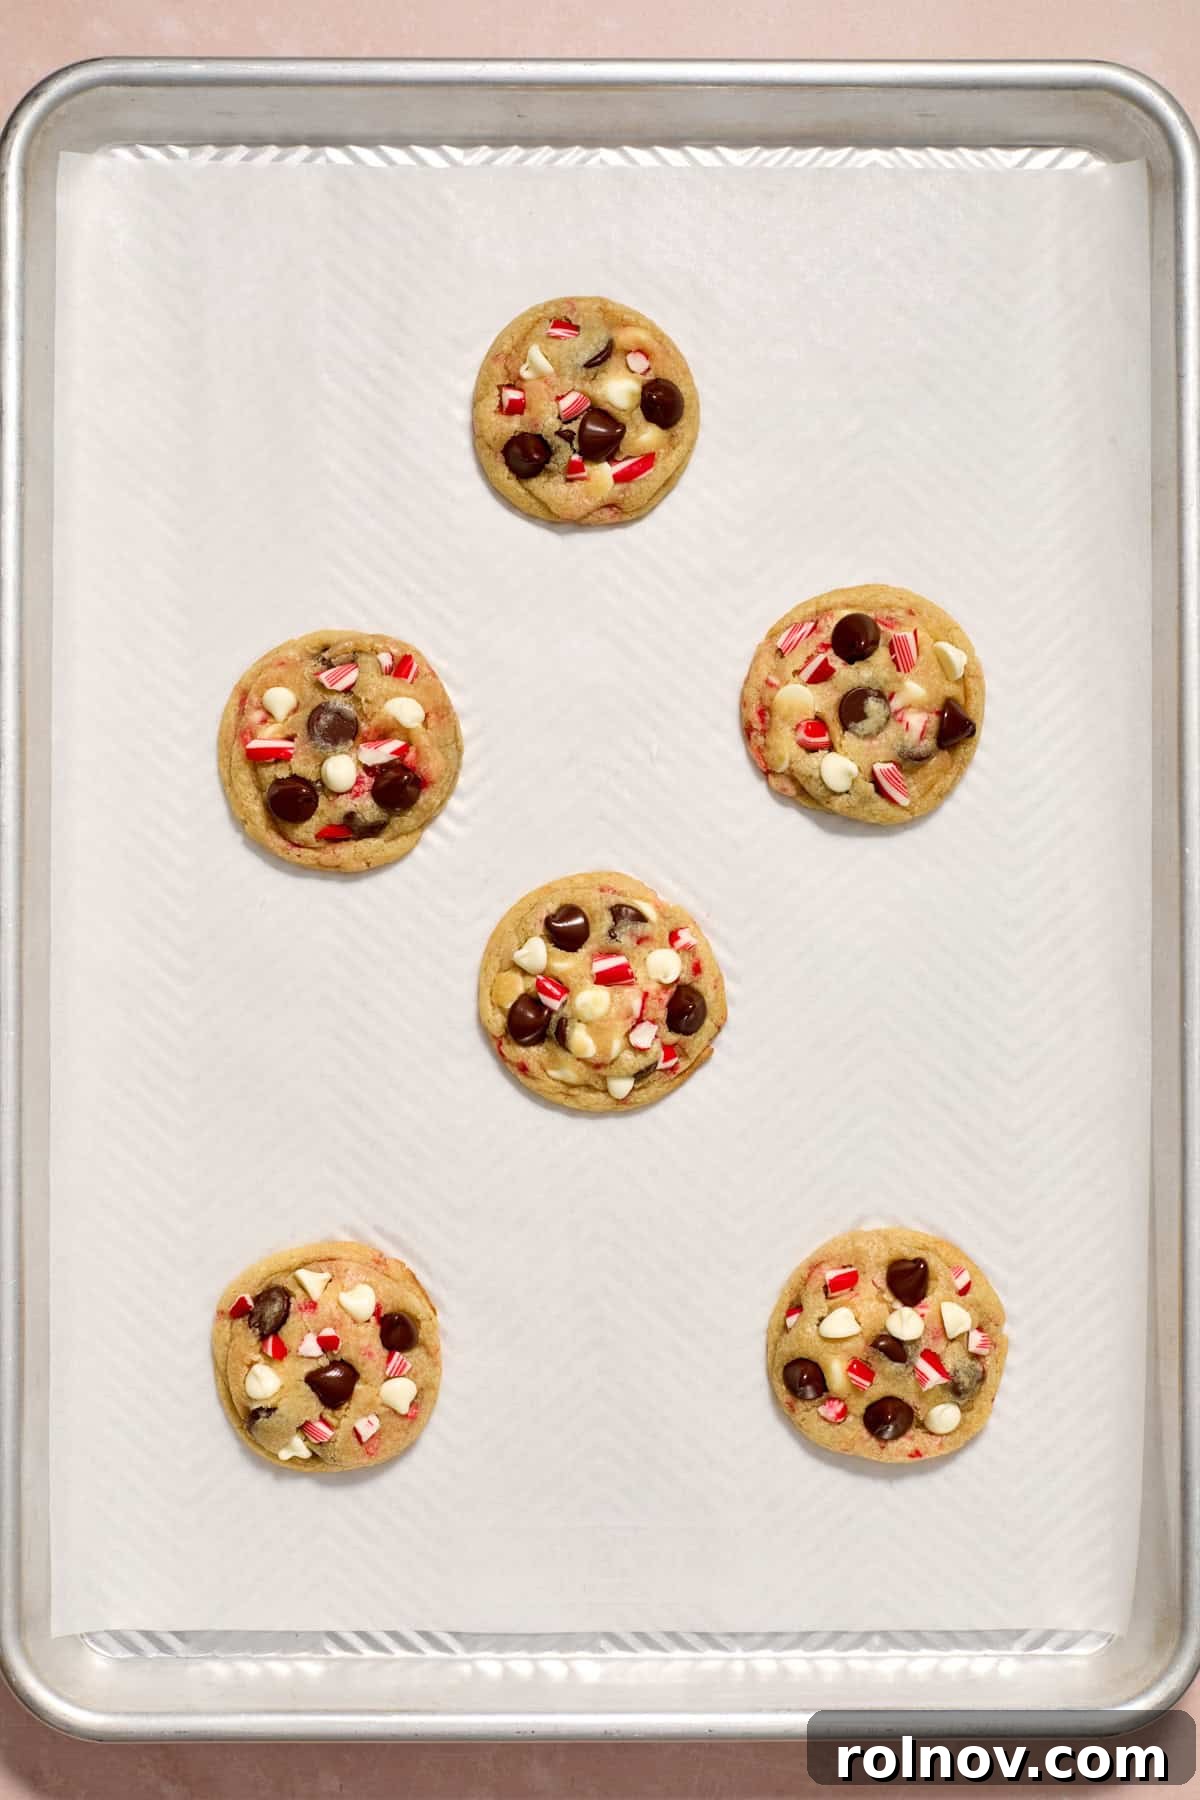
Step 10: As soon as the cookies emerge from the oven, and while they are still warm and pliable, you can use a biscuit cutter or the rim of a wide-mouthed glass to gently “shuffle” them into perfectly round shapes. This step is entirely optional but creates a beautifully uniform appearance. For an extra touch of visual appeal, press a few additional chocolate chips and crushed candy cane pieces onto the tops of the warm cookies. Allow them to cool on the baking sheet for a few minutes before transferring to a wire rack to cool completely.

Expert Tips for Baking the Best Peppermint Chocolate Chip Cookies
- Prevent Candy Cane Run-Off: One common challenge with peppermint-laden cookies is the candy cane pieces melting and spreading too much, affecting the cookie’s appearance. To minimize this, inspect your scooped cookie dough balls before baking. If you notice any large candy cane pieces near the edges, gently push them into the center of the dough or remove them. While a little run-off won’t ruin the taste, managing the candy cane placement helps maintain a prettier, cleaner edge.
- Crush Candy Canes Finely: For the most consistent results and to further prevent melting issues, always crush your candy canes into very small, fine pieces. Avoid large chunks, as these are more prone to melting and spreading. Finely crushed peppermint still delivers all the wonderful flavor and festive crunch you desire without compromising the cookie’s shape.
- The Magic of Chilling Cookie Dough: Chilling your cookie dough is a fundamental step for superior results, especially for chewy cookies. The refrigeration process solidifies the butter, which means it takes longer to melt in the oven. This slower melting helps the cookies hold their shape, preventing excessive spreading and ensuring a thicker, chewier texture. If you’re short on time, don’t fret too much, but be aware that skipping this step may result in a slightly flatter, less chewy cookie.
- Always Check Your Baking Soda: This might seem like a minor detail, but using fresh, active baking soda is paramount for proper cookie leavening. Old or expired baking soda loses its effectiveness, which can lead directly to flat, dense cookies that lack that desirable soft rise. To test its freshness, mix a teaspoon of baking soda with a few tablespoons of vinegar; it should bubble vigorously. If it doesn’t, it’s time for a new box!
- Effortless Batch Doubling: This recipe is designed to be easily scalable, making it perfect for holiday entertaining or gifting. I’ve successfully doubled the batch numerous times, yielding fantastic results every single time. Simply multiply all ingredients by two, and follow the same instructions, adjusting baking time slightly if needed for larger batches.
- Embrace Abundant Chocolate Chips: What’s the secret to truly outstanding chocolate chip cookies? More chips, of course! Feel free to be generous with your chocolate chip additions. I love to sprinkle a few extra chocolate chips on top of the freshly baked cookies as they come out of the oven. The residual heat gently melts them, creating a beautifully glossy, inviting chocolate puddle that adds an irresistible visual and textural appeal.
Proper Storage for Lasting Freshness
Ensuring your Peppermint Chocolate Chip Cookies stay fresh and delicious is simple with these storage tips. Proper storage helps maintain their delightful texture and flavor for days or even months.
To store baked cookies: Once completely cooled, place your cookies in an airtight container at room temperature. They will retain their best texture and flavor for up to 5 days. For optimal enjoyment, aim to consume them within the first 2-3 days.
To freeze baked cookies: For longer storage, transfer the fully cooled cookies to a freezer-safe container. To prevent them from sticking together, place a layer of wax paper or parchment paper between each cookie layer. They can be frozen for up to 2 months. Thaw them at room temperature before serving.
To freeze cookie dough: This is a fantastic make-ahead option! First, scoop the raw cookie dough into individual balls (approximately 1½ inches). Arrange these balls on a plate or baking sheet lined with parchment paper and freeze for about an hour, or until firm. Once firm, transfer the frozen dough balls to a freezer-safe bag or container. They can be stored in the freezer for up to 2 months.
Baking from frozen dough: You can bake the cookie dough directly from frozen! Simply add an additional 2-3 minutes to the recommended bake time. Alternatively, you can allow the dough balls to come to room temperature for about 15-20 minutes before baking according to the original instructions.
For even more baking wisdom, explore some of my comprehensive cookie baking tips and frequently asked questions here before you embark on making these delightful cookies!

Troubleshooting: Why Are My Cookies Flat?
It can be disheartening to pull a batch of cookies out of the oven only to find them flat and spread out. Several factors can contribute to flat cookies, but often it comes down to one of these common culprits:
- Not Enough Flour: The flour provides structure to your cookies. If the dough is too wet or has insufficient flour, it won’t be able to hold its shape during baking, leading to excessive spreading. A good test is to bake one cookie initially; if it spreads too much, try adding 1-2 extra tablespoons of flour to the remaining dough to give it more lift and less spread.
- The Dough is Too Warm: Warm dough, particularly warm butter within the dough, melts much faster in the oven, causing cookies to spread rapidly before they can set. If you suspect your dough is too warm, rolling the cookie balls and chilling them in the refrigerator for about 30 minutes before baking can make a significant difference. Ensure your butter is at the correct room temperature (as described in the ingredient notes) from the start; if it’s too warm during the creaming process, it won’t incorporate enough air, affecting the final texture and rise.
- Cookie Dough Was Over-Mixed: While creaming butter and sugar requires thorough mixing, once you add the dry ingredients, over-mixing is a common pitfall. Excessive mixing develops the gluten in the flour, making the cookies tough and leading to a denser, flatter result. Mix only until the dry ingredients are just incorporated, and no streaks of flour remain.
- Your Butter Was Too Warm: This is a distinct issue from warm dough. If your butter was too soft or even slightly melted when you started creaming, it won’t properly hold the air needed for a light, fluffy cookie. Softened butter should still be cool to the touch and hold its shape well. When you press your finger into it, there should be a slight indentation, but it shouldn’t easily press all the way through or feel greasy. Starting with butter at the correct temperature is foundational for successful cookies.
- Leavening Agents are Old or Expired: Baking soda is a crucial leavening agent that helps cookies rise. If your baking soda is old, expired, or has been exposed to too much air, it loses its potency. Even if it’s within the expiration date, if it’s been open for a long time, it might not work effectively. Unfortunately, if this is the case, your cookies may end up flat, and there’s little you can do but enjoy them for their flavor and remember to get fresh leavening agents for your next batch!
Discover More Delightful Holiday Treats:
Expand your holiday baking repertoire with these other irresistible recipes, perfect for sharing, gifting, or simply indulging!
- Nutella Stuffed Ritz Cracker Cookies with Peppermint White Chocolate
- Cream Cheese Snowball Cookies
- One Bowl Small Batch Chocolate Chip Cookies
- Christmas Golden Oreo Truffles
- Snickerdoodle Cheesecake Stuffed Crescent Wreath
- Dark Chocolate Candy Cane Pretzel Bark
- Dark Chocolate Peppermint Puppy Chow
- Individual Cranberry Orange Crisps
- Maple Vanilla Spiced Pecans Recipe
- Nutella Crumble Bars
HUNGRY FOR MORE? Subscribe to my newsletter and follow me on Facebook, Instagram, and Pinterest for all the latest delicious recipes and inspiration!
Peppermint Chocolate Chip Cookies
Lorie Yarro

Print Recipe
15 minutes
10 minutes
30 minutes
55 minutes (active + minimum chill)
24 cookies
Ingredients
- ½ cup unsalted butter, softened (1 stick)
- ½ cup granulated sugar
- ⅓ cup light brown sugar, packed firmly
- 1 ½ tsp vanilla extract
- 1 large egg
- 1 ½ cups all-purpose flour (204 g)
- ½ tsp sea salt
- ½ tsp baking soda
- ¾ cup white chocolate chips
- ¾ cup dark or regular chocolate chips
- 5 candy canes, crushed into fine pieces (about ¼ cup plus a tablespoon)
Instructions
-
Using a hand or stand mixer, cream the softened butter, granulated sugar, and brown sugar until very light and fluffy. This should take at least 3-4 minutes – do not skip this crucial step, as it incorporates air for the best cookie texture. Add the vanilla extract and egg, and beat just until incorporated (about 20 seconds). Overmixing at this point can make cookies stiff.
-
In a separate bowl, whisk together the all-purpose flour, sea salt, and baking soda. Gradually add these dry ingredients to the wet mixture, mixing on low speed only until just combined. Be careful not to overmix, as this can lead to tough, dense cookies.
-
Gently fold in the chocolate chips (white and dark) and the finely crushed candy canes until they are evenly distributed throughout the dough.
-
Cover the dough tightly and chill in the refrigerator for 30-60 minutes. Chilling helps the cookies hold their shape and develop a chewier texture. If chilling for more than 2 hours (up to 3 days), allow the dough to sit at room temperature for 10-15 minutes before baking for easier scooping.
-
When ready to bake, preheat your oven to 350°F (175°C). Roll the chilled dough into 1½-inch balls or use a cookie scoop, then arrange them about 2 inches apart on a parchment-lined baking sheet. Bake for 9-12 minutes, or until the edges are lightly golden brown and the centers still appear slightly soft. It’s better to slightly underbake than overbake for a soft, chewy cookie. For perfectly round cookies, immediately after removing them from the oven, use a large round cookie cutter or biscuit cutter to gently “shuffle” the warm cookies into shape.
-
Allow the cookies to cool on the baking sheet for a few minutes to set before transferring them to a wire rack to cool completely. Or, transfer directly to your mouth – we won’t judge!
Recipe Video
Watch this helpful video to see how these delightful Peppermint Chocolate Chip Cookies come to life, from mixing the dough to their festive finish. Visual guidance ensures your baking experience is smooth and successful!
Watch the Peppermint Chocolate Chip Cookies Video

Notes
*Softened butter should still be cool to the touch and firm enough to hold its shape, leaving only a small indentation when pressed. If the butter is too warm or mushy, it can lead to thin, overly spread, and runny cookies. Allow your butter to sit out at room temperature for about an hour or so for the ideal consistency.
*Flour weight conversions can vary significantly. While one cup of flour can weigh anywhere from 120g to 150g, extensive testing for this recipe found 204 grams to be ideal for 1.5 cups, which means one cup weighs approximately 136 grams. If you are not using a kitchen scale, always err on the side of caution and have an extra tablespoon or two of flour on hand, as slight variations in measurement can impact the cookie’s structure.
*Ensure you cream the butter and sugars for at least 3 minutes. This process creates crucial air pockets within the mixture. If your butter is too warm at the start, or if you don’t cream for long enough, these air pockets won’t form adequately, often resulting in super flat cookies.
*Important note for doubling or tripling the recipe: Automated calculators typically do not adjust flour grams correctly due to density variations. If you are doubling this recipe, you will need 408 grams of flour. For tripling, use 612 grams of flour to ensure the correct consistency.
*Too much candy cane near the edges of the cookie will run during baking. While this won’t ruin the taste, it can affect the aesthetic. When scooping dough onto the baking sheet, quickly check around the edges for large candy cane pieces. Either gently push them further into the dough or remove them to keep your cookies looking their best.
*When in doubt, crush candy canes into very fine pieces. This significantly reduces the chances of them melting excessively and spreading. You’ll still get all that wonderful peppermint flavor and a delightful crunch!
*If your chilled dough still yields cookies that spread a lot, try incorporating 1 or 2 additional tablespoons of flour. Even a slight inaccuracy in flour measurement can drastically change how well cookies hold their shape, so a small adjustment can make a big difference.
Nutrition
Nutrition information is automatically calculated and should be used as an approximation.
Did you enjoy this recipe? Have a question?
Leave a comment below! We love hearing from you!
Shop Essential Baking Tools:
Enhance your baking experience and achieve perfect results with these recommended tools used in this recipe:
Hand Mixer
Buy Now →
Mixing Bowls
Buy Now →
Sheet Pan
Buy Now →
Cookie Scoop
Buy Now →
KitchenAid Stand Mixer
Buy Now →