
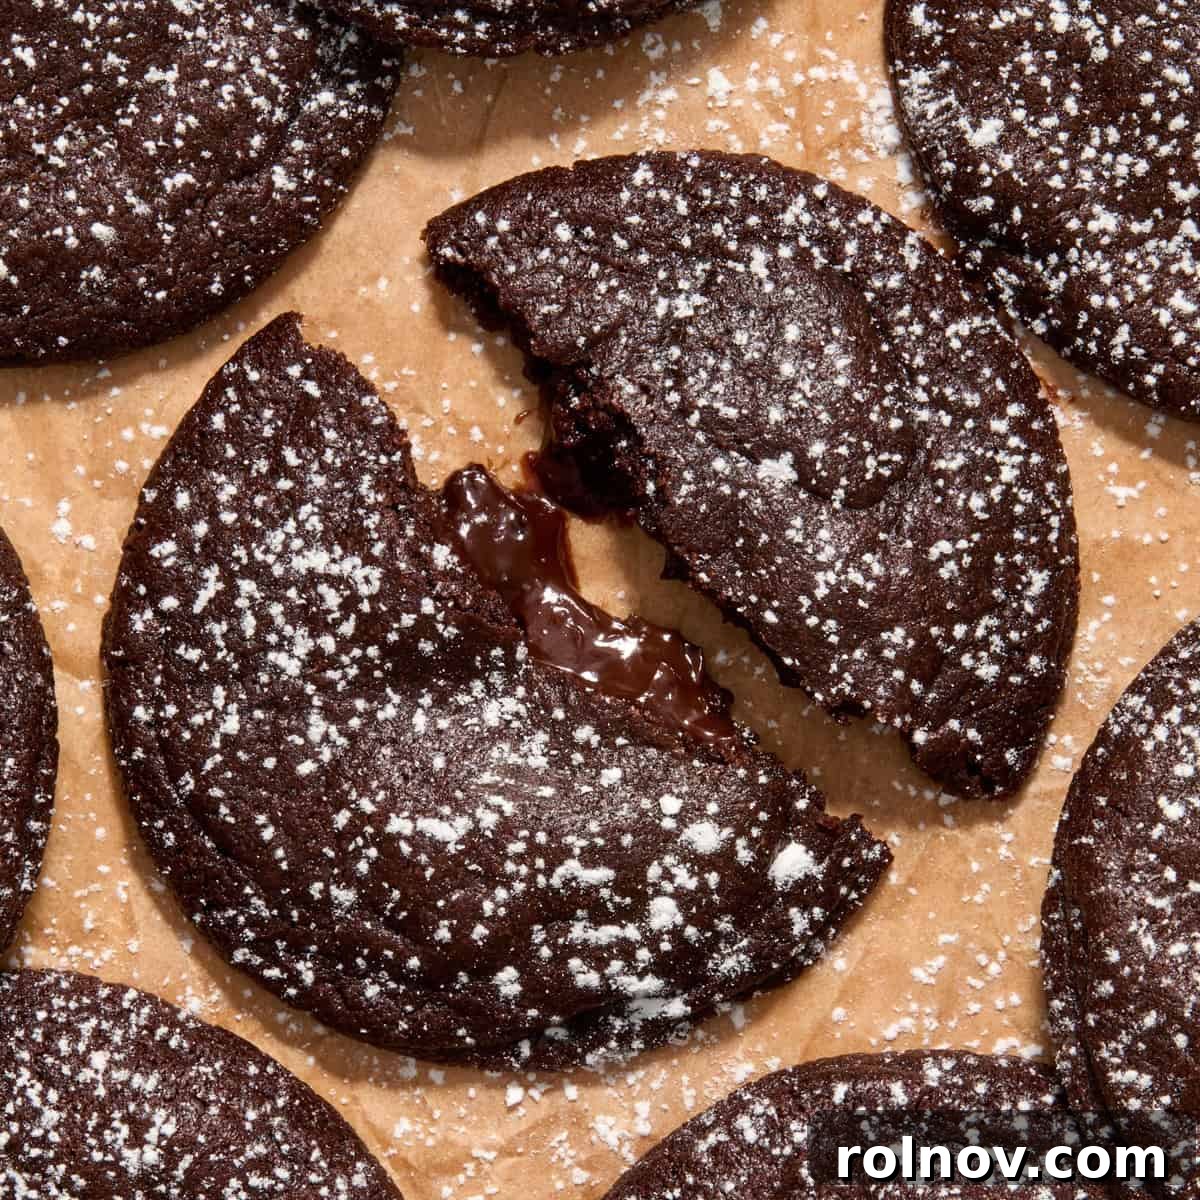
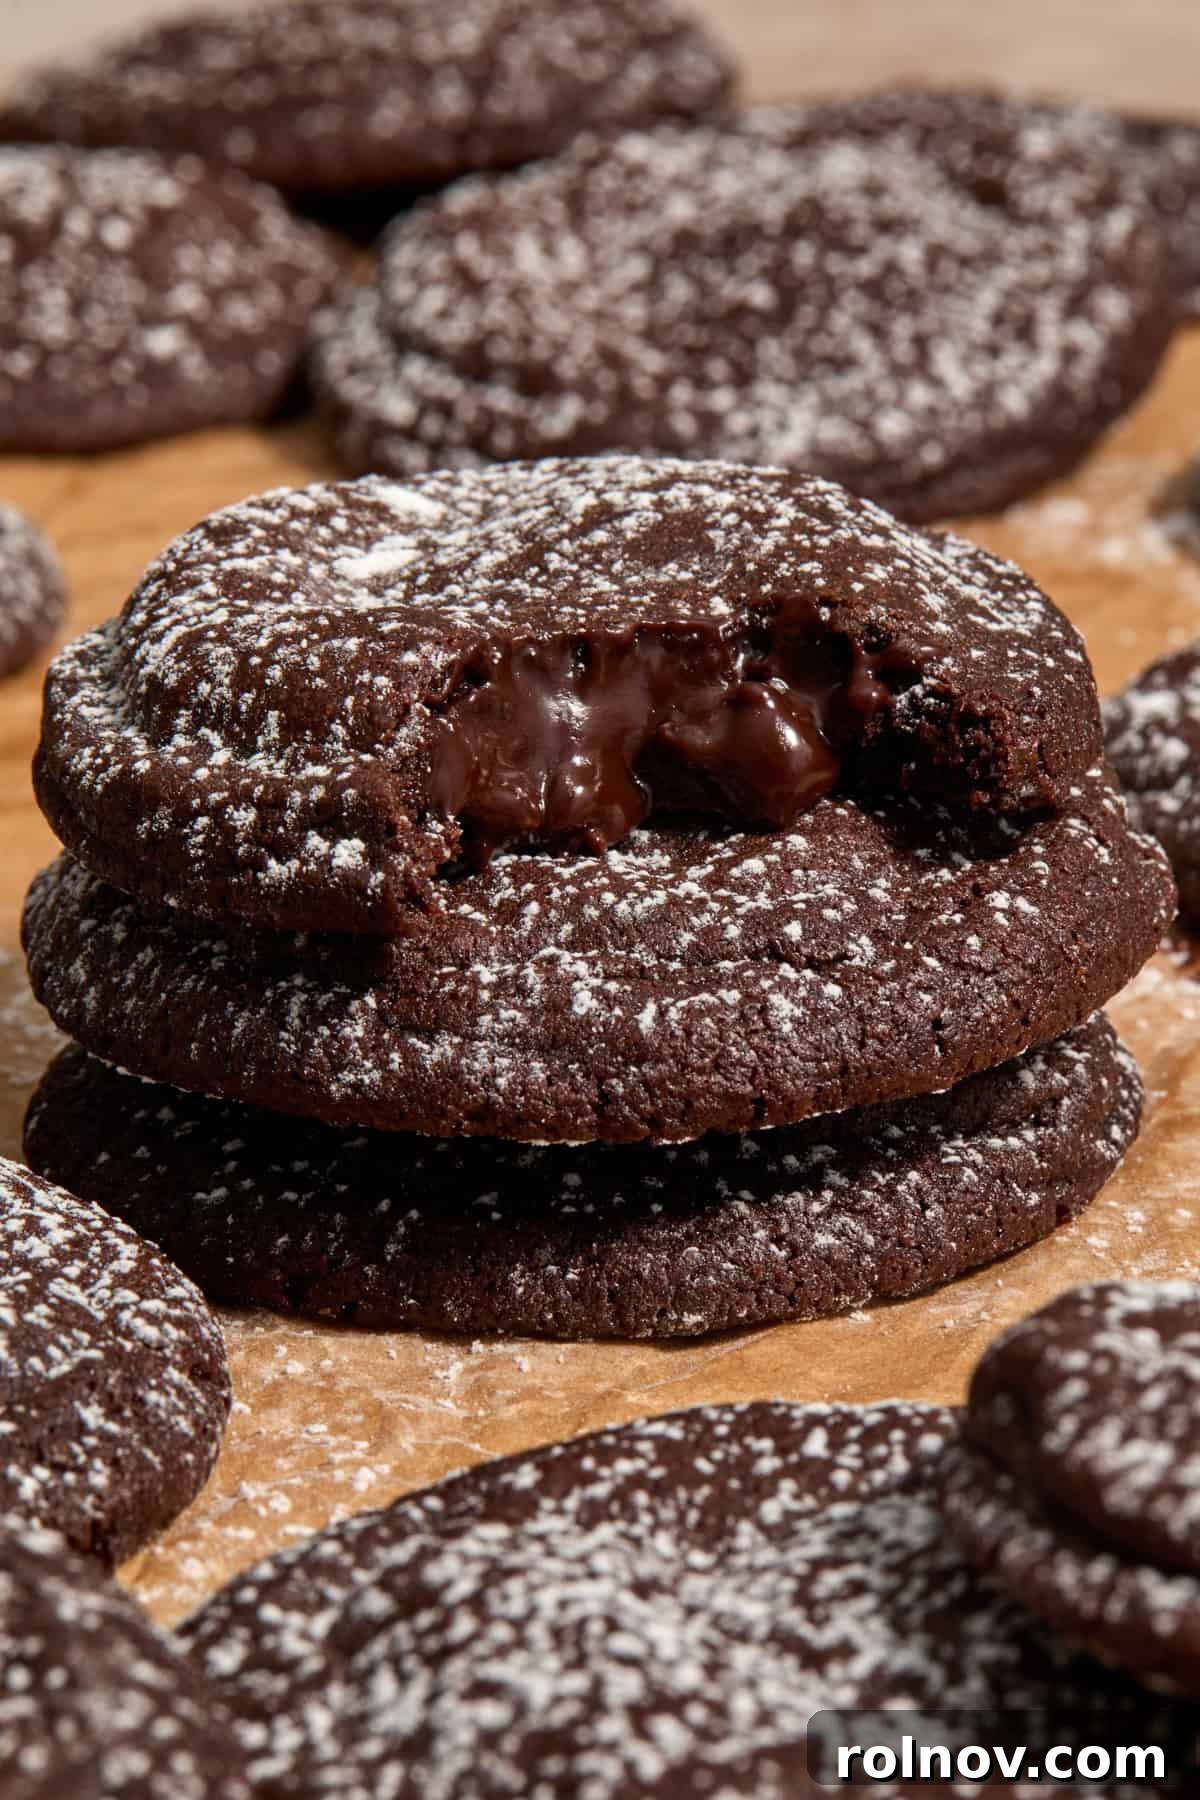
Indulge in the ultimate chocolate experience with these utterly irresistible chocolate lava cookies! A delightful fusion of your favorite molten chocolate cake and a soft, chewy cookie, this recipe delivers a rich, gooey center that will captivate every chocolate lover. Forget chilling dough – these simple yet spectacular cookies are designed for quick enjoyment, making them a perfect treat for any occasion. Each bite promises an explosion of deep chocolate flavor and a luxurious, warm, molten core that’s truly unforgettable.

If you’ve ever dreamt of combining the intense richness of a classic chocolate lava cake with the convenience and chewiness of a cookie, then these fudgy chocolate lava cookies are your dream come true. Imagine biting into a perfectly baked chocolate cookie, only to discover a warm, silky-smooth molten chocolate ganache flowing from its heart. It’s an experience that elevates the humble cookie to an extraordinary dessert, making every single bite a pure moment of chocolate bliss.
For those who adore innovative cookie creations, you might also love exploring other unique recipes like Cosmic Brownie Cookies, Brownie Crinkle Cookies, or these festive Peppermint Mocha Cookies. And if you’re seeking a departure from traditional cookies, give these delightful Frosted Sugar Cookie Bars a try for a different kind of sweet satisfaction!
Why These Chocolate Lava Cookies Are Simply Irresistible

My passion for chocolate cookies has been undeniable lately. Over the recent holidays, I found myself immersed in a chocolate cookie frenzy, leading to the creation and sharing of six brand-new chocolate cookie recipes. Yes, you could say I’m completely obsessed! While these particular gooey chocolate lava cookies didn’t make it into that festive collection, they might just be the perfect centerpiece for upcoming celebrations, especially Valentine’s Day!
These magnificent chocolate lava cookies stand out for several reasons:
- Each cookie is an intensely rich and fudgy delight, housing a warm, luscious chocolate ganache center that melts in your mouth.
- While they involve a few more steps than your average cookie, the process remains incredibly simple and rewarding, making them accessible for home bakers of all skill levels.
- They are, without exaggeration, a chocolate lover’s ultimate dream come true – a truly decadent experience in every bite.
- For convenience, these cookies are remarkably freezer-friendly, allowing you to prepare them in advance or save some for a future chocolate craving.
I genuinely cannot wait for you to try these heavenly creations and experience the magic for yourself!
Essential Ingredient Notes for Perfect Chocolate Lava Cookies
Crafting the perfect chocolate lava cookie begins with understanding the role of each ingredient. Below are some crucial tips to ensure your cookies turn out absolutely magnificent. For a complete list of ingredients and precise measurements, please refer to the detailed recipe card further down.
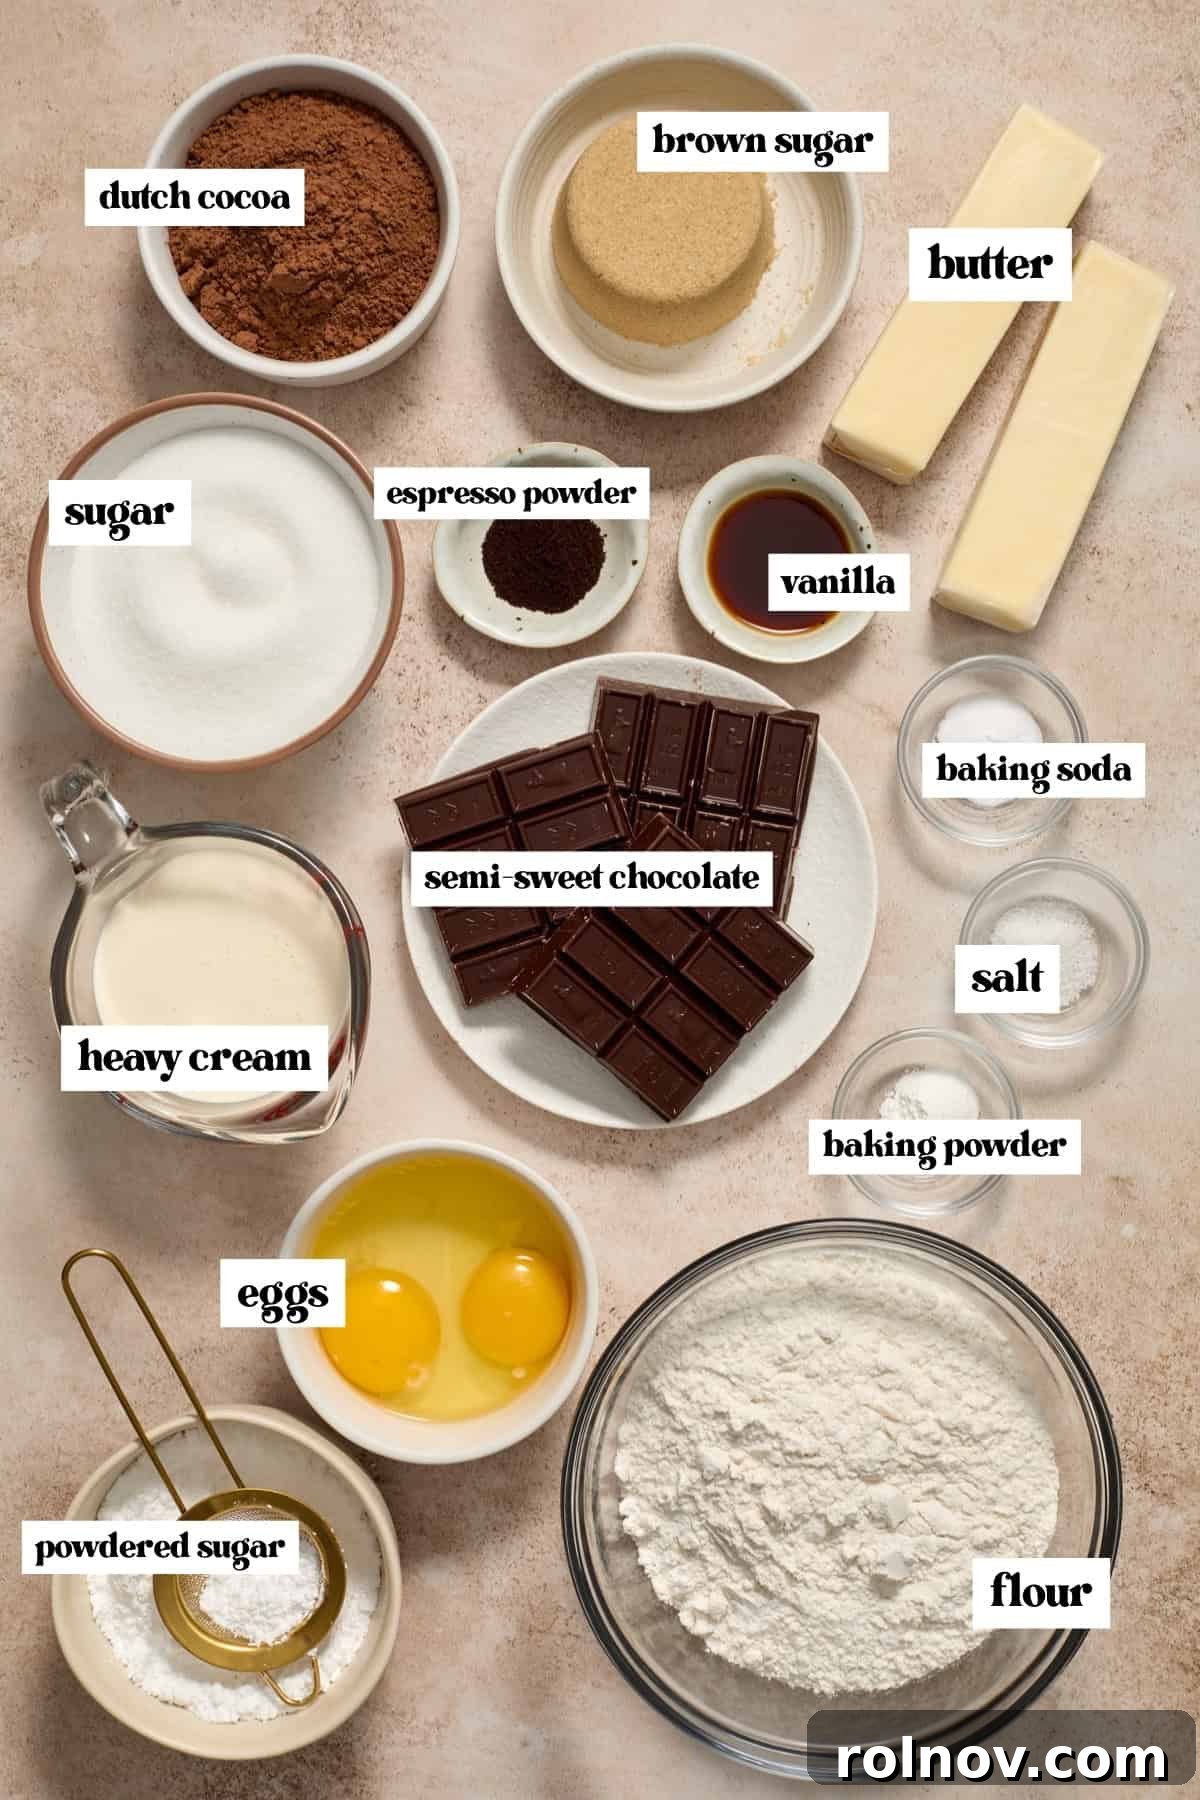
- Dutch-Processed Cocoa Powder: The Secret to Deep Color and Flavor. For the richest color and most intense chocolate flavor, I strongly recommend using Dutch-processed cocoa powder over natural cocoa powder. Dutch-processed cocoa has been treated to reduce its acidity, resulting in a darker hue and a smoother, less bitter chocolate taste. This pH difference is crucial when combined with the baking soda and powder in this recipe, yielding a wonderfully chewy, fudgy, and dense cookie. While you can use regular cocoa powder, be aware that the cookies may have a lighter color and a slightly different texture.
- Espresso Powder: A Flavor Intensifier. Though optional, espresso powder is truly a game-changer in any chocolate baked good. It doesn’t make your cookies taste like coffee; instead, it amplifies the natural chocolate flavor, making it taste even more profound and complex. If you have it on hand, I highly suggest including it for an elevated chocolate experience.
- High-Quality Chocolate for Ganache: The Heart of the Cookie. The ganache filling is the star of these lava cookies, so using a high-quality chocolate is paramount for the best results. I personally favor Ghirardelli baking chocolate for its superior melt and rich flavor. Keep an eye out for sales to get premium chocolate at a good value. While chocolate chips can work in a pinch, baking bars or wafers generally produce a silkier, more luxurious ganache.
- Room Temperature Butter and Eggs: For Optimal Texture. Ensure your butter and eggs are at true room temperature. This allows them to cream together properly with the sugars, creating an emulsified batter that traps air, leading to light, airy, and evenly textured cookies. Butter should be firm enough to hold its shape but soft enough to leave a slight imprint when pressed.
Exciting Ways to Customize Your Lava Cookies
While these chocolate lava cookies are perfect as is, they also lend themselves beautifully to customization. Feel free to get creative and personalize them to your taste:
- Experiment with the Ganache Center: Don’t limit yourself to dark or semi-sweet chocolate. Try a milk chocolate ganache for a sweeter, creamier core, or a more intense dark chocolate for a sophisticated flavor profile. For a nutty twist, you could even substitute the chocolate ganache with a generous dollop of Nutella or a homemade hazelnut spread.
- A Hint of Salt: A delicate sprinkle of flaky sea salt over the top of the baked cookies enhances the chocolate’s depth and provides a delightful contrast in flavor. It’s a simple touch that makes a big impact.
- Add Flavor Extracts: Introduce a touch of almond extract to the cookie dough for a subtle, aromatic note that complements the chocolate beautifully. You could also try a hint of orange zest or a few drops of peppermint extract for a seasonal variation.
- Mix-ins for Texture: Gently fold in some mini chocolate chips or chopped nuts (like pecans or walnuts) into the cookie dough for added texture and flavor dimension.
- A Festive Dusting: Beyond powdered sugar, consider drizzling the cooled cookies with melted white chocolate, milk chocolate, or even a vibrant colored icing for special occasions.
Step-By-Step Guide to Baking Chocolate Lava Cookies
Ready to bake these incredible cookies? Follow these detailed instructions for a smooth and enjoyable baking process. Precision in each step will ensure your chocolate lava cookies turn out perfectly gooey and delicious.
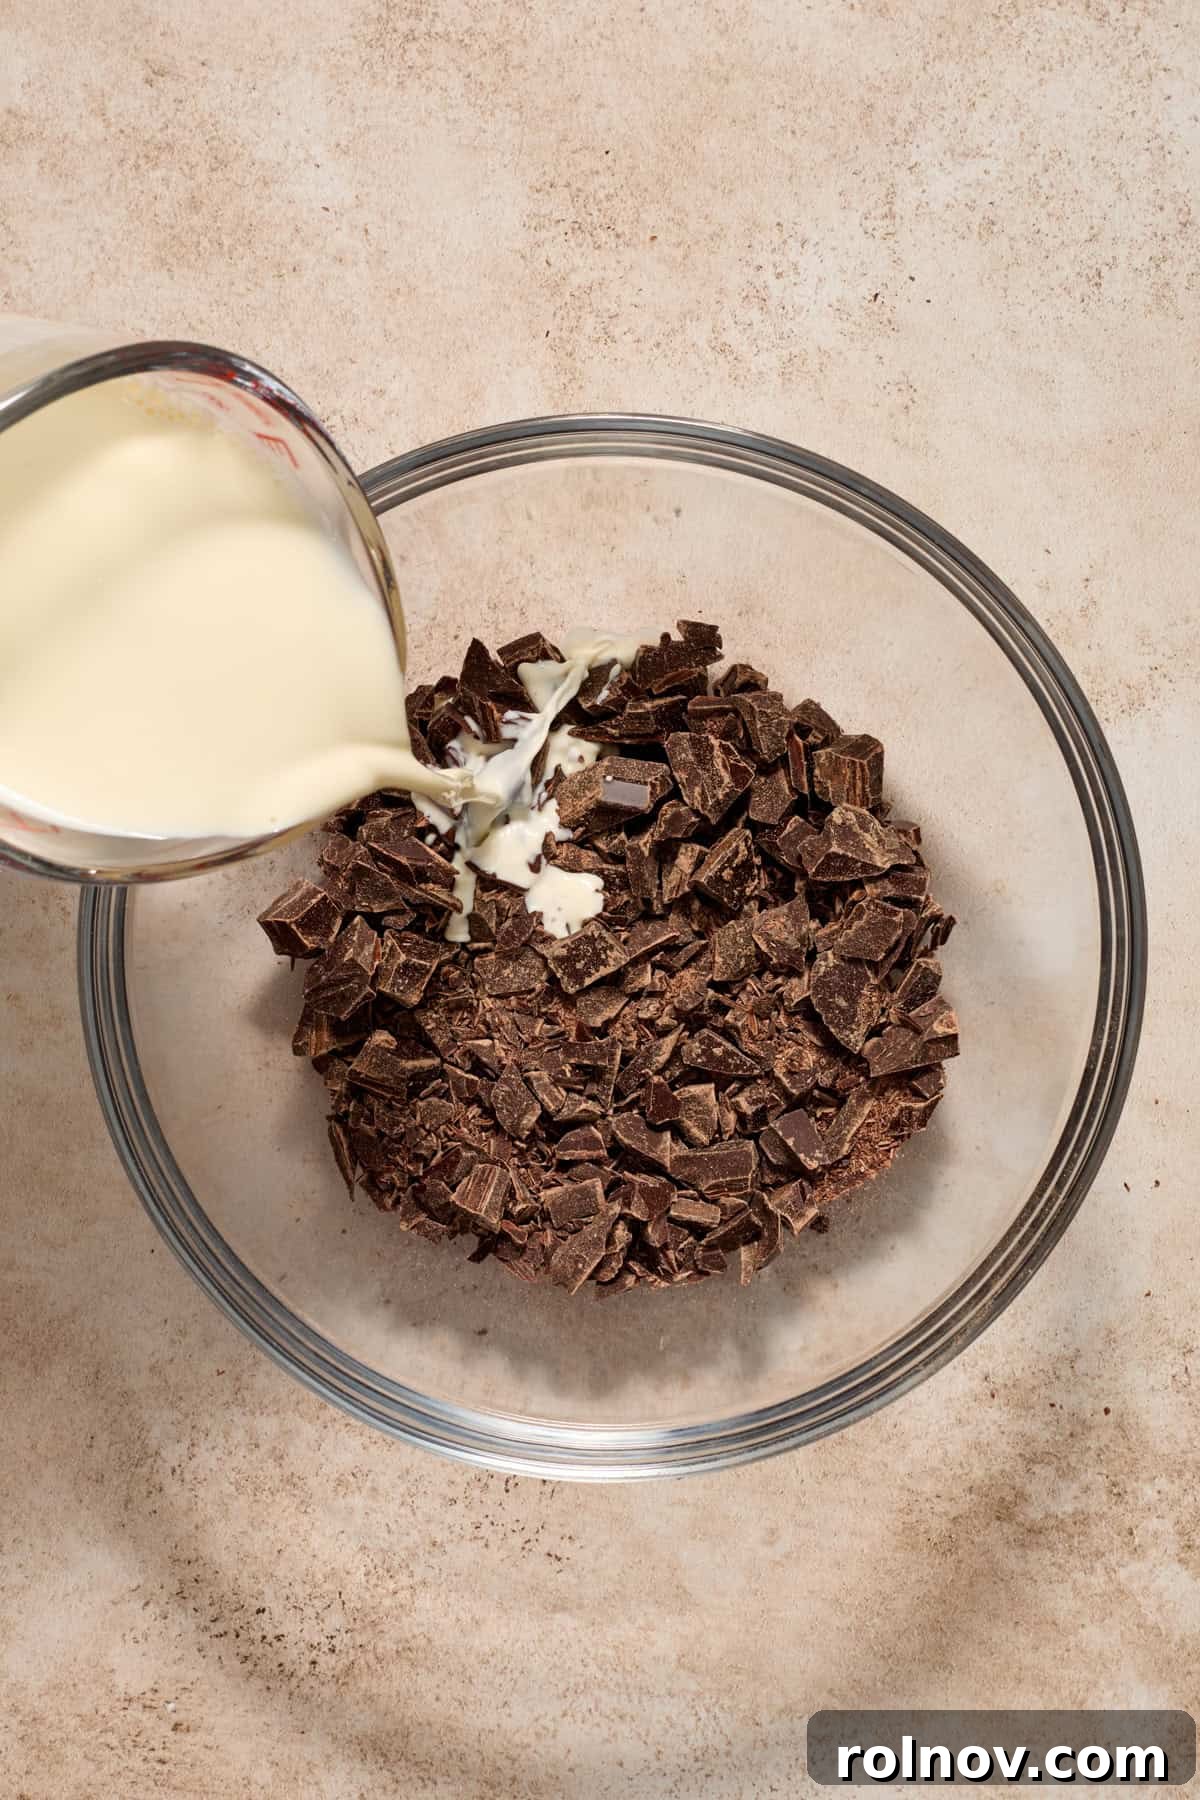
Step 1: Prepare the Ganache. Begin by finely chopping your chosen chocolate (dark or semi-sweet works wonderfully) into very small, uniform pieces. This ensures even melting. Place the chopped chocolate into a small, heatproof bowl. In a separate microwave-safe container, gently warm the heavy cream in 20-second intervals until it is hot but not boiling. Typically, 50-60 seconds in most microwaves is sufficient. Pour the hot cream directly over the chopped chocolate and let it sit undisturbed for a few minutes. This allows the residual heat from the cream to begin melting the chocolate.
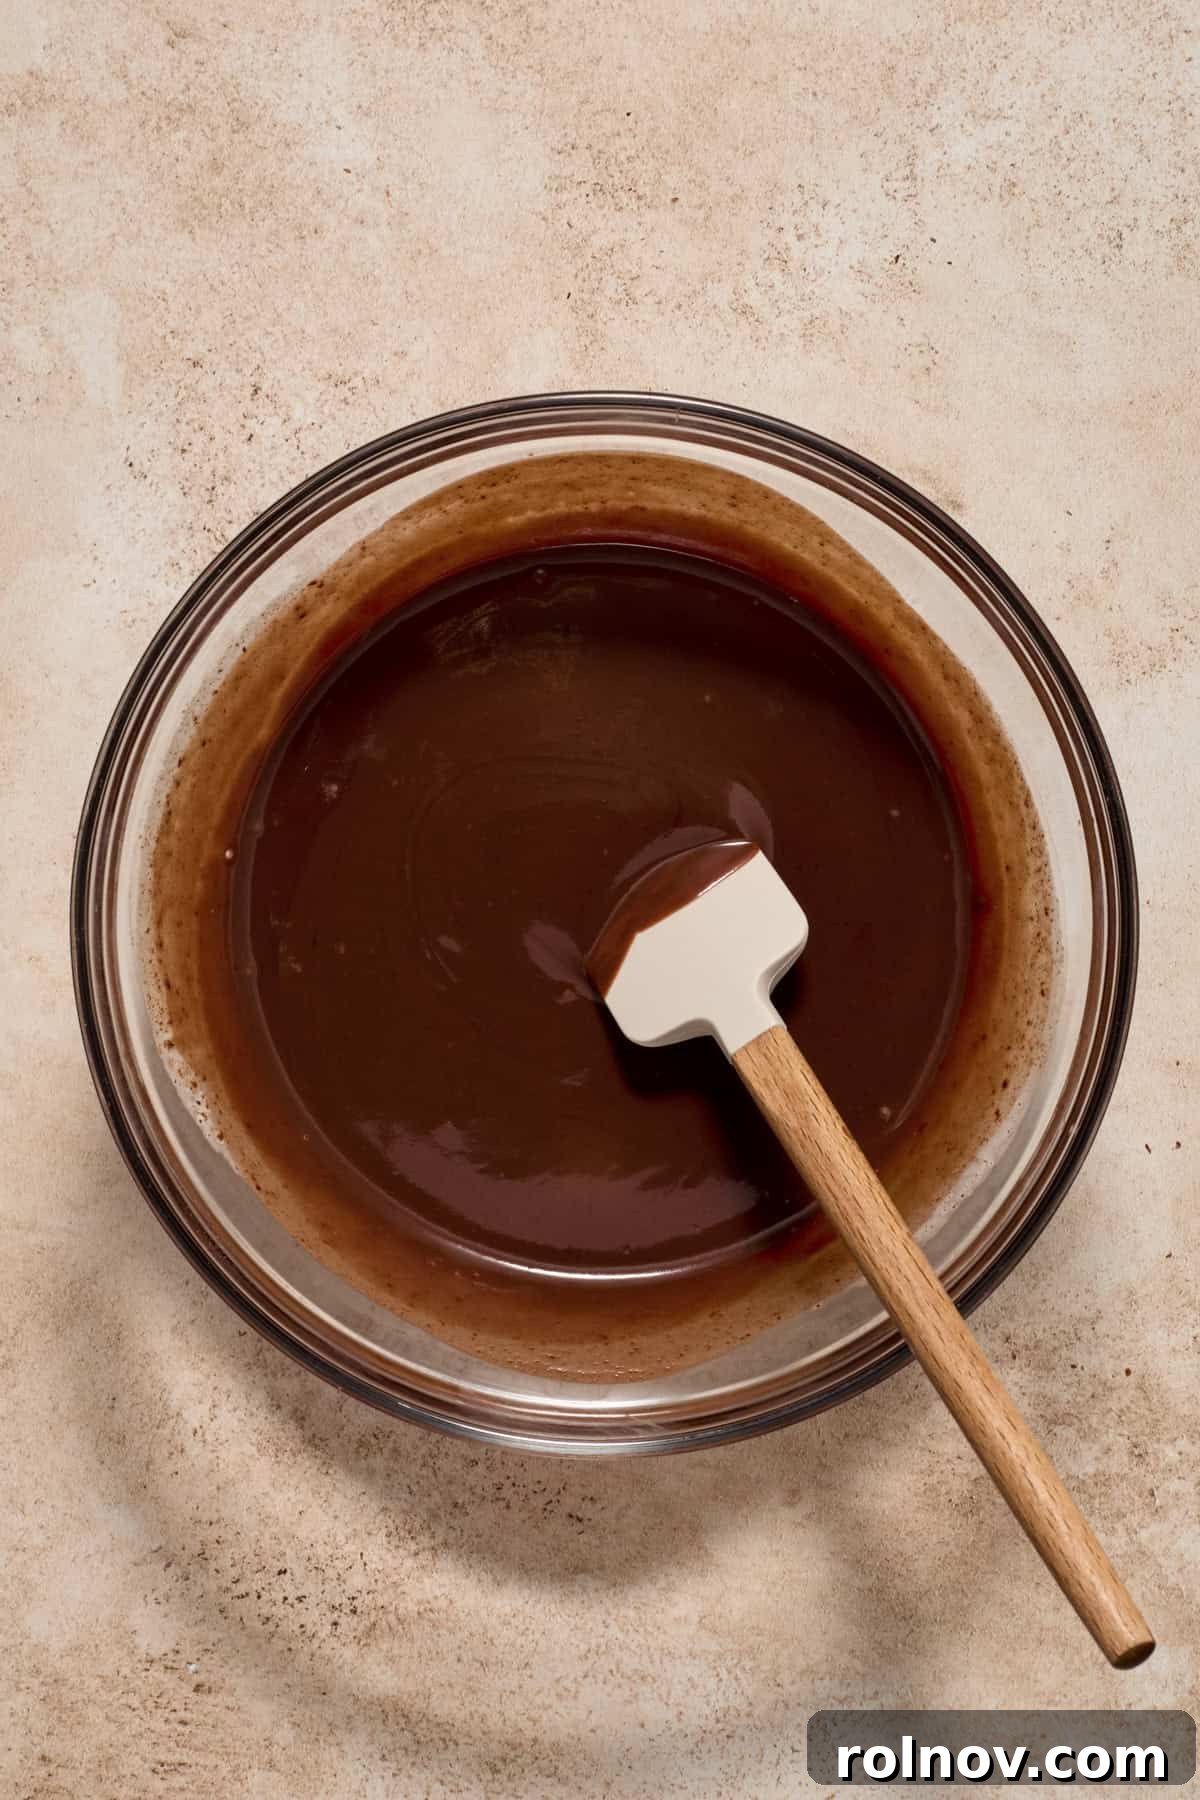
Step 2: Finish and Chill the Ganache. After the chocolate has rested in the hot cream, stir the mixture gently but continuously until all the chocolate has melted and you achieve a perfectly smooth, glossy ganache. If any small chocolate pieces remain unmelted, pop the bowl back into the microwave for an additional 5-10 seconds, then stir again until completely smooth. Once the ganache is ready, place the bowl in the refrigerator for approximately 20-30 minutes. This chilling time is essential to allow the ganache to firm up just enough so it can be scooped and handled.
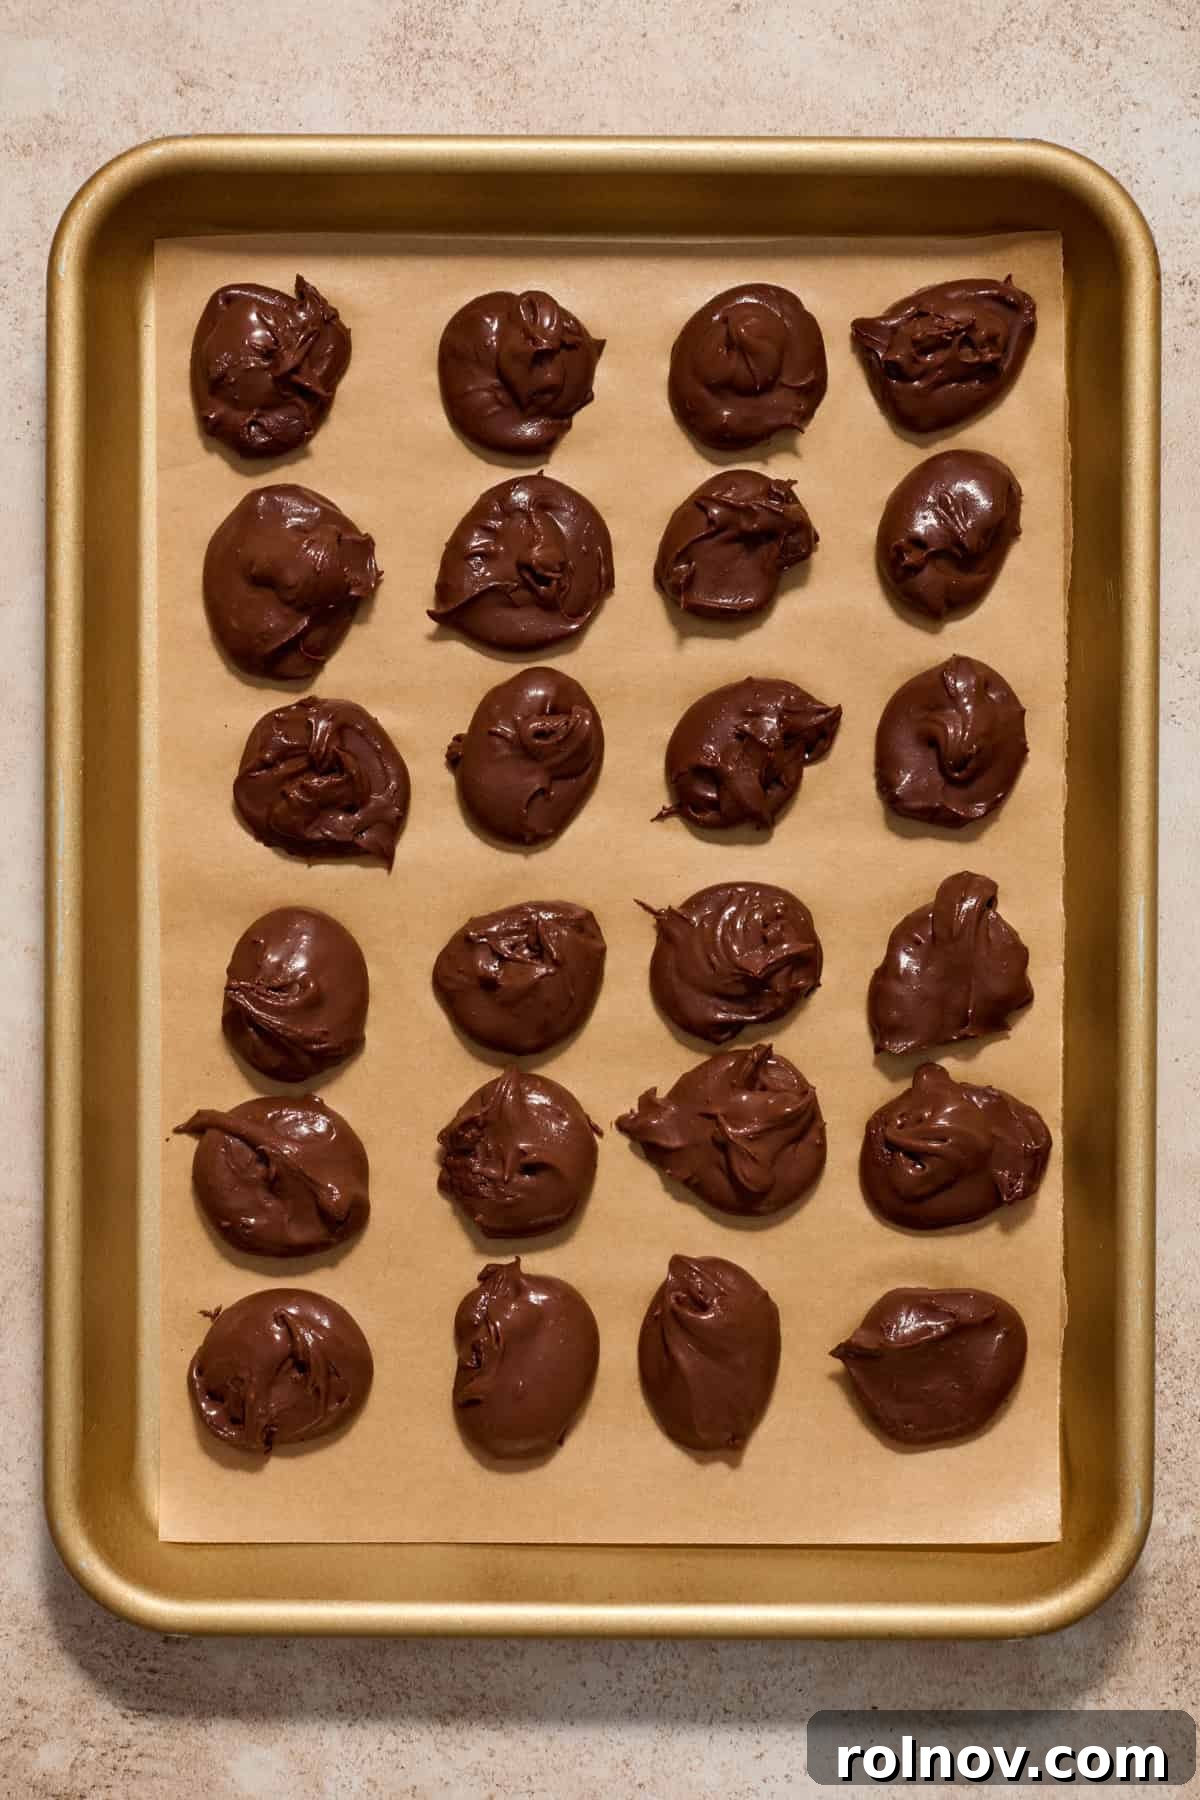
Step 3: Freeze Ganache Portions. Once the ganache has sufficiently chilled and is firm enough to scoop, use a small spoon (about 1 teaspoon in size) to portion out approximately 24 equal small dollops of ganache onto a baking pan lined with parchment paper. These don’t need to be perfectly round at this stage. Transfer the pan to the freezer for at least 30 minutes. Freezing them solid will make them much easier to work with when stuffing into the cookie dough. If you prefer, once they are firm, you can quickly roll them into neat balls, though this step isn’t strictly necessary.
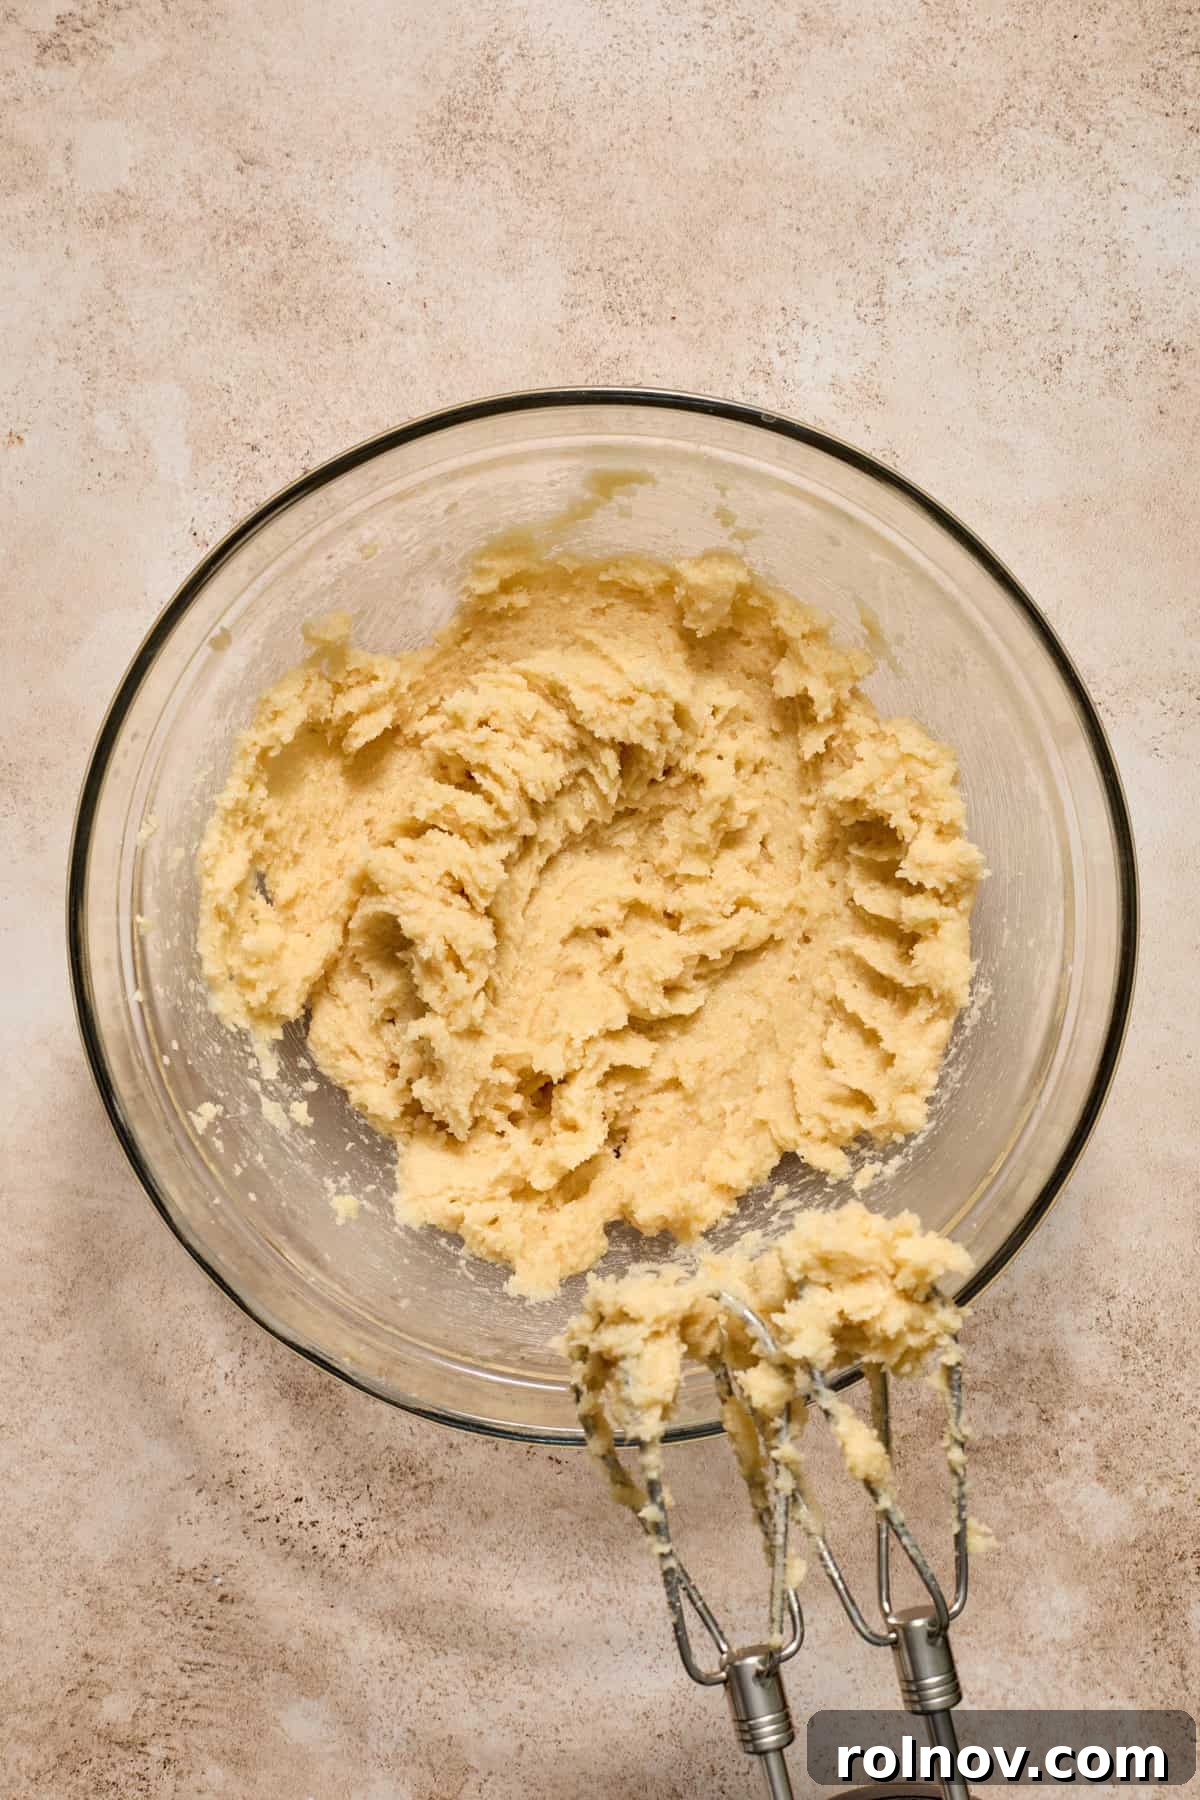
Step 4: Combine Dry and Cream Wet Ingredients. While the ganache is freezing, prepare your cookie dough. In a medium bowl, whisk together the flour, espresso powder (if using), Dutch-processed cocoa powder, salt, baking soda, and baking powder until well combined. In a separate large bowl, or the bowl of a stand mixer fitted with the paddle attachment, beat the room temperature butter, light brown sugar, and granulated white sugar on medium-high speed. Cream this mixture until it’s light, fluffy, and pale in color, which should take about 3-4 minutes. Scrape down the sides of the bowl as needed.
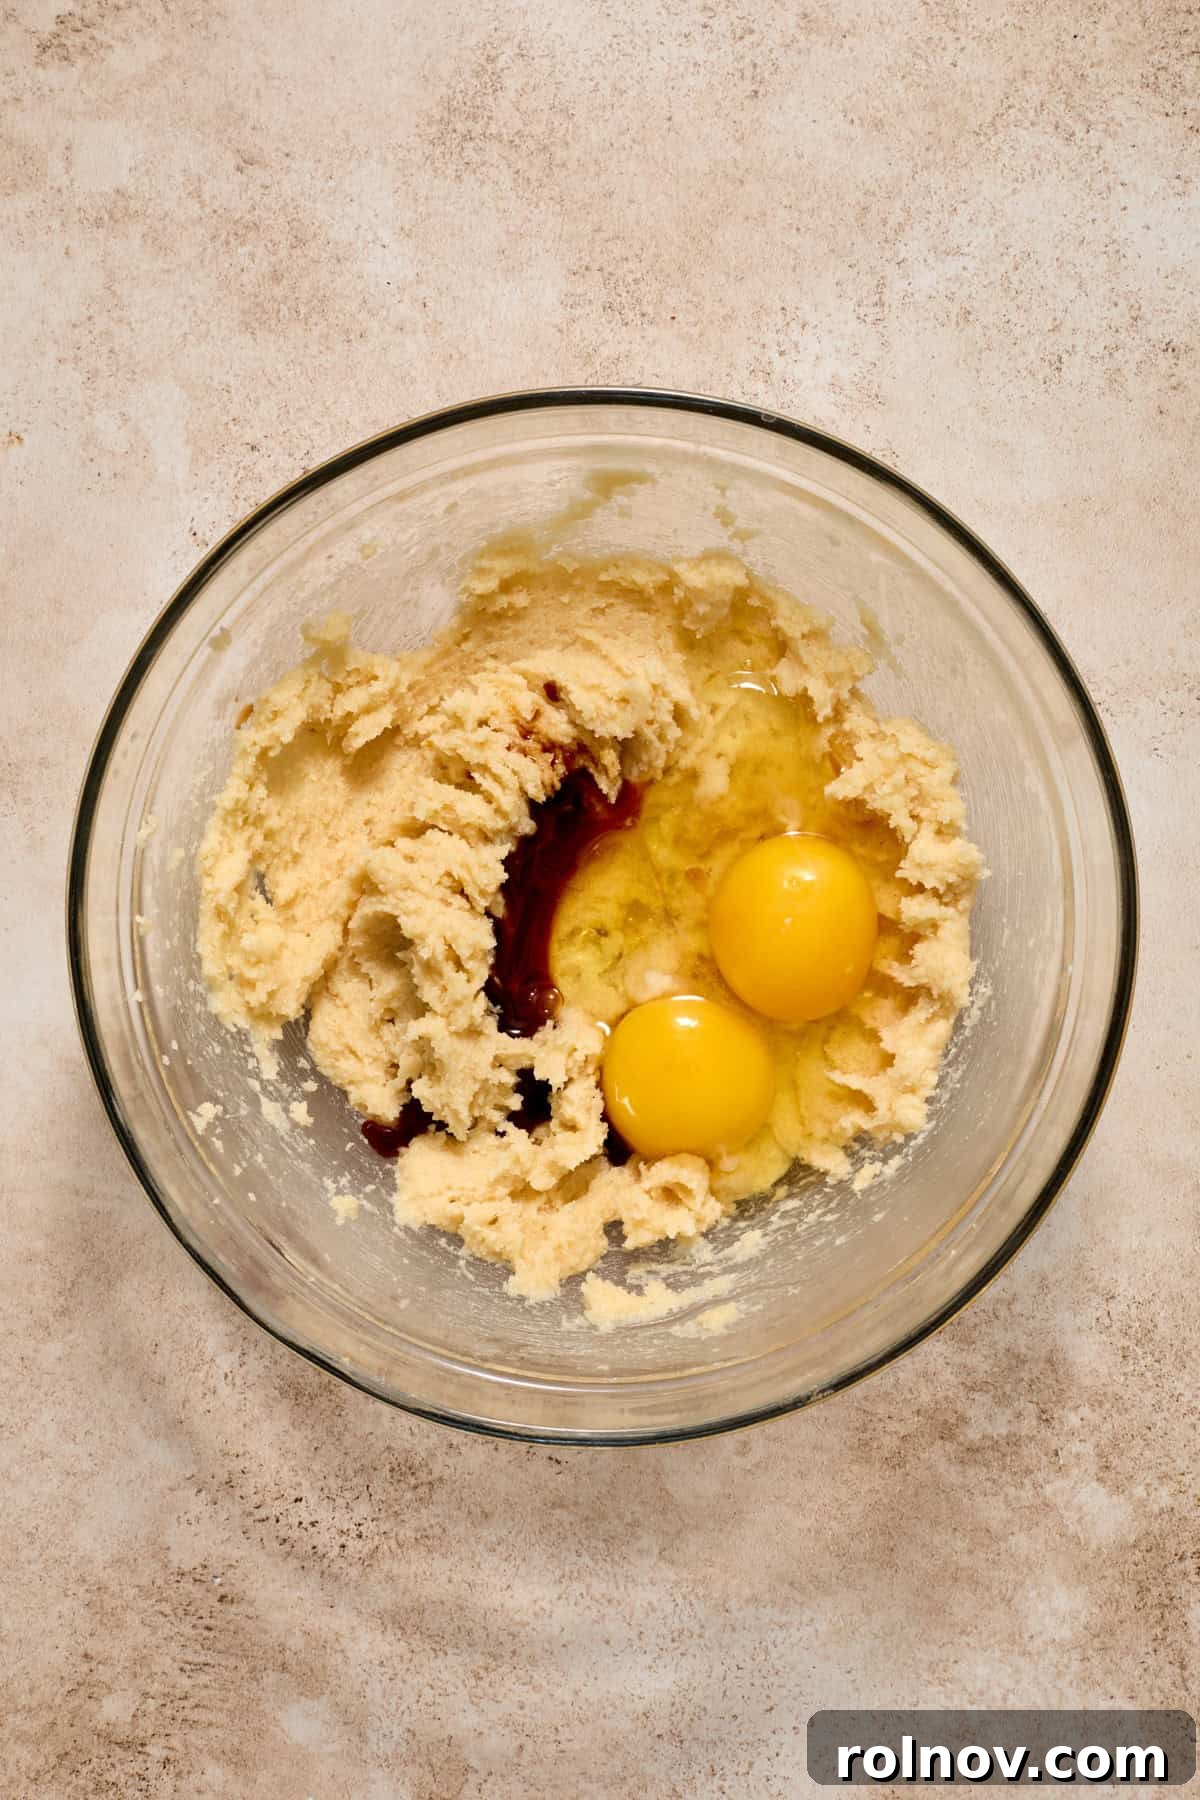
Step 5: Incorporate Eggs and Vanilla. Once the butter and sugars are perfectly creamed, add the two large room temperature eggs, one at a time, beating well after each addition until fully incorporated. Then, stir in the vanilla extract, mixing until just combined. Ensure the mixture remains light and fluffy; overmixing at this stage can lead to tougher cookies.
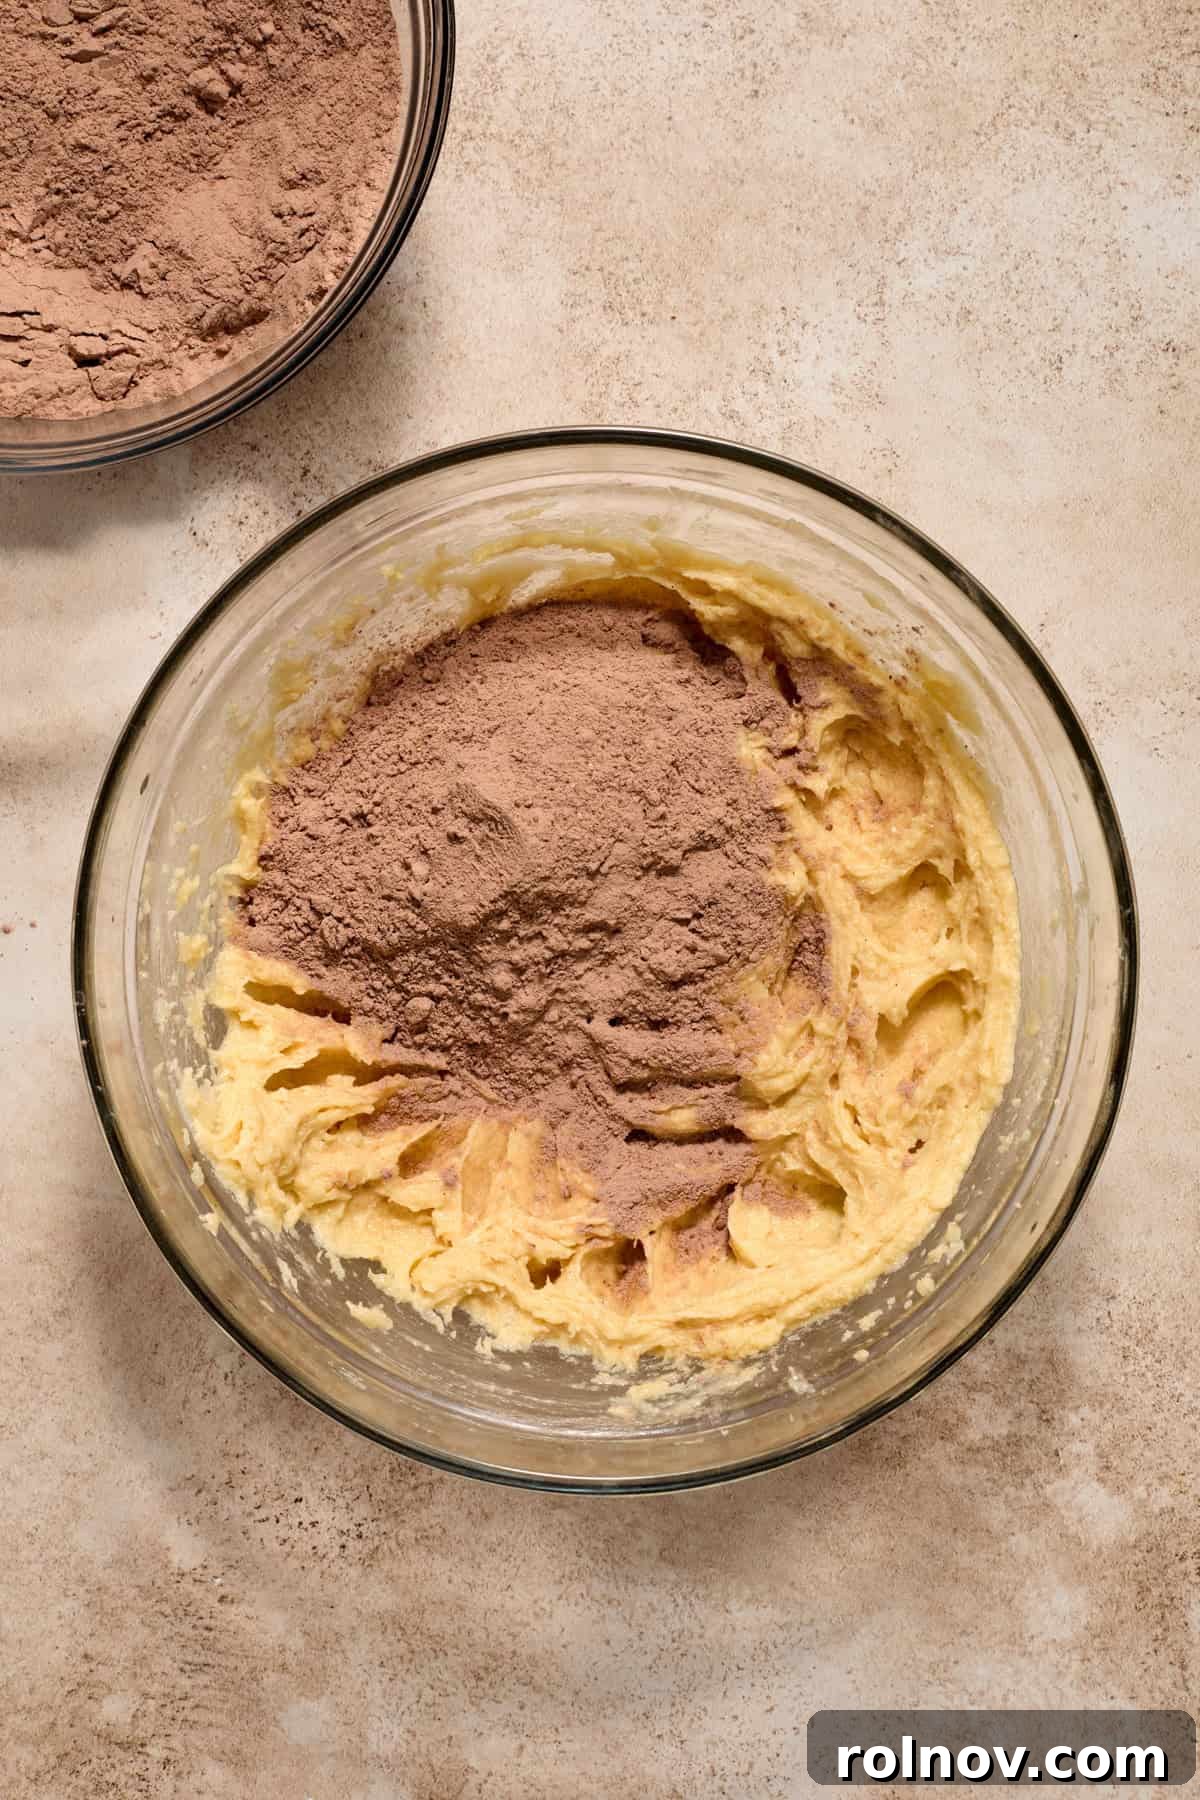
Step 6: Add Dry Ingredients. Gradually add the whisked dry ingredients to the wet mixture. Do this in three separate additions, beating on low speed only until just combined after each addition. It’s crucial not to overmix the dough at this stage, as overworking the gluten in the flour can result in tough cookies. Stop mixing as soon as no streaks of flour are visible.
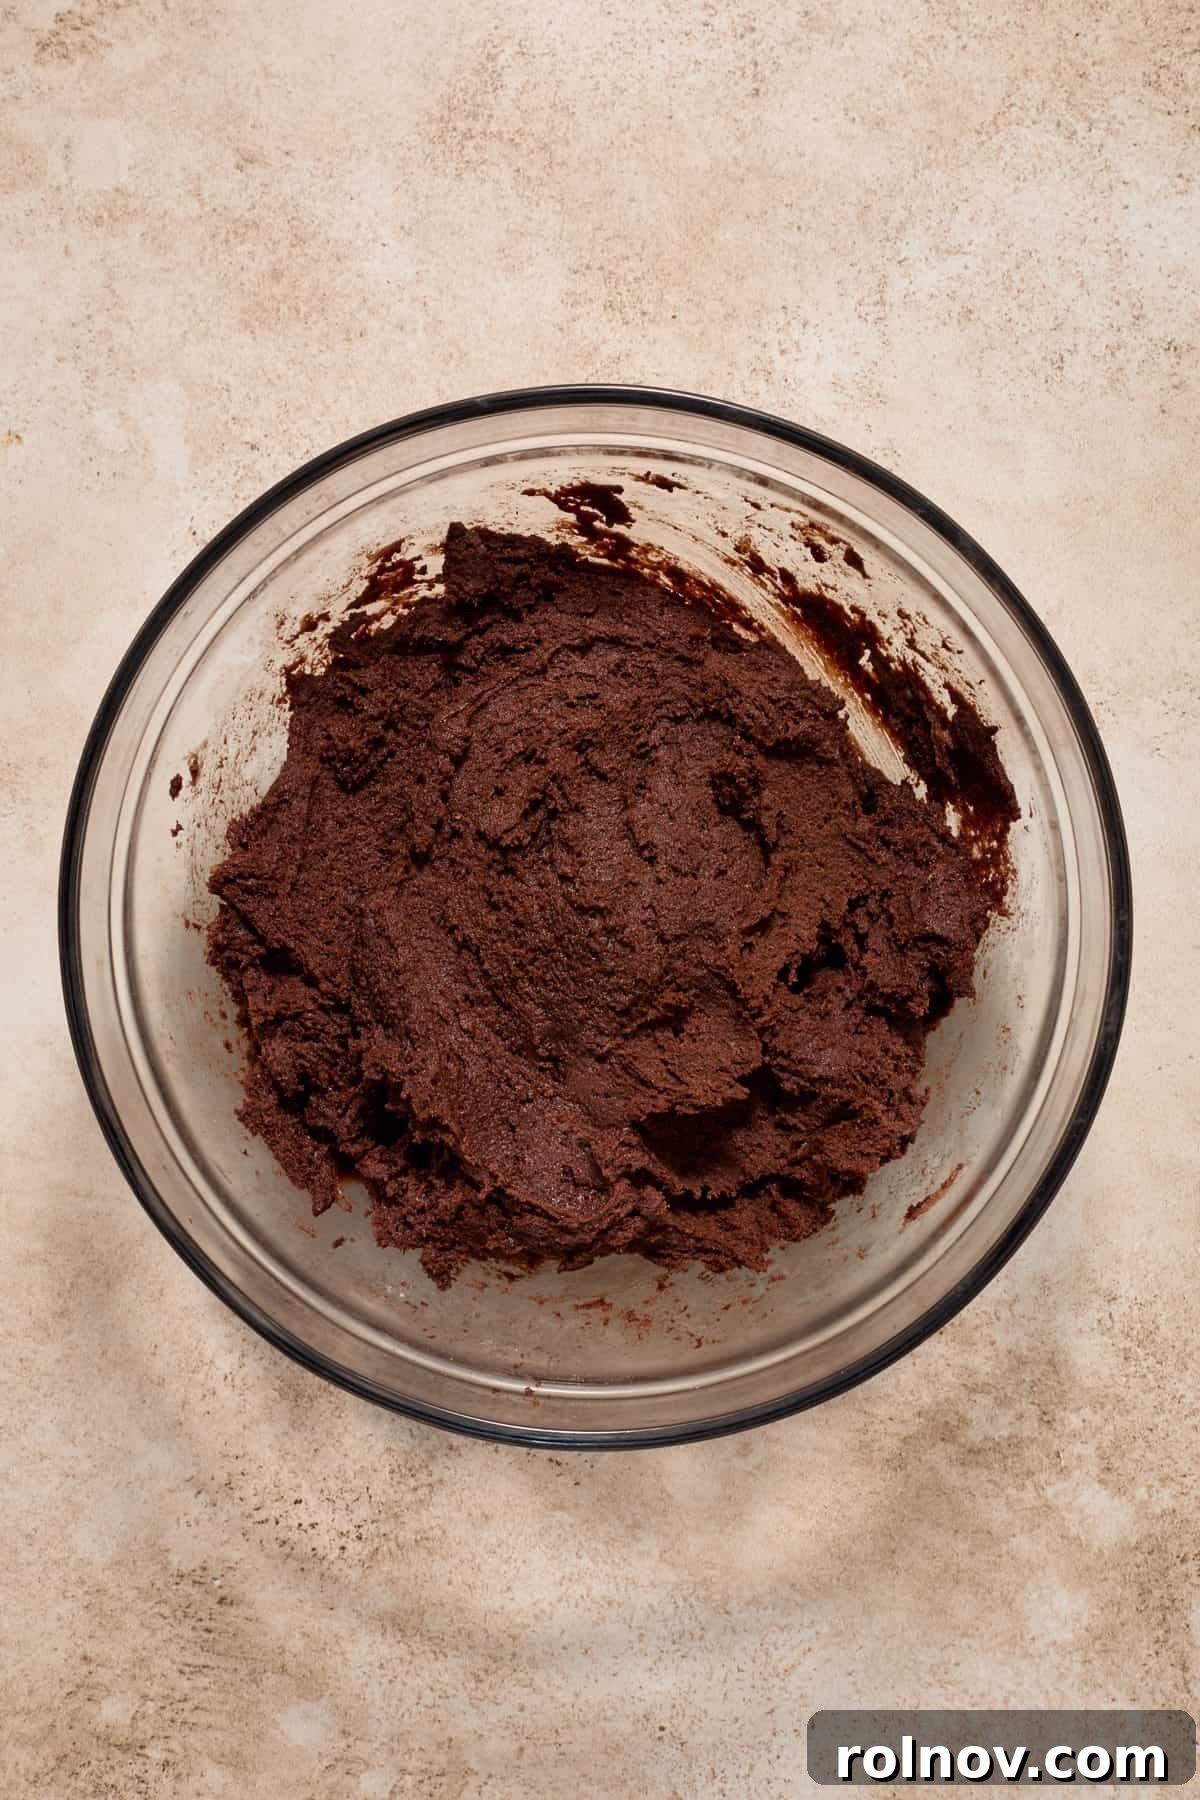
Step 7: Portion the Cookie Dough. The cookie dough will be a bit sticky, but it should be manageable and typically does not require chilling before assembly. Use a 2-tablespoon cookie scoop to portion out even amounts of cookie dough. Roll each portion gently between your palms to form smooth balls. Aim for consistency in size to ensure even baking. While you can make a small indentation now, the next step provides a more precise method for stuffing.
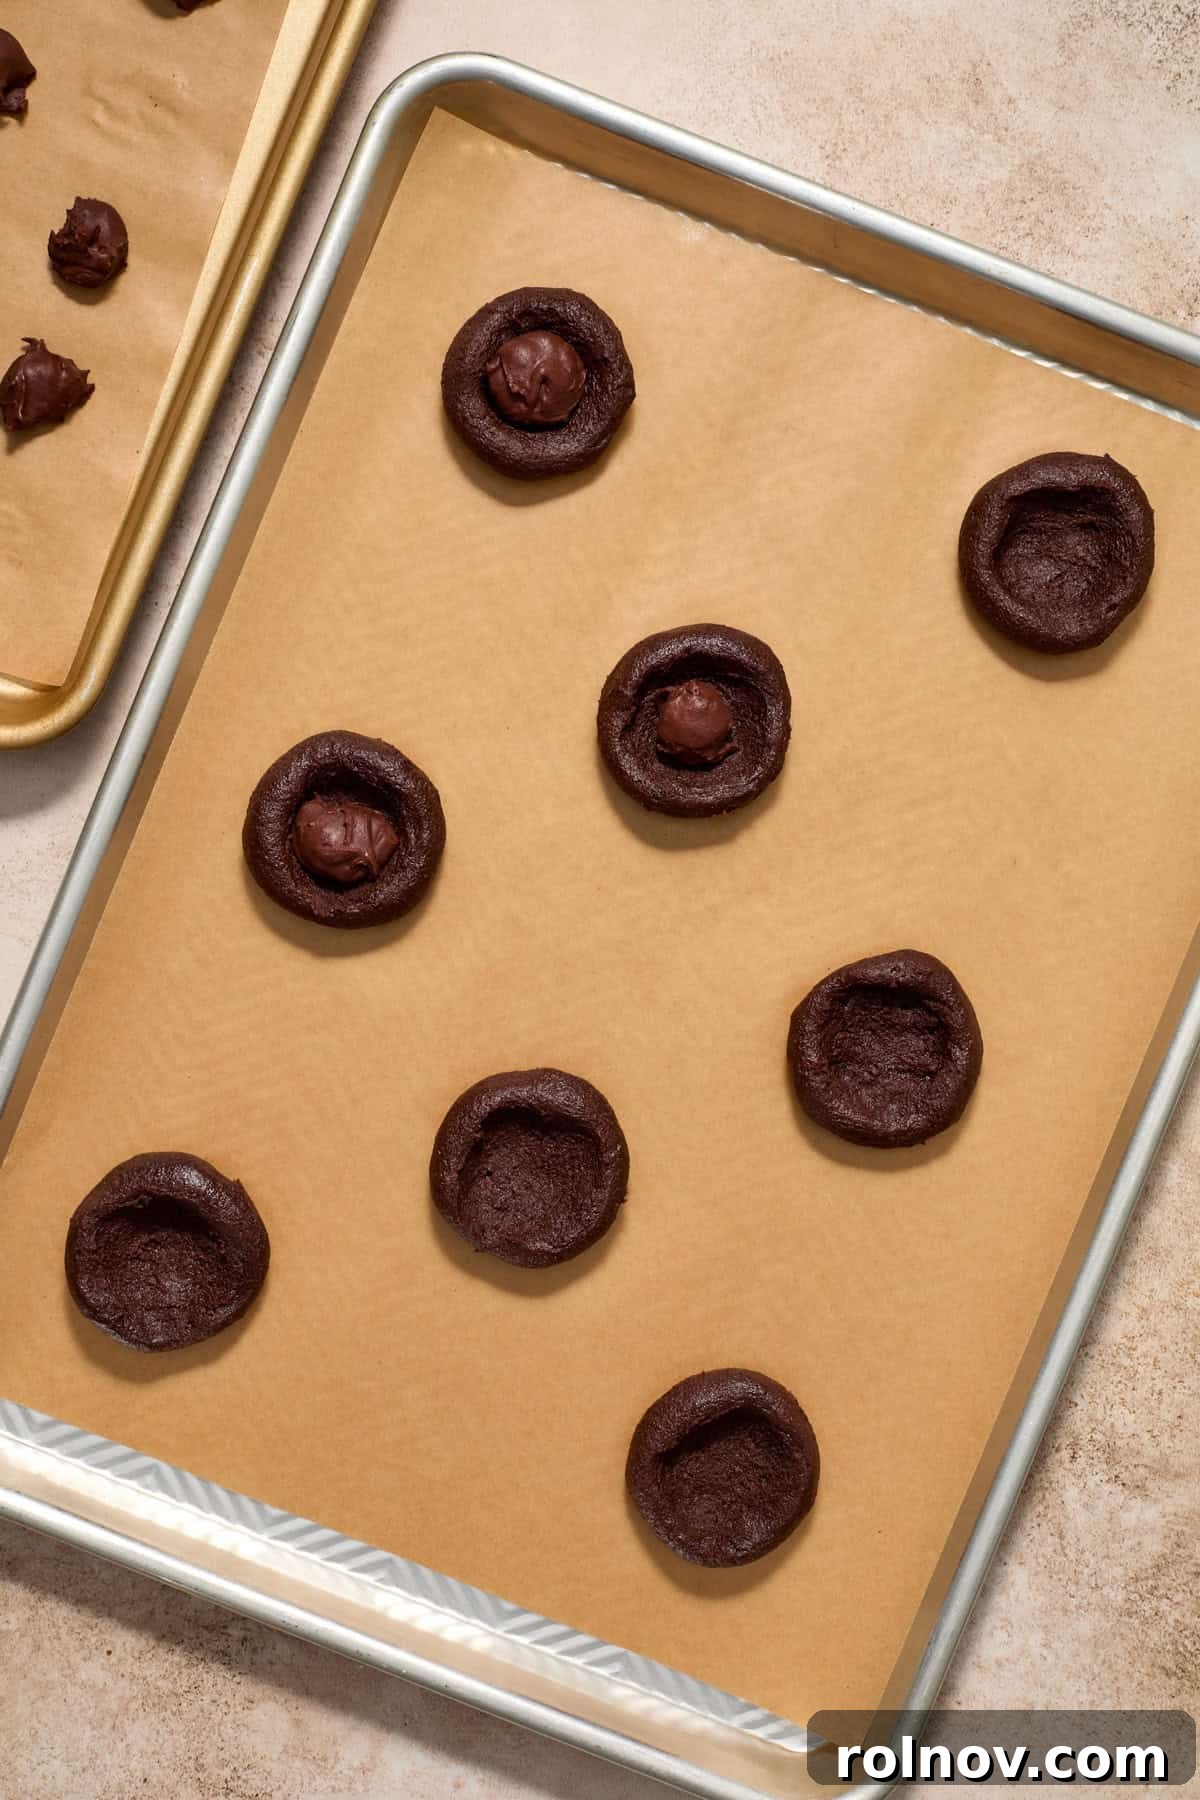
Step 8: Stuff with Ganache. Take one cookie dough ball and use your thumb to press a deep cavity into its center. Retrieve a frozen ganache piece from the freezer and carefully place it into this cavity. Gently, but firmly, mold the cookie dough around the ganache, ensuring it is completely sealed within the dough. No ganache should be visible. Reroll the stuffed dough into a smooth ball. Arrange the completed cookie dough balls on a baking pan lined with parchment paper, leaving enough space between them for spreading.
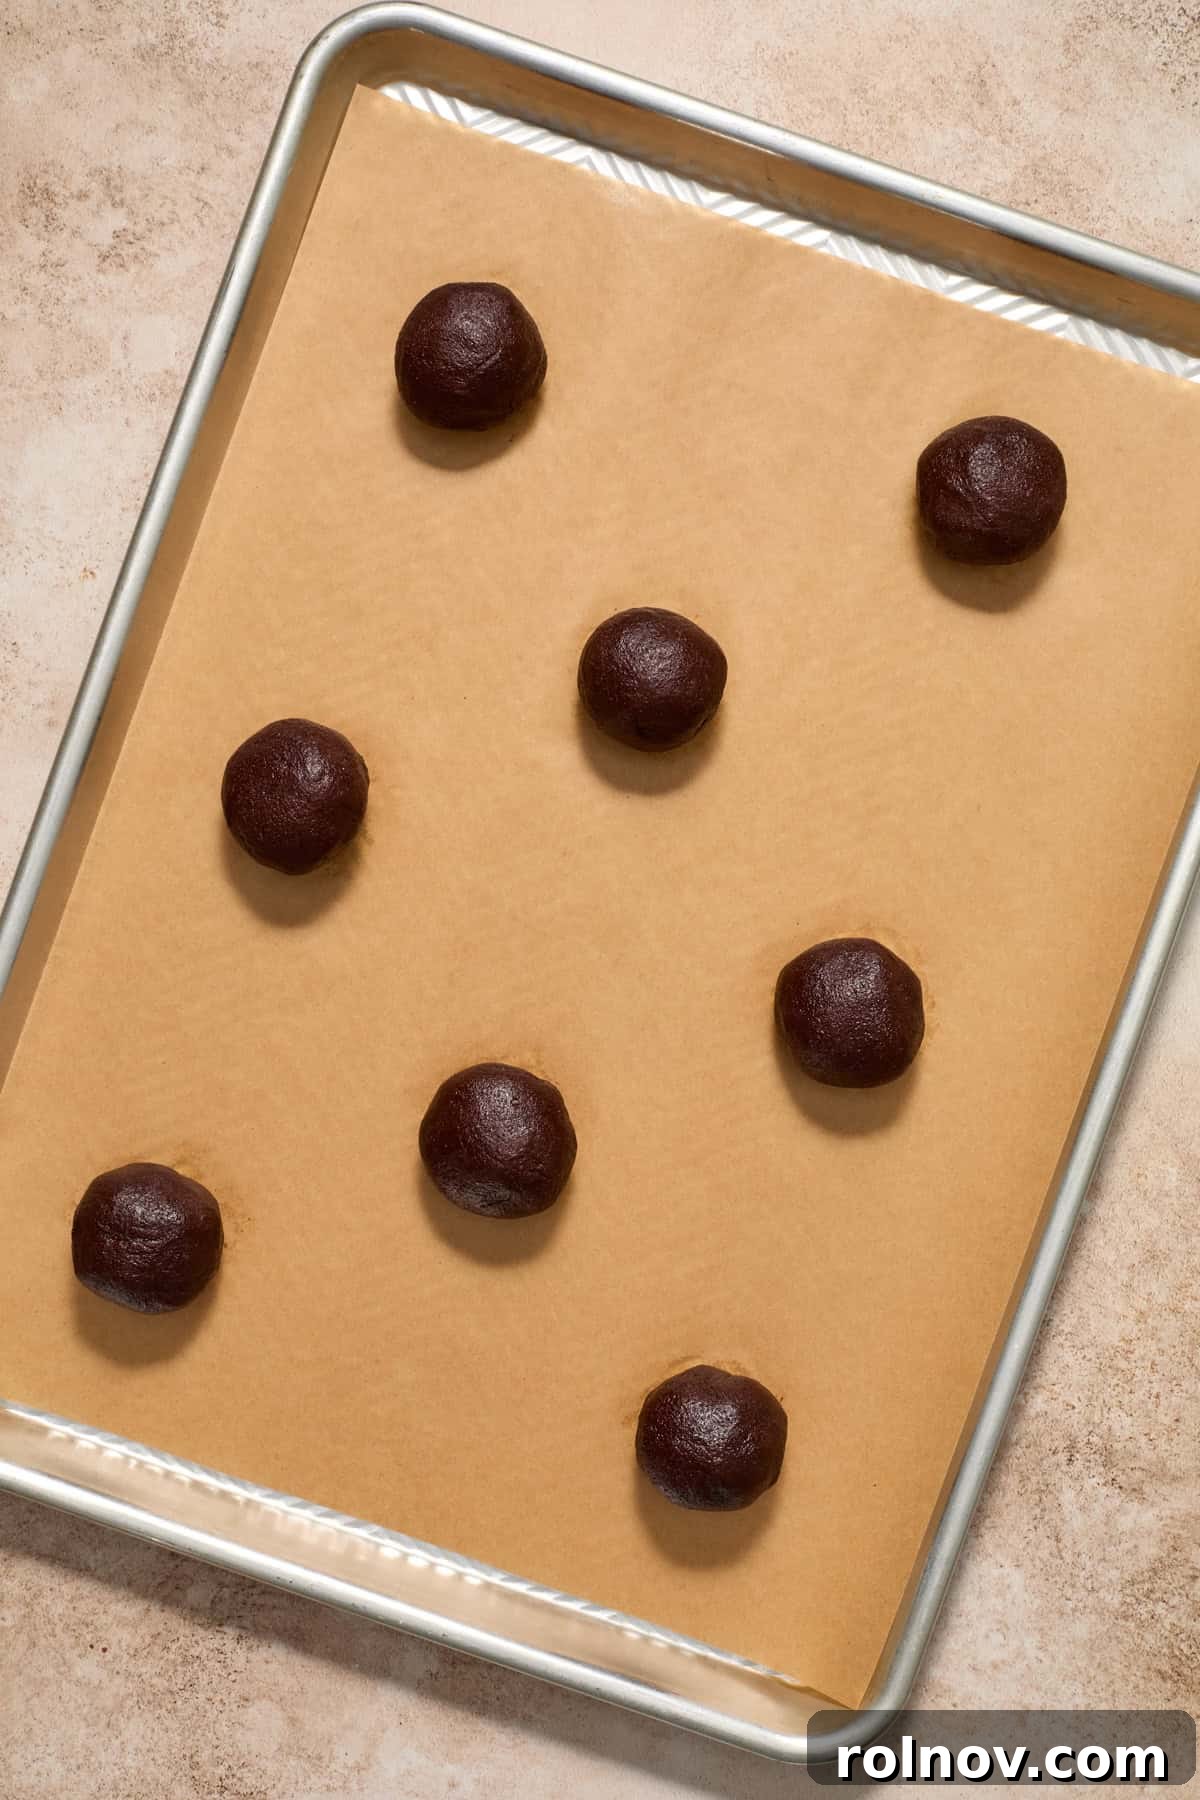
Step 9: Bake the Cookies. Preheat your oven to 350°F (175°C). Place the baking sheet with the prepared cookie dough balls into the preheated oven. Bake for approximately 8-11 minutes. The baking time can vary slightly depending on your oven. Look for edges that are just set and tops that appear slightly puffy but no longer wet or shiny in the center. Avoid overbaking if you want that signature gooey lava center.
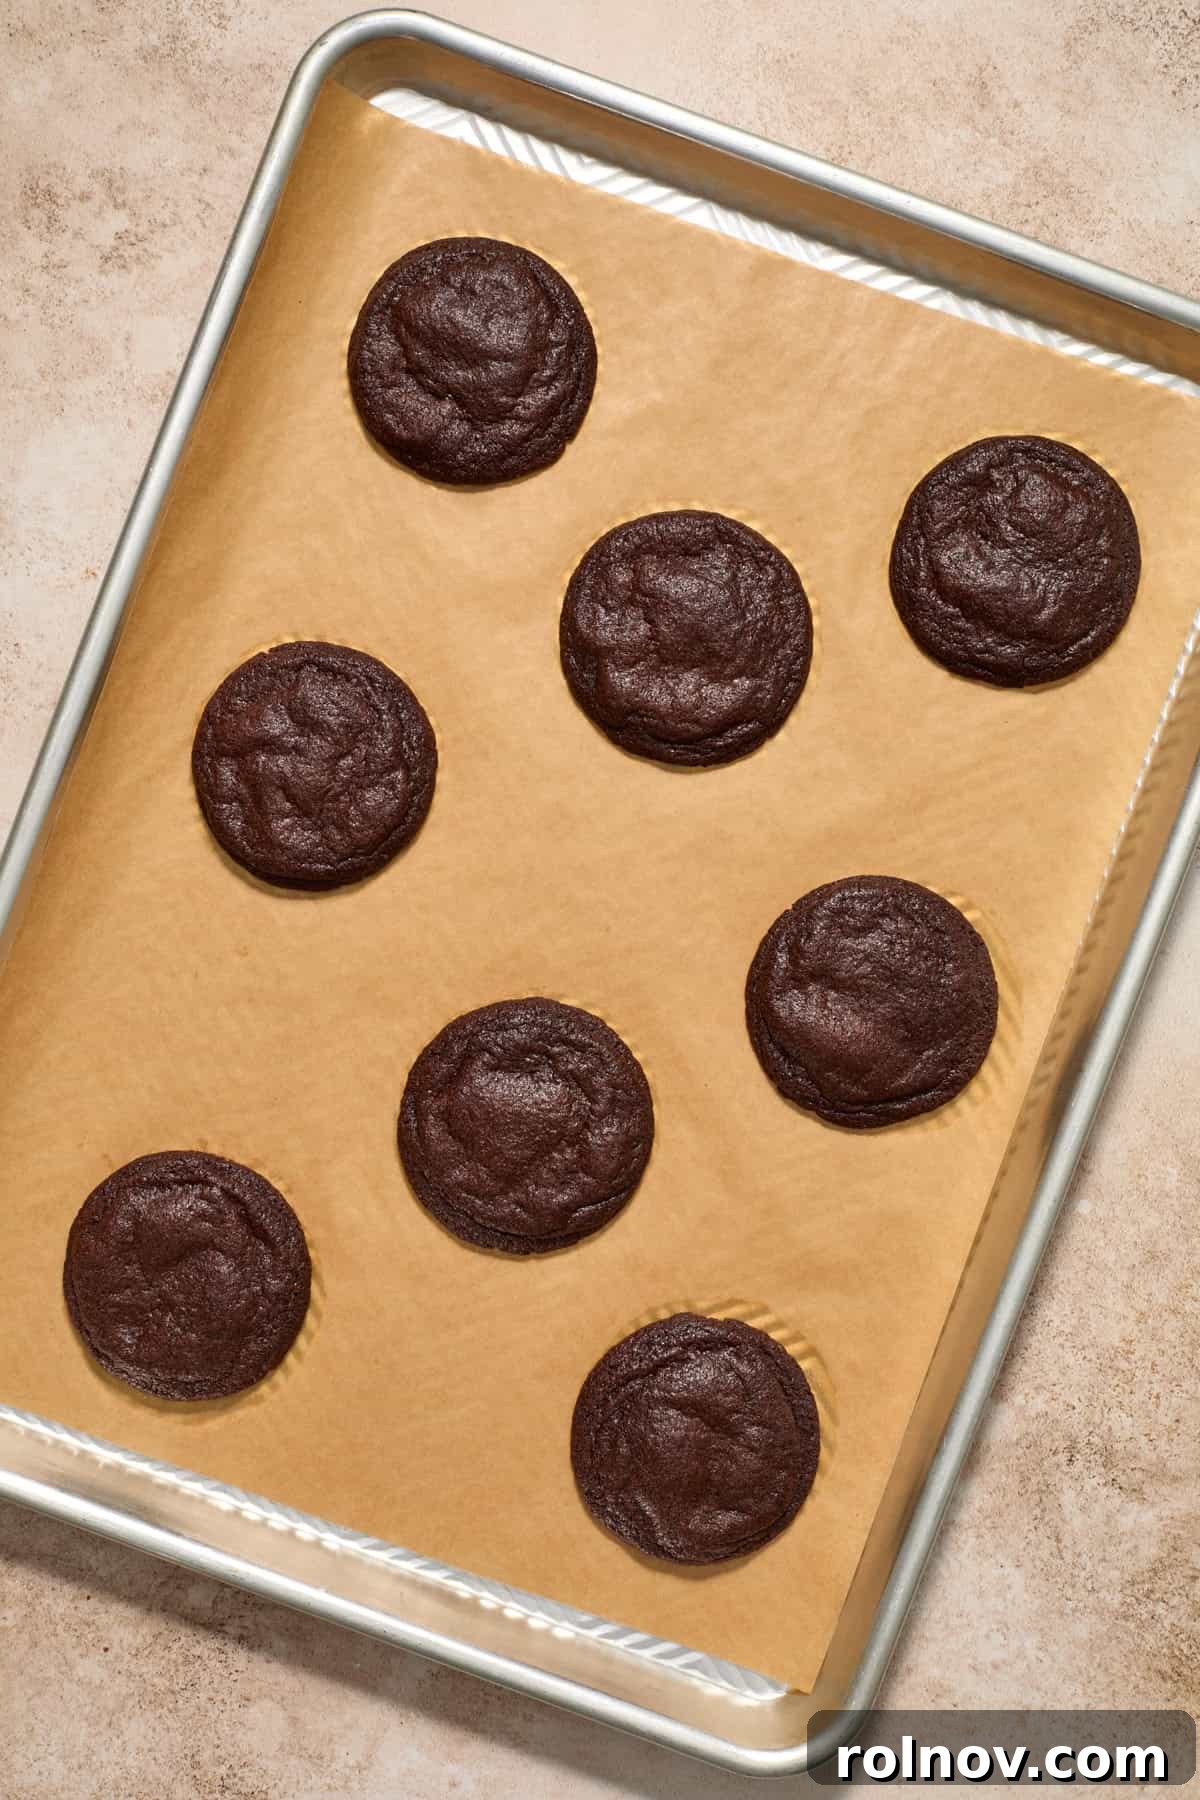
Step 10: Cool and Garnish. Once baked, remove the cookies from the oven. For perfectly round cookies, immediately use a biscuit cutter or a larger cookie cutter (one that’s slightly larger than your cookie) and gently scoot it around each warm cookie on the pan in a circular motion. This “cookie scooting” technique pushes the edges inward, creating beautifully uniform circles – it’s entirely optional but highly recommended for presentation! Allow the cookies to cool on the baking sheet for several minutes to set slightly before carefully transferring them to a wire rack to finish cooling completely. For that classic molten lava cake aesthetic, sift a light dusting of powdered sugar over the cooled cookies just before serving. You could also drizzle them with a bit of extra melted chocolate for added indulgence.
Expert Tips for Perfect Chocolate Lava Cookies
Achieving the perfect balance of chewy cookie and molten center requires a few key insights. Keep these expert tips in mind for consistently amazing results:
- Understanding Room Temperature Butter: “Room temperature” butter is often misunderstood. It should not be overly soft or greasy. True room temperature butter will still hold its shape when you press it and leave only a slight indentation. Aim for a temperature of around 65°F-67°F (18°C-19°C). I typically leave mine out on the counter for about an hour. Using butter that is too warm can lead to cookies that spread excessively and have a greasy texture.
- Center the Ganache: The placement of the chocolate ganache within the cookie dough is crucial. Ensure you completely enclose the frozen ganache piece in the center of the cookie dough ball. If the ganache is too close to the edge or bottom, it can leak out during baking, creating a messy pan and a less impressive “lava” effect. Take a moment to properly seal each one.
- Reheating for Extra Lava Flow: Even after cooling, the ganache centers of these cookies should remain soft and distinct in texture. However, for that truly fresh-out-of-the-oven molten experience, pop a cooled cookie into the microwave for about 5-10 seconds before eating. This will warm the ganache, making it wonderfully gooey and liquid.
- Serve with Ice Cream: For an ultimate dessert indulgence, serve these warm chocolate lava cookies with a scoop of vanilla bean ice cream. The contrast of warm, rich chocolate and cool, creamy ice cream is simply heavenly!
- Do Not Overmix: As with most cookie recipes, overmixing the dough after adding the flour can develop too much gluten, resulting in tougher cookies. Mix until just combined.
- Parchment Paper is Your Friend: Always use parchment paper on your baking sheets. It prevents sticking, ensures even baking, and makes cleanup a breeze.
Storage and Freezing Instructions
These chocolate lava cookies are so delicious, they might not last long! But if you manage to have leftovers, here’s how to store them to keep them fresh and delicious:
- Room Temperature Storage: Store the cooled cookies in an airtight container at room temperature. For best quality and to prevent them from sticking together, arrange them in a single layer or separate layers with parchment or wax paper. They will stay fresh and soft for about 3-4 days.
- Freezing Baked Cookies: These cookies freeze beautifully! Once they have completely cooled and the ganache has set, place them in a freezer-safe container. Again, a layer of parchment or wax paper between each cookie will prevent them from sticking. Freeze for up to 3 months. To enjoy, thaw at room temperature or warm briefly in the microwave for a fresh, gooey center.
- Freezing Unbaked Dough Balls: For ultimate convenience, you can also freeze the unbaked, ganache-stuffed cookie dough balls. Place them on a parchment-lined baking sheet and freeze until solid (about 1-2 hours). Once frozen, transfer them to a freezer-safe bag or container. When ready to bake, place the frozen dough balls on a prepared baking sheet and bake as directed, adding an extra 1-3 minutes to the baking time as needed.
Explore More Delicious Cookie Recipes
Cookies
Chocolate Lava Cookies
Cookies
Red Velvet Cake Mix Cookies with Cream Cheese Icing
Christmas
Chocolate Crinkle Blossom Cookies
Cookies
Cosmic Brownie Cookies
HUNGRY FOR MORE? Subscribe to my newsletter and follow me on Facebook, Instagram and Pinterest for all the latest recipes and baking inspiration!
Chocolate Lava Cookies
Lorie Yarro
Print Recipe
20 minutes
9 minutes
1 hour
1 hour 45 minutes
24 cookies
Ingredients
Ganache Filling
- 4 oz dark or semi-sweet chocolate , high quality baking chocolate works best, but chocolate chips can work
- ½ cup heavy whipping cream
Cookies
- 2 cups plus 2 Tbsp flour (270 g)
- ½ cup plus 2 Tbsp dutch processed cocoa powder (67g)
- ½ – 1 tsp espresso powder
- ½ tsp baking soda
- ½ tsp baking powder
- ¼ tsp sea salt
- 1 cup salted butter (227g), room temperature
- 1 cup white sugar (200g)
- ½ cup light brown sugar (110g)
- 2 large eggs, room temperature
- 1½ tsp vanilla extract
- powdered sugar, optional, for dusting
Enter your email to save this recipe! Plus, get new recipes from me regularly.
(Placeholder for a simple email signup, original form was JS-based and removed.)
Instructions
-
Make the Ganache: Chop the chocolate into very small pieces and place in a small bowl. Warm the heavy cream in the microwave in 20-second increments until hot (approx. 40-50 seconds), but not boiling.
-
Pour the cream over the chopped chocolate and allow it to sit for a few minutes. Then, stir until the chocolate is completely melted and the mixture is smooth and glossy. If any chocolate remains, microwave for another 5 seconds and stir again.
-
Chill the ganache mixture in the refrigerator for about 20-30 minutes, or until it is firm enough to scoop.
-
Once chilled and set, spoon about 24 equal small dollops (approximately 1 teaspoon each) of ganache onto a parchment-lined baking pan. Freeze these ganache portions for at least 30 minutes to ensure they are firm and easy to handle. If desired, you can roll them into neat balls once they are firm from freezing.
-
Prepare the Cookies: Preheat your oven to 350°F (175°C). In a medium bowl, whisk together the flour, espresso powder, cocoa powder, salt, baking soda, and baking powder until well combined.
-
In a separate large bowl (or stand mixer bowl), beat the room temperature butter, light brown sugar, and white sugar on medium-high speed until the mixture is light and fluffy (this usually takes 3-4 minutes).
-
Add the eggs one at a time, beating well after each addition. Stir in the vanilla extract until just combined.
-
Gradually add the dry flour mixture to the wet ingredients in three additions, beating on low speed only until just mixed after each. Be careful not to overmix the dough.
-
Scoop approximately 2 tablespoons of cookie dough and roll it into a ball. Create a deep cavity in the center with your thumb. Place one frozen ganache piece inside the cavity. Carefully cover the ganache completely with the cookie dough and roll into a smooth ball again. Arrange the stuffed cookie dough balls on a parchment-lined baking pan, ensuring adequate spacing.
-
Bake for 8-11 minutes, or until the edges are set and the tops appear slightly puffy but not wet in the center. Avoid overbaking.
-
Remove the cookies from the oven. For perfectly round cookies, use a biscuit or cookie cutter slightly larger than the cookies to gently scoot them into even circles while still warm on the baking sheet (optional, but enhances appearance). Cool on the pan for several minutes before transferring to a wire rack to cool completely. Once cooled, dust with powdered sugar for a molten lava cake look, if desired.
Notes
Ganache placement is important. Ensure the chocolate ganache is well-centered within the cookie dough ball. If it’s too close to the edges, it might leak out onto the pan during baking, creating a slight mess.
Enjoying your lava cookies warm. Even when fully cooled, the ganache will retain a soft, distinct texture. For that truly molten experience, warm a cooled cookie in the microwave for 5-10 seconds before indulging. These are also amazing served with a scoop of vanilla ice cream!
Storage: Store cooled cookies in an airtight container at room temperature for 3-4 days, separating layers with parchment paper. To freeze, place completely cooled cookies in a freezer-safe container with parchment between layers; freeze for up to 3 months.
Nutrition
Nutrition information is automatically calculated and should be used as an approximation only.
Did you enjoy this recipe? Have a question?
Leave a comment below!
Shop Essential Baking Tools and Ingredients
To help you create these incredible chocolate lava cookies with ease, here are some recommended tools and ingredients:
Rainbow Candy Coated Chips
Buy Now →
Cookie Scoop
Buy Now →
Hand Mixer
Buy Now →
KitchenAid Stand Mixer
Buy Now →
Espresso Powder
Buy Now →
Sheet Pan
Buy Now →
Dutch Processed Cocoa Powder
Buy Now →