

Indulge in the delightful experience of individual, buttery, and flaky treats with these incredibly easy Air Fryer Hand Pies. Featuring a vibrant, fresh blueberry filling encased in a simple, homemade butter crust, these delectable pies cook to perfection in your air fryer in just about 10 minutes! For those without an air fryer, we also provide traditional oven baking instructions so no one misses out on this delightful dessert.
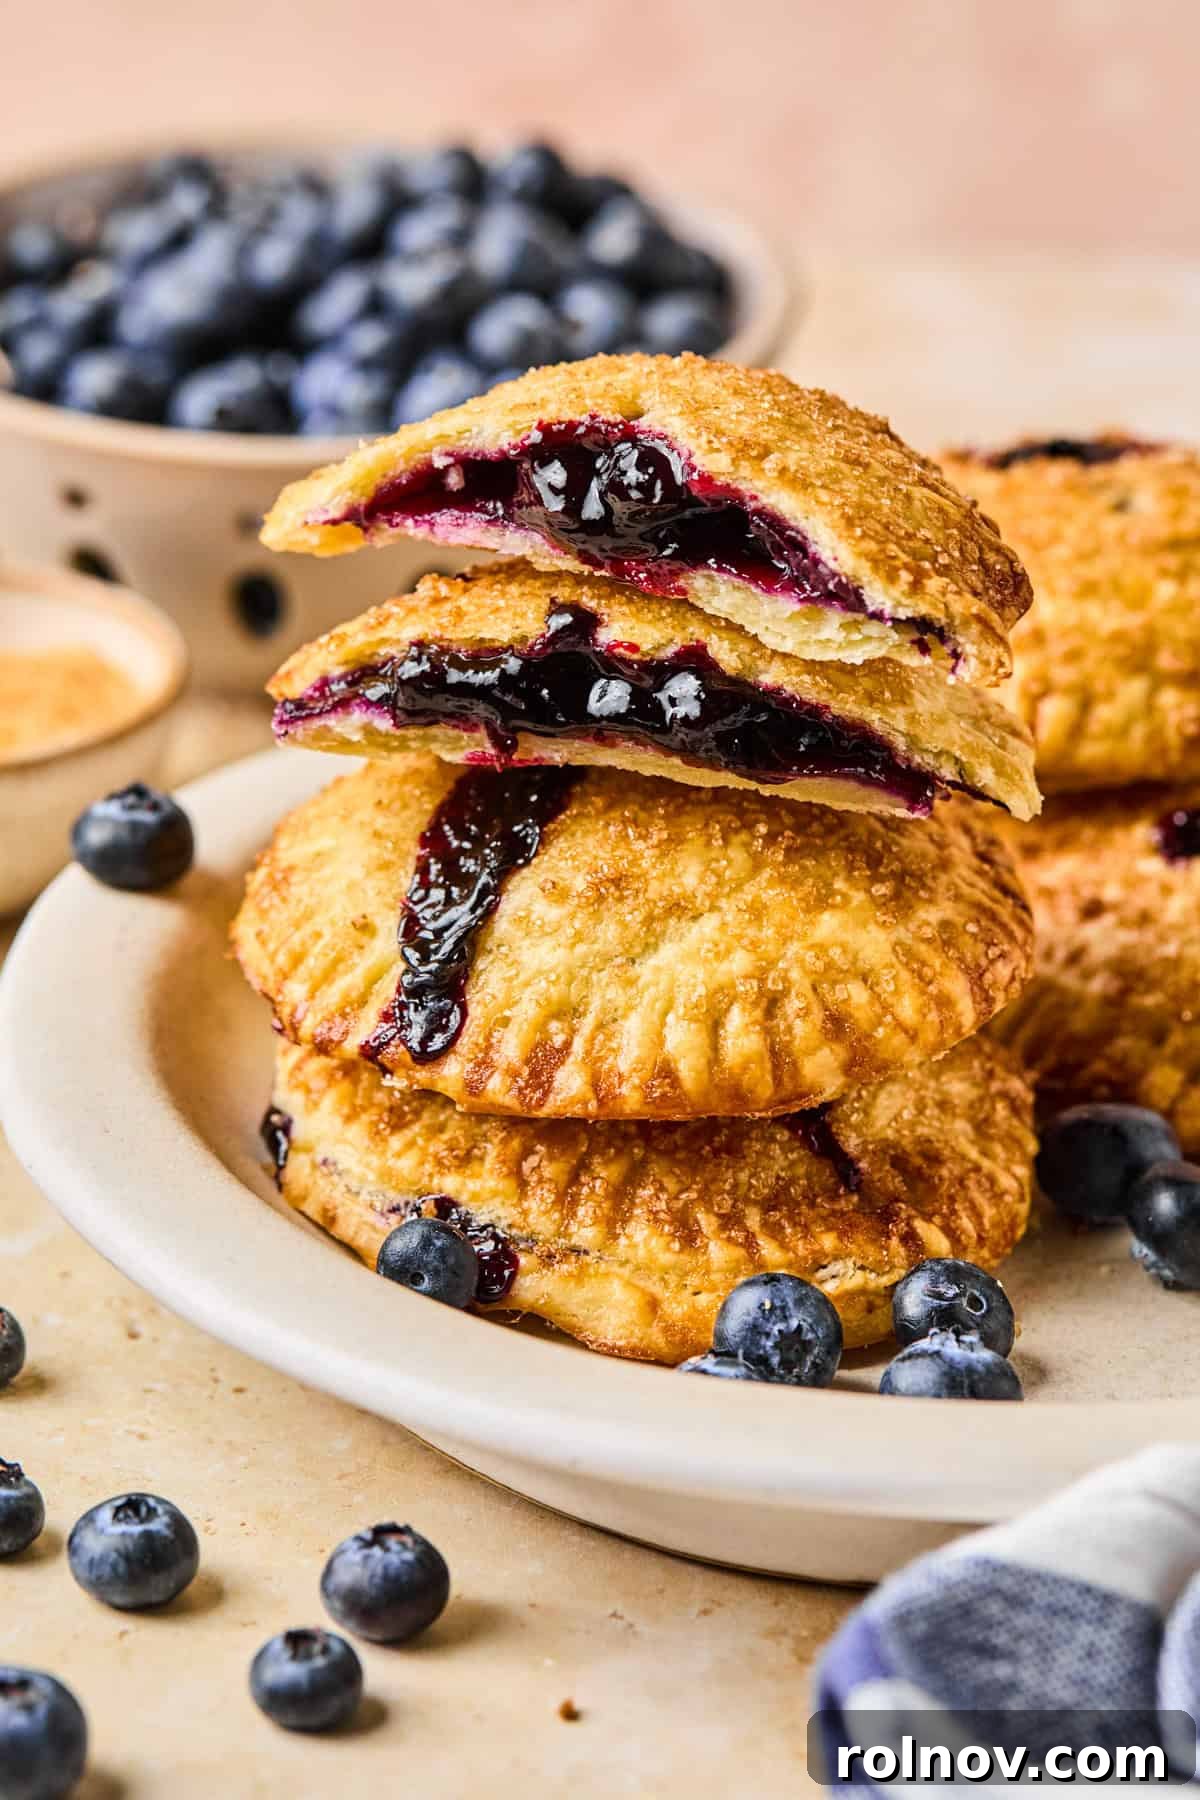
Few things rival the simple pleasure of a perfectly baked pie. But what if you could enjoy all that exquisite flavor and flaky texture in a convenient, portable package? Enter the hand pie – a culinary marvel that transforms a comforting classic into an on-the-go delight. Imagine sinking your teeth into a warm, fruit-filled pastry anytime, anywhere. These individual portions are not only charming but also incredibly practical for picnics, packed lunches, or simply satisfying a sweet craving without committing to an entire pie.
And when you introduce the magic of the air fryer into the equation, these hand pies reach a new level of culinary perfection. The air fryer works wonders, cooking them to a golden, crispy, and impossibly flaky finish in a mere 10 minutes. This quick cooking time makes homemade pastries accessible even on busy weeknights, offering a healthier alternative to deep-fried treats while still delivering that satisfying crispness.
While this recipe focuses on luscious blueberry hand pies, it’s a foundation for made-from-scratch baking that is genuinely easier than tackling a full-sized pie. The process is streamlined, offering a rewarding experience for both novice and experienced bakers alike. For an even quicker yet similar treat, consider exploring Easy Homemade Pop Tarts with Pie Crust.
If you’re a connoisseur of blueberry dessert recipes, you’ll surely appreciate these other delightful creations as well: my absolute favorite, the Blueberry Lemon Dump Cake; the wonderfully creamy Blueberry Cheesecake Dip; or for a breakfast-friendly (yet dessert-worthy) option, the Blueberry Lemon Coffee Cake. Each one celebrates the irresistible flavor of blueberries in its own unique way.
Why You Will Absolutely Love These Air Fryer Hand Pies
- Effortlessly Homemade, Zero Headache: The thought of making pie from scratch often deters many, and I admit, it intimidated me for years. However, this recipe changes the game. Our simple pie crust comes together in a food processor in just one to two minutes, transforming what used to be a daunting task into an enjoyable one. The most challenging part is simply waiting for the dough to chill! You’ll achieve that coveted flaky texture with minimal effort, making homemade pastry a truly accessible joy.
- Lightning-Fast Air Fryer Cooking: While there’s a small amount of assembly involved, the cooking process itself is incredibly swift thanks to the air fryer. These hand pies crisp up beautifully in a matter of minutes, meaning you can preheat your air fryer, cook a batch, and even cool them down enough to enjoy before a traditional oven could even finish baking them. This efficiency makes them perfect for last-minute cravings or when you need a quick dessert without a long wait. While oven baking is certainly a tasty alternative, the air fryer’s speed is truly unmatched.
- Perfect with Fresh or Frozen Berries: Don’t fret if fresh berry season is over! This recipe is wonderfully versatile and works beautifully with frozen blueberries, allowing you to enjoy these hand pies year-round. For the best results when using frozen berries, I recommend thawing them first, then gently heating them as per the recipe instructions. This ensures a consistently thick and flavorful filling, regardless of the season.
- Smart Shortcuts Are Always Welcome: There’s absolutely no shame in utilizing a few clever shortcuts to make a delicious treat even simpler to prepare. You can easily opt for a high-quality store-bought pie crust, which saves significant time and effort without compromising too much on flavor. Alternatively, pre-made pie filling or even your favorite fruit jam can be fantastic time-sasavers for the filling. While I adore making everything from scratch, I’m the first to reach for a ready-made pie crust from the grocery aisle when time is short! These shortcuts empower you to enjoy homemade taste with less fuss.
Essential Ingredient Notes and Tips
For the complete list of ingredients with precise measurements, please refer to the recipe card below.
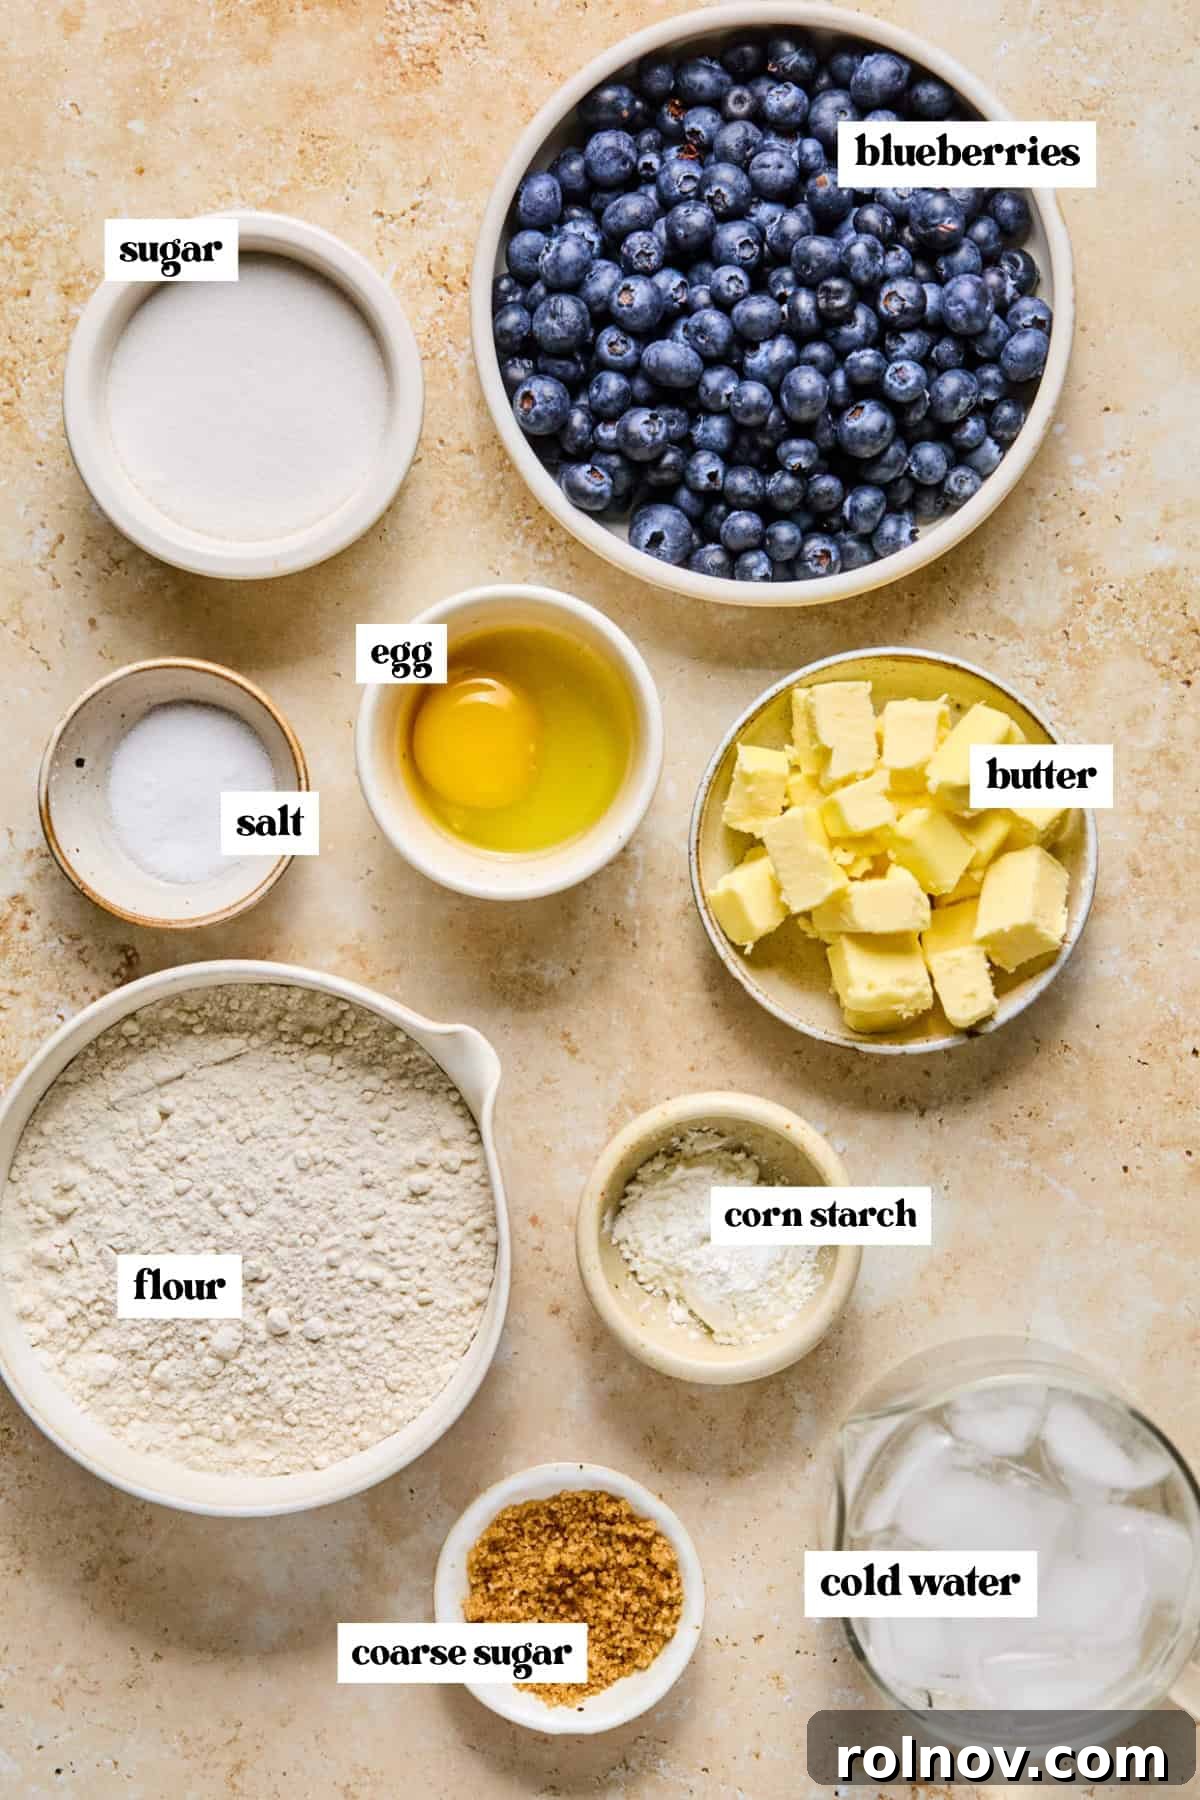
For the Flaky Crust:
- All-Purpose Flour: Proper flour measurement is crucial for a tender, flaky crust. Begin by stirring your flour vigorously in its container to aerate it. Then, spoon the flour into your measuring cup and use a straight edge (like a knife or ruler) to level it off, removing any excess. **Never** scoop your measuring cup directly into the flour bag, as this compacts the flour and can result in using too much, leading to a dry, tough crust – a texture no one desires in a pie!
- Very Cold Butter: The secret to an incredibly flaky pie crust lies in using extremely cold fat. Cold butter creates pockets of steam as it bakes, which separate the layers of dough, resulting in that desirable flakiness. Ensure your butter is straight from the refrigerator, and cut it into small, uniform cubes or pieces. For an extra boost of coldness, you can even pop the cut butter into the freezer for 10-15 minutes before you begin processing.
- Ice Water: Just like the butter, the water needs to be super cold. This helps keep the butter solid and prevents the dough from becoming overworked or developing gluten too quickly, which can make the crust tough. Using ice water maintains the overall low temperature of your dough, contributing significantly to its final flaky texture.
For the Luscious Blueberry Filling:
- Blueberries: You can use either fresh or frozen blueberries for this recipe, making it adaptable to any time of year. While blueberries are classic, feel free to experiment with other berries like raspberries, blackberries, or even a delightful mixed berry blend. If using frozen berries, it’s best to thaw them first to ensure consistent cooking and thickening.
- Cornstarch: This acts as our thickening agent, preventing the blueberry filling from becoming too runny. A thick filling is essential for hand pies, as it helps prevent them from oozing out during assembly and cooking. If you prefer, arrowroot powder can be used as a direct substitute for cornstarch.
- Water: Only a small amount of water is needed here. Its primary role is to help dissolve the cornstarch and sugar and to kickstart the thickening process of the blueberries without adding excessive moisture. Remember, we aim for a wonderfully thick and jammy filling.
- Optional Lemon Zest: I almost always incorporate lemon zest into my blueberry recipes these days! The bright, aromatic oils from lemon zest perfectly complement the sweetness of the blueberries, adding a refreshing zing and depth of flavor that elevates the entire pie. It’s a small addition with a significant impact.
For Hand Pie Assembly and Finishing Touches:
- Egg: A whisked egg (or an egg combined with a touch of water) creates an egg wash. Brushing this over your hand pies before baking serves two important purposes: it gives the pastry a beautiful, shiny, golden-brown color, and it helps to seal the edges, ensuring the top and bottom crusts adhere firmly together. If you have an egg allergy or dietary preference, you can substitute milk or cream for a similar (though slightly less pronounced) browning effect.
- Coarse Sugar (Optional): A sprinkle of coarse sugar on top of your hand pies before cooking adds a lovely sparkling finish and a delightful textural crunch. It’s an aesthetic choice that also enhances the overall sweetness and appeal. If you prefer a simpler look, feel free to omit it.
Detailed Step-by-Step Instructions
For optimal results and ease of assembly, always prepare the pie crust first. This allows ample time for the dough to chill properly in the refrigerator, which is critical for a flaky texture, before you begin assembling your Air Fryer Hand Pies.
For a quick and incredibly easy pie crust, I highly recommend using a food processor. It simplifies the mixing process and helps prevent overworking the dough.
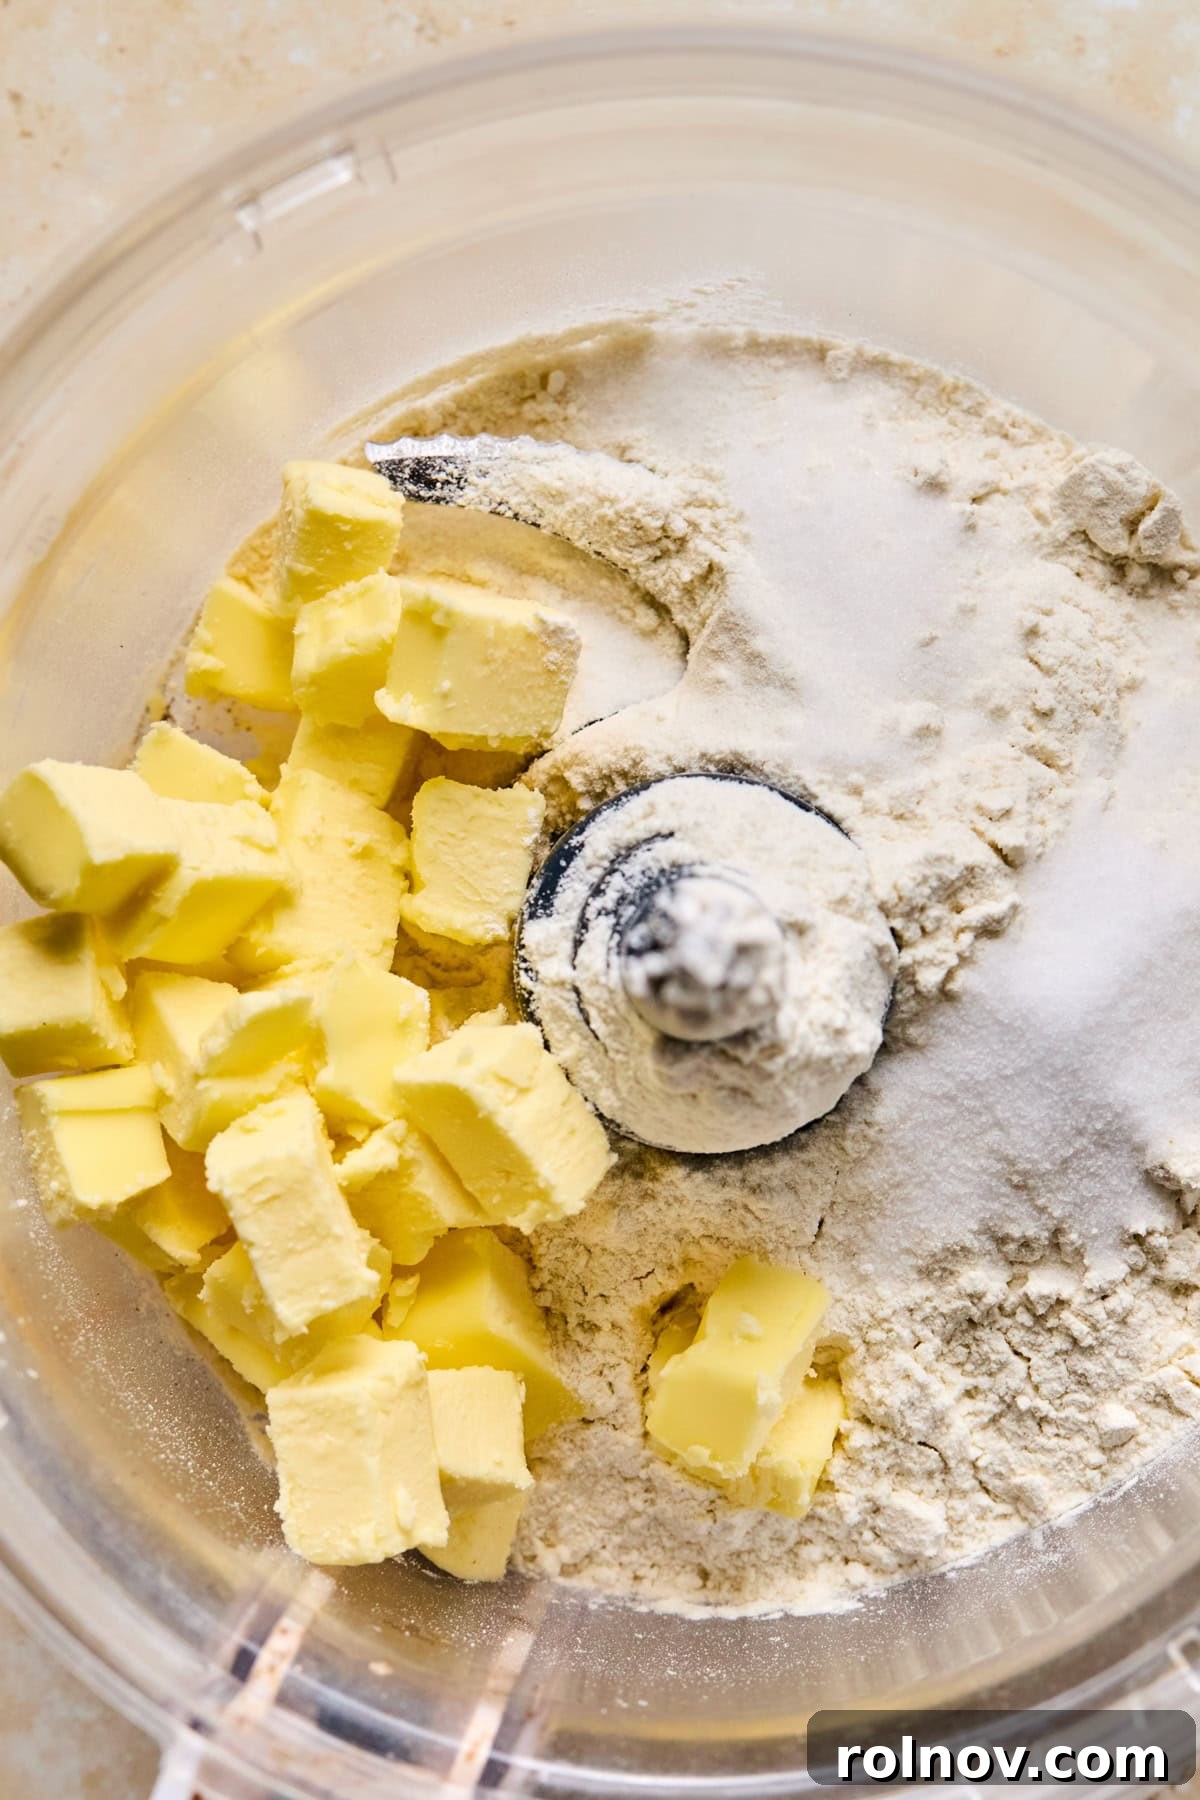
Step 1: Prepare Dry Ingredients. Add the accurately measured flour, sea salt, sugar, and the very cold, cubed butter into the bowl of your food processor. Ensure the butter is well-chilled to achieve maximum flakiness.
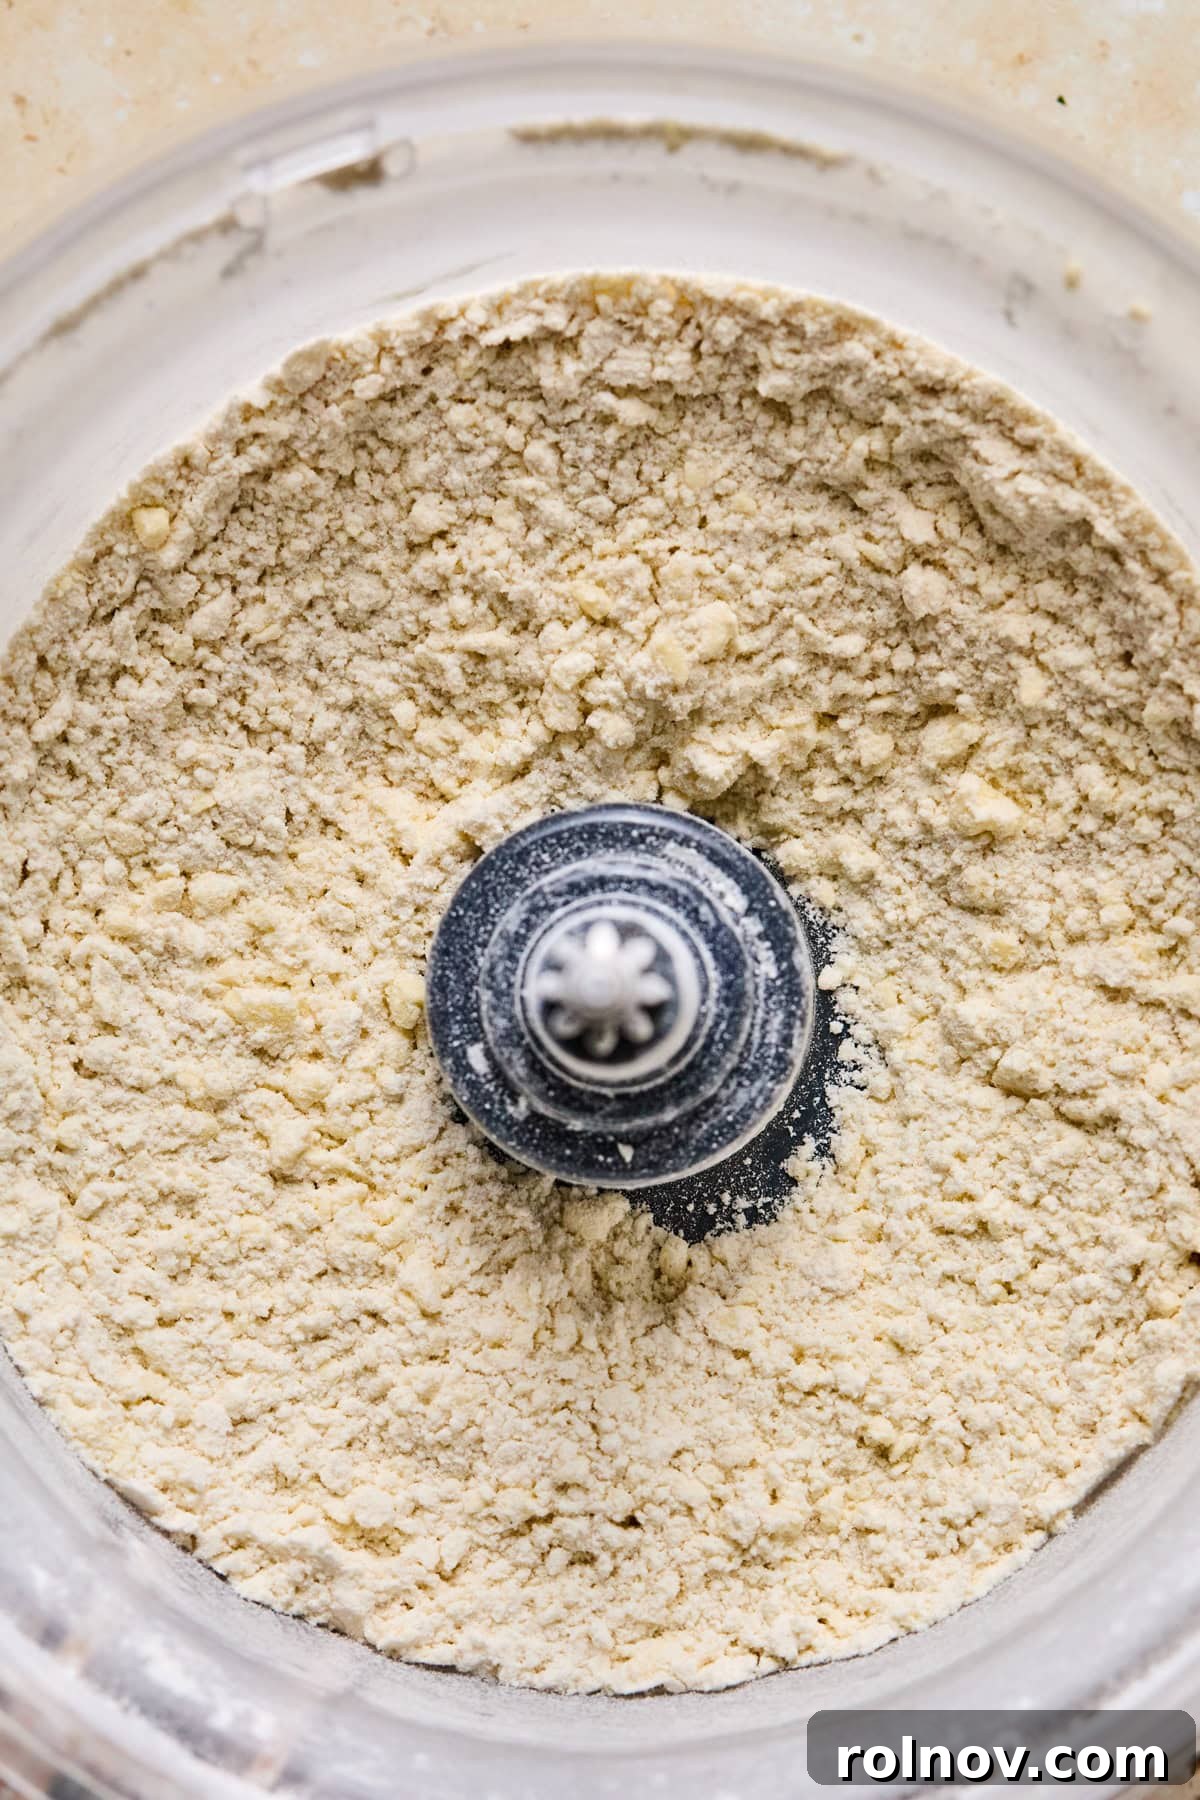
Step 2: Combine Butter and Flour. Pulse the mixture in short bursts, about 10-15 times for 1-2 seconds per pulse. Continue until the mixture resembles coarse crumbs, with some pea-sized pieces of butter still visible. The exact number of pulses may vary depending on the size of your butter pieces.
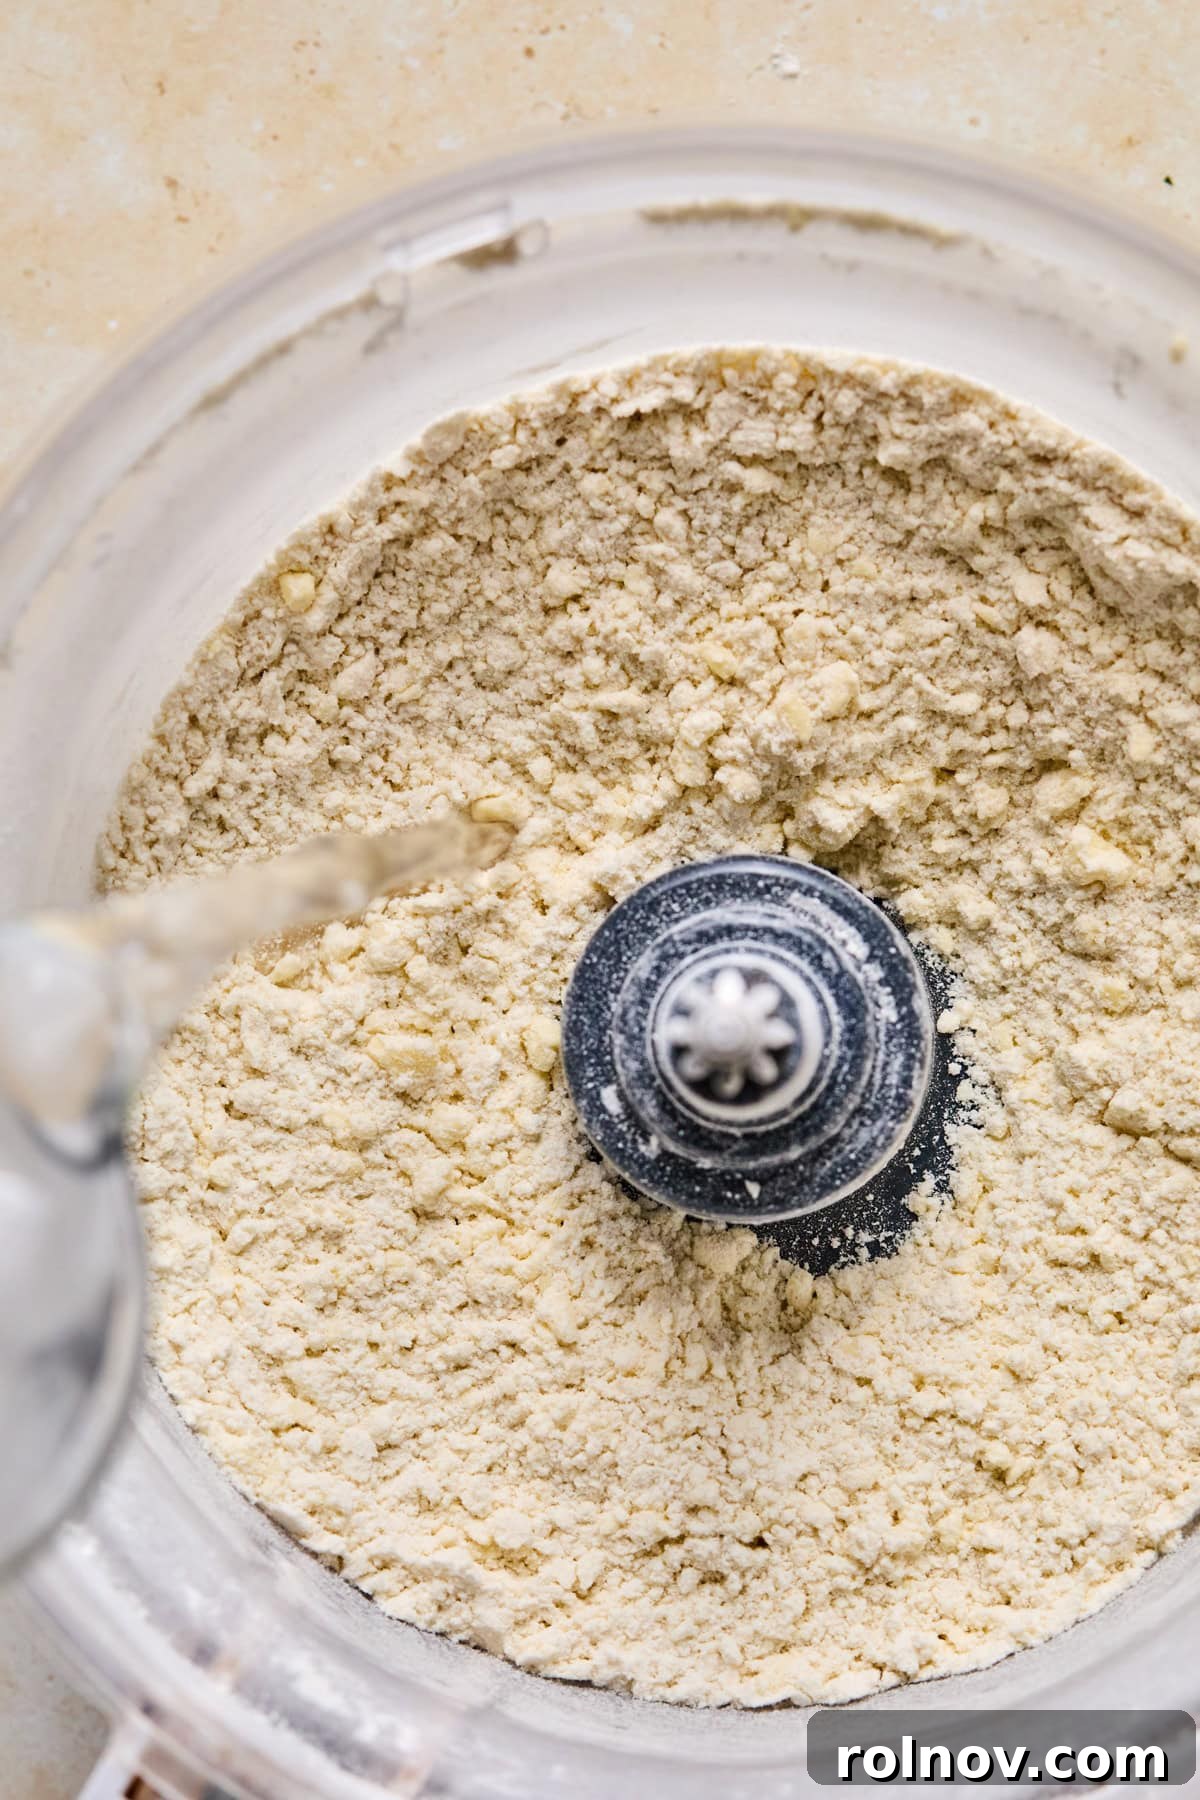
Step 3: Gradually Add Water. With the food processor running on low, slowly add the ice water, approximately 1 tablespoon at a time. Allow the mixture to process briefly after each addition before adding more. This controlled addition prevents the dough from becoming too wet.
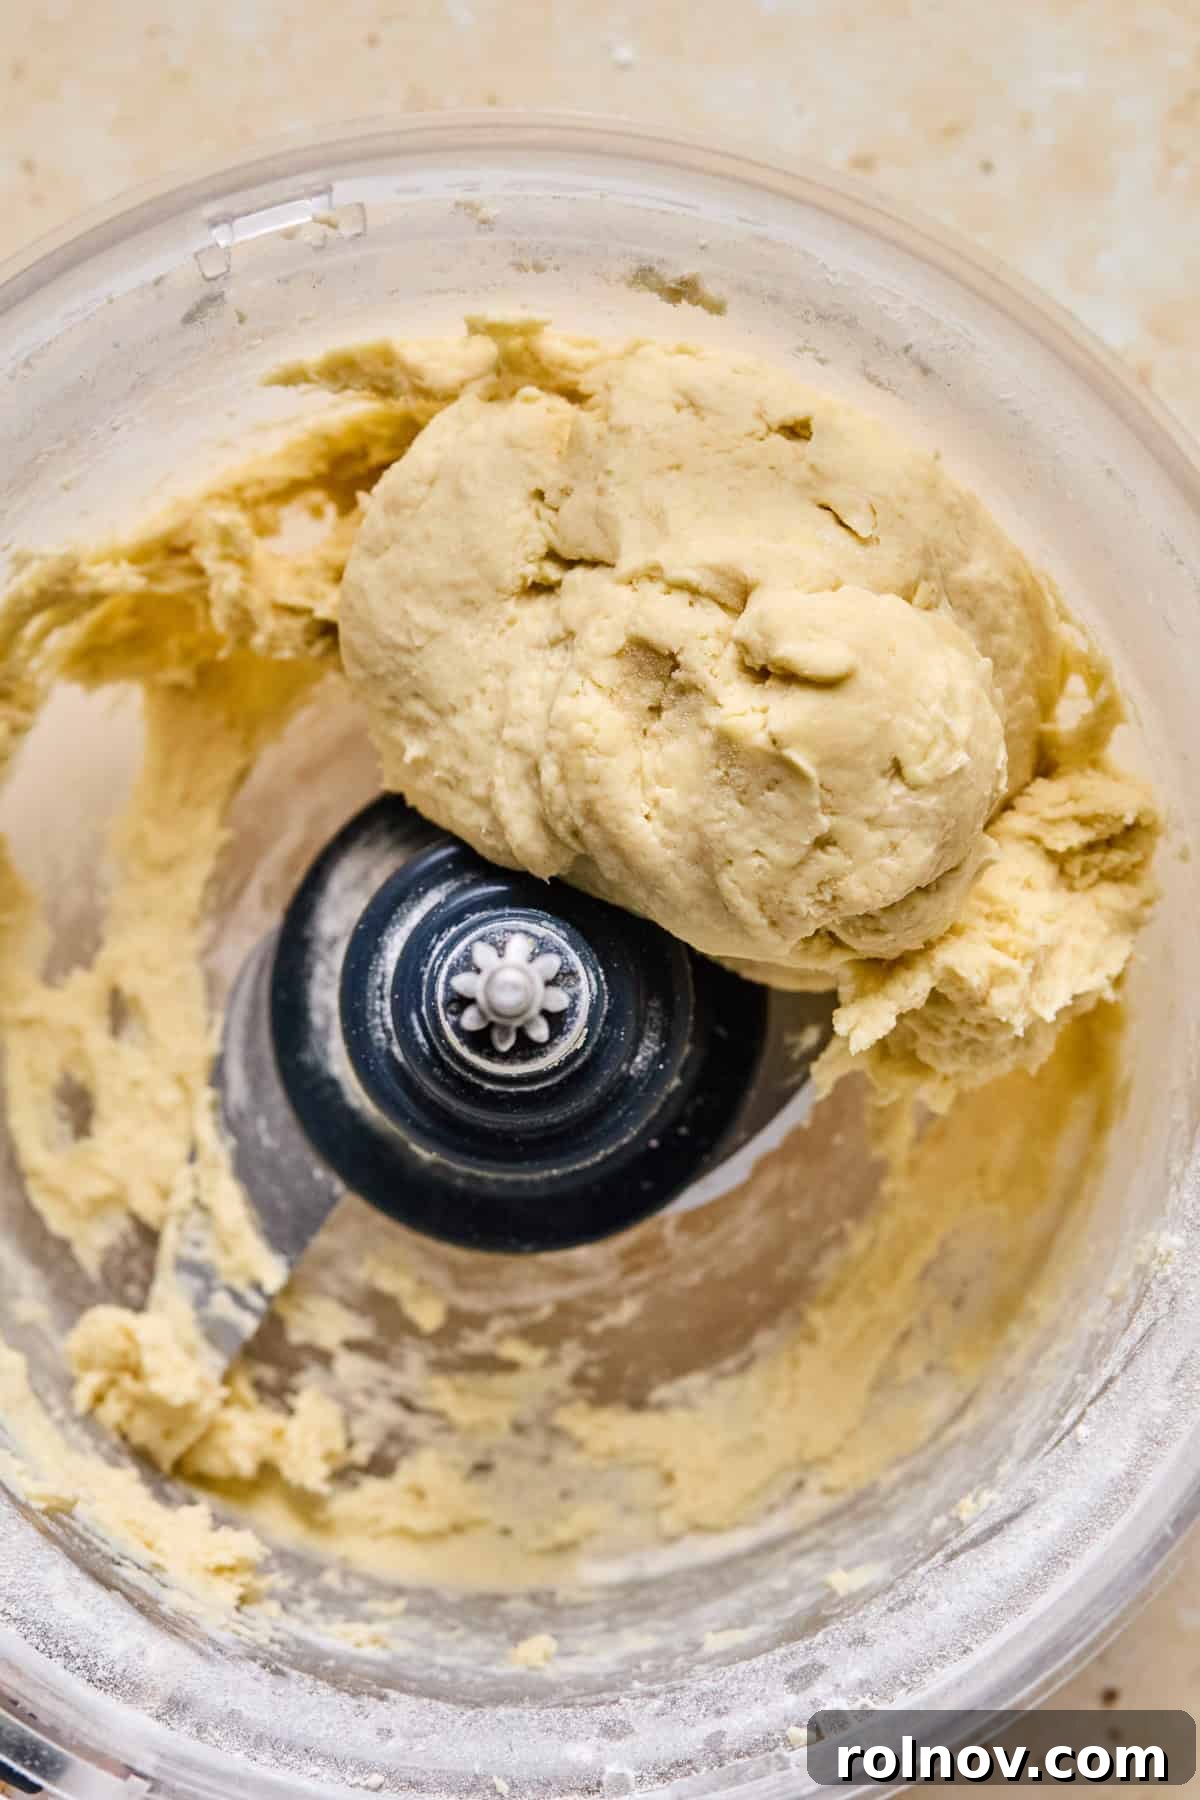
Step 4: Form the Dough. Continue processing until a cohesive ball of dough forms. For most recipes, around 3.5 tablespoons of water is usually sufficient. The dough should appear smooth and hold together without any visible cracks or excessive crumbliness. If it’s too dry, add a tiny bit more water, a teaspoon at a time.
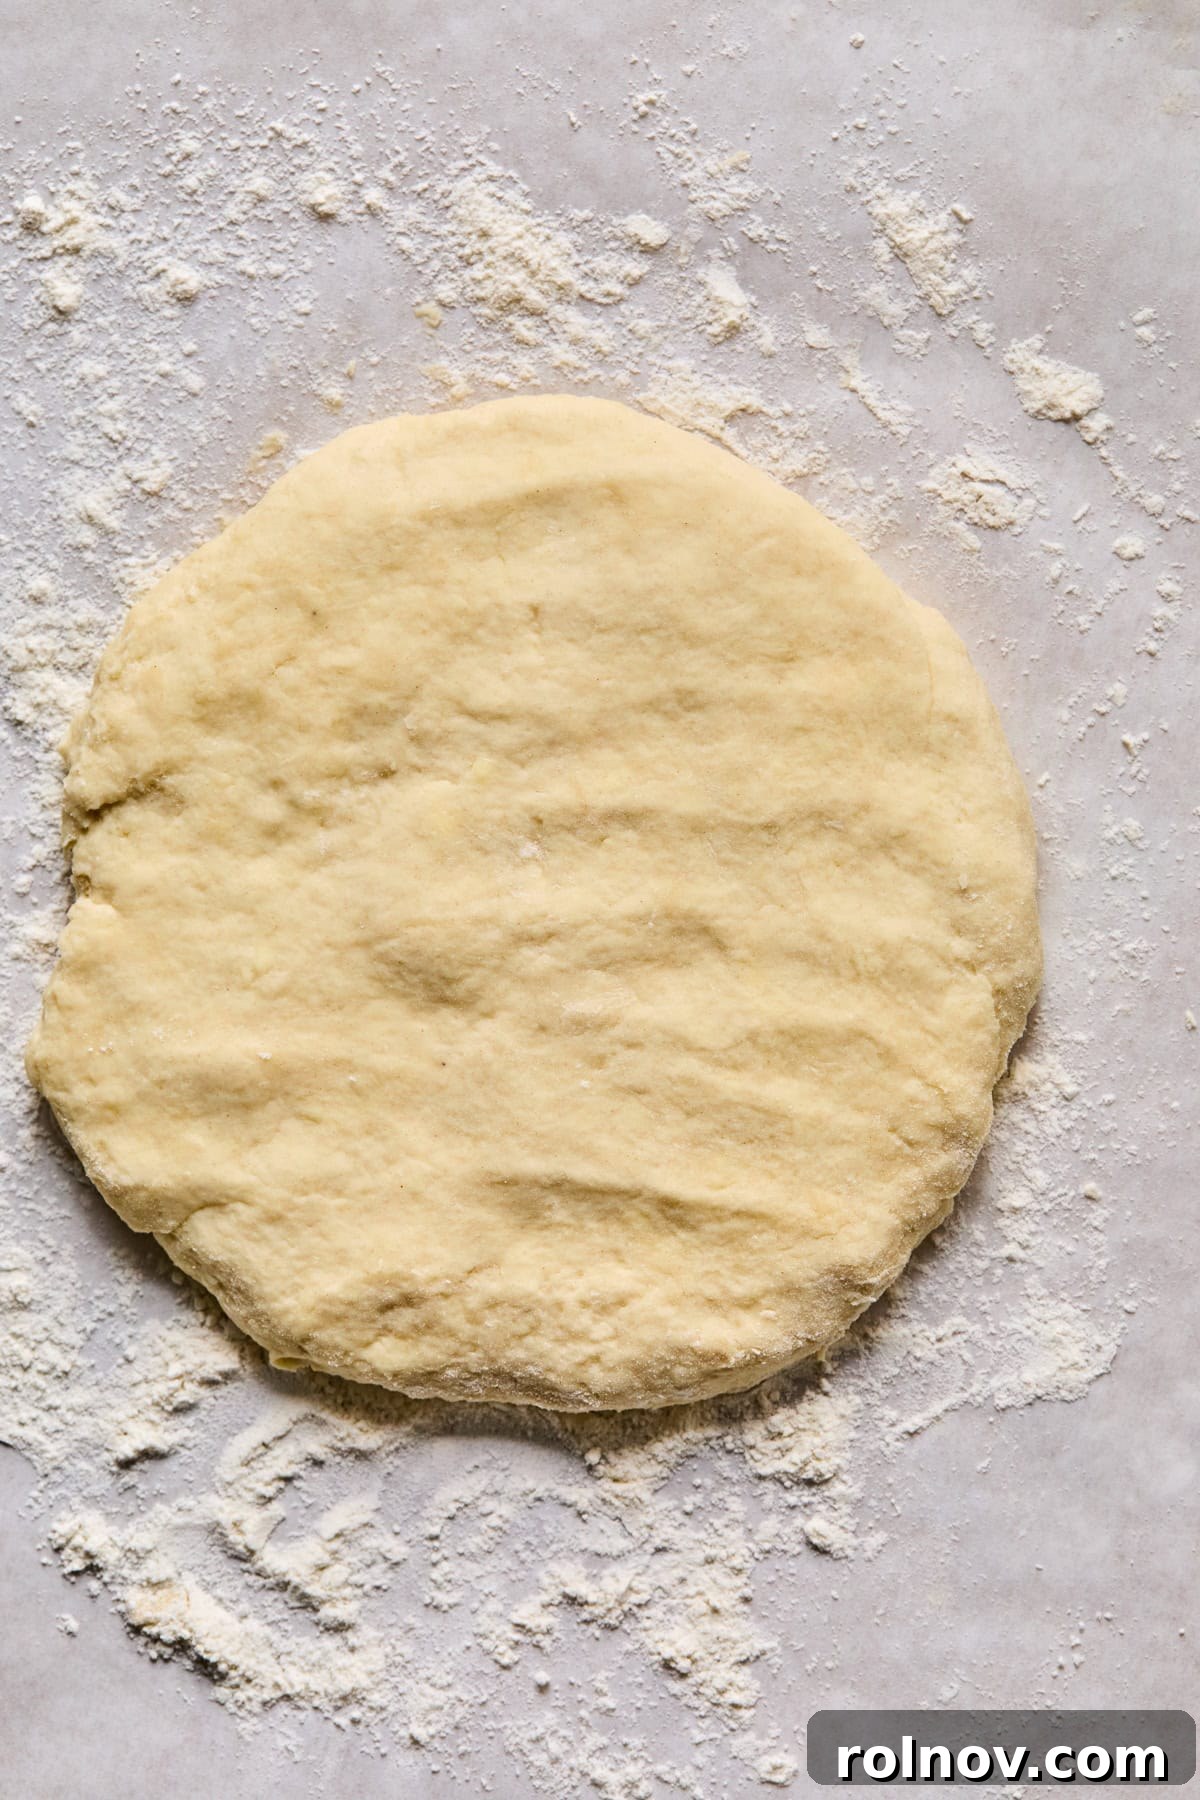
Step 5: Chill the Dough. Transfer the dough from the food processor onto a lightly floured surface. Gently gather and form it into a neat, flat disk, approximately 1 inch thick. Wrap the disk tightly in plastic wrap and place it in the refrigerator to chill for a minimum of 30 minutes. This chilling period is crucial as it allows the gluten to relax and the butter to firm up, making the dough easier to roll and ensuring a flaky crust.
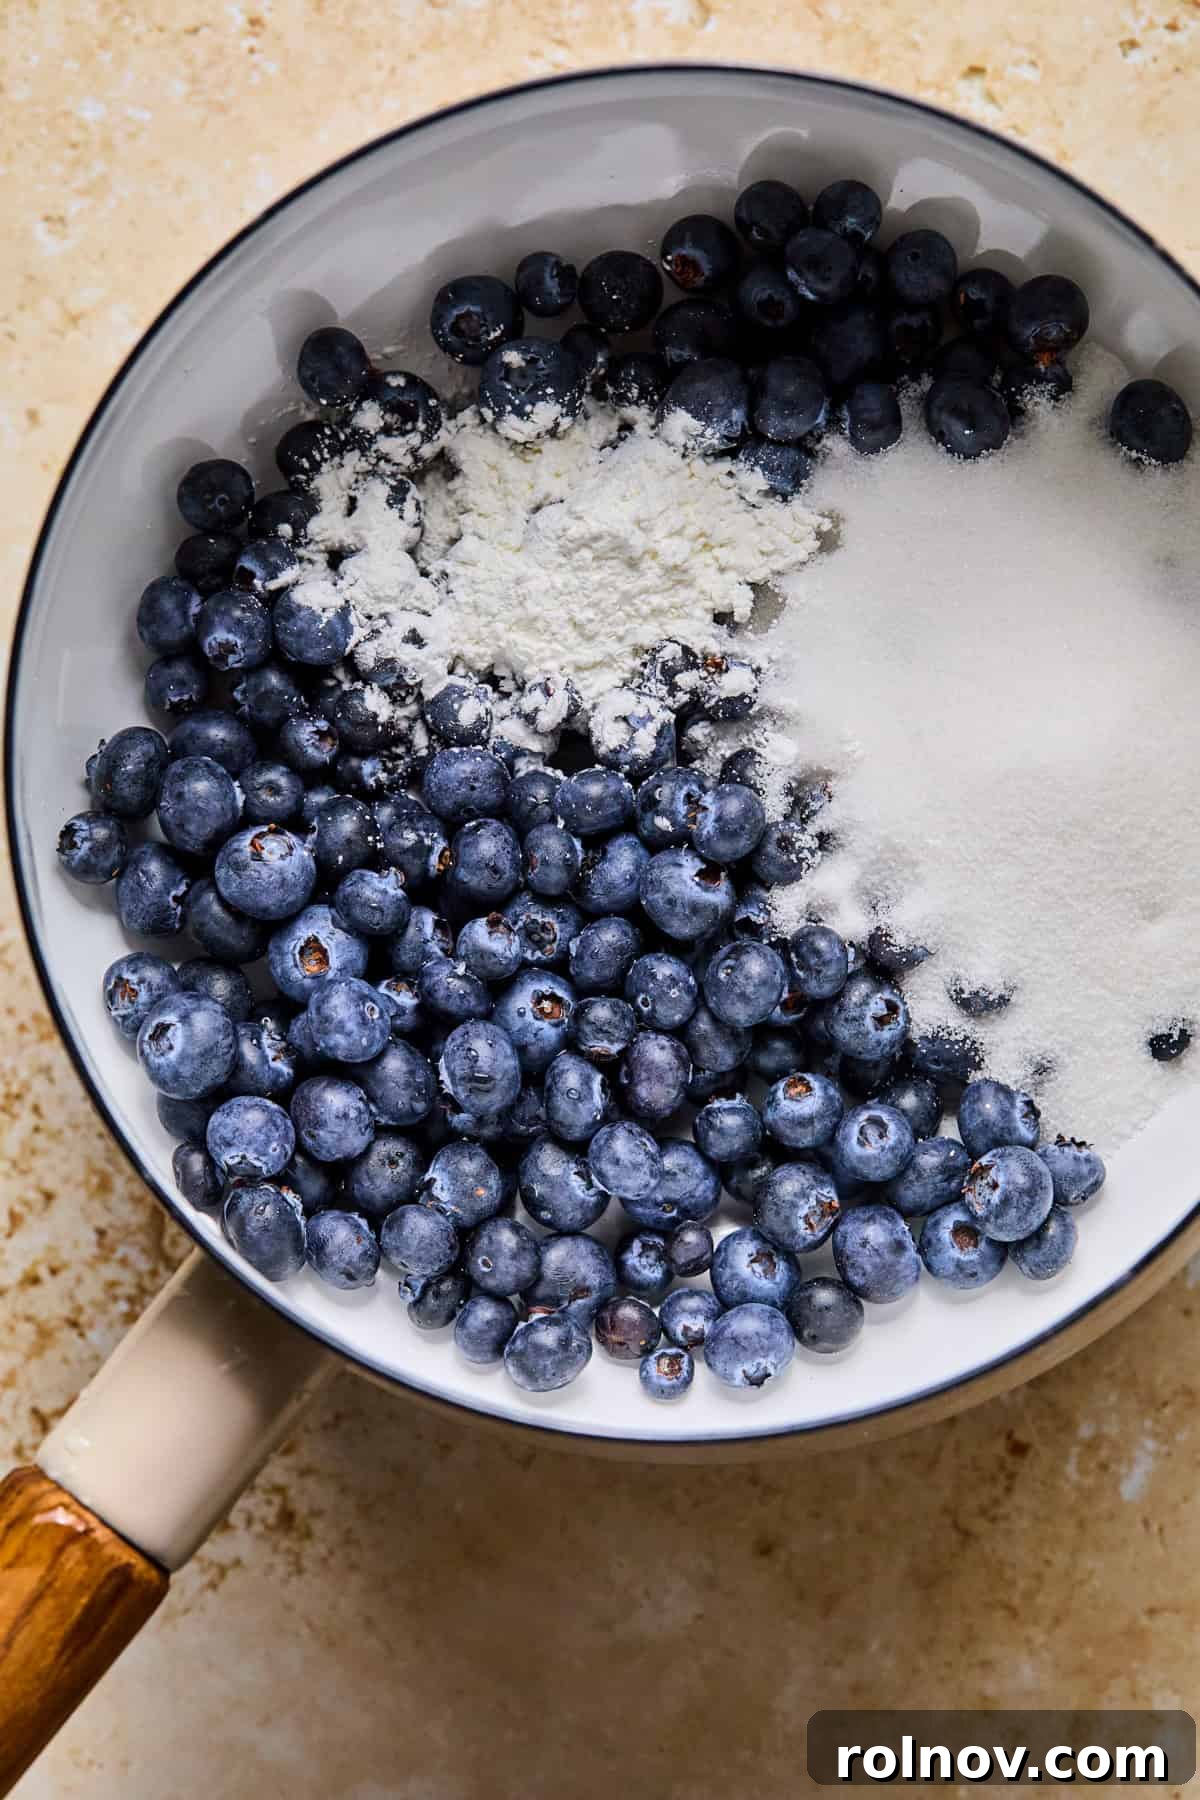
Step 6: Start the Blueberry Filling. In a small saucepan, combine the fresh or thawed blueberries, granulated sugar, cornstarch, and water. If using, now is the time to add the optional lemon zest for an extra layer of bright flavor. Stir gently to combine all ingredients.
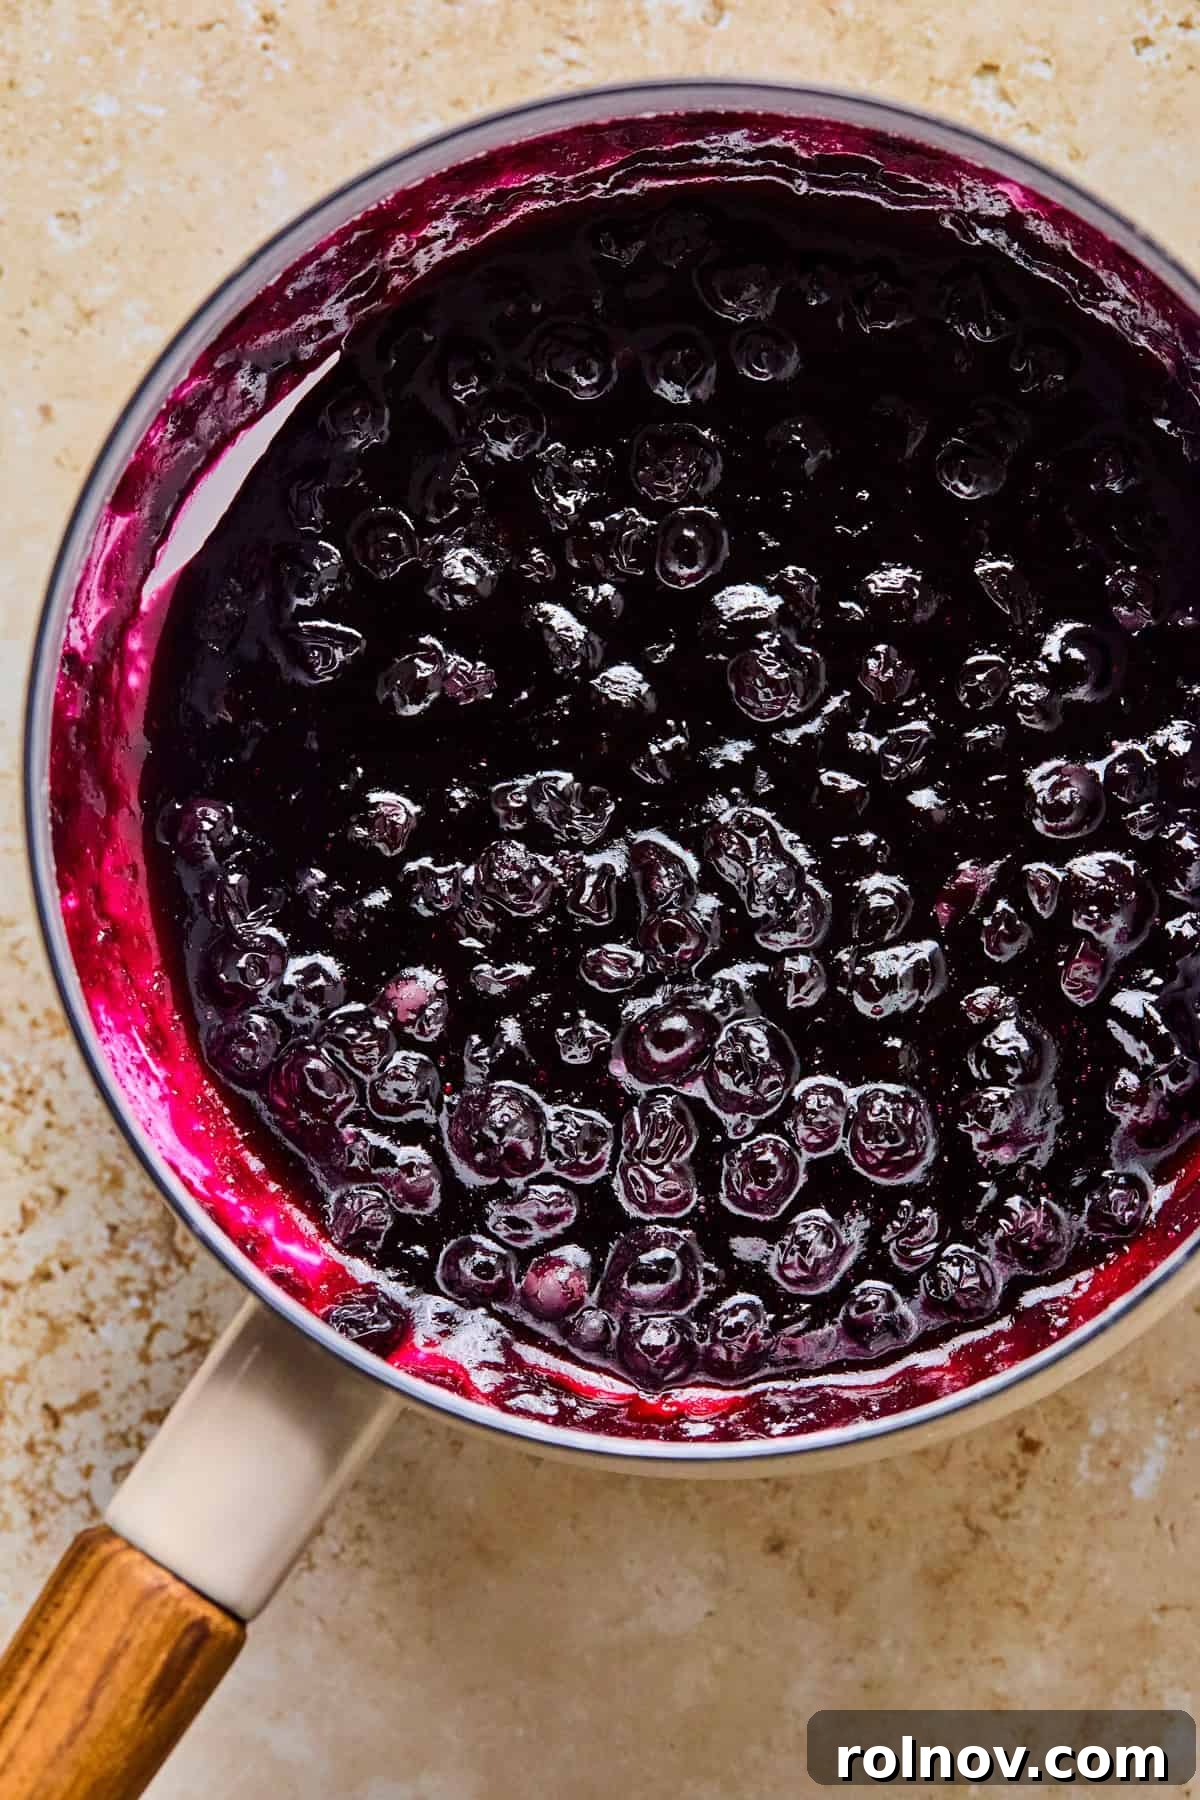
Step 7: Thicken and Cool the Filling. Place the saucepan over medium-low heat and bring the mixture to a gentle simmer. Cook for approximately 10 minutes, stirring occasionally to prevent sticking. You’ll notice the mixture beginning to thicken into a lovely, jam-like consistency. Once thick, remove the saucepan from the stove and allow the filling to cool completely before assembling the hand pies. A cooled, thick filling is key to preventing messy leaks.
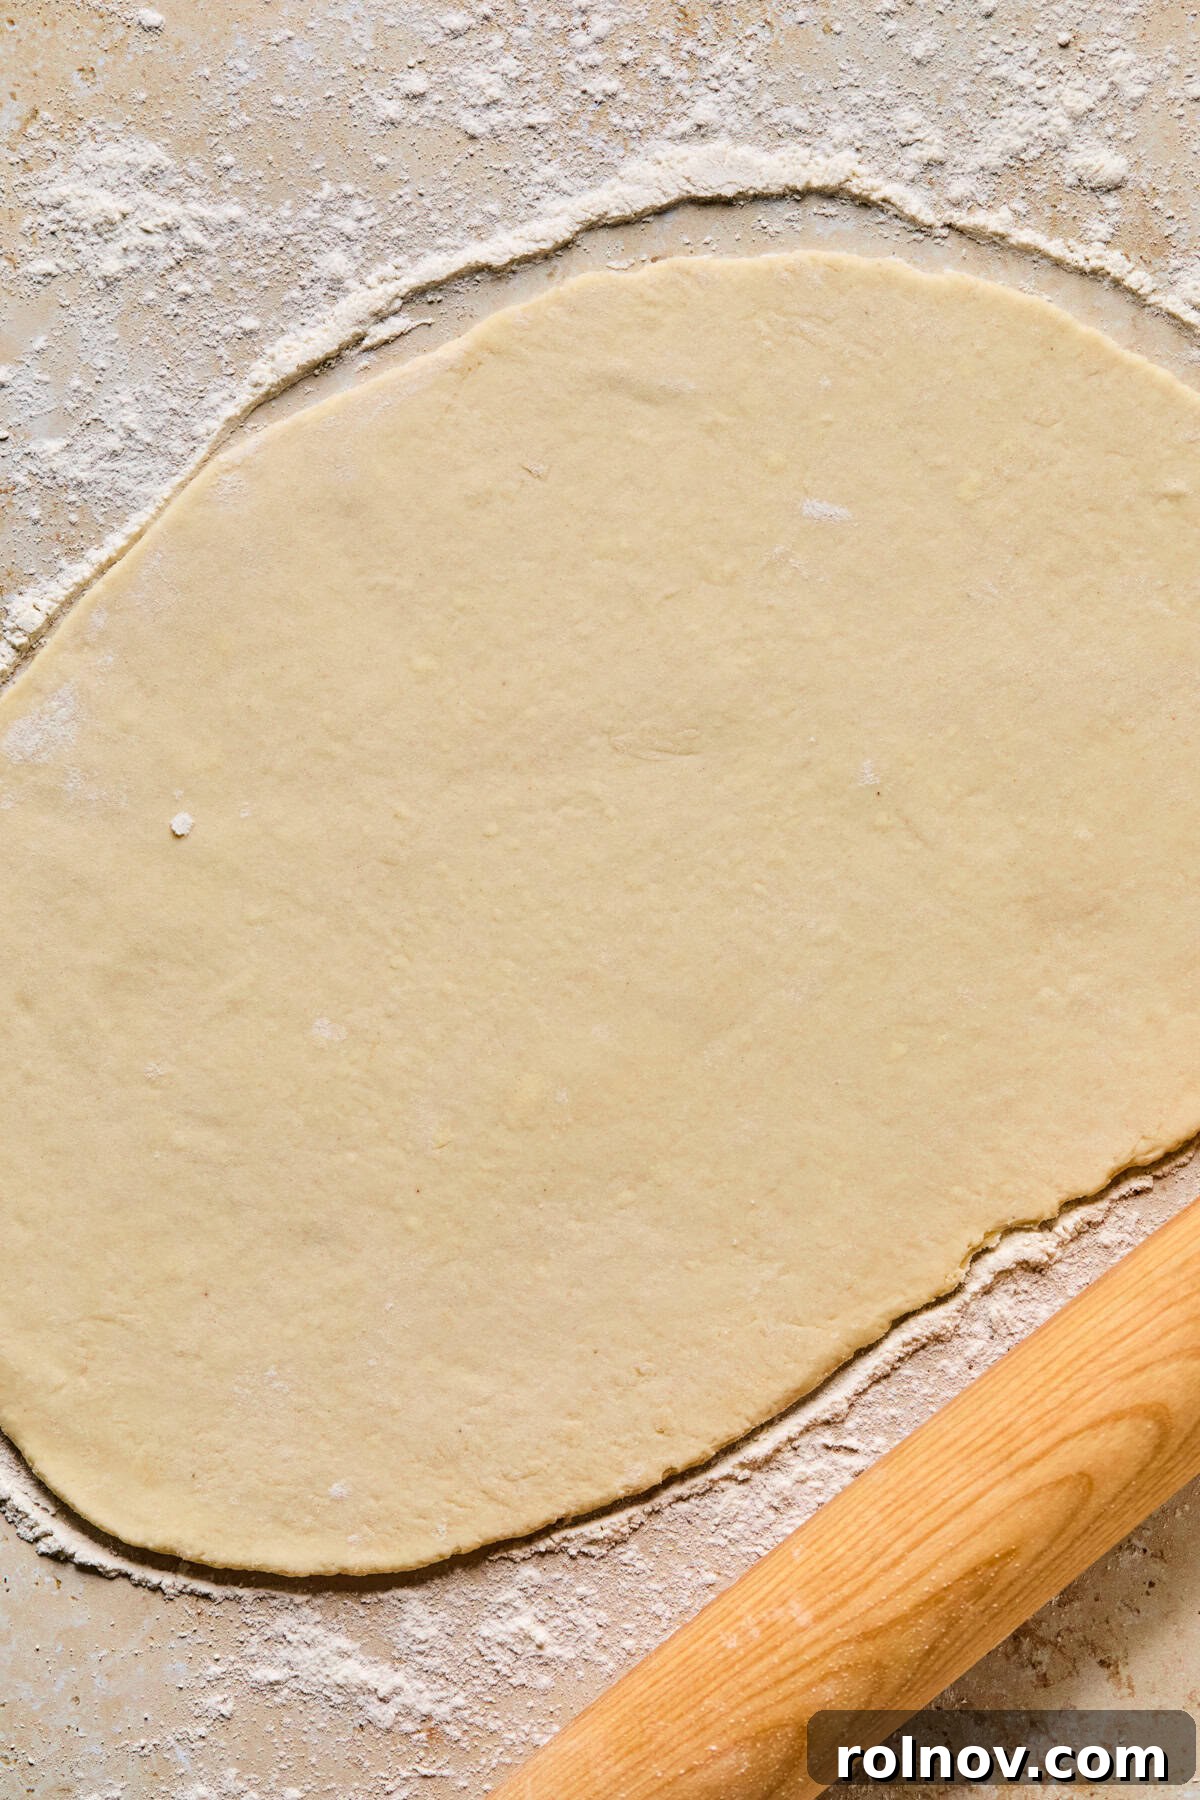
Step 8: Roll Out the Dough. Once your dough is sufficiently chilled, remove it from the refrigerator. Lightly dust a clean work surface with flour, then roll out the dough to an even thickness of about 1/4 inch, or slightly less. Aim for consistency to ensure even baking. Avoid rolling it too thin, which can make it prone to tearing, or too thick, which can result in a doughy hand pie.
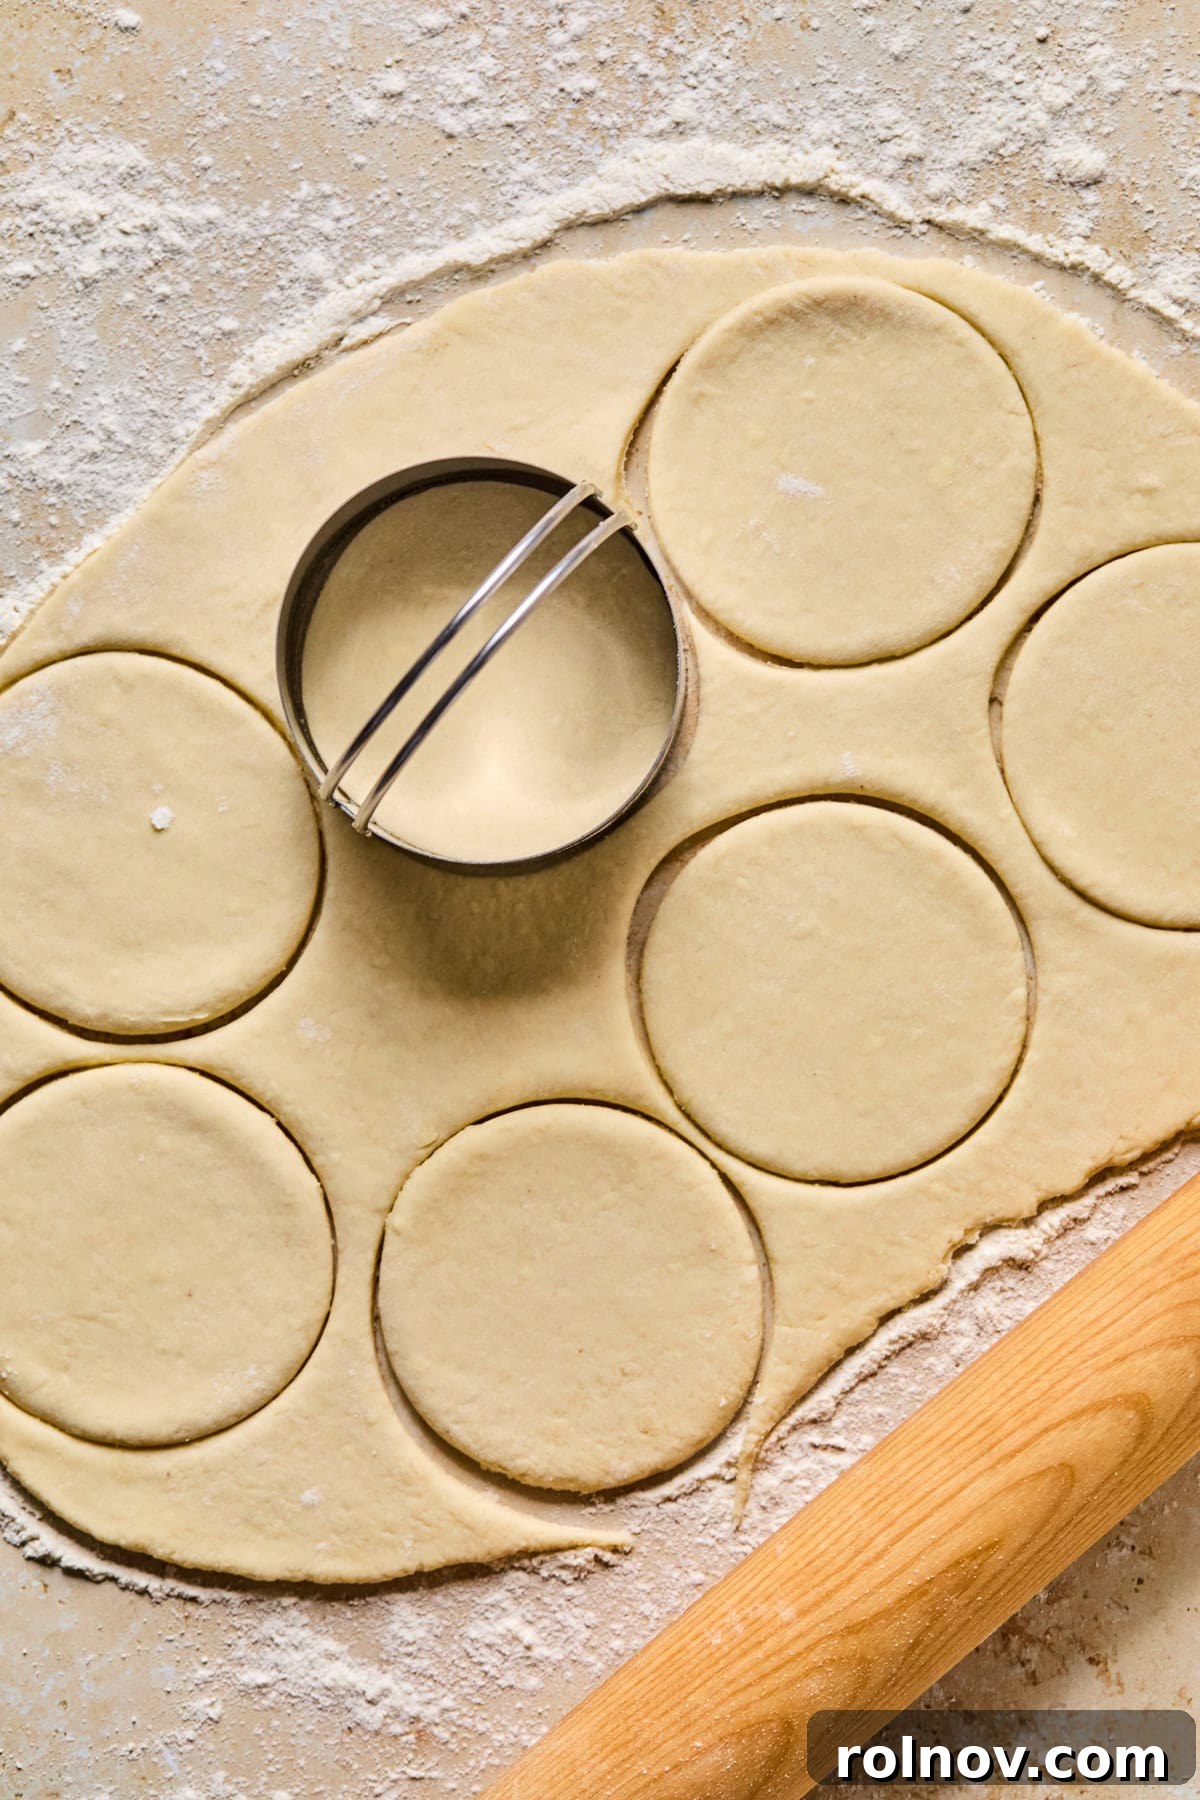
Step 9: Cut Out Pie Shapes. Using a round biscuit cutter or a cookie cutter of your desired size (a 3- to 4-inch cutter works well for individual hand pies), cut out your pie shapes. For variety, you can also use a knife or pastry wheel to cut the dough into rectangular shapes. Gather any dough scraps, gently re-roll them, and cut out additional shapes to maximize your yield.
Hand Pie Assembly: Crafting Your Perfect Treats
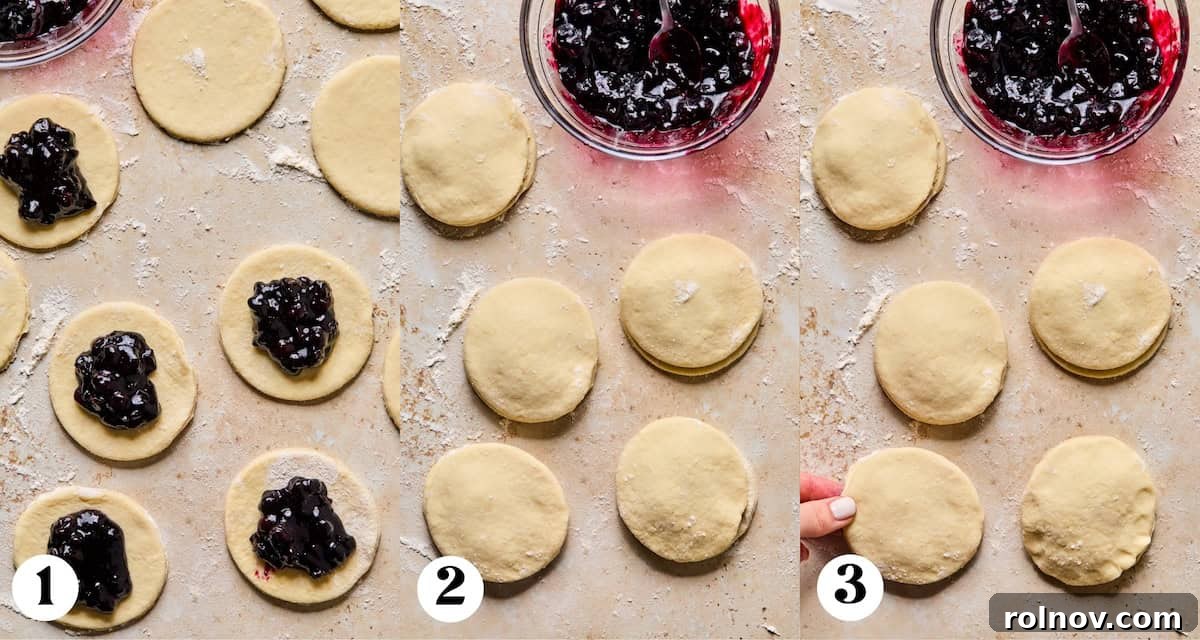
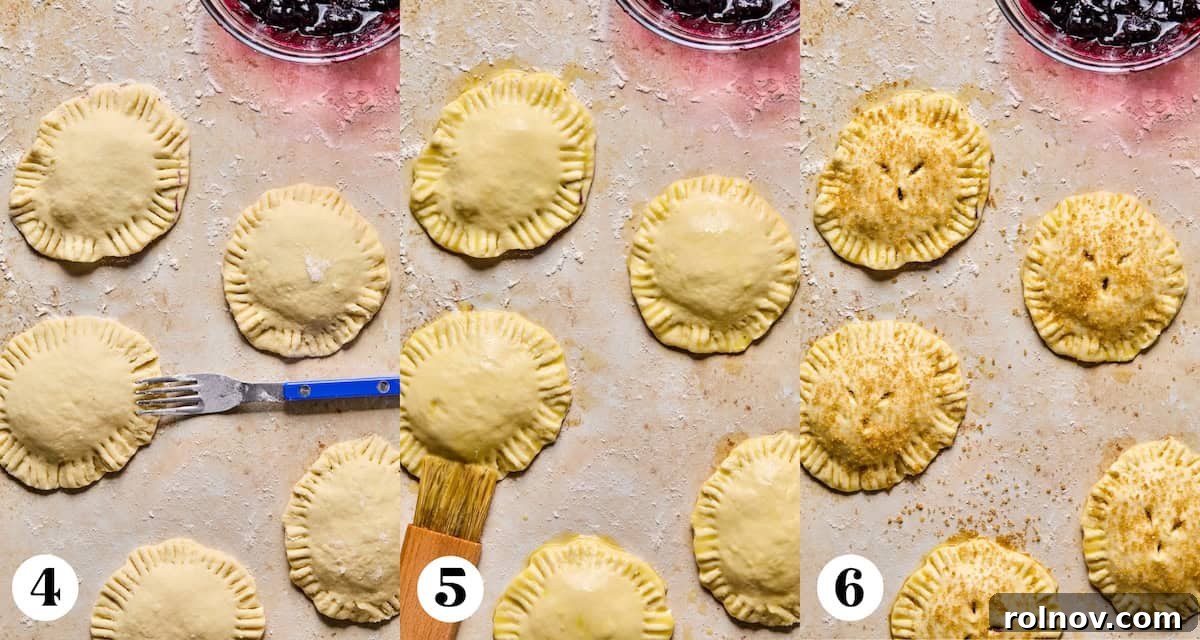
- Base Layer: Place one of your cut-out round crusts onto a lightly flour-dusted surface or directly onto a piece of parchment paper.
- Add Filling: Spoon about 1 to 1.5 tablespoons of the cooled blueberry filling into the center of the pie crust, leaving a clear border around the edges. Avoid overfilling, as this can lead to leaks during baking.
- Top Layer & Initial Seal: Carefully place another crust circle directly on top of the filling. Gently press down around the edges with your fingers to seal the two layers of dough together, creating a preliminary seal. Don’t worry if a tiny bit of filling peeks out – it’s part of the rustic charm.
- Crimp the Edges: For a more secure seal and a beautiful finish, use the tines of a fork to firmly crimp all around the edges of the hand pie. This not only adds a decorative touch but also helps prevent the filling from escaping as it cooks.
- Apply Egg Wash: In a small bowl, whisk together one egg with 2 teaspoons of water until well combined. Using a pastry brush, lightly coat the entire surface of each blueberry hand pie with this egg wash. This will help them achieve that gorgeous, glossy golden-brown color when cooked. If you have an egg allergy, a brush of milk or cream can offer a similar, though slightly less shiny, effect.
- Vent and Decorate: Using a sharp knife, cut several small slits into the top crust of each hand pie. These vents allow steam to escape during cooking, preventing the pies from puffing up excessively and ensuring a crispier crust. Finally, sprinkle a generous amount of coarse sugar over the top for a dazzling finish and added crunch. Repeat these steps with all remaining pie crusts and filling.
Air Fryer Cooking Instructions
Get ready for perfectly golden and flaky hand pies in a flash!
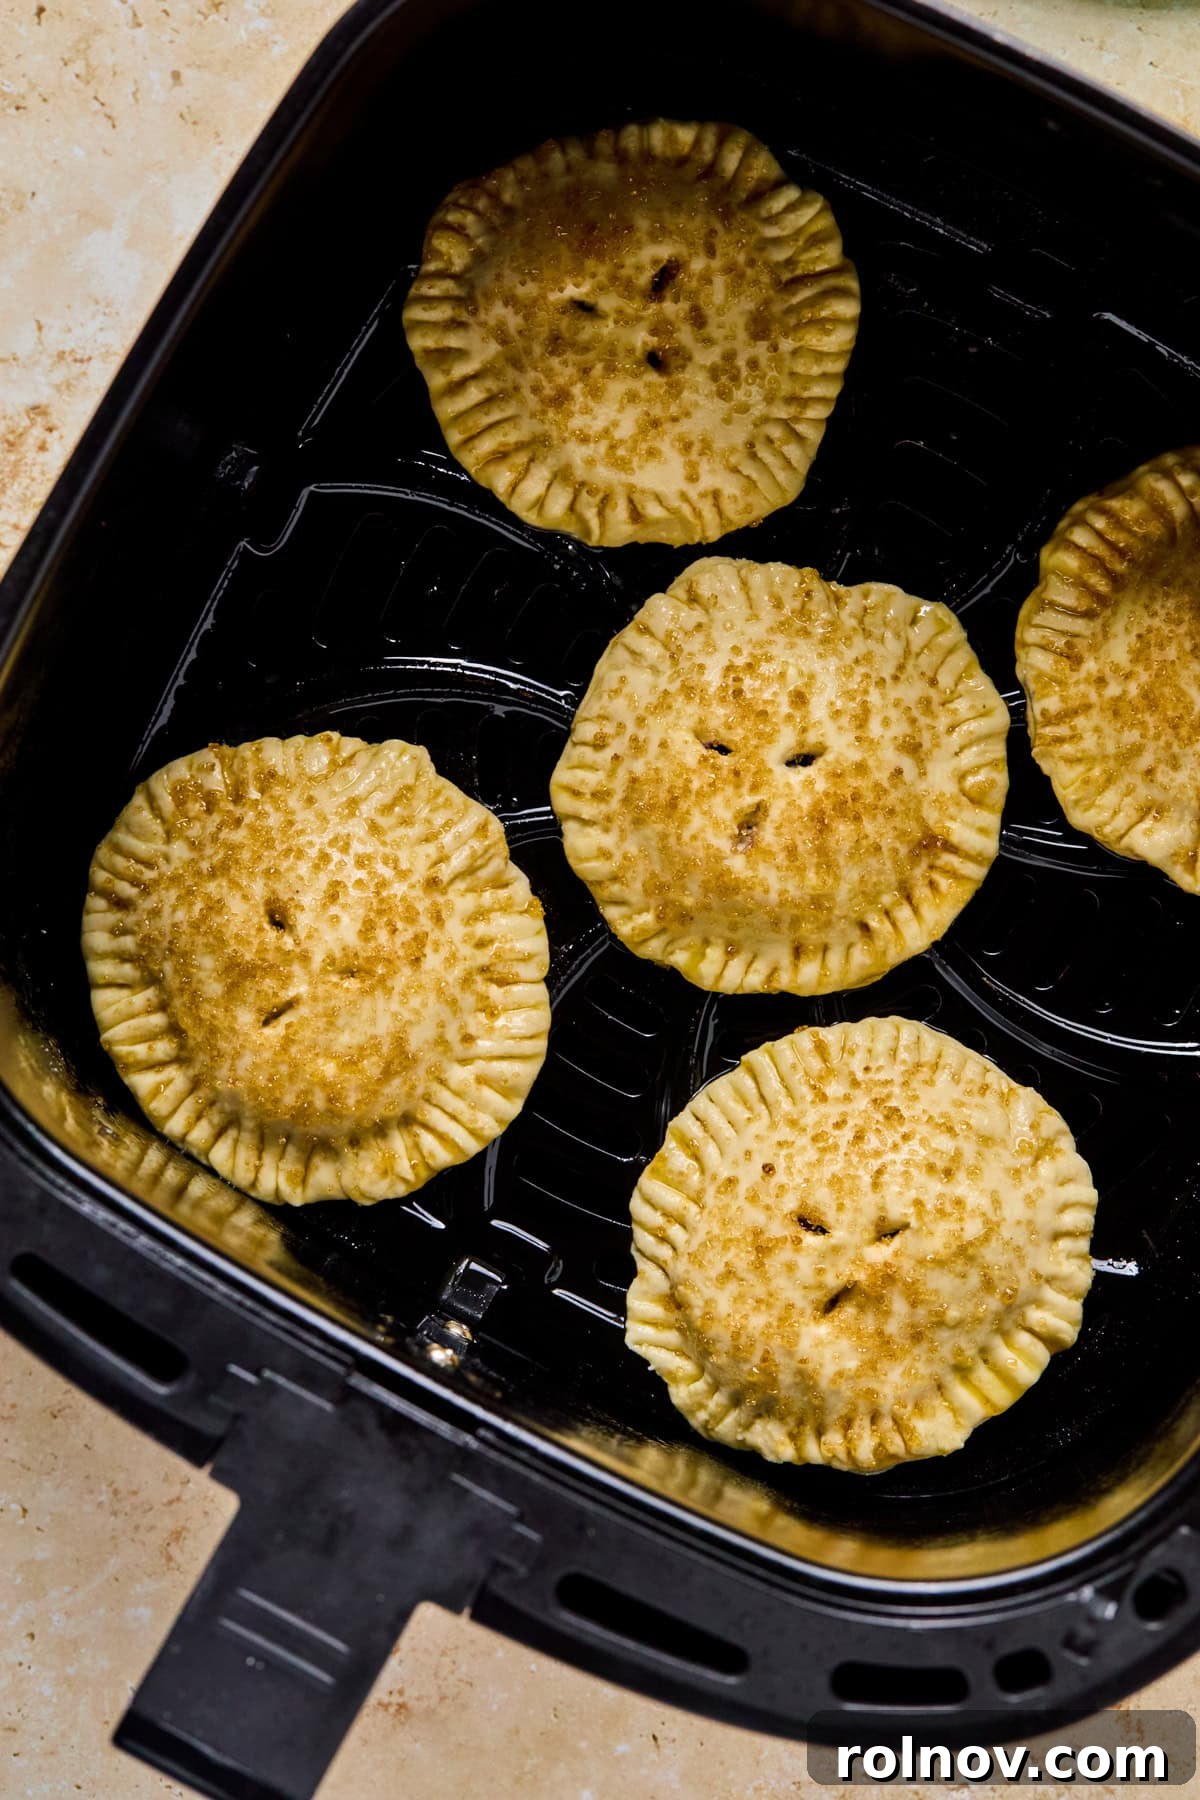
Step 1: Load the Air Fryer. Lightly spray or brush the basket of your air fryer with a little oil to prevent sticking. Carefully place each assembled hand pie into the basket, ensuring they are in a single layer and not overcrowding the basket. This allows for optimal air circulation, which is essential for even cooking and crispness. You may need to cook in batches depending on the size of your air fryer.
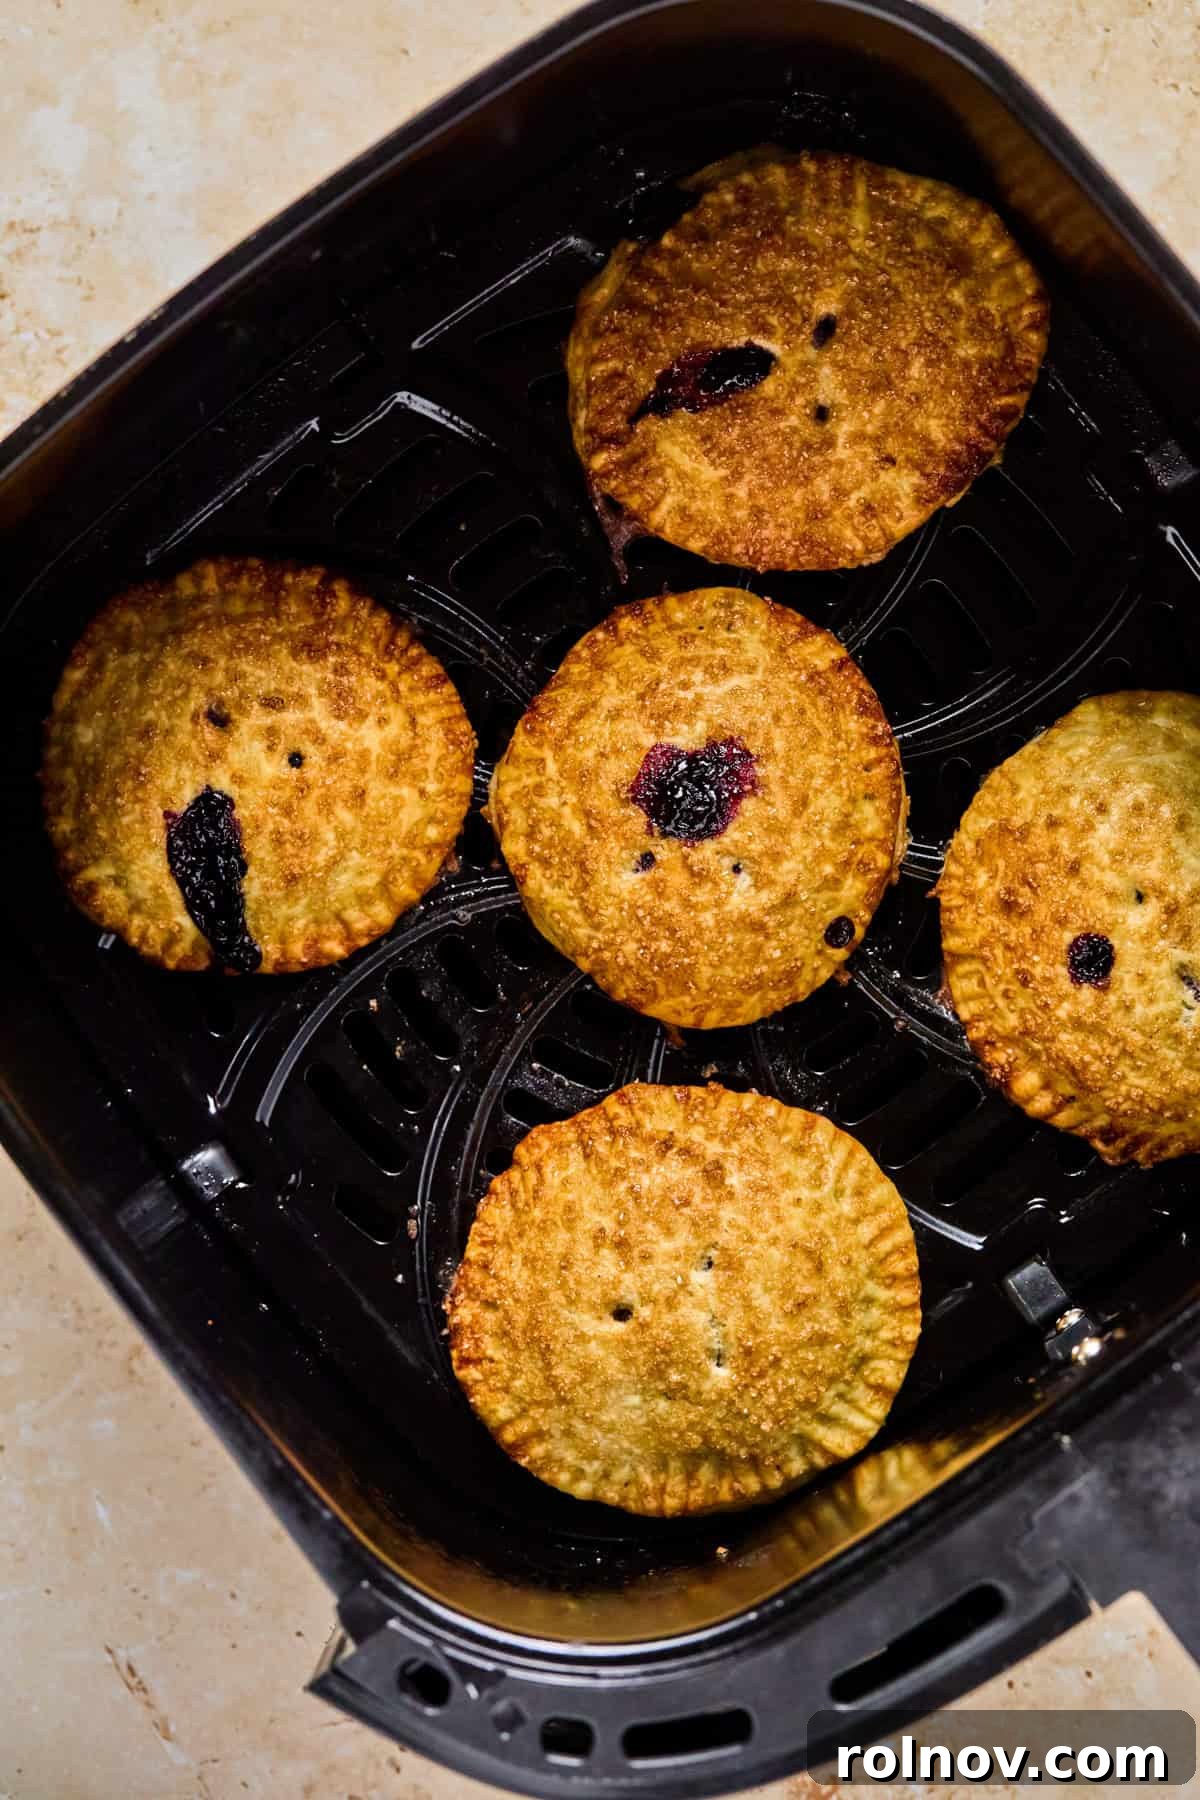
Step 2: Air Fry to Golden Perfection. Set your air fryer to 340°F (170°C). Air fry the hand pies for approximately 10-12 minutes, or until the crust is beautifully golden brown and looks crisp. Cooking times can vary slightly between different air fryer models, so keep an eye on them. Once cooked, carefully remove the pies from the air fryer and transfer them to a wire cooling rack. Allow them to cool for at least 5-10 minutes before serving, as the filling will be extremely hot and needs time to set.
Traditional Oven Baking Instructions (No Air Fryer? No Problem!)
Even without an air fryer, you can still enjoy these delightful hand pies! Simply preheat your oven to 400°F (200°C). Arrange the assembled hand pies on a baking sheet lined with parchment paper. Bake for approximately 20 minutes, or until the crust is golden brown and crisp to your liking. Keep an eye on them as oven temperatures can vary.
Expert Recipe Tips for Perfect Hand Pies
- The Thicker the Filling, The Better: This is arguably the most crucial tip for mess-free hand pies. A thick, almost jammy blueberry filling will stay contained within the crust much more effectively. If your filling is too runny, it’s very likely to seep out during assembly and cooking, creating a sticky situation. Allow the filling to thicken sufficiently on the stove and then let it cool completely before spooning it into the pie crusts. A chilled filling is much easier to work with.
- Rescuing Dry or Crumbly Crust: If, after chilling, your pie crust seems a bit dry or crumbly when you try to roll it out, don’t despair! You can often remedy this by sprinkling a very small amount of ice water (about half a teaspoon at a time) onto the dry spots and gently working it into the dough with your hands. Knead it just enough to bring the dough back together, but avoid overworking, which can develop too much gluten and make the crust tough.
- Embrace Smart Shortcuts: As mentioned before, there’s absolutely no need to feel guilty about using shortcuts. These Air Fryer Hand Pies do require some time for preparation and assembly, so if using a pre-made pie crust or even a quality canned pie filling saves you time and makes the baking process more enjoyable, then by all means, do it! The goal is to create a delicious treat with as much (or as little) effort as you desire.
- Know Your Air Fryer: Every air fryer is slightly different, and even the same model can vary. I found that 340°F (170°C) for 10-12 minutes worked best in my air fryer, yielding perfectly cooked, golden-brown pies without any burning, even without preheating. It’s a good idea to perform a test batch if it’s your first time or if you suspect your air fryer runs hotter or cooler. If your pies aren’t quite golden after the recommended time, simply continue heating for a couple more minutes, checking frequently. Adjusting to your appliance’s nuances will guarantee the best results.
- Cool Completely Before Storing: For the best texture and to prevent sogginess, always allow your hand pies to cool completely on a wire rack before storing them. Trapped steam can make the crust soft and less enjoyable.
Storage Solutions for Your Hand Pies
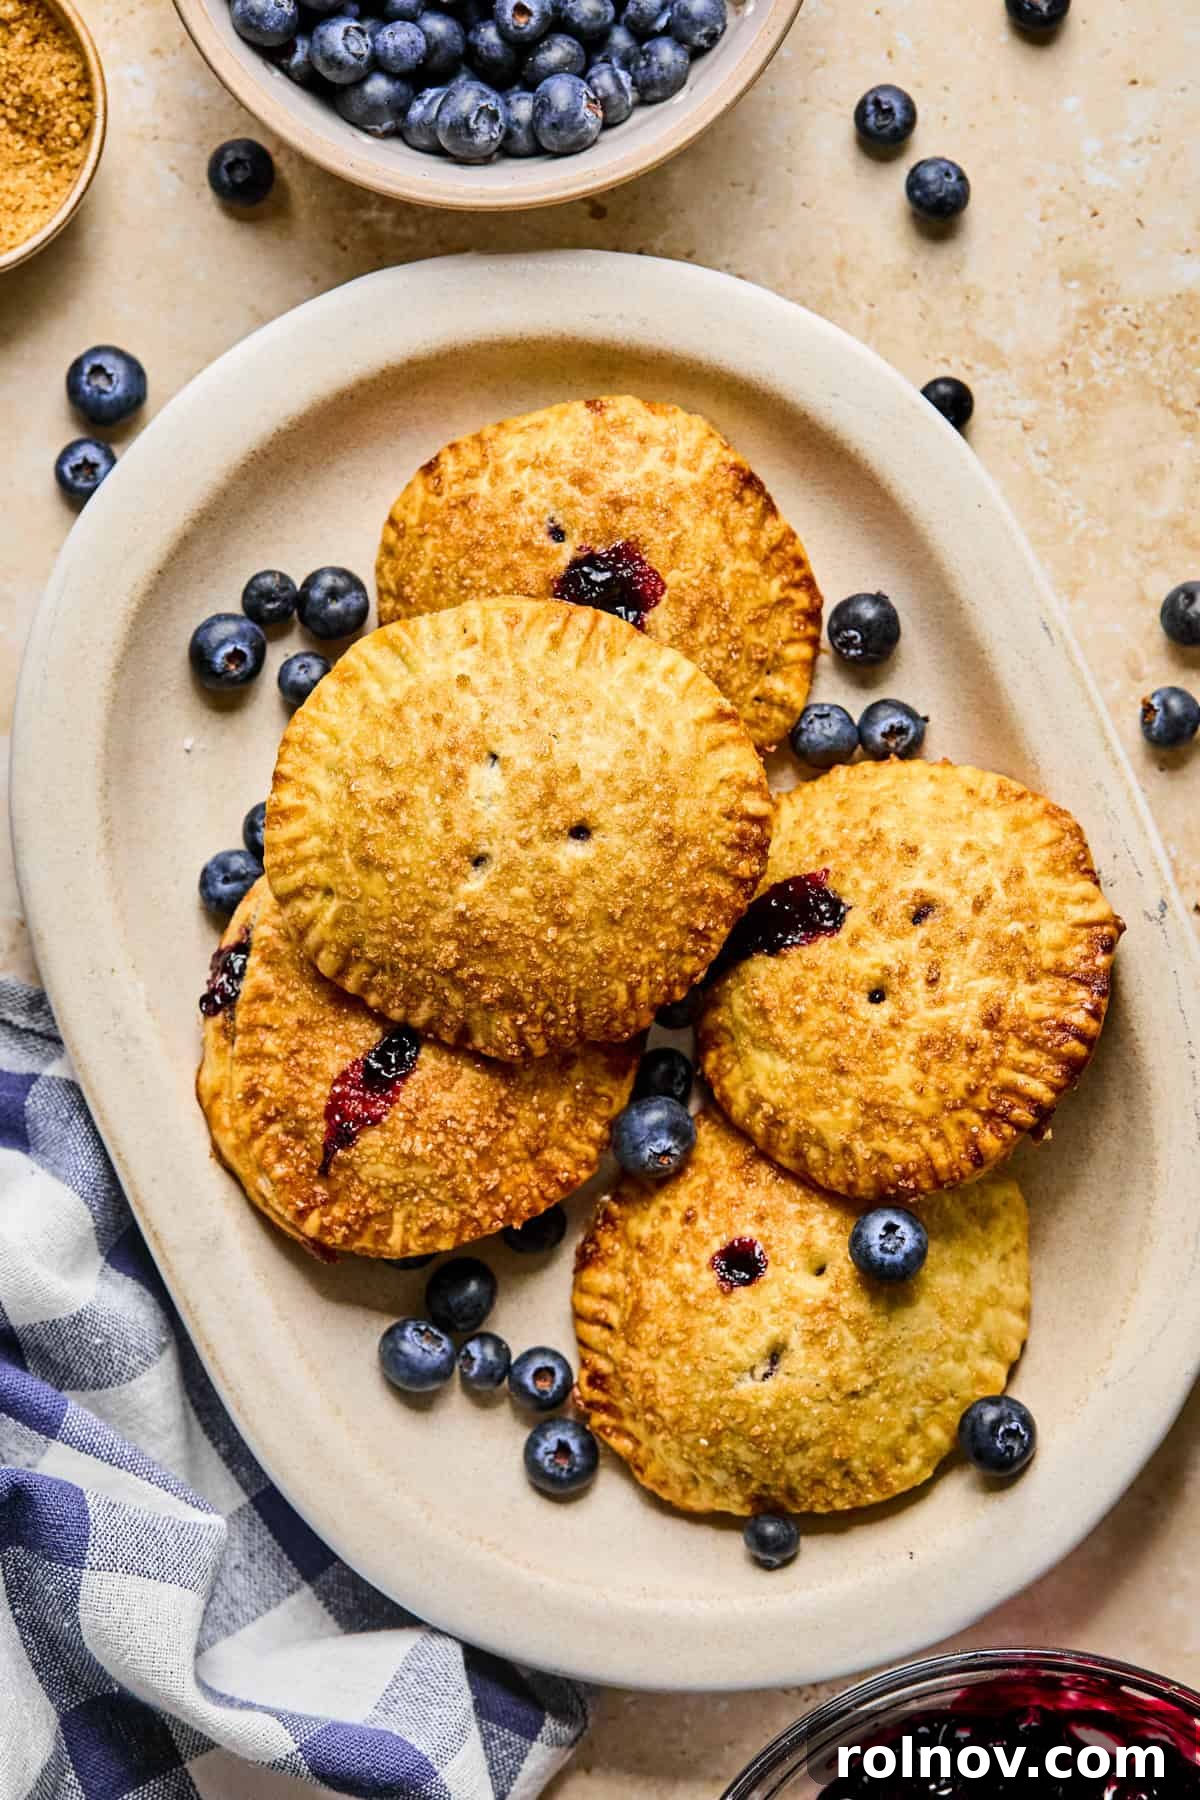
To enjoy leftover hand pies, you can store them in an airtight container at room temperature for up to 2 days. For extended freshness and to help maintain the crust’s texture, transfer them to the refrigerator where they will keep well for approximately 4-5 days. For best results and to prevent them from drying out, I recommend wrapping each individual hand pie in plastic wrap before placing them in the airtight container.
These hand pies also freeze beautifully once they are completely cooled. Wrap each pie individually in plastic wrap, then transfer them to a freezer-safe bag or container. They can be frozen for up to 3 months. When you’re ready to enjoy, simply thaw them at room temperature or gently reheat them in the air fryer or oven until warmed through and crisp again.
Exciting Recipe Variations to Explore
- Seasonal Fruit Fillings: While blueberries are fantastic, the beauty of hand pies lies in their adaptability. You can easily substitute the blueberry filling with any variety of seasonal fruit. Think luscious apple cinnamon, sweet peach, tangy cherry, or a vibrant mixed berry medley. For autumn, pumpkin or sweet potato pie filling would be incredible!
- Canned Pie Filling: For the ultimate time-saver, feel free to use your favorite store-bought canned pie filling. This opens up a world of flavor options instantly, from classic apple and cherry to more unique seasonal offerings. Just ensure the filling isn’t too runny before using.
- Delicious Jam Alternative: Another excellent shortcut is to use your favorite fruit jam or preserves instead of making a fresh filling. Simply spoon a tablespoon or two of jam into each pie. Choose a high-quality, fruit-forward jam for the best flavor.
- Pre-Made Pie Crust Power: Don’t hesitate to use pre-made pie crust from the grocery store. We’ve all been there, and it’s a fantastic way to cut down on prep time without sacrificing the joy of a homemade treat. Look for options that promise a flaky texture.
- Indulgent Sweet Fillings: Step away from fruit and fill these hand pies with decadent alternatives! Nutella is a popular choice for its rich, chocolate-hazelnut flavor. You could also use a spoonful of dulce de leche, a blend of cream cheese and sugar for a cheesecake-like treat, or a sprinkle of chocolate chips (dark, milk, or white!) for a molten center.
- Drizzle with Icing or Glaze: Elevate your hand pies with a simple icing or glaze. A basic powdered sugar glaze (powdered sugar mixed with a little milk or lemon juice) can add an extra layer of sweetness and visual appeal. This simple icing from our homemade pop-tarts recipe would be a perfect complement. You can also experiment with a cream cheese glaze or a light lemon drizzle.
- Savory Hand Pies: Don’t limit yourself to sweet! Hand pies can be wonderfully savory. Consider fillings like seasoned ground beef and cheese, spinach and feta, or even a classic chicken pot pie mixture. These make fantastic appetizers or light meals.
More Air Fryer Recipes You’ll Love
- Air Fryer French Toast Sticks
- Buffalo Air Fryer Potatoes
- Air Fryer Broccoli
- Air Fryer Apples
- Parmesan Air Fried Potato Wedges
- 3 Cheese Air Fryer Zucchini
- Air Fryer Hamburgers
- Air Fryer Coconut Shrimp with Honey Sriracha Sauce
HUNGRY FOR MORE? Stay connected and never miss a new recipe! Subscribe to our newsletter and follow us on Facebook, Instagram, and Pinterest for all the latest culinary inspiration!
Blueberry Air Fryer Hand Pies

Ingredients
For the Crust:
- 1 ¼ c flour
- ½ c butter, very cold, cubed
- 2 tsp sugar
- ¾ tsp sea salt
- 3-4 Tbsp ice water
For the Blueberry Filling:
- 1 ½ c blueberries
- ⅓ c sugar
- 2 tsp corn starch
- 1 Tbsp water
- 2 tsp lemon zest, optional
For Hand Pie Assembly:
- 1 egg
- 1 Tbsp water
- coarse sugar, optional
Instructions
To Make the Pie Crust:
-
Add the flour, salt, sugar, and very cold butter to a food processor. Pulse about 10-15 times for 1-2 seconds each until the mixture is crumbly and the butter is broken down into pea-sized pieces.
-
Slowly add the ice water, about 1 tablespoon at a time, allowing it to process briefly before adding more. Continue until a ball of dough forms. Transfer the dough to a floured surface and gently form it into a 1-inch thick disk. Wrap tightly in plastic wrap and chill for at least 30 minutes (or up to 1 hour for best results).
To Make the Blueberry Filling:
-
Add all filling ingredients (blueberries, sugar, cornstarch, water, and optional lemon zest) to a small saucepan. Simmer on medium-low heat for about 10 minutes, stirring occasionally, until the mixture thickens to a jam-like consistency.
-
Remove the saucepan from the heat and allow the filling to cool completely before using. A cool, thick filling is crucial for easy assembly.
Assemble the Hand Pies:
-
Remove the chilled pie dough from the fridge and roll it out on a lightly floured surface to about 1/4 inch thickness. Using a 3.5-inch (or similar size) biscuit or cookie cutter, cut out circles. Gather and re-roll any scraps to cut additional shapes until all dough is used.
-
Place one dough circle on a floured surface. Scoop about 1.5 tablespoons of cooled blueberry filling into the center, leaving a clear border around the edges. Place another dough circle on top. Use your fingers to gently pinch and seal the edges of the dough together. Then, use a fork to crimp around the edges for a more secure seal and decorative finish.
-
In a small bowl, whisk together 1 egg and 1 tablespoon of water to create an egg wash. Brush this mixture completely over the top and sides of each hand pie. Cut several small slits into the top crust to allow steam to escape, and sprinkle with coarse sugar if desired for added crunch and sparkle. Repeat with all remaining hand pies.
-
Lightly oil or spray your air fryer basket. Carefully place the assembled hand pies into the basket in a single layer, ensuring they are not overcrowded. Preheat your air fryer to 340°F (170°C). Air fry the hand pies for 10-12 minutes, or until they are beautifully golden brown and crisp.
-
Once cooked, remove the hand pies from the air fryer and transfer them to a wire cooling rack. Allow them to cool for at least 5-10 minutes before enjoying. The filling will be extremely hot, so trust me on this one – biting in too soon is NOT fun!
Notes
Ensure a Thick Filling: As emphasized earlier, the consistency of your blueberry pie filling is paramount. A thick, jammy filling is much less likely to ooze out and create a messy situation during assembly and cooking. Be sure to cook it until noticeably thick and allow it to cool down significantly before filling your pie crusts. This simple step will save you a lot of clean-up and ensure a beautifully contained pie.
Oven Baking Option: If you don’t own an air fryer, these delicious hand pies can be easily baked in a conventional oven. Prepare them as directed, then place them on a baking sheet lined with parchment paper. Preheat your oven to 400°F (200°C) and bake for approximately 20 minutes, or until the crust is golden brown and perfectly crisp.
Optimal Storage: Leftover hand pies can be stored at room temperature in an airtight container for up to 2 days. To prolong their freshness and prevent the crust from becoming dry, it’s best to store them in the refrigerator for about 4-5 days. For best results, individually wrap each pie in plastic wrap before placing them in the container.
These hand pies are also freezer-friendly. Once completely cooled, wrap each pie individually and transfer them to a freezer-safe bag or container. They can be frozen for up to 3 months. Thaw at room temperature or gently reheat in an oven or air fryer for a fresh-baked taste.
Nutrition Information (Approximate per Serving)
- Calories: 313 kcal
- Carbohydrates: 38 g
- Protein: 4 g
- Fat: 16 g
- Saturated Fat: 10 g
- Trans Fat: 1 g
- Cholesterol: 68 mg
- Sodium: 438 mg
- Potassium: 71 mg
- Fiber: 2 g
- Sugar: 16 g
- Vitamin A: 532 IU
- Vitamin C: 4 mg
- Calcium: 15 mg
- Iron: 1 mg
Nutrition information is automatically calculated and should only be used as an approximation.
Did you enjoy this recipe? Have a question?
Leave a comment below!
Shop This Post: Recommended Tools for Success
Equip your kitchen with the right tools to make these Air Fryer Hand Pies and many more delicious creations with ease. Here are some of our top recommendations:
Air Fryer
An essential appliance for quick, crispy, and healthier cooking, perfect for these hand pies and a multitude of other dishes.
Buy Now →
Food Processor
Makes preparing the flaky pie crust a breeze, mixing ingredients quickly and evenly without overworking the dough.
Buy Now →
Biscuit Cutters
Ideal for cutting uniform circles for your hand pies, ensuring consistent size and shape for even cooking.
Buy Now →
Pastry Brush
Perfect for applying egg wash to achieve that beautiful golden-brown, shiny crust on your hand pies.
Buy Now →