

Dive into the delightful world of cake pops with an exciting twist – this version is entirely no-bake! These Halloween Cake Pops are wonderfully easy to create, incredibly fun to decorate, and absolutely irresistible to eat. Forget spending hours in the kitchen; whip up this holiday favorite with minimal effort and maximum festive cheer!
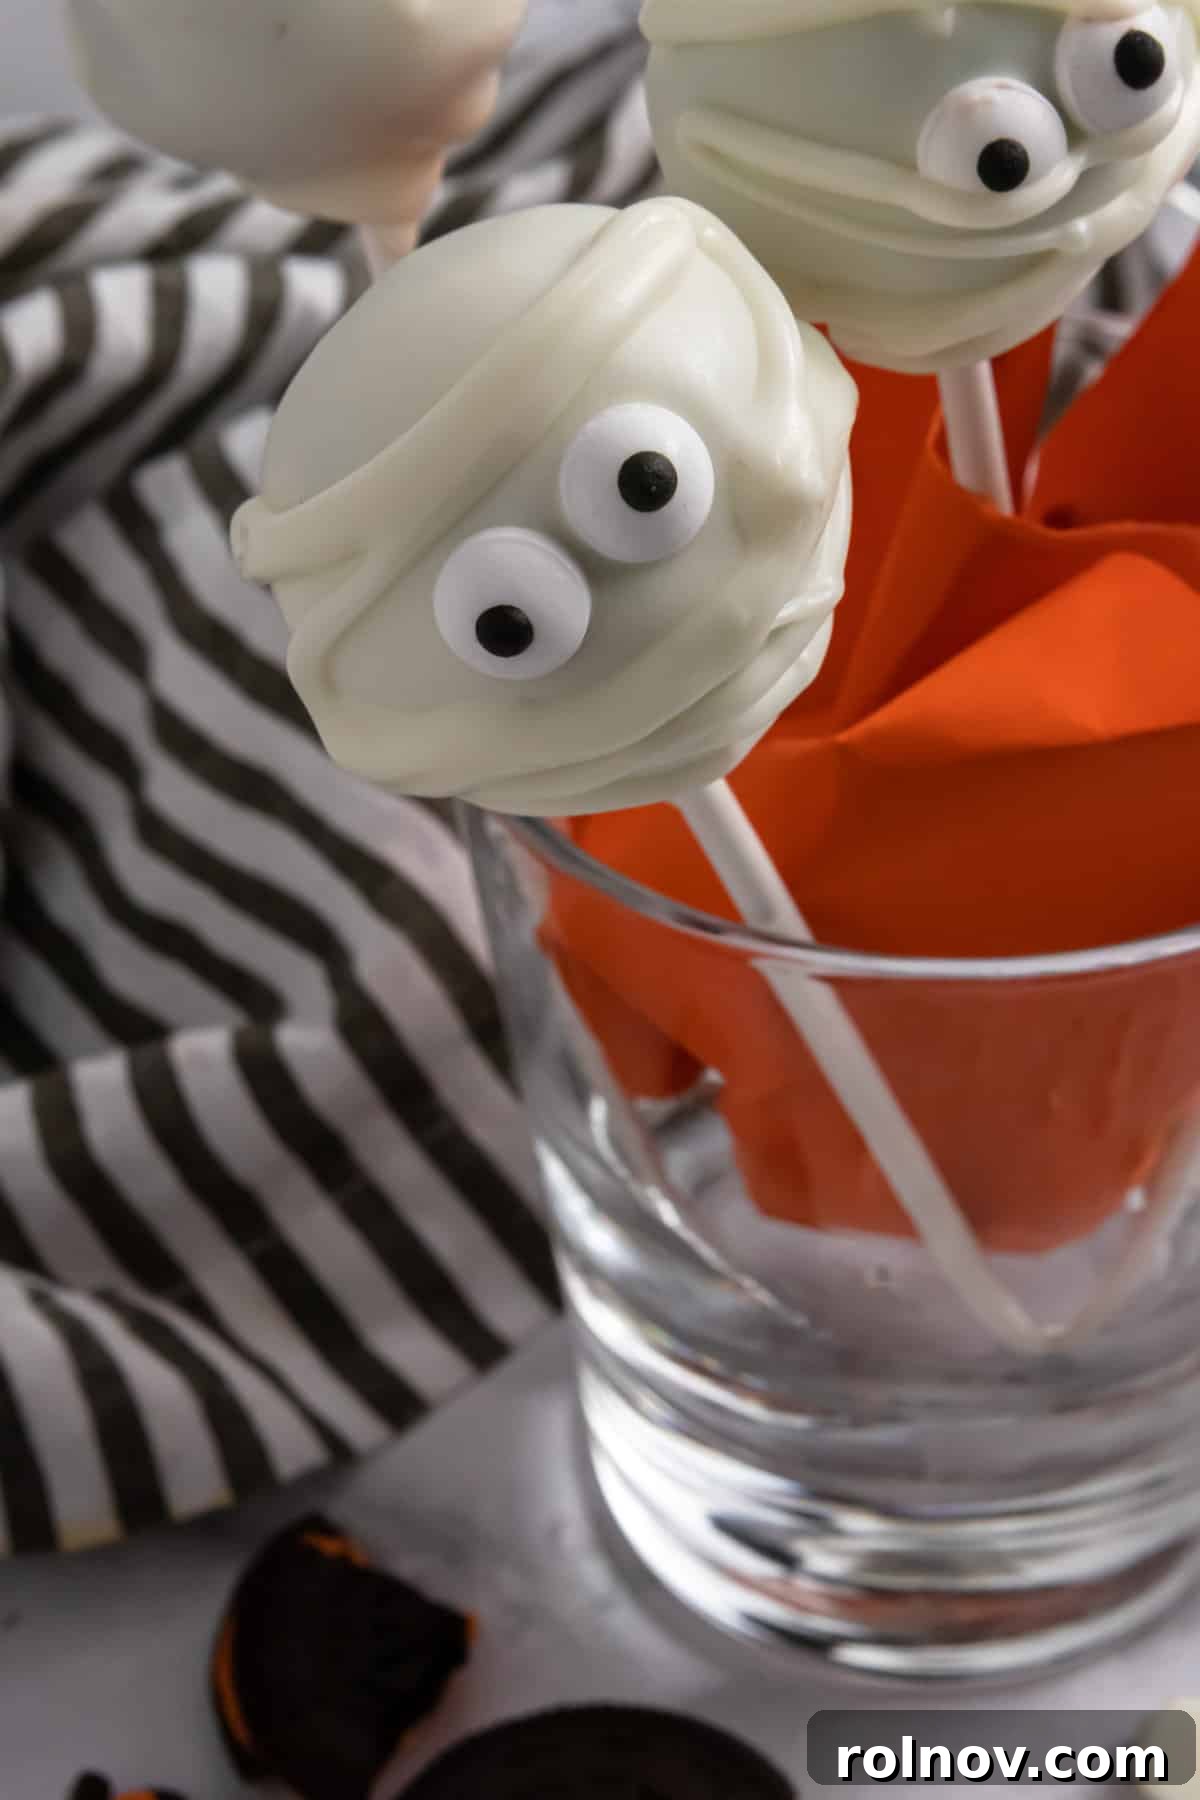
Unleash Your Inner Treat Maker with No-Bake Halloween Cake Pops!
Creating show-stopping Halloween treats doesn’t have to be a daunting task. Imagine transforming a simple cake into vibrant, bite-sized delights without even turning on your oven! Our no-bake Halloween Cake Pops recipe is designed for ease, enjoyment, and efficiency, making it the perfect project for busy parents, enthusiastic bakers, or anyone looking to add a touch of homemade magic to their Halloween festivities.
If you’re a devoted fan of cake pops but find yourself short on time or energy, this recipe is your ultimate holiday savior. We’re here to prove that a “no-bake” cake pop is not only possible but also incredibly delicious and fun to make. Get ready to impress your friends and family with these charming, easy-to-customize Halloween treats!
Why You’ll Fall in Love with These Easy No-Bake Cake Pops:
- **Truly No-Bake:** Seriously, no oven required! We skip the traditional baking step entirely, saving you over an hour of prep time.
- **Super Versatile:** These cake pops are a blank canvas for your creativity. Experiment with a myriad of fun colors, spooky characters, and imaginative designs to match any theme or holiday.
- **Nice and Light, Yet Flavorful:** Despite their ease, these cake pops boast a delightful texture and rich flavor that will have everyone reaching for more.
The Secret Weapon: Store-Bought Angel Food Cake
The magic behind these lightning-fast cake pops lies in a simple yet brilliant shortcut: a fresh Angel Food Cake from your local grocery bakery. This pre-baked marvel instantly eliminates the need to bake and cool a cake from scratch, drastically cutting down your preparation time. Angel Food cake is naturally light and airy, making it incredibly easy to crumble and mix into a perfect cake pop consistency. It’s often available un-iced, which is exactly what we need for this recipe.
While Angel Food cake is our top recommendation for its lightness and convenience, if you can find another un-iced, plain cake like a pound cake, you could experiment with that too. However, the delicate texture of Angel Food cake truly shines here. If you adore simple, no-bake recipes, you might also enjoy whipping up this Halloween Oreo Dirt Cake alongside your cake pops for an extra festive touch!
Essential Ingredients for Your Halloween Cake Pop Adventure
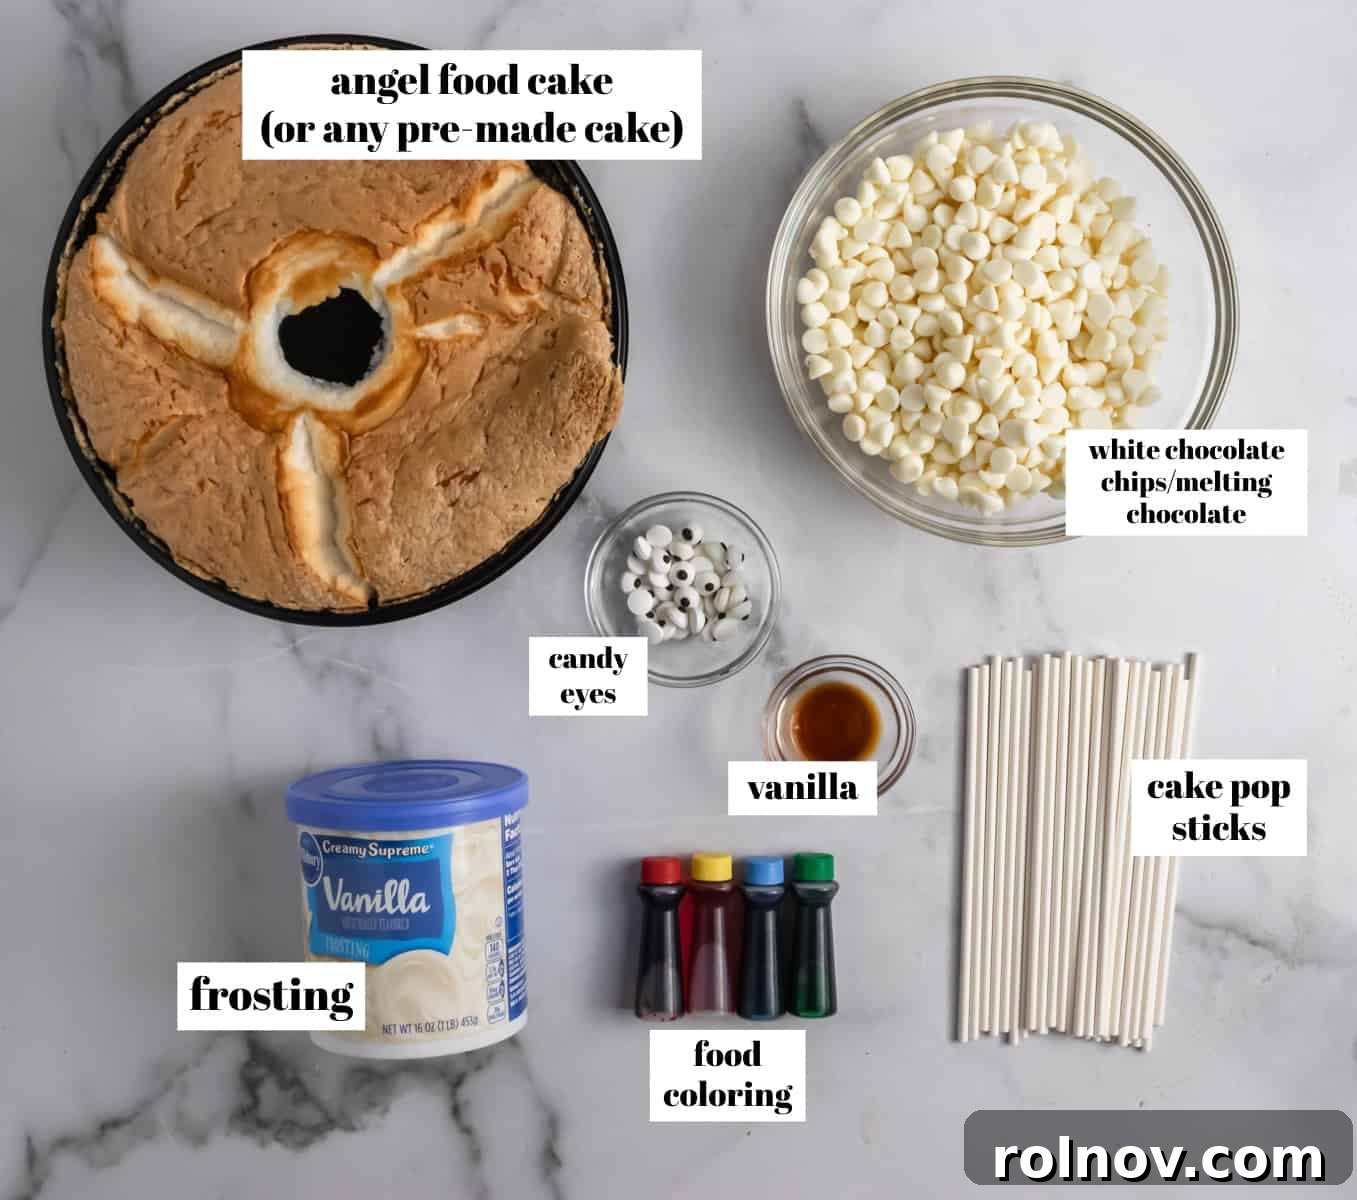
Gathering the right components is the first step to crafting these delightful Halloween cake pops. Here’s a detailed look at what you’ll need, along with tips for selection:
- **Angel Food Cake (12 oz.):** Your ultimate shortcut! Seek out a fresh, un-iced Angel Food Cake in your grocery store’s bakery section. Its light, airy texture is perfect for easily crumbling and forming moist cake balls without the need for any baking. If Angel Food cake isn’t available, an un-iced pound cake or even a dense vanilla sponge cake could work, though Angel Food offers the best results for a truly “no-bake” and light texture.
- **Vanilla Frosting (¾ cup):** This acts as the essential binder for your cake pops, providing moisture and a sweet, creamy flavor. Opt for a good quality vanilla frosting, as its taste will be prominent.
- **Vanilla Extract (1 tsp):** A teaspoon of pure vanilla extract enhances the overall flavor profile, adding depth and warmth to both the cake and frosting mixture.
- **White Chocolate Chips or Melting Chocolate (2 ½ cups):** This amount is needed for dipping all your cake pops. White chocolate chips are a fantastic choice as they provide a smooth, neutral base that can be easily colored. Alternatively, you can use candy melts specifically designed for dipping. These are available in various colors (like orange, black, green) and can save you a step if you’re not planning to dye the chocolate yourself. For best results, choose a high-quality brand known for good melting properties.
- **Food Coloring (Gel or Liquid):** Essential for transforming your white cake pops into spooky Halloween hues. Gel food coloring is often recommended as it provides more vibrant and concentrated colors with fewer drops compared to liquid dyes, which can sometimes thin your mixture.
- **Optional Decorating Goodies:** This is where the fun truly begins, allowing you to personalize each cake pop!
- **Sprinkles:** Orange, black, purple, and green sprinkles are perfect for an instant festive touch. Halloween-themed sprinkle mixes are also a great option.
- **Crushed Oreos:** Adds a dark, crumbly texture resembling “dirt” or a spooky, shadowy effect. You can use regular or Halloween-themed Oreos.
- **Candy Eyeballs:** Instantly turns your cake pops into adorable (or delightfully creepy) monsters, ghosts, or other creatures.
- **Other Colored Chocolate Melts:** Keep a few extra colors on hand for contrasting drizzles, stripes, or small decorative features.
- **Piping Icing/Gel:** Use store-bought tubes of icing or make your own for drawing intricate faces, spiderwebs, mummy bandages, or other fine details.
- **Cake Pop Sticks (18-20):** You’ll need about this many sticks to hold your delicious creations. Choose sturdy sticks that can support the weight of the cake pop. If you don’t have sticks, don’t worry – these can easily be enjoyed as cake truffles!
Step-by-Step Guide: Crafting Your Spooky Halloween Cake Pops
Follow these easy, detailed steps to bring your delightful Halloween cake pops to life. Precision and adequate chilling are key to ensuring perfect, professional-looking results!
1. Prepare the Cake Base:
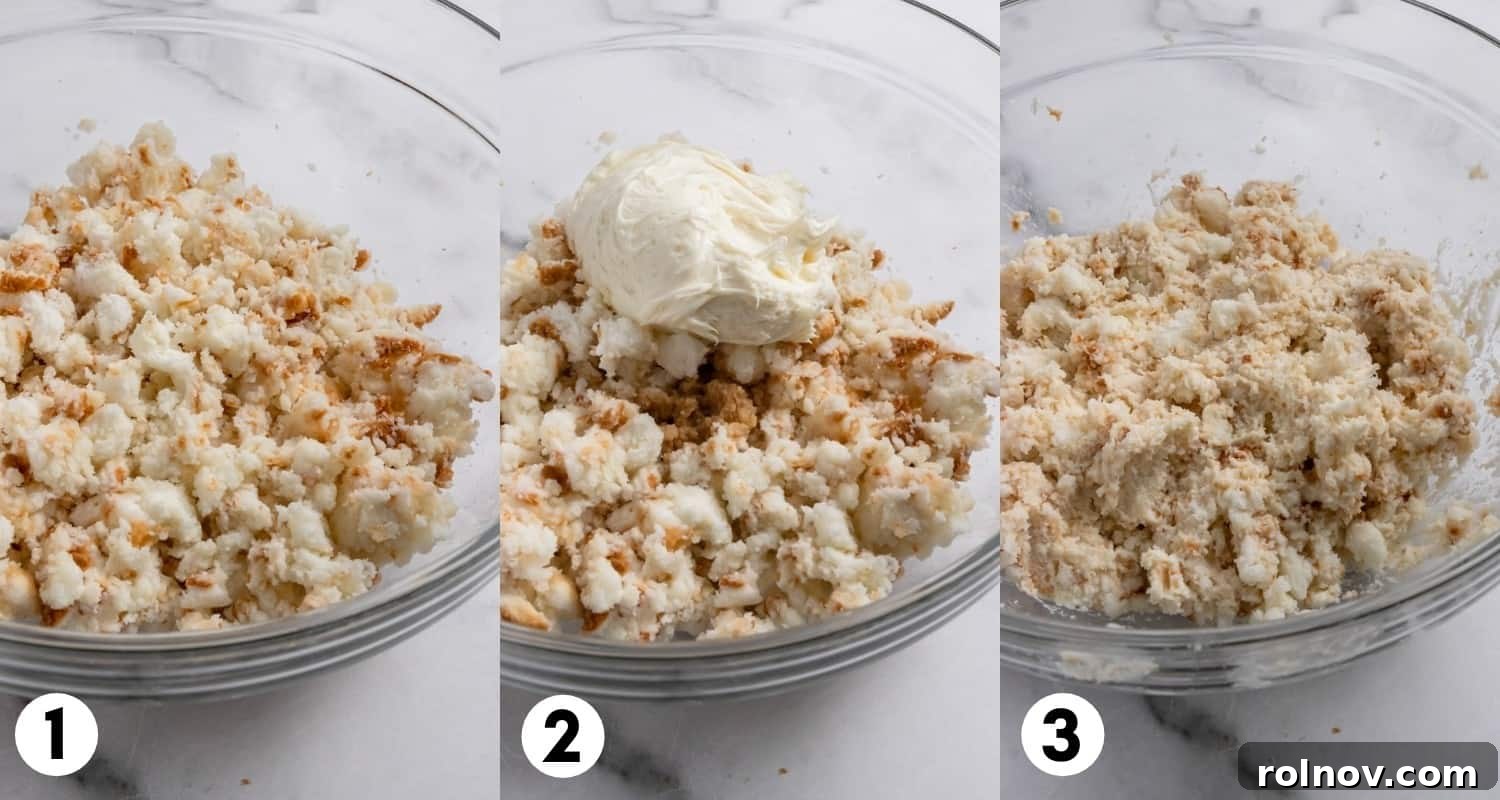
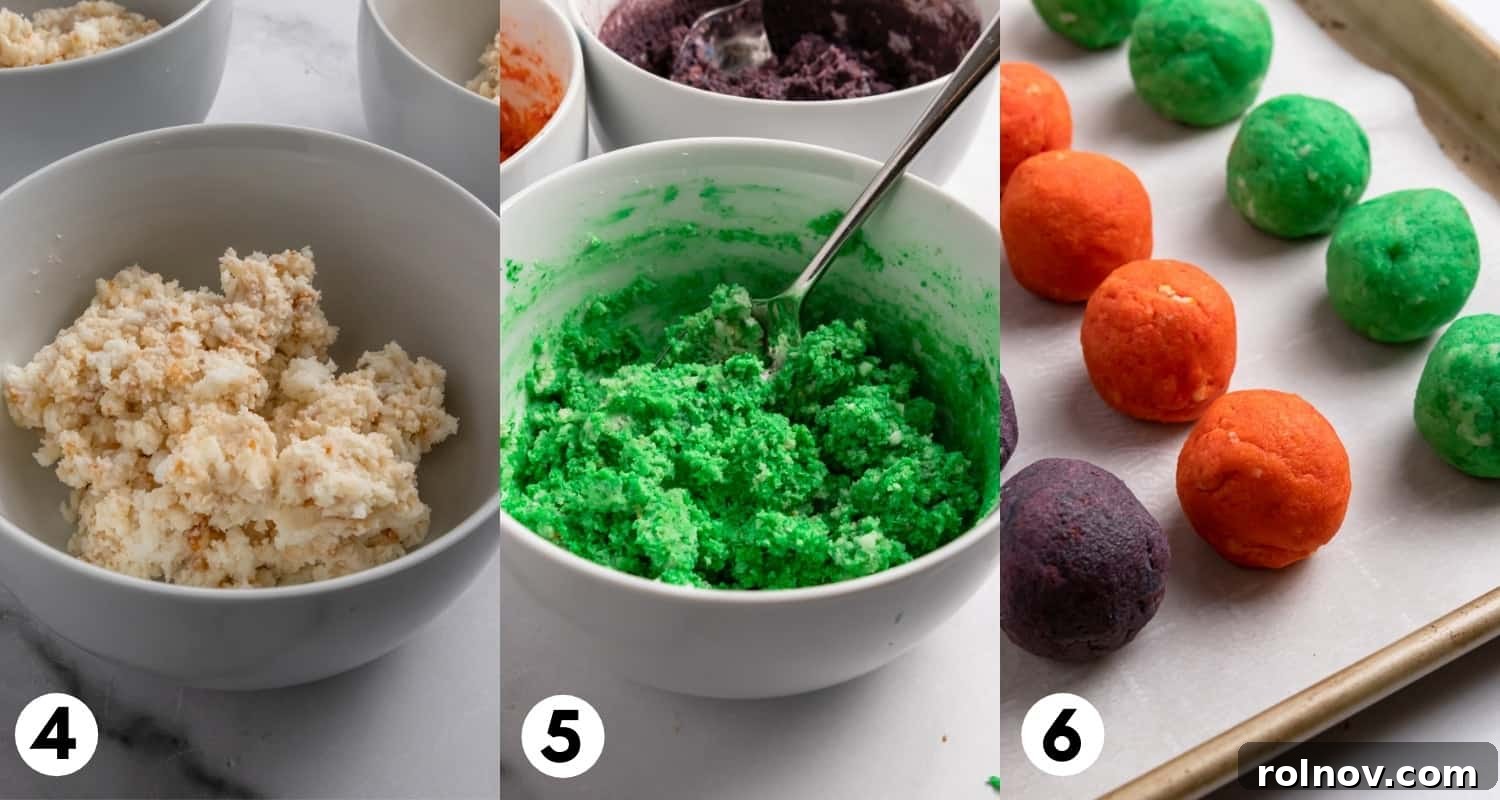
- Take your baked Angel Food Cake and place it into a large mixing bowl. Using clean hands, gently but thoroughly crumble the entire cake into very small pieces. The finer and more uniform the crumbs, the smoother and more consistent your cake pop mixture will be. This step is crucial for achieving that classic, melt-in-your-mouth cake pop texture.
- Add the ¾ cup of vanilla frosting and 1 teaspoon of vanilla extract to the crumbled cake. Begin to mix everything together, either using your hands (which works best for even incorporation) or a sturdy spoon. Continue mixing until the frosting is fully incorporated into the cake crumbs and the mixture forms a moist, cohesive “dough.” It should be pliable enough to roll into balls without crumbling or feeling overly sticky. If it feels too dry, add a tiny bit more frosting; if too wet, a tablespoon of powdered sugar can help.
2. Add Spooky Colors & Chill the Dough:
- If you’re planning to make multi-colored cake pops (which is highly recommended for Halloween!), divide the cake “dough” equally into separate bowls – one for each color you desire. For iconic Halloween shades like orange, green, and purple, you would divide the mixture into three bowls.
- Now, add your chosen food coloring to each bowl. For a vibrant green, aim for about 25 drops of green food coloring (adjust for intensity). For a rich orange, try a mix of approximately 13 yellow and 12 red drops. For a deep purple, combine about 13 red and 12 blue drops. Mix thoroughly into each bowl until the color is evenly distributed and vibrant. Feel free to adjust the number of drops to achieve your perfect hue.
- Once colored, place the bowls of cake dough (covered with plastic wrap) into the freezer for 10-15 minutes. This quick chill is essential as it makes the dough firmer, significantly easier to handle, and much smoother to roll into perfect, crack-free balls.
3. Roll the Cake Balls and Prepare for Dipping:
- Remove the chilled dough from the freezer. Roll the mixture into firm, approximately 1 ½-inch balls. Since Angel Food cake has a lighter consistency, it’s crucial to roll these balls tightly to ensure they hold their shape throughout the dipping process and don’t become flimsy. You should yield about 18 cake balls from a standard 12 oz. Angel Food Cake.
- Arrange the rolled cake balls on a baking sheet lined with parchment paper. Return them to the freezer. **Pro Tip for Success:** The longer the cake balls remain frozen and firm, the better they will hold up during the warm chocolate dipping process. I highly recommend freezing them for at least 30 minutes, or even up to several hours, pulling out only a few at a time to work with, to maintain their chill.
4. Secure the Sticks with Chocolate “Glue”:
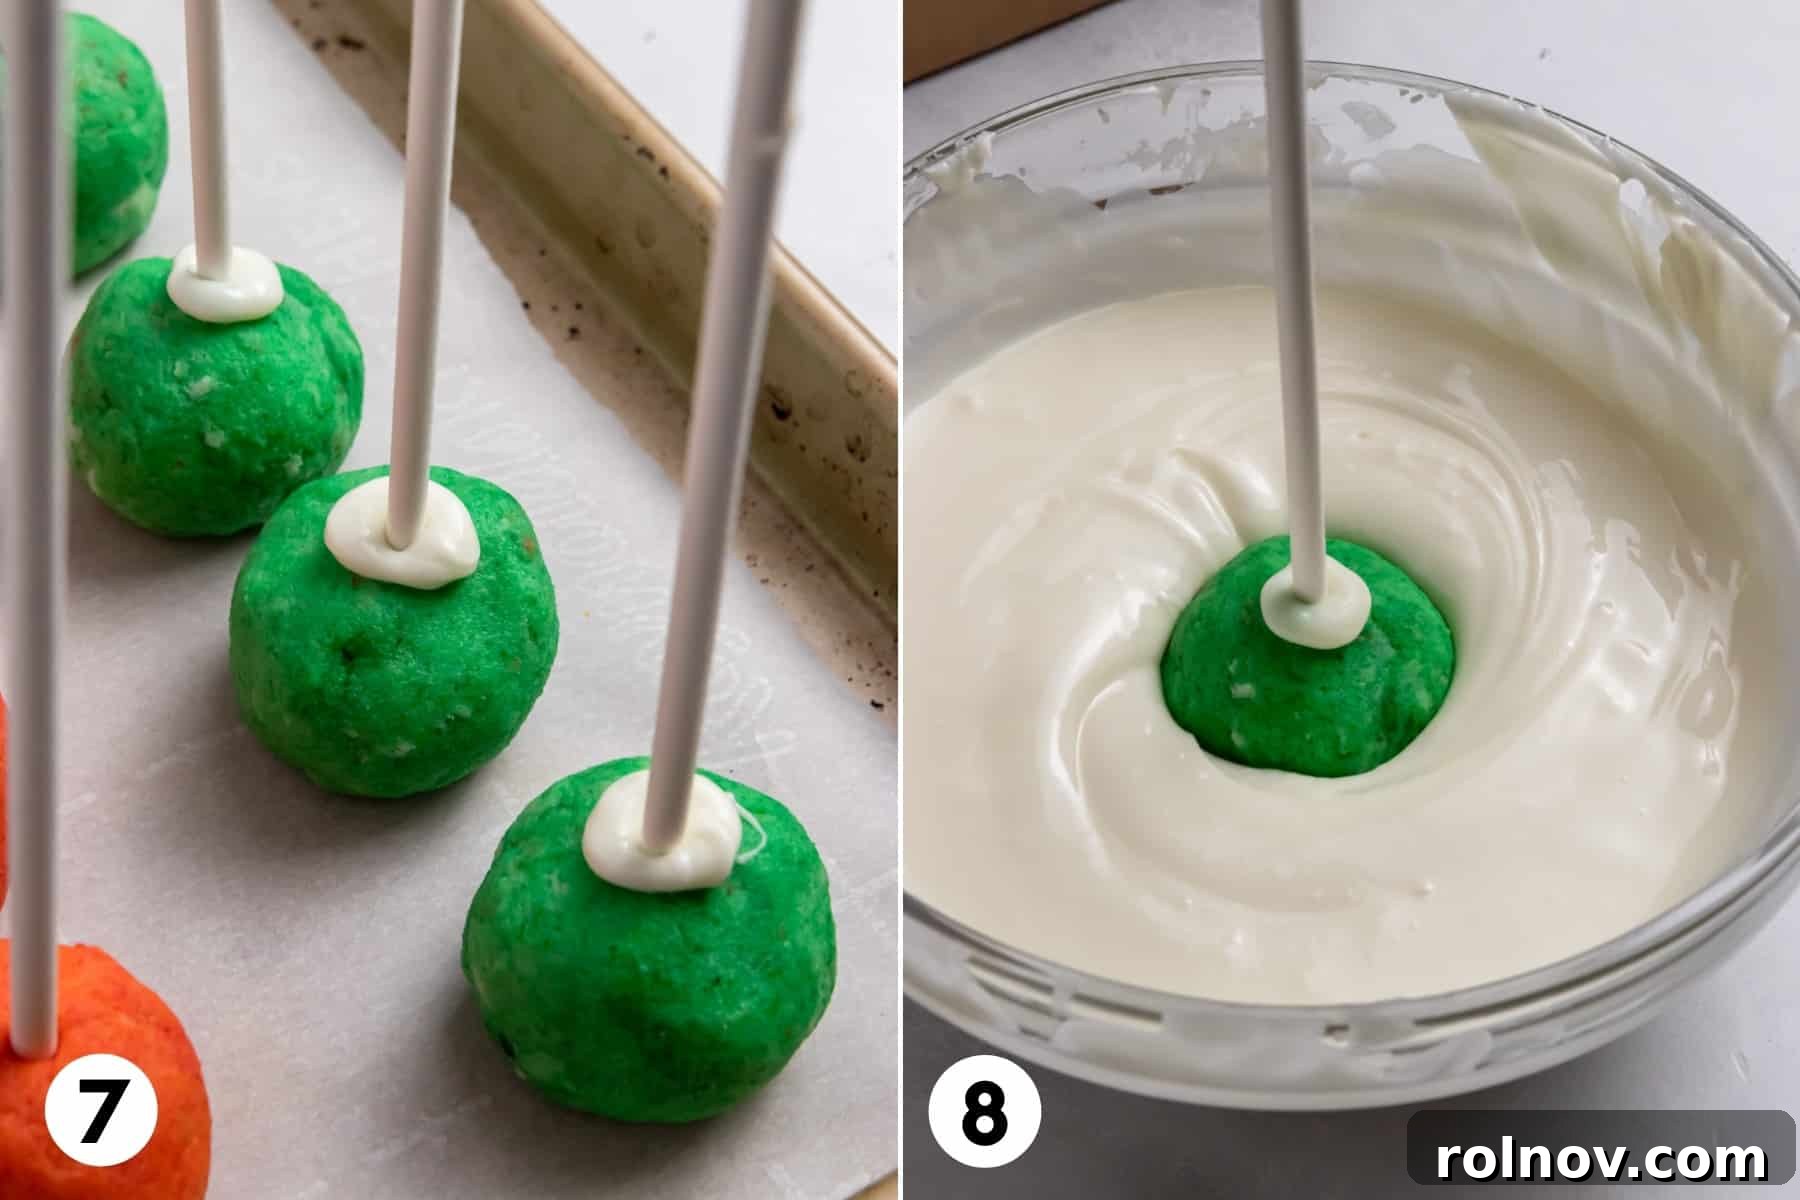
- While your cake balls are continuing to chill and firm up, prepare your “glue” for the cake pop sticks. Melt about ⅓ cup of your chosen melting chocolate or white chocolate chips in a small, microwave-safe bowl. Microwave in short bursts of 15-20 seconds, stirring thoroughly after each interval, until the chocolate is completely smooth and free of lumps. This prevents scorching.
- Take a few chilled cake balls from the freezer (work in small batches to keep the others cold). Dip the very tip of each cake pop stick into the melted chocolate, then gently but firmly insert the chocolate-dipped end of the stick halfway into the center of each cake ball. The melted chocolate will act as an adhesive, creating a strong bond that secures the cake ball to the stick.
- Once all sticks are inserted, place the assembled cake pops back into the freezer to allow the chocolate “glue” to set completely. This crucial step can take 10-15 minutes, or you can leave them in for a few hours if you’re preparing ahead of time. A well-chilled and securely attached cake pop is key to a smooth dipping experience.
5. The Grand Dip & Decorate:
- When you’re ready for the final coating, melt the remaining chocolate (approximately 2 cups) using the same microwave method: 15-20 second intervals, stirring well after each. Continue until it’s completely smooth and fluid, ensuring you don’t overheat it. For the best and easiest dipping experience, use a small, deep bowl for your melted chocolate. If the white chocolate appears too thick, stir in about ½ teaspoon of vegetable oil to thin it slightly.
- Take one very cold cake pop from the freezer. Hold it by the stick and dunk it fully into the melted chocolate, straight down and then slowly pull it out. Gently tap the stick against the edge of the bowl to allow any excess chocolate to drip back, creating a smooth, even coating.
- Immediately after dipping, if you’re adding candy eyeballs, sprinkles, or crushed Oreos, apply them while the chocolate coating is still wet. This ensures they adhere properly before the chocolate sets.
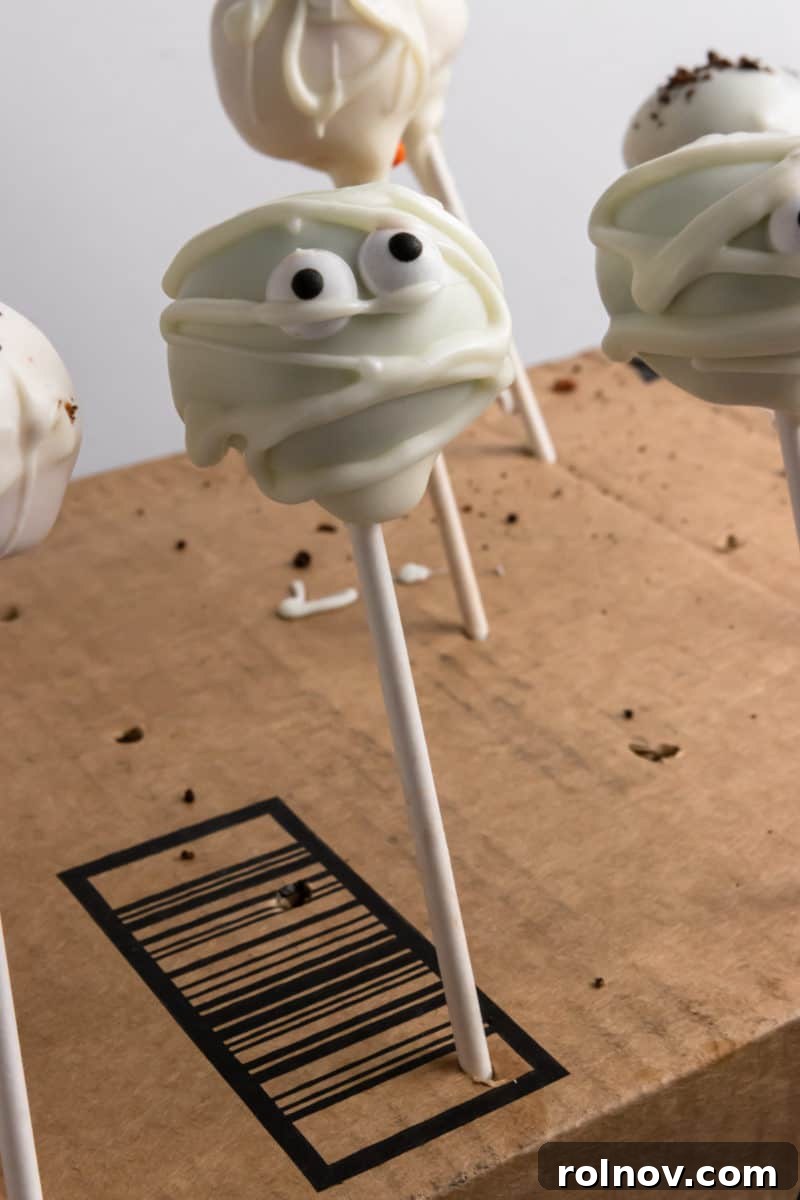
- Place each coated and decorated cake pop upright to dry. You can use a sturdy piece of styrofoam, a tall glass filled with rice or sugar, or a cardboard box with small holes carefully punched into it. Allow them to set completely at room temperature or, for faster setting, in the refrigerator.
- **Creative Decoration Ideas to Spook & Delight:**
- **Classic Halloween Style:** Drizzle with contrasting colored melts (e.g., black chocolate over orange pops) or sprinkle with a mix of orange and black jimmies for an instant festive look.
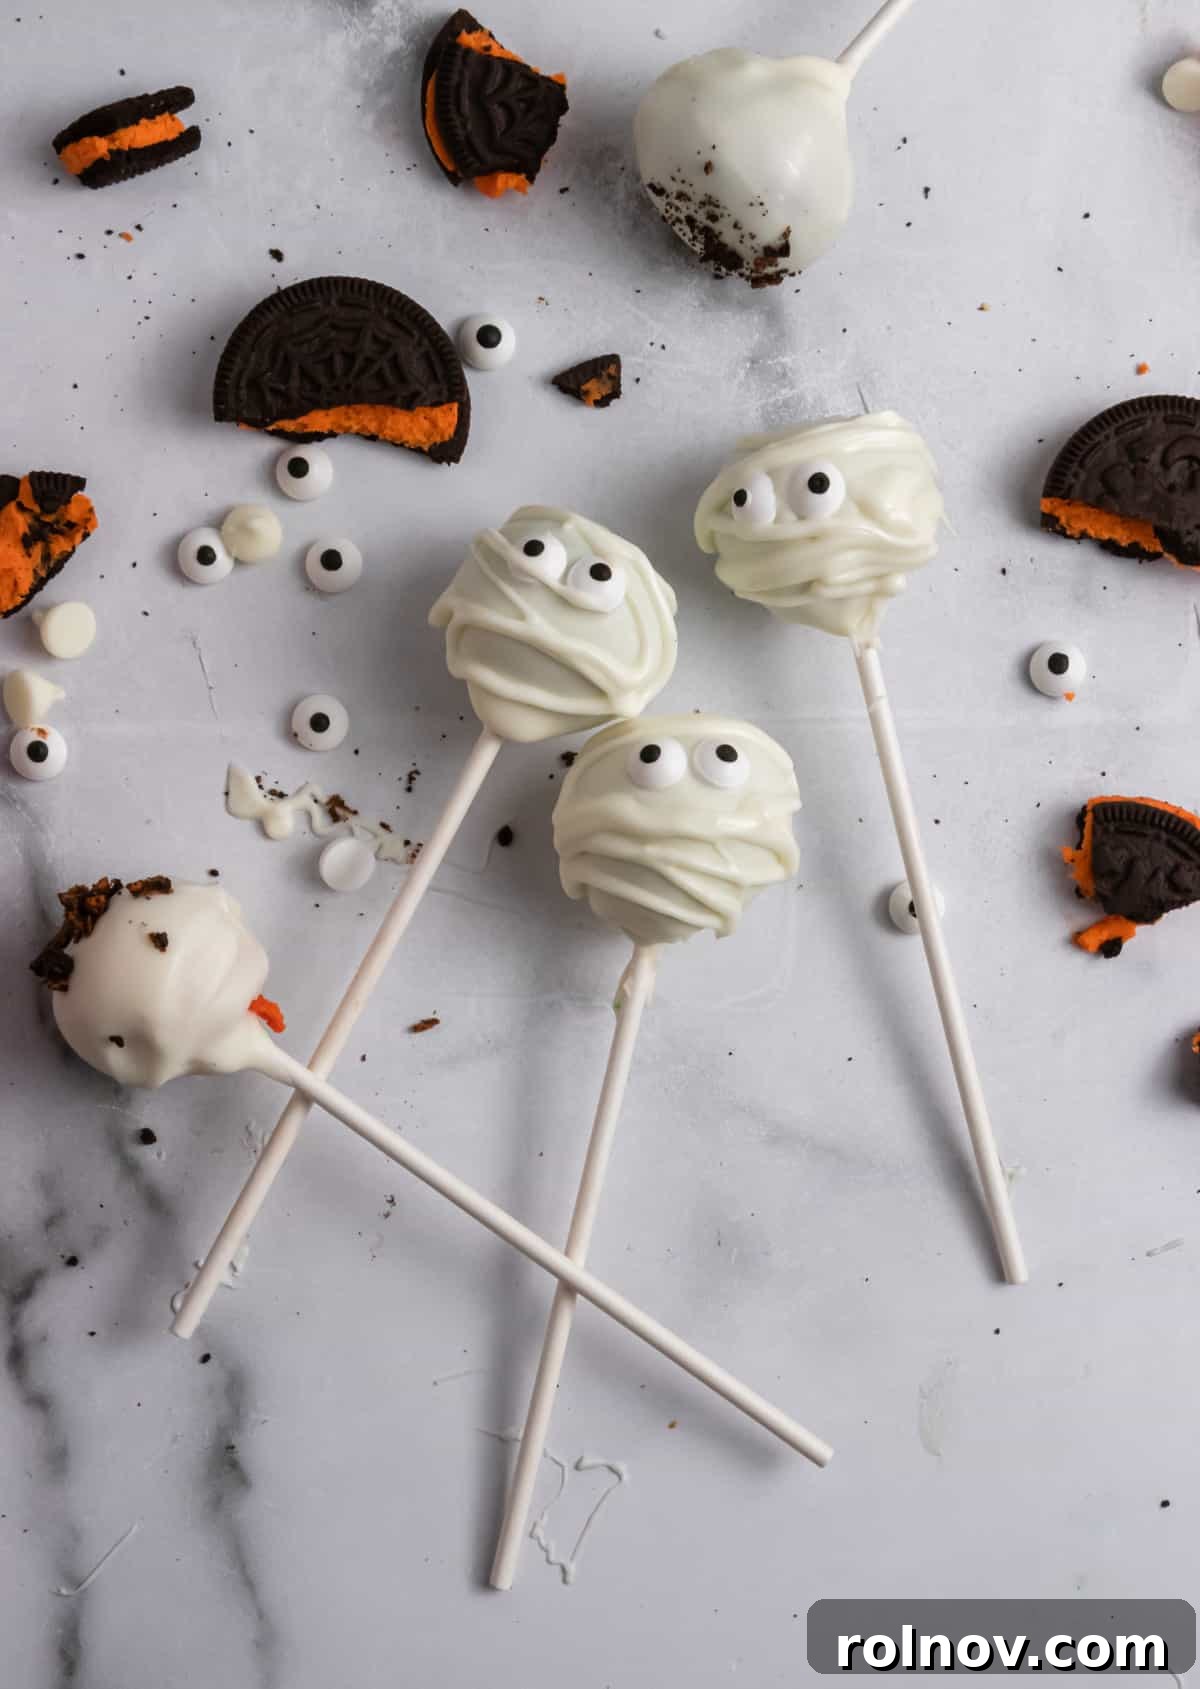
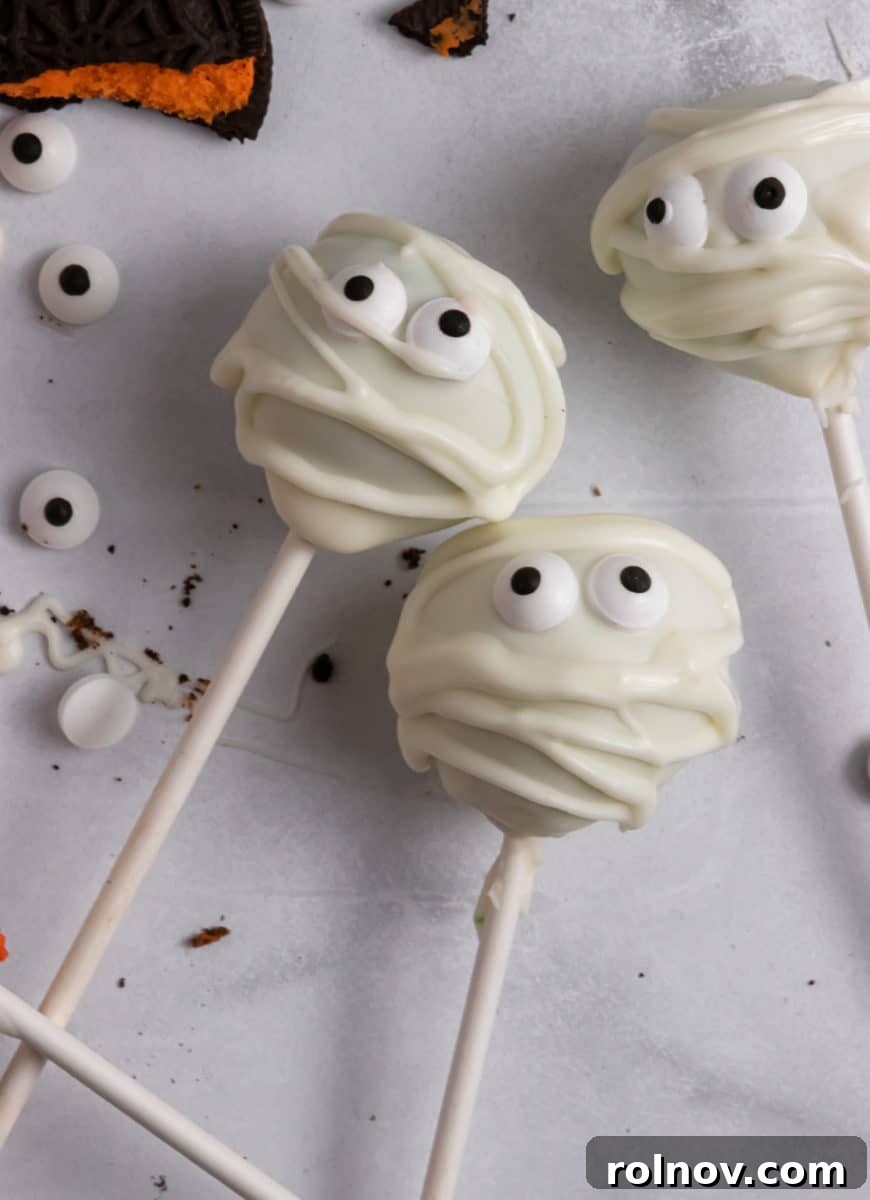
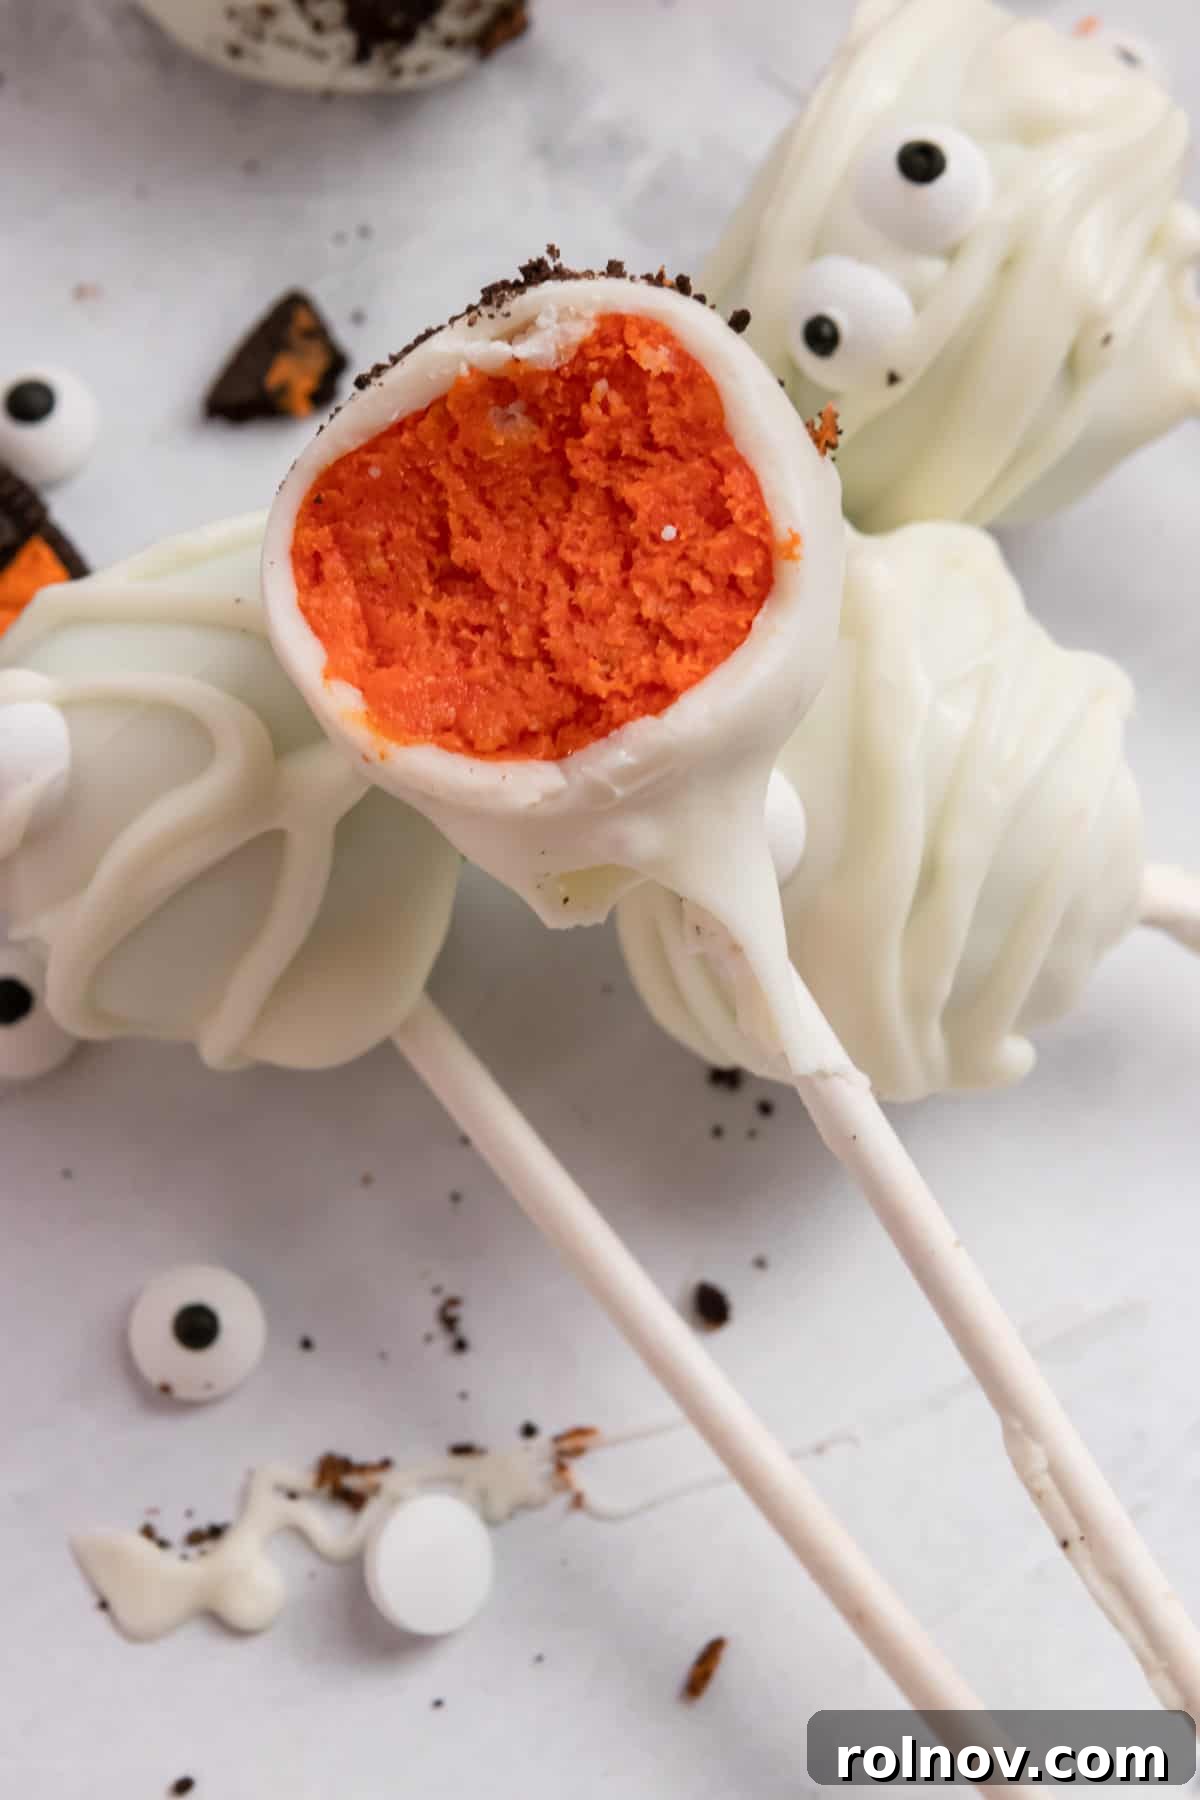
- **Mummy Madness:** For an adorable mummified effect, transfer some melted white chocolate into a piping bag fitted with a tiny round tip (or simply snip a tiny corner off a Ziploc bag). Once the base chocolate coat on your cake pop is fully dry, lay it down and drizzle thin, wavy lines of white chocolate back and forth across it to create mummy bandages. Add two candy eyeballs before the mummy wraps fully dry.
- **Spooky Spiderwebs:** Coat a cake pop in black or dark purple chocolate. While the chocolate is still wet, use a contrasting color (like white) to draw concentric circles on top. Then, drag a toothpick from the center outwards through the circles to create a haunting spiderweb pattern.
- **Creepy Critters:** Use crushed Halloween Oreos for “dirt” or “bat wings” (attach half an Oreo to the side of a black cake pop for quick wings). Edible glitter can add extra sparkle!
Pro Tips & Expert Notes for Perfect Halloween Cake Pops
Achieving bakery-quality cake pops at home is easier than you think, especially with these insider tips and tricks that address common challenges and enhance your creative process:
- **The Golden Rule of Melting Chocolate:** Never burn your melting chocolate! Once scorched, it becomes thick, clumpy, and unusable – and there’s really no way to salvage it. Always microwave in very short bursts (15-20 seconds at a time) and stir thoroughly after each interval. Even if a few solid chips remain, continue stirring vigorously; the residual heat will often melt them completely without further microwaving. For those who prefer, a double boiler method (heating chocolate in a heatproof bowl set over a pot of simmering water) is an excellent alternative for gentle, even melting.
- **Smooth Coating Secret:** If your white chocolate chips (or melting chocolate) appear too thick for easy, smooth dipping, don’t fret! You can thin it out slightly by stirring in about ½ teaspoon of neutral-flavored vegetable oil, coconut oil, or even paramount crystals. This creates a much more fluid consistency, allowing for a thinner, more even coating. This fantastic tip, borrowed from baking experts like Sally’s Baking Addiction, makes a noticeable difference in the finish of your cake pops!
- **Roll ‘Em Tight!** Due to the lighter, airier texture of Angel Food Cake compared to denser cake types, it’s absolutely essential to roll your cake balls very tightly and firmly. This compact rolling prevents them from becoming flimsy, cracking, or falling apart when dipped into the warm chocolate or handled. Apply consistent, firm pressure as you shape each ball.
- **Unleash Your Creativity:** Remember, there are absolutely no strict rules when it comes to decorating these Halloween Cake Pops! This recipe is incredibly adaptable. Feel free to experiment with any colors, sprinkles, candy, or piping designs that spark your imagination. You can easily adapt the colors and decorations for other holidays too – imagine festive red and green for Christmas, delicate pastels for Easter, or patriotic red, white, and blue for the 4th of July. The possibilities are endless!
- **No Sticks? No Problem!** If you don’t have cake pop sticks on hand, or simply prefer a different presentation, you can skip the sticks altogether. Simply roll the cake mixture into balls and coat them as described, creating delightful, bite-sized “cake truffles.” They are just as delicious and perfect for serving on a platter.
- **Optimal Storage:** Once your Halloween cake pops are beautifully decorated and the chocolate coating has fully set, it’s best to store them in an airtight container. Keep them in the refrigerator for up to one week to maintain their freshness and prevent the chocolate coating from melting or becoming too soft.
- **Serving Ideas:** For a truly eye-catching Halloween party spread, display your finished cake pops upright. You can use a decorative glass, a piece of styrofoam covered with festive fabric, a small, hollowed-out pumpkin, or even a tiered serving tray.
A Fun Idea for Leftovers: The Mystery Cake Pop!
As you near the end of rolling your cake balls, you might find small amounts of each colored cake mixture remaining. Instead of discarding them, why not combine them for a fun surprise? Take a little bit of orange, green, and purple dough, gently swirl them together, and roll out a unique “mystery” cake pop! This marbled, multi-colored treat can be a delightful and unexpected surprise for anyone who gets it, adding a playful twist to your Halloween treats. Who wouldn’t love a delicious prize that’s also a little bit of a mystery?
More Delightful Treats You’ll Love:
If you enjoyed making these easy Halloween Cake Pops, be sure to check out some of our other fun and delicious recipes perfect for any occasion:
- Golden Oreo Truffles
- Spooky Banana Mummy Pops
- Peanut Butter Reese’s Pieces Cookie Dough Bites
- Celebratory Funfetti Cookies
- Pumpkin Spice Molasses Cookies with Cream Cheese Icing
Made these incredible Halloween Cake Pops? We’d absolutely love to hear from you! Please leave a comment below and share your experience, favorite decorations, or any clever twists you added. We also adore seeing your Lemons + Zest recipes on social media – don’t forget to tag us @LEMONSANDZEST on INSTAGRAM or FACEBOOK with your amazing creations!
Halloween Cake Pops Recipe
Effortlessly spooky and utterly delicious, these no-bake Halloween cake pops are the ultimate holiday treat for parties, trick-or-treaters, or simply a fun kitchen activity!
Yields: 18 Cake Pops
Prep Time: 30 minutes
Chill Time: 30-60 minutes (or longer for best results)
Total Time: Approximately 1 hour 30 minutes
By: Lorie Yarro
Ingredients
- 1 (12 oz.) Baked Angel Food Cake
- ¾ cup Vanilla Frosting
- 1 tsp Vanilla Extract
- 2 ½ cups White Chocolate Chips or Melting Chocolate*
- Food Coloring (gel preferred, in Halloween colors like green, orange, purple)
- 18-20 Cake Pop Sticks
- **Optional Decorations:** Sprinkles (orange, black, purple), crushed Oreos, candy eyeballs, piping icing/gel
Instructions
- **Prepare the Cake Mixture:** Place the baked Angel Food Cake into a large bowl. Using your hands, crumble the cake into very small, fine pieces. Add the ¾ cup vanilla frosting and 1 teaspoon vanilla extract. Mix well with your hands until the frosting is fully incorporated and you have a moist, cohesive cake “dough.”
- **Color the Dough (Optional):** Divide the cake mixture equally into separate bowls for each color you plan to use. Add desired food coloring to each bowl (e.g., ~25 drops green for green, ~13 yellow + ~12 red for orange, ~13 red + ~12 blue for purple). Stir thoroughly until the color is vibrant and even. Place the colored dough into the freezer for at least 10-15 minutes to firm up.
- **Roll the Cake Balls:** Remove the chilled dough. Roll the mixture into tight, approximately 1 ½-inch balls. Place these rolled balls onto a parchment-lined baking sheet. Return the baking sheet with cake balls to the freezer for a minimum of 15-20 minutes, or up to several hours, ensuring they are very firm.
- **Prepare Sticks:** While the cake balls are chilling, melt ⅓ cup of white chocolate chips or melting chocolate in a small, microwave-safe bowl. Heat in 15-20 second intervals, stirring well after each, until smooth.
- **Attach Sticks:** Take a few firm cake balls from the freezer. Dip the tip of each cake pop stick into the melted chocolate, then carefully insert the stick halfway into each cake ball. This melted chocolate acts as a “glue.” Place the assembled cake pops back into the freezer for another 15-20 minutes to allow the glue to set.
- **Coat the Cake Pops:** Once the sticks are secure and the cake pops are thoroughly chilled, melt the remaining 2 cups of white chocolate in a deep, small bowl using the same 15-20 second microwave intervals, stirring well. If the chocolate is too thick, stir in ½ tsp of vegetable oil.
- **Dip & Decorate:** Take one chilled cake pop at a time, dunk it completely into the melted chocolate, and slowly lift, gently tapping off any excess. Immediately add sprinkles, candy eyeballs, or other decorations before the chocolate sets.
- **Dry & Store:** Place the decorated cake pops upright in a piece of styrofoam, a cup, or a box with holes to dry and set. Once the chocolate is firm, store the finished cake pops in an airtight container in the refrigerator for up to one week.
Recipe Notes:
- *To make coating with white chocolate chips easier and smoother, you can add about ½ tsp of vegetable oil to the melted chocolate to thin it out slightly.
- Avoid burning your melting chocolate by microwaving in short intervals and stirring thoroughly. Continuous stirring helps melt remaining chips with residual heat.
- Angel Food Cake is lighter, so roll cake balls very tightly to prevent flimsiness during dipping.
- Feel free to customize colors and decorations for any holiday or theme!
- If you prefer, omit the sticks and serve these as delicious cake truffles.
Nutrition Information (Approximate Per Serving):
Calories: 223kcal | Carbohydrates: 32g | Protein: 3g | Fat: 10g | Saturated Fat: 5g | Cholesterol: 5mg | Sodium: 136mg | Potassium: 100mg | Fiber: 1g | Sugar: 26g | Vitamin A: 8IU | Vitamin C: 1mg | Calcium: 66mg | Iron: 1mg
Nutrition information is automatically calculated and should be used as an approximation.