
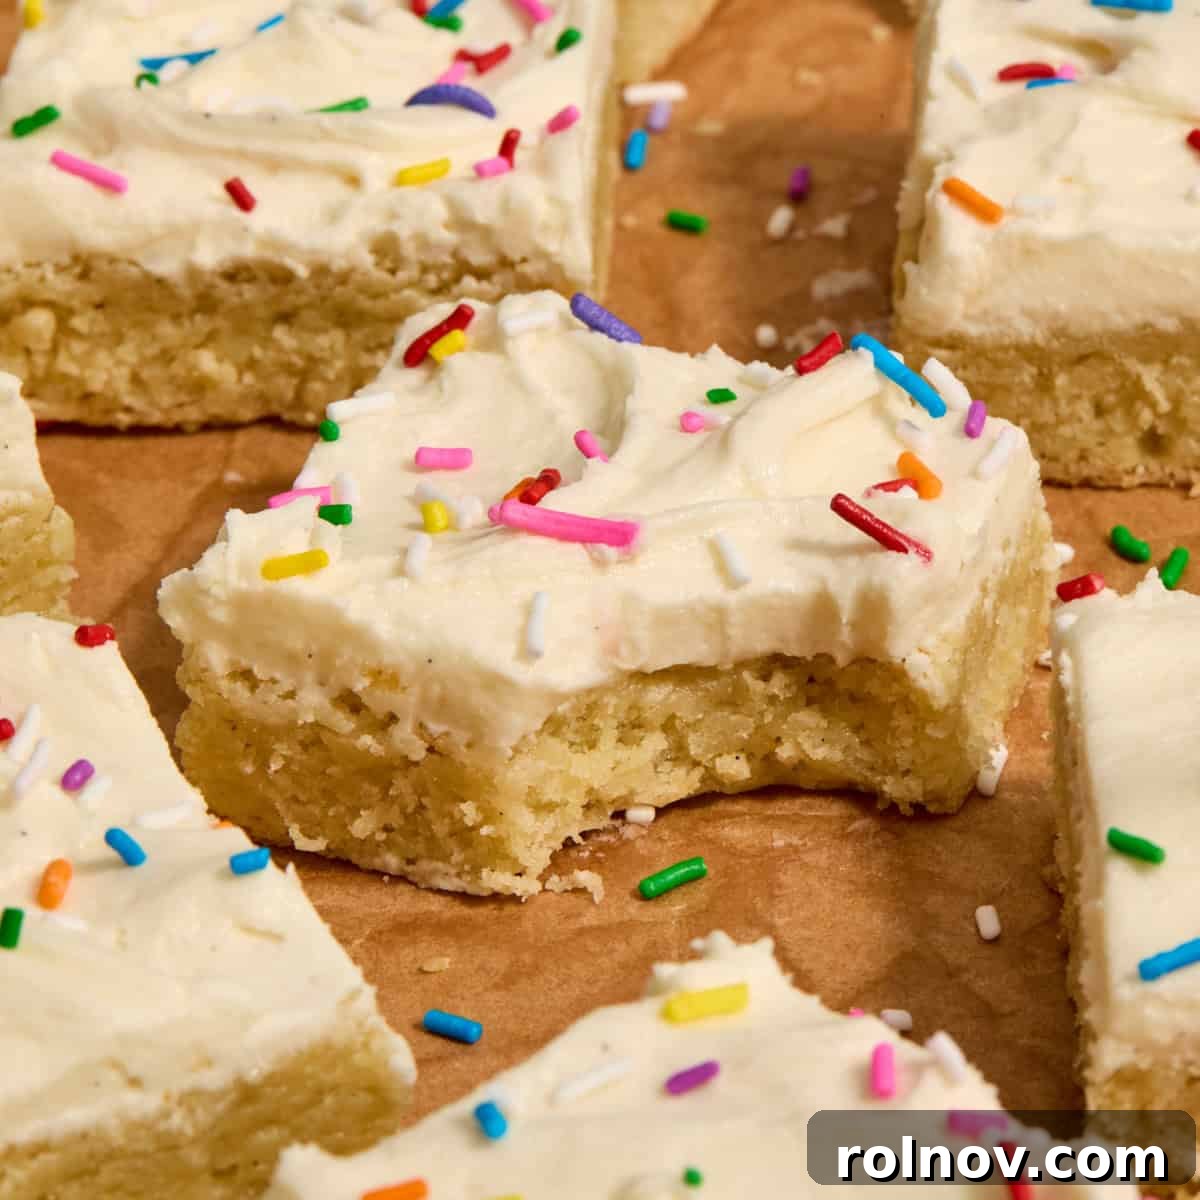
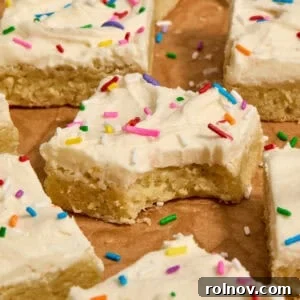
Indulge in the irresistible delight of these incredibly soft and wonderfully chewy frosted sugar cookie bars. This recipe redefines simplicity in baking, requiring absolutely no chilling time for the dough, making it the perfect choice for a quick and satisfying homemade treat. Imagine the classic, beloved flavor of sugar cookies, elevated and transformed into an easy-to-manage bar format that takes significantly less time to prepare than traditional drop cookies. For an unparalleled depth of flavor, we highly recommend using vanilla bean paste if you have it on hand – it truly makes these cookie bars exceptional. Crowned with a luxurious vanilla bean buttercream and a generous shower of colorful sprinkles, these bars aren’t just a dessert; they’re a celebration in every bite!
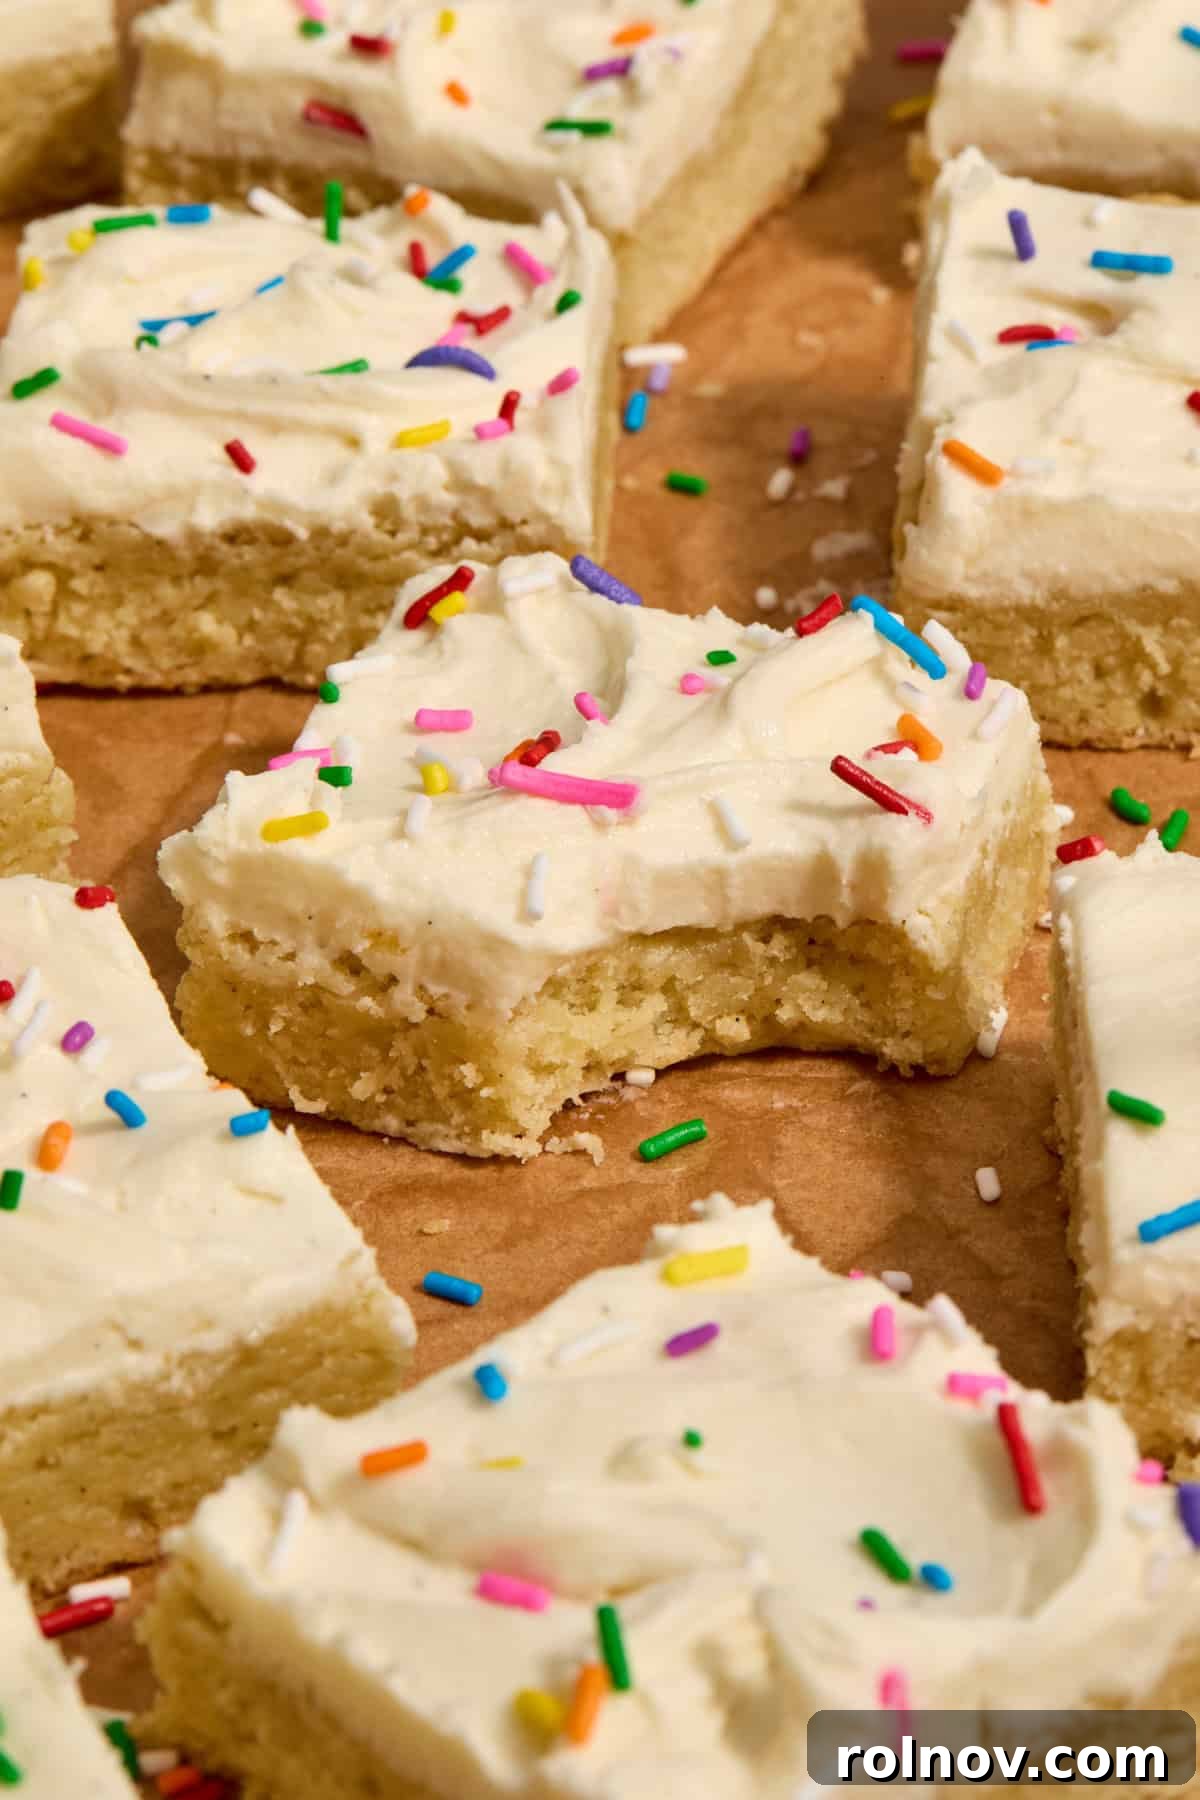
There’s something magical about frosted sugar cookies – they’re a timeless favorite for a reason. So, why not take everything we adore about them and transform it into an even more convenient, no-fuss bar recipe? These cookie bars deliver all the joy and deliciousness without the extra effort of rolling and cutting individual cookies, making them ideal for gatherings, busy weeknights, or simply satisfying that sudden sweet craving.
If you’re a fan of our Frosted Sugar Cookie Bars, you’ll surely love exploring other delightful treats in our collection. Discover more favorite cookie recipes, including bright and zesty Lemon Sugar Cookies, a fantastic Eggless Sugar Cookies option, tropical Key Lime Cookies, or super simple Brownie Mix Cookies. For another delicious bar variation, don’t miss these amazing Gluten Free White Chocolate Chip Blondies.
Why These Frosted Sugar Cookie Bars Are an Absolute Must-Try

These tender, soft, and utterly delightful sugar cookie bars have quickly become a staple in our household. They’re a treat that appeals to everyone, from the pickiest little eaters to the most discerning adults – ahem, they’re my personal favorite! Plus, my little helper absolutely adores getting involved in the making process, adding to the joy of baking.
Here’s what makes these Frosted Sugar Cookie Bars truly special:
- Effortlessly Simple: They are incredibly straightforward to prepare, making them accessible for bakers of all skill levels. Forget complicated techniques; this recipe focuses on pure enjoyment.
- Flavor Explosion: Thanks to the inclusion of vanilla bean paste and a hint of almond extract, these bars boast a flavor profile that is wonderfully rich, nuanced, and utterly addictive. The delicate balance creates a taste that’s far beyond ordinary.
- Celebratory Aesthetic: With their vibrant sprinkles and smooth, creamy frosting, these bars have an inherent “birthday cake” appeal, instantly transforming any moment into a special occasion. They’re perfect for parties, holidays, or just a Tuesday pick-me-up.
- No-Fuss Baking: Say goodbye to lengthy chilling times, messy rolling pins, and intricate cookie cutters. This recipe streamlines the baking process, getting you to delicious results faster and with less clean-up.
- A “Cookie” Marvel in Bar Form: While not technically individual cookies, these bars capture the essence and comfort of your favorite sugar cookie in a more practical, shareable, and surprisingly easy-to-make format. They’re perfect for cutting into custom sizes!
The success and sheer deliciousness of this recipe were so inspiring that they even led to the creation of my festive Christmas Tree Sugar Cookie Bars – proving just how versatile and fun this base recipe can be!
Key Ingredients for Perfect Sugar Cookie Bars
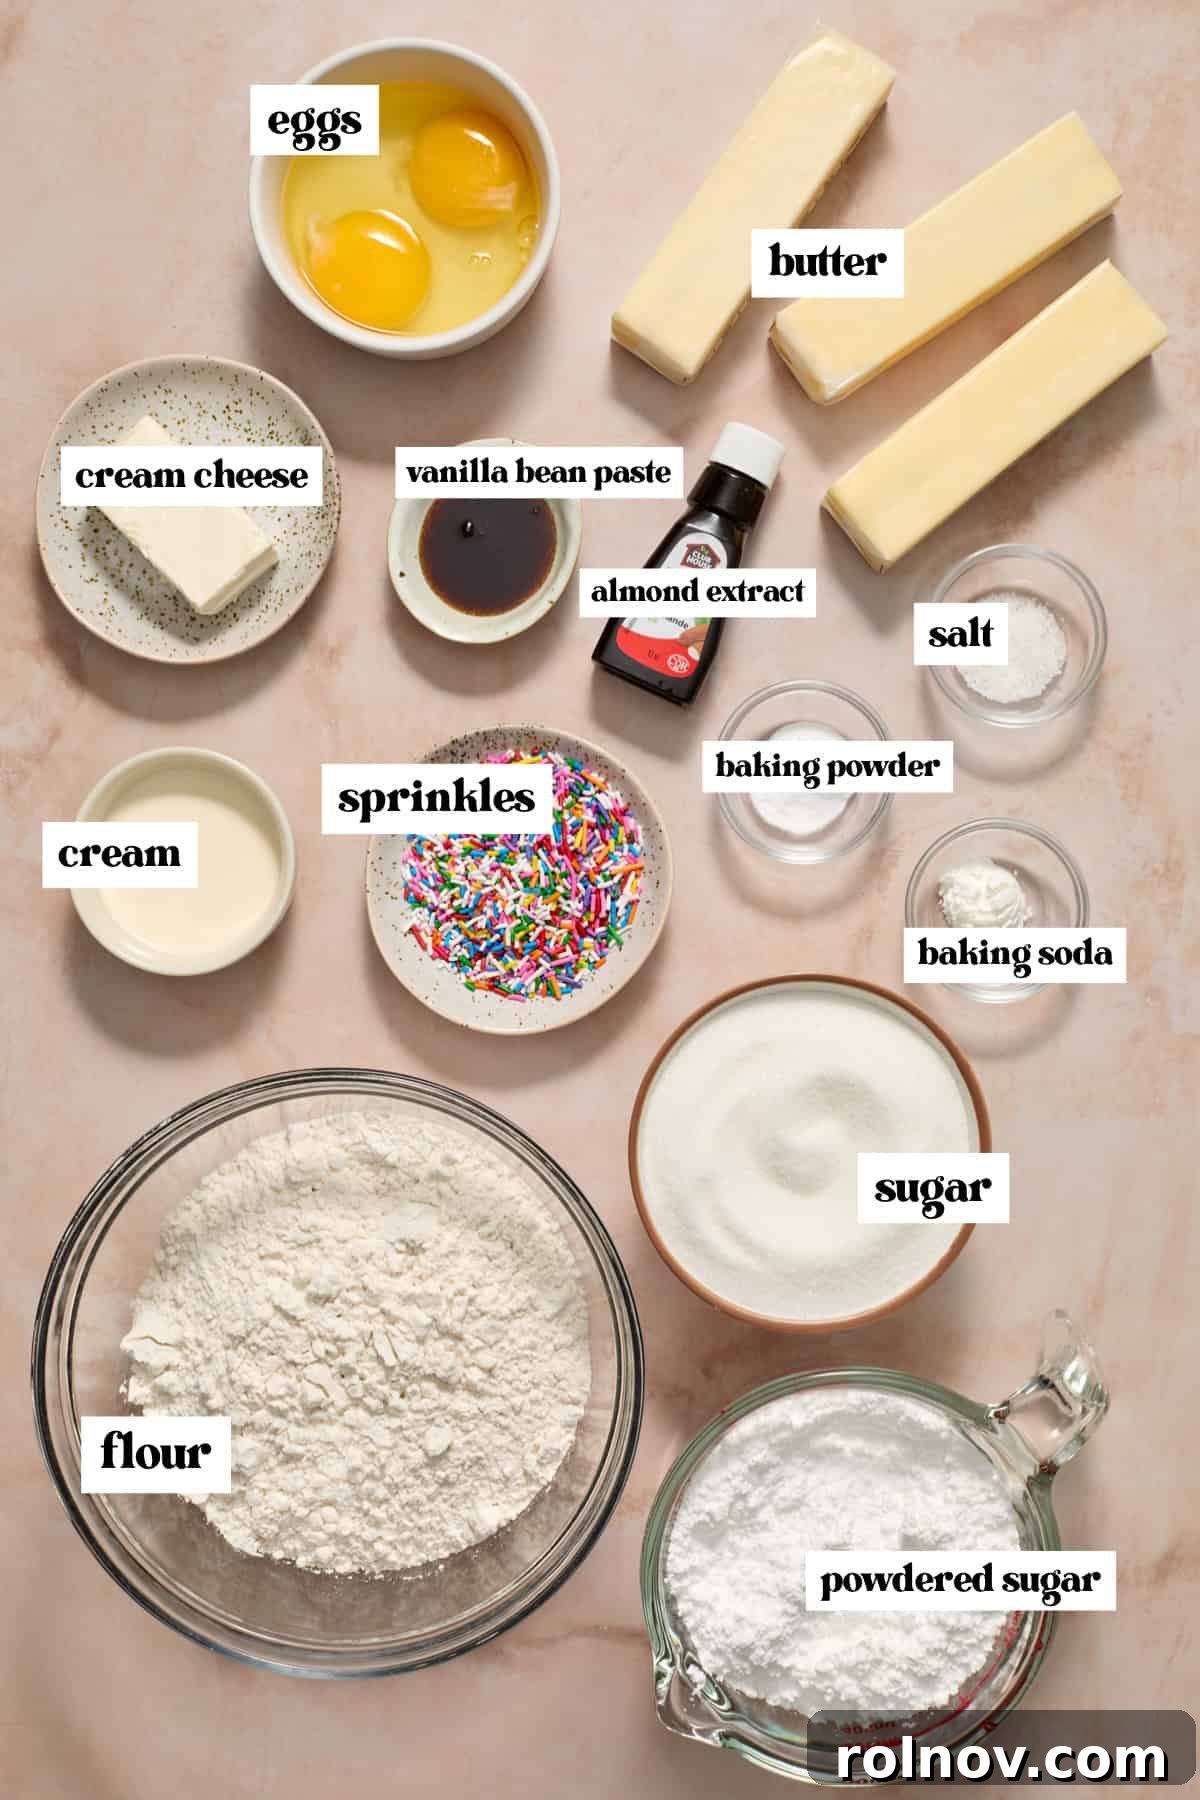
To ensure your Frosted Sugar Cookie Bars turn out perfectly every time, paying attention to the quality and state of your ingredients is crucial. Here are some notes on the stars of this recipe:
- Vanilla Bean Paste: I cannot overstate my recent obsession with vanilla bean paste! It delivers a deep, complex vanilla flavor with visible flecks of vanilla bean that vanilla extract simply cannot match. While vanilla extract is a perfectly acceptable substitute if you don’t have the paste, I wholeheartedly recommend investing in vanilla bean paste for this recipe if you can. It truly elevates the flavor to gourmet levels.
- All-Purpose Flour: This recipe was developed using standard all-purpose flour, which provides the ideal structure and tenderness for the bars. While I haven’t personally tested gluten-free flour alternatives yet, many readers have reported success using a 1:1 gluten-free baking blend. If you choose to use a GF blend, look for one that contains xanthan gum for best results.
- Full-Fat Cream Cheese: For the most luxurious flavor and a delightfully chewy, moist texture in your cookie bars, opt for full-fat cream cheese. Low-fat or fat-free versions may alter the texture and flavor profile, making the bars less rich and potentially drier. Ensure it’s softened to room temperature for smooth incorporation.
- Unsalted Butter (Room Temperature): The quality of your butter matters. Unsalted butter allows you to control the salt content precisely. Crucially, ensure your butter is at true room temperature (around 65-67°F or 18-19°C) – it should be soft enough to make a slight indentation when pressed, but not greasy or melted. This is key for proper creaming with sugar.
- Granulated Sugar: Beyond sweetness, sugar contributes to the tenderness and browning of the cookie bars. Measure it accurately for the best balance.
- Large Eggs (Room Temperature): Room temperature eggs incorporate more evenly into the batter, creating a smoother emulsion and a more consistent texture in your baked goods.
- Baking Powder & Baking Soda: These leavening agents work together to give the cookie bars their perfect rise and soft crumb. Ensure they are fresh for maximum effectiveness.
- Salt: A pinch of salt balances the sweetness and enhances all the other flavors in the bars.
- Almond Extract: This adds a subtle, delicate nutty undertone that complements the vanilla beautifully, giving the bars a professional bakery taste.
Creative Variations to Customize Your Cookie Bars
One of the best things about these Frosted Sugar Cookie Bars is how incredibly versatile they are! While delicious as is, they serve as a fantastic canvas for your creativity. Here are some exciting ways to adapt this recipe and make it uniquely yours:
- Sprinkles in the Dough: For an extra festive touch and a funfetti-like appearance, gently fold 2-3 tablespoons of your favorite sprinkles directly into the cookie bar dough during the final mixing stage. Be mindful that some naturally dyed sprinkles may bleed color into the dough, especially if overmixed or if the dough is very wet.
- Flavor Extracts Swap: Experiment with different flavor profiles! Instead of almond extract, try using lemon extract for a bright, citrusy zing, or add a teaspoon of fresh lemon zest to the dough for an even more intense lemon flavor. Peppermint extract is fantastic for holiday variations, and coconut extract can transport you to a tropical paradise.
- Add Chocolate Chips or Other Mix-ins: Elevate the richness by folding in white chocolate chips, milk chocolate chips, or even mini chocolate chips into the sugar cookie dough. Other delicious additions could include chopped nuts (like pecans or walnuts), toffee bits, or even dried cranberries for a festive twist.
- Holiday and Theme Customization: The frosting and sprinkles are your ultimate tools for customization! Vary the sprinkle colors to match any holiday (red and green for Christmas, pastels for Easter, orange and black for Halloween). You can also easily tint the vanilla buttercream with food coloring to match a specific team, party theme, or seasonal palette.
- Shape Them with Cookie Cutters: While these are “bars” for ease, you can still get creative with shapes! After baking and allowing the bars to cool completely, use your favorite cookie cutters (hearts for Valentine’s Day, stars for patriotic celebrations, or circles for mini “cookies”) to cut out individual shapes from the slab. This can be a fun activity, especially with kids. Just remember that this will leave some scraps.
- Brown Butter Frosting: For a deeper, nuttier flavor in your frosting, try browning the butter before making the buttercream. Let the browned butter cool and solidify slightly before creaming it for an incredibly rich frosting.
Step-By-Step Guide to Baking Perfect Sugar Cookie Bars
Follow these detailed steps to create your delicious Frosted Sugar Cookie Bars. Accuracy in measurement and attention to detail will ensure a fantastic result!
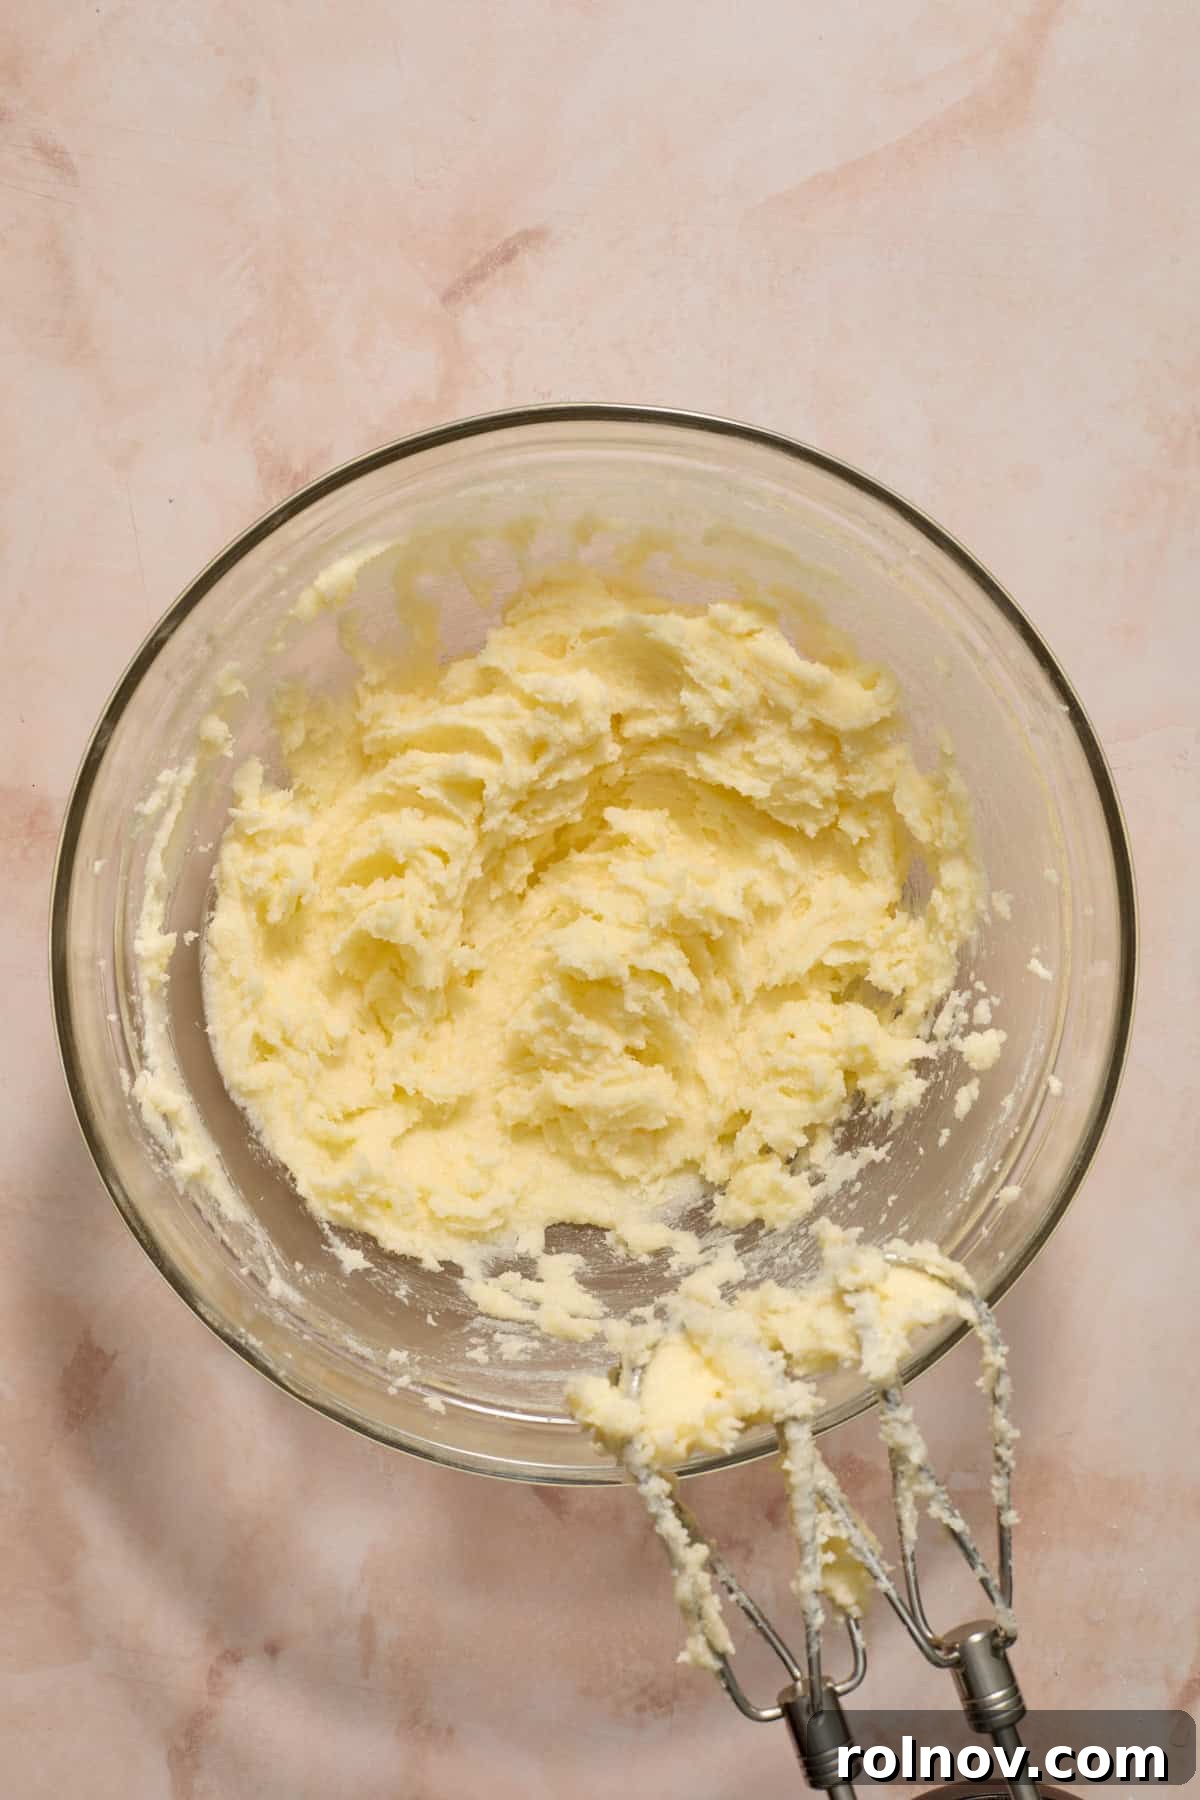
Step 1: Prepare Your Oven and Dry Ingredients. Preheat your oven to 350°F (175°C). In a small bowl, combine the all-purpose flour, baking powder, baking soda, and salt. Whisk these dry ingredients together thoroughly to ensure they are well combined and evenly distributed. This step prevents pockets of leavening agents in your bars. In a separate large mixing bowl, add the softened unsalted butter and granulated sugar. Using an electric mixer, beat them on medium-high speed for 3-5 minutes until the mixture becomes visibly light, pale, and fluffy. This creaming process incorporates air, which is essential for the bars’ soft texture.
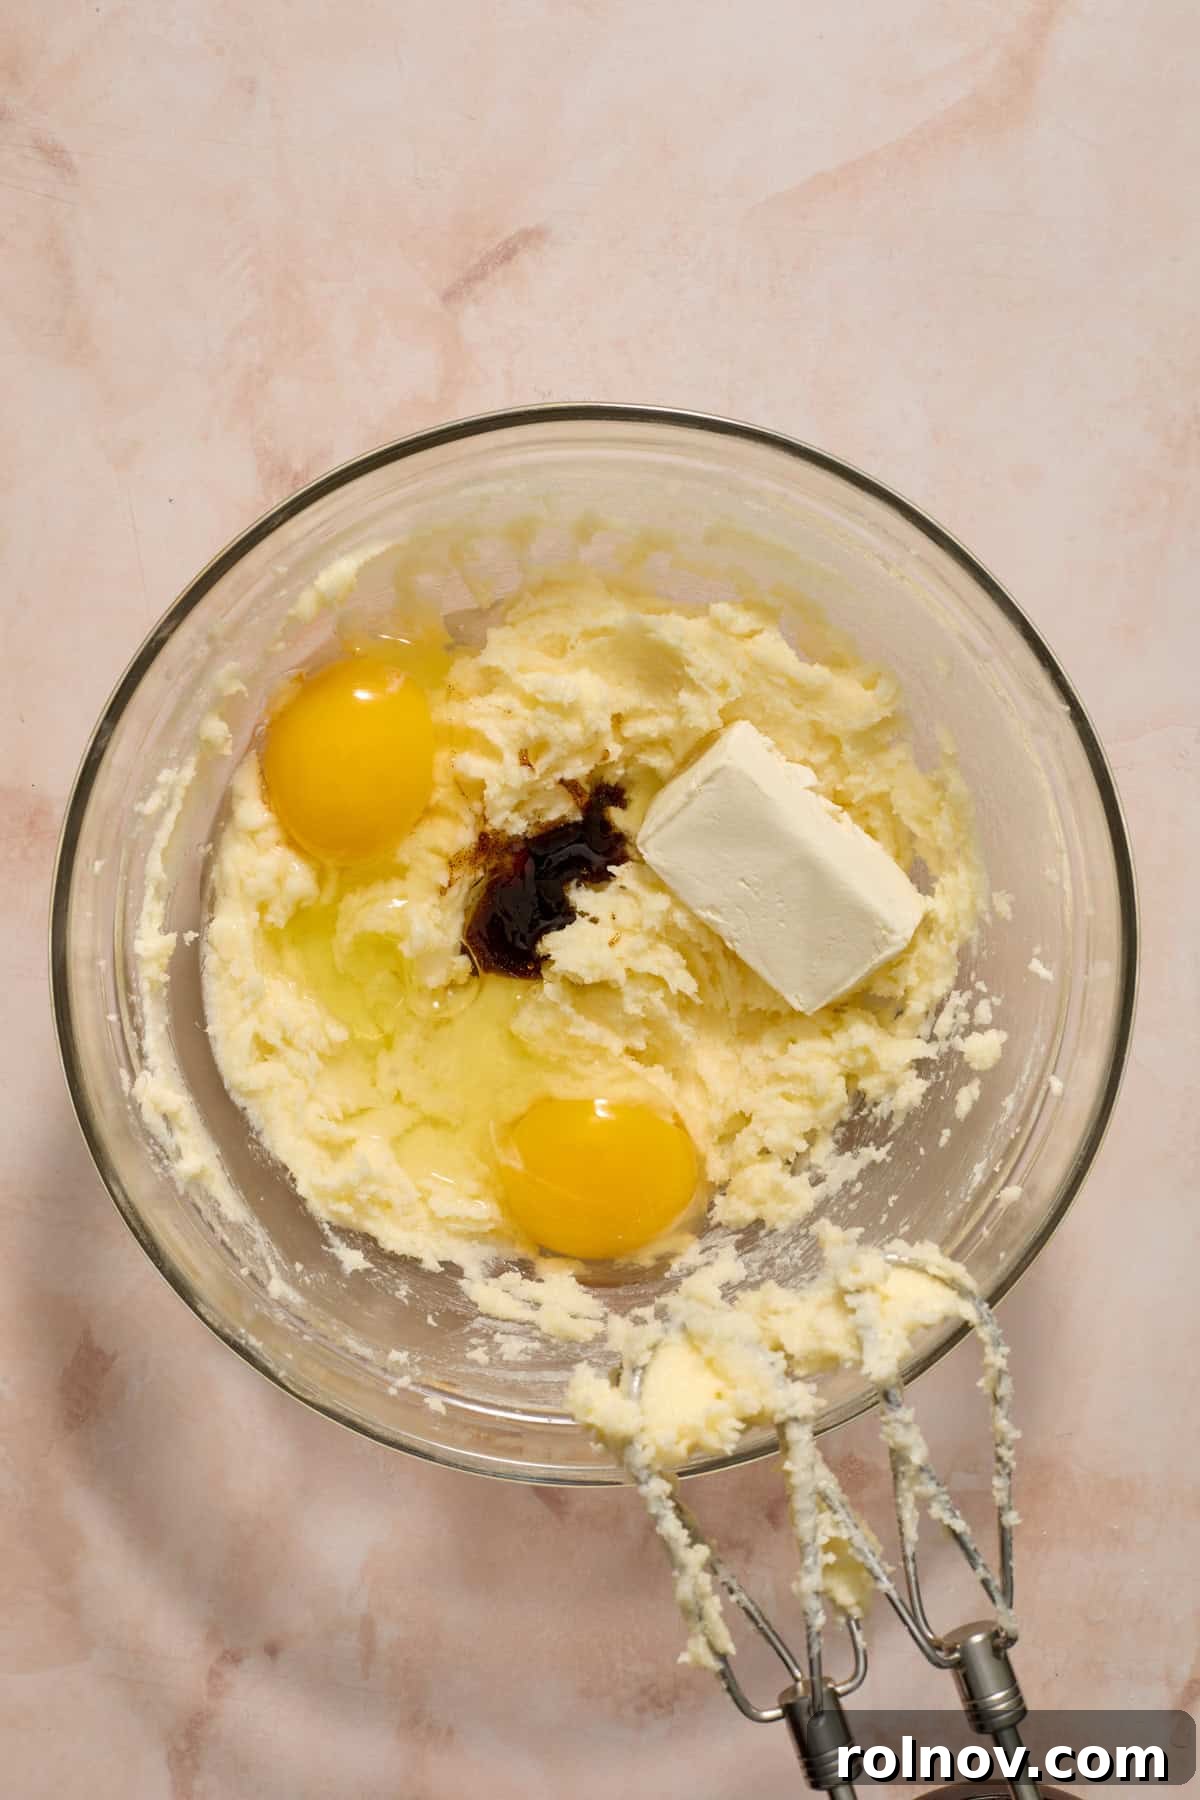
Step 2: Incorporate Wet Ingredients. To the creamed butter and sugar mixture, add the large eggs (one at a time, beating well after each addition), vanilla bean paste (or vanilla extract), almond extract, and softened full-fat cream cheese. Beat everything together using your electric mixer until all the ingredients are fully incorporated and the mixture is smooth and homogenous. Scrape down the sides of the bowl as needed to ensure everything is mixed evenly.
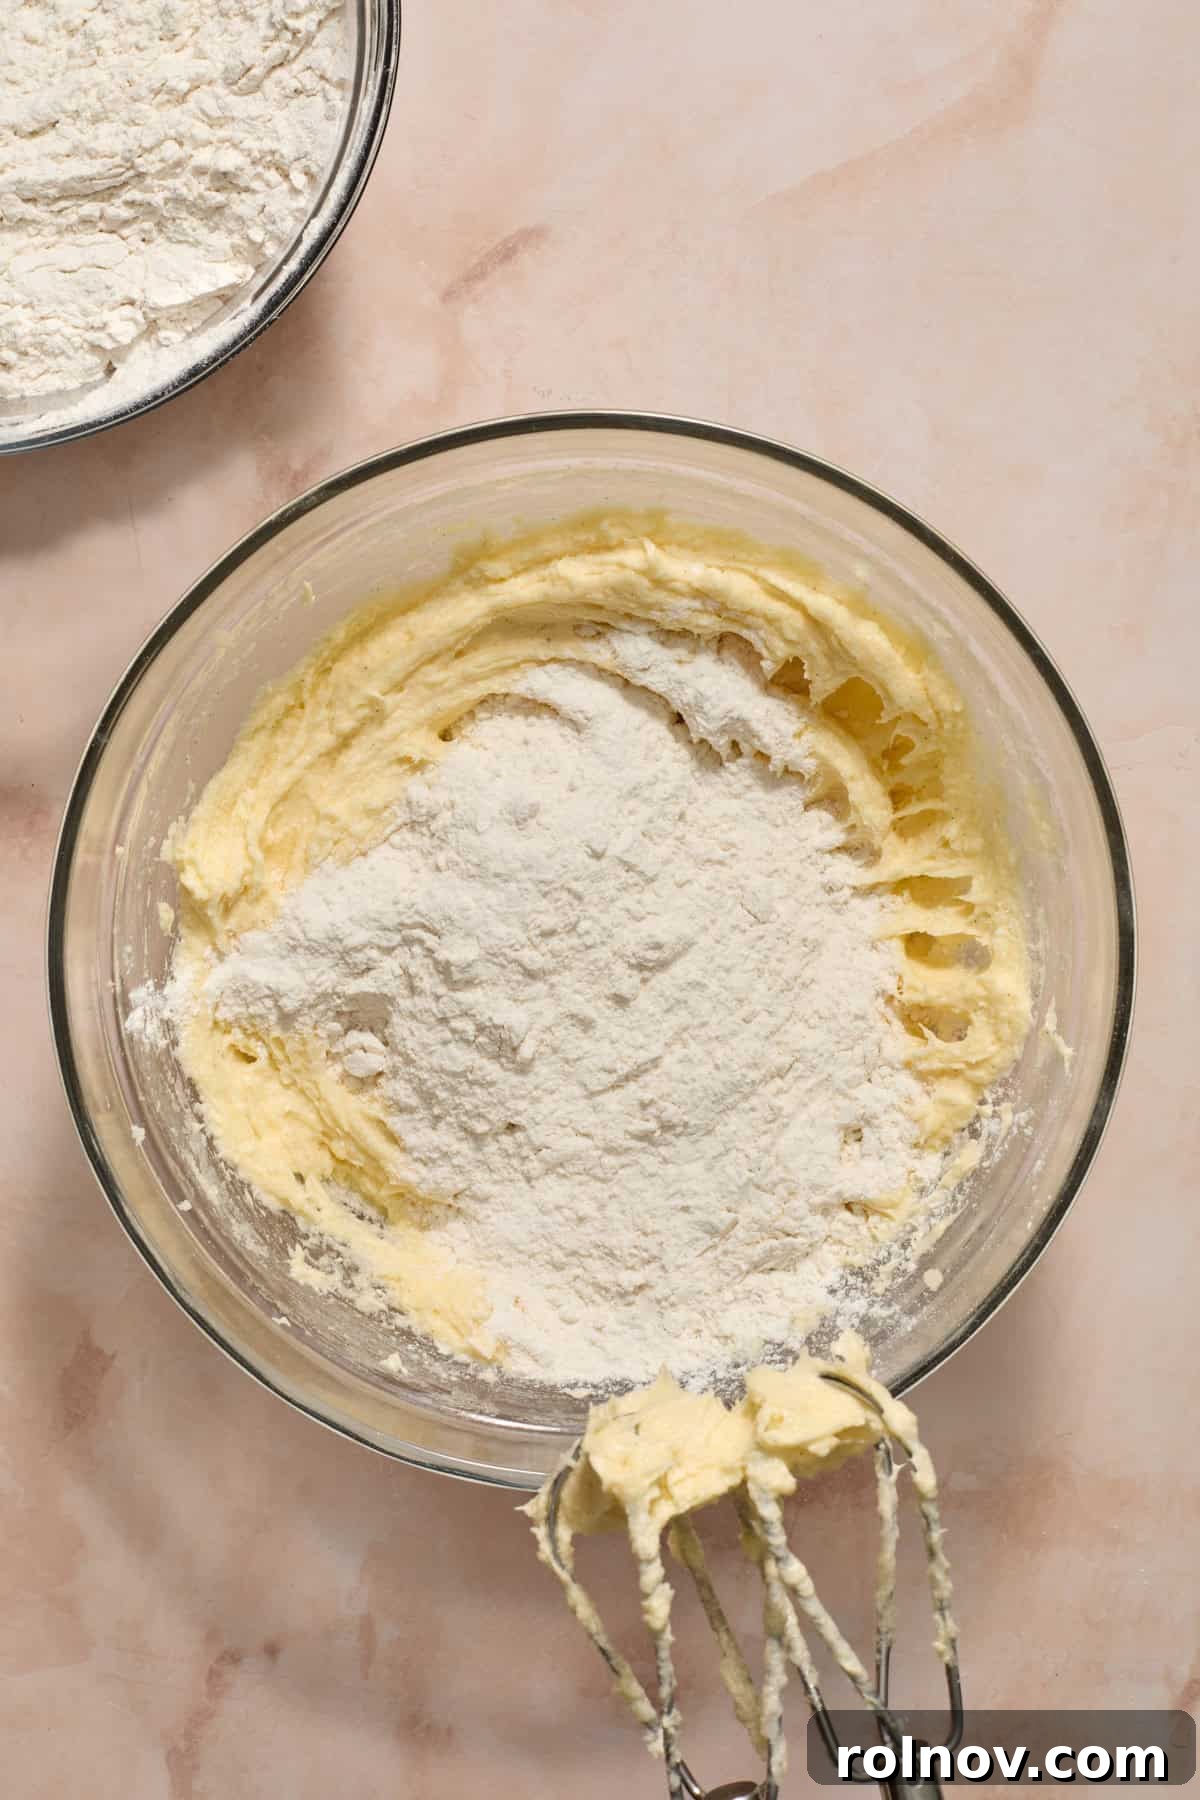
Step 3: Combine Wet and Dry Ingredients. Gradually add the whisked dry ingredients to the wet mixture in the large bowl. Start on low speed with your electric mixer and beat just until no streaks of flour are visible. It’s crucial not to overmix at this stage, as overmixing can lead to tough, dense cookie bars. If you plan to add sprinkles into the dough, now is the time to gently fold them in with the last bit of dry ingredients.
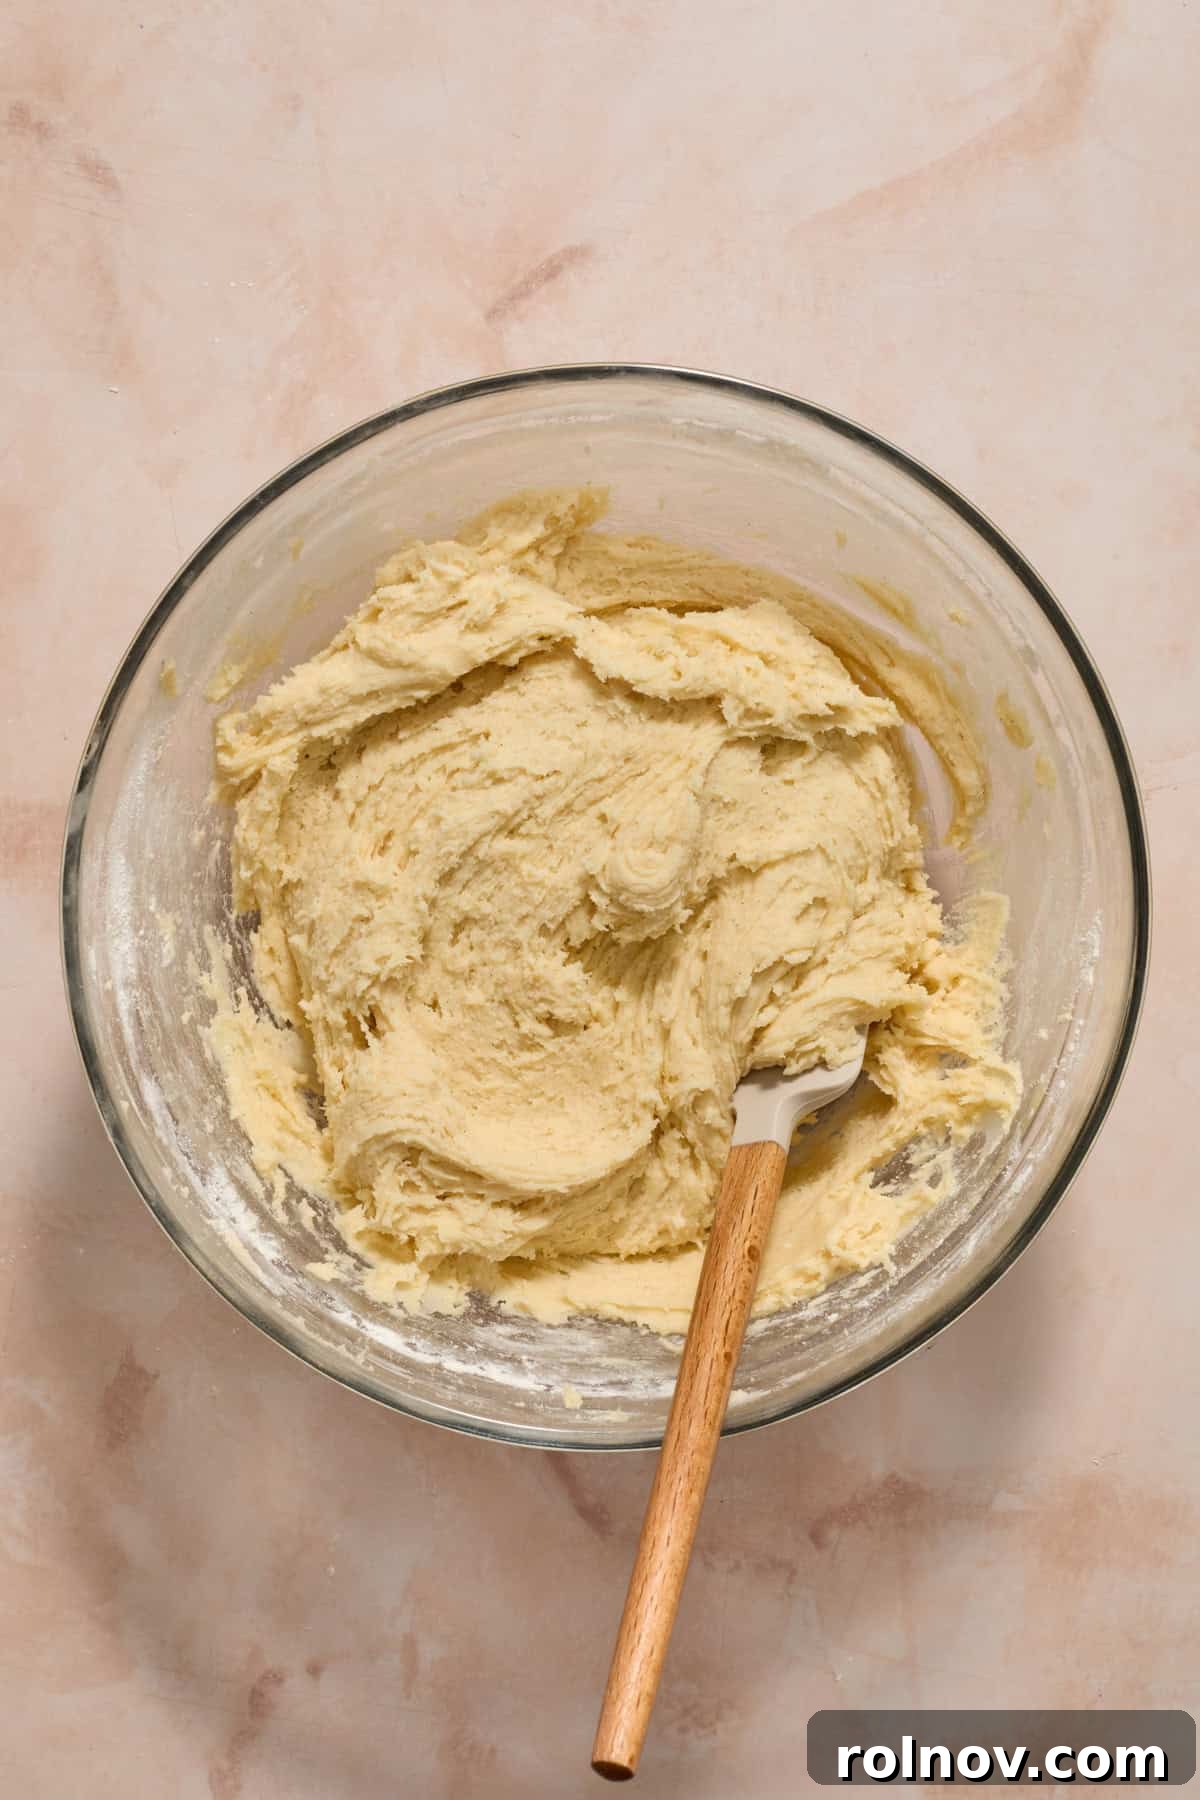
Step 4: Avoid Overmixing. As reiterated in Step 3, once the flour is just incorporated and no dry streaks remain, stop mixing. Overworking the dough develops gluten excessively, which can result in a dense, cake-like texture rather than the desired soft and chewy cookie bar. A gentle hand will yield the best results.
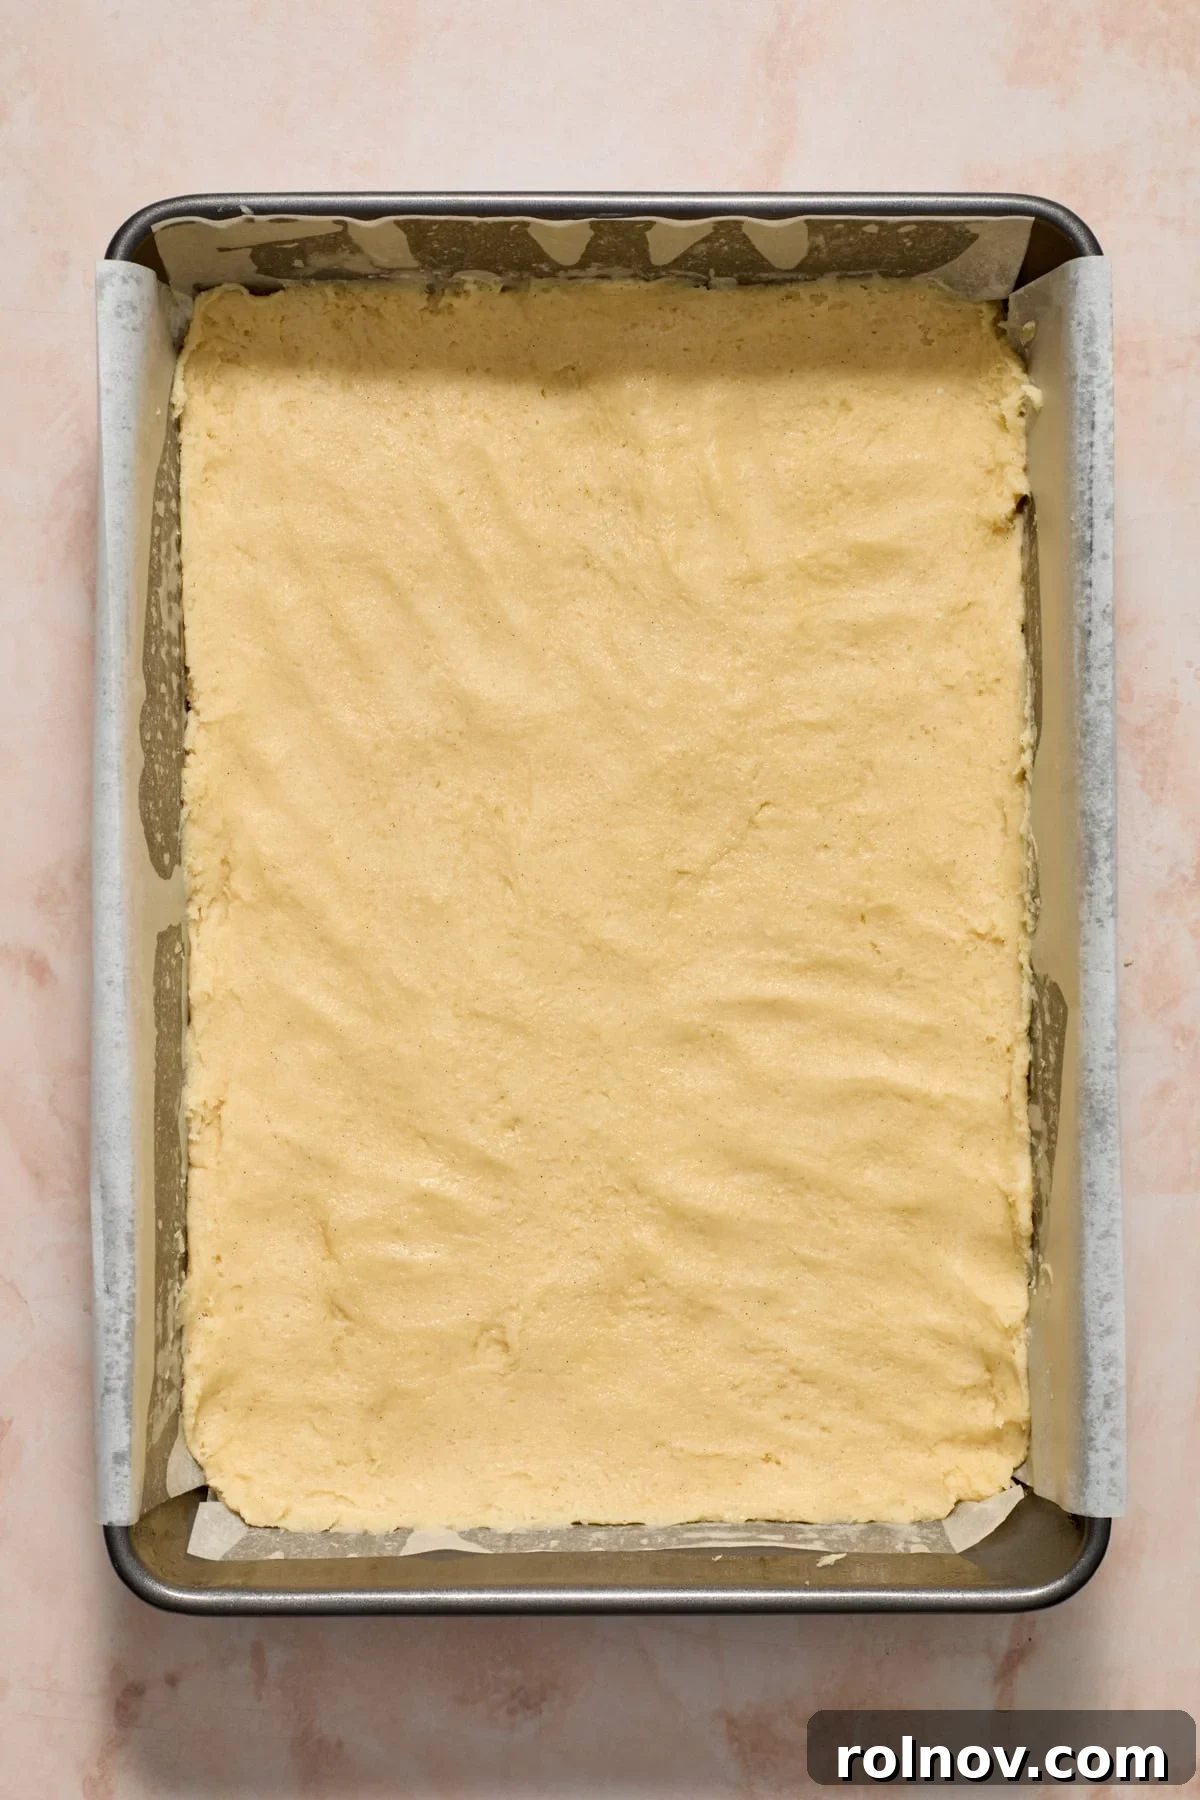
Step 5: Prepare for Baking. Line a 9×13 inch baking pan with parchment paper, leaving an overhang on the sides. This overhang will act as handles, making it easy to lift the cooled bars out of the pan. Evenly press the cookie dough into the prepared pan. The dough will be a bit sticky, so to prevent it from clinging to your hands, you can lightly spray your hands with cooking oil or lay a second piece of parchment paper over the dough and press it down using your hands or a flat bottom of a glass.
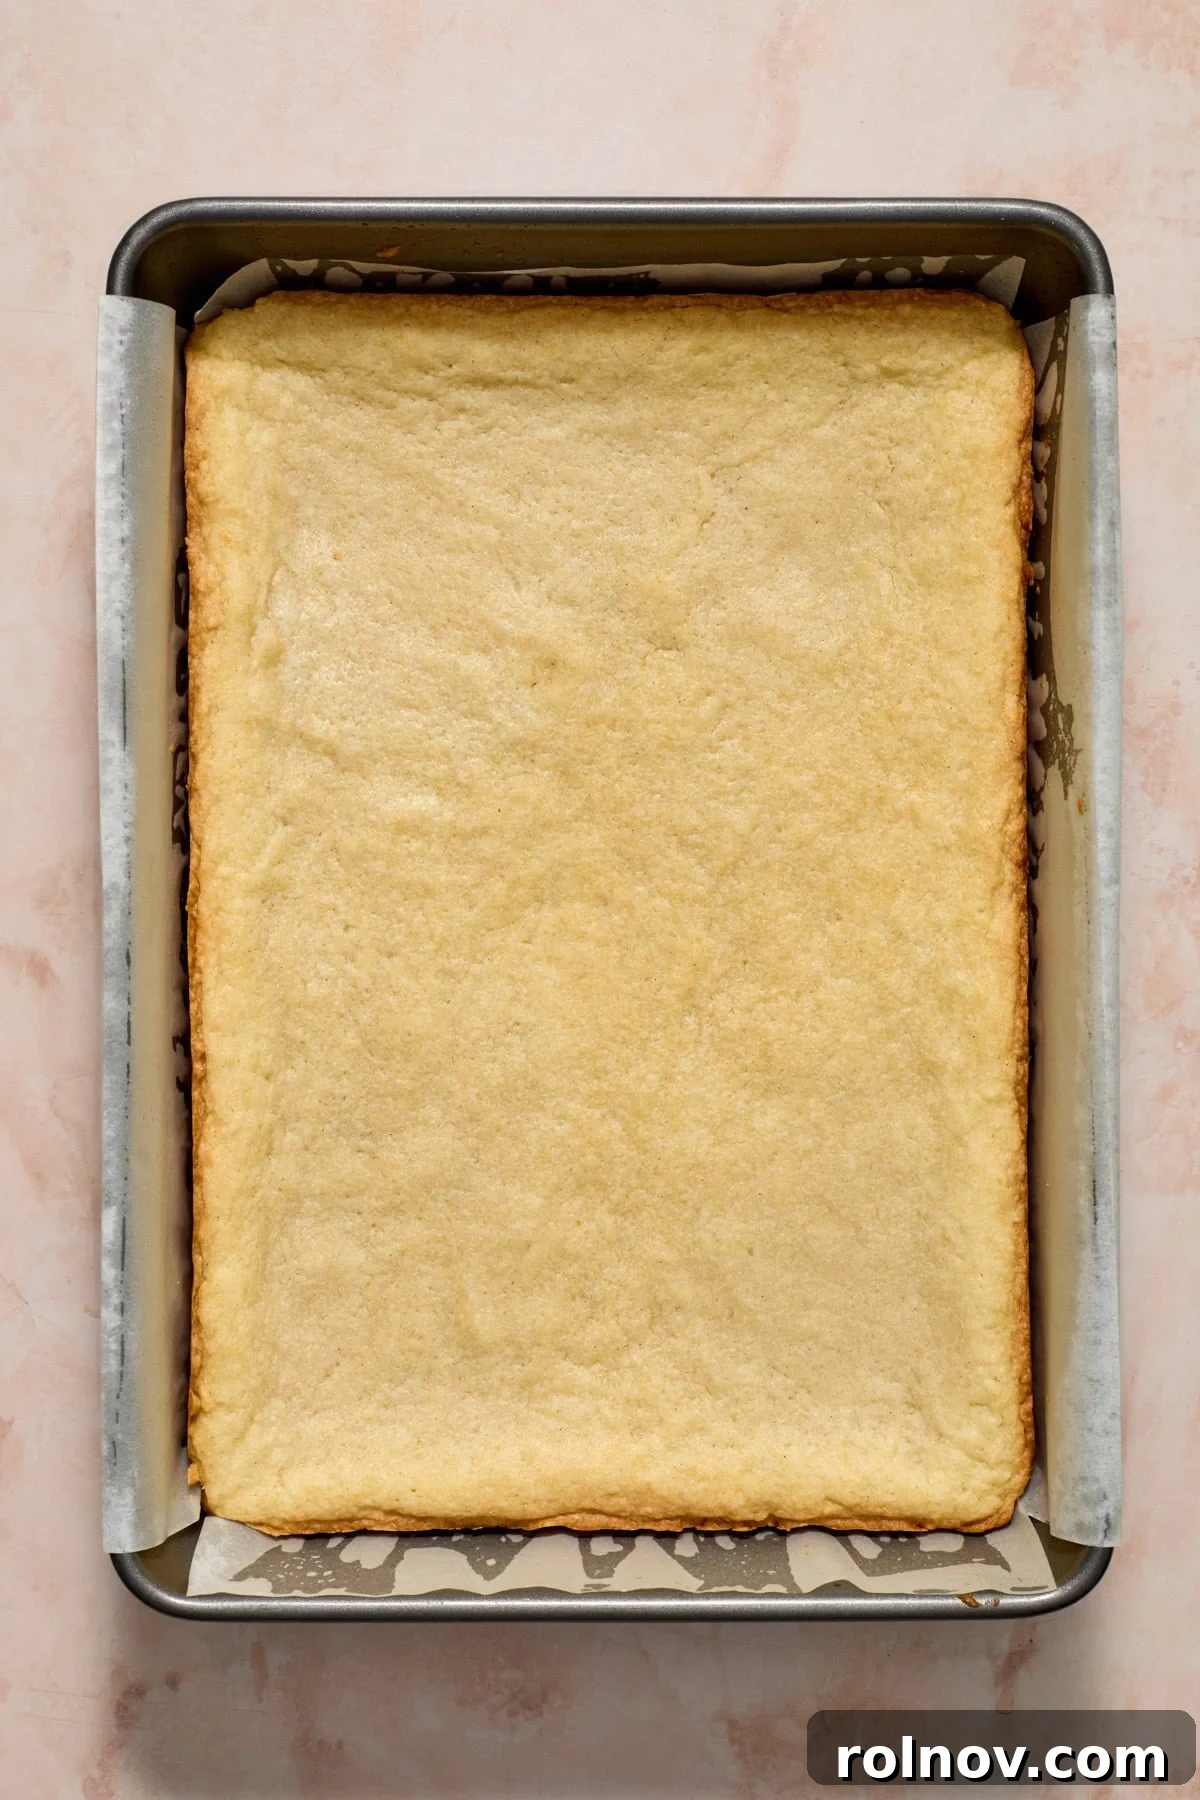
Step 6: Bake to Perfection. Bake the cookie bars for approximately 17-22 minutes. You’re looking for the edges to be lightly golden brown and the center to appear set, no longer wet or jiggly. It’s okay if the very center still seems a tiny bit underdone; much like brownies, the bars will continue to set and firm up as they cool outside the oven. Be careful not to overbake, as this is the quickest way to dry them out. Once baked, remove the pan from the oven and allow the bars to cool completely in the pan on a wire rack before attempting to frost them.
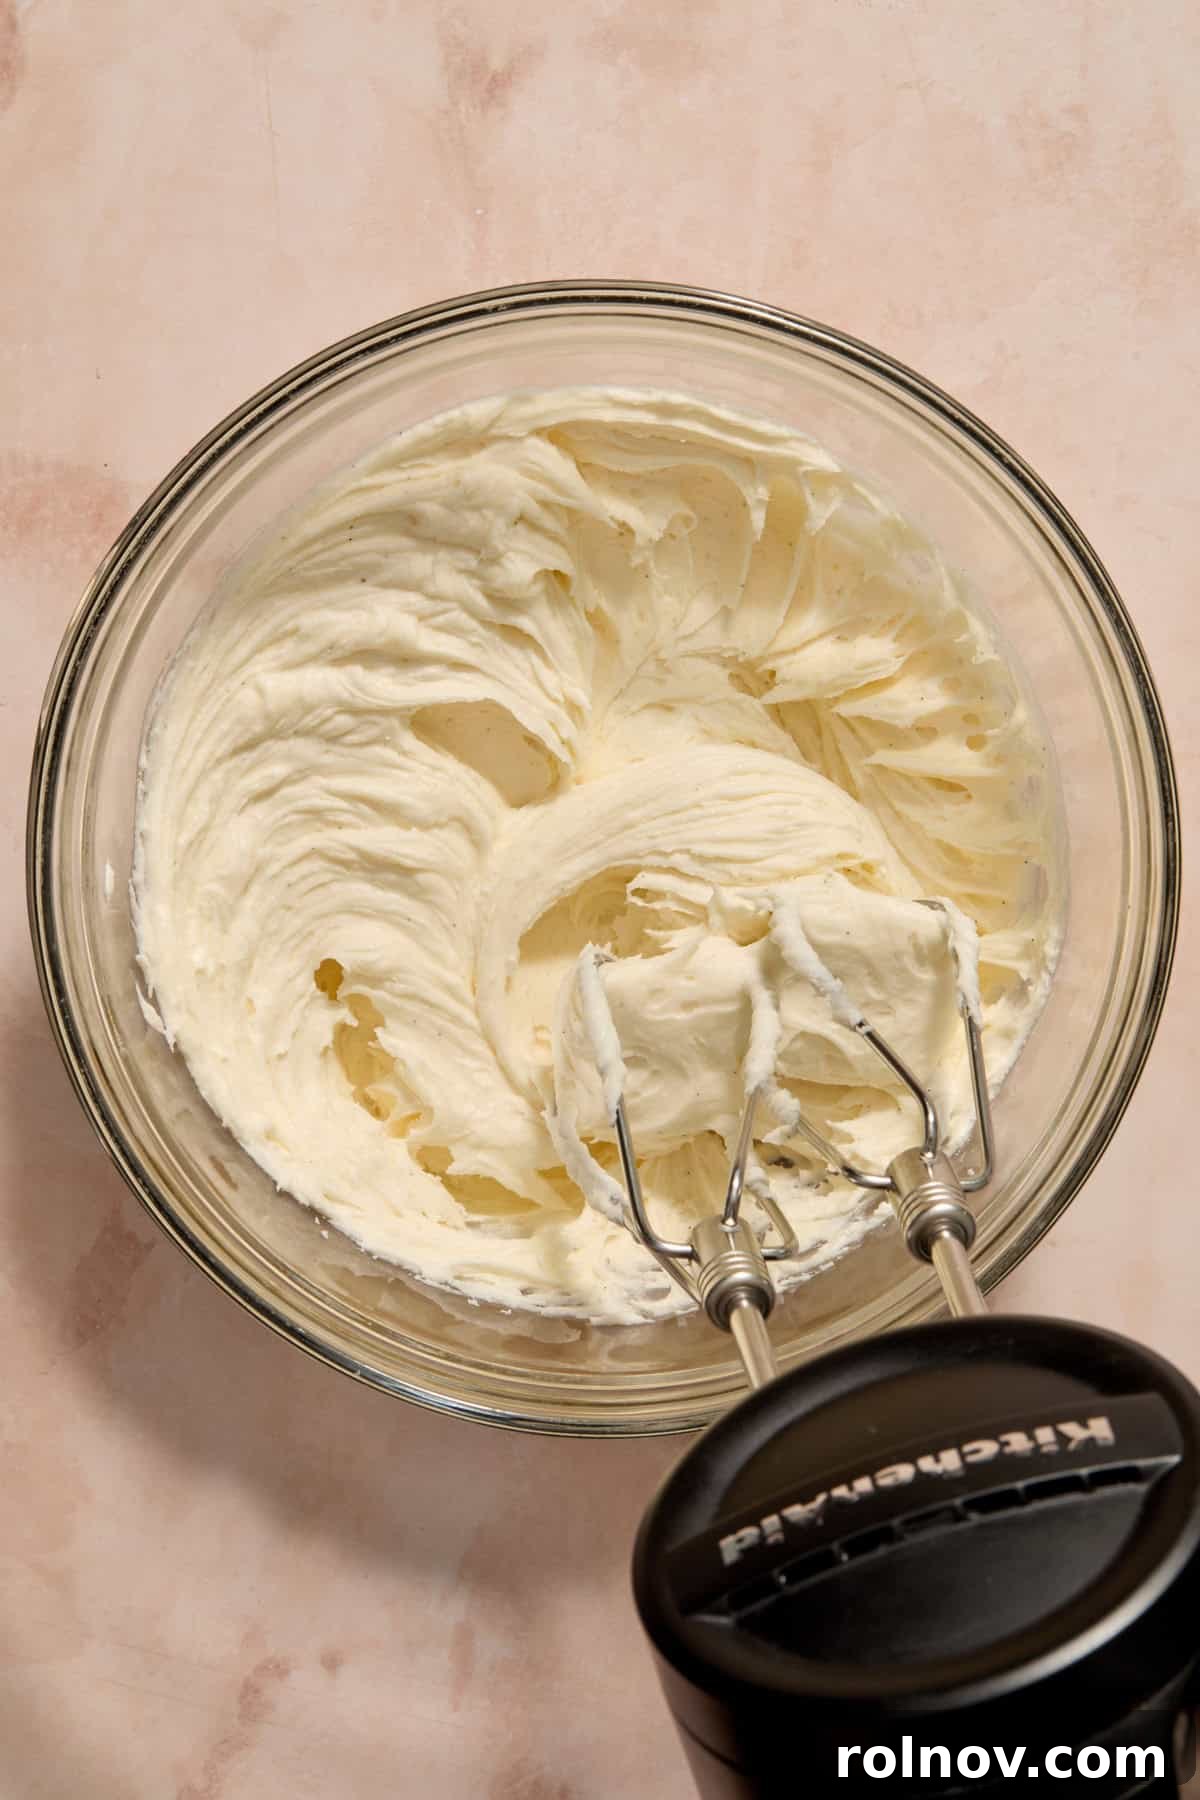
Step 7: Prepare the Heavenly Buttercream Frosting. While the cookie bars are cooling, prepare your frosting. In a medium bowl, beat the softened butter with an electric mixer until it’s smooth and creamy, about 2-3 minutes. Add the vanilla bean paste (or vanilla extract), sea salt, and almond extract, mixing until just incorporated. Slowly add the 2 cups of powdered sugar, one cup at a time, beating on low speed until combined, then increasing to medium until smooth. Gradually add the heavy cream, one tablespoon at a time, beating until the frosting reaches your desired creamy and fluffy consistency. You may need a little more or less cream depending on the desired thickness.
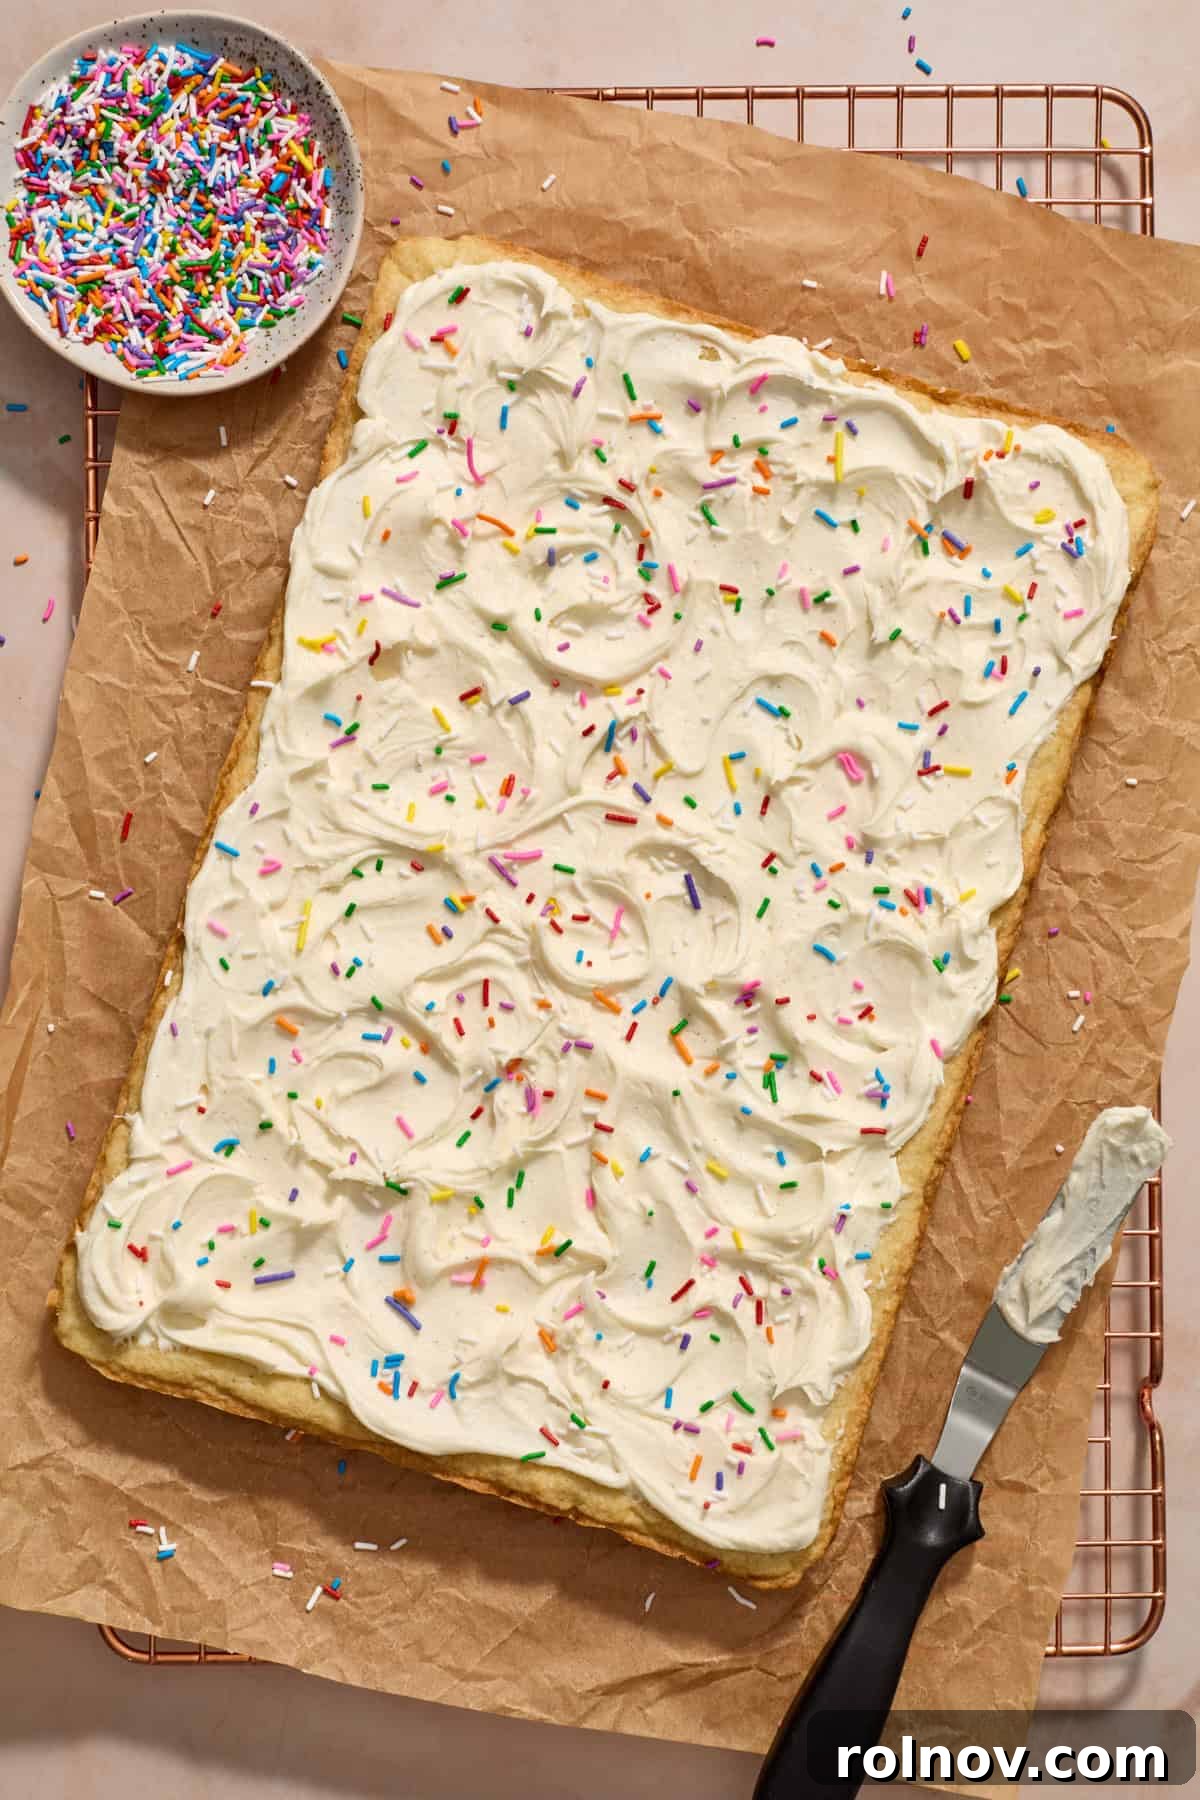
Step 8: Frost and Decorate. Once the cookie bars are completely cooled, use an offset spatula or a knife to evenly spread the vanilla bean buttercream frosting over the entire surface. This is your chance to get creative with sprinkles! Add rainbow sprinkles, or choose any color combination that suits your mood, event, or holiday theme. Allow the frosting to set for at least 15-30 minutes at room temperature before slicing the bars. This step helps ensure clean, neat cuts and prevents the frosting from smearing.
Expert Recipe Tips for Success
Achieving bakery-quality frosted sugar cookie bars is all about a few key details. Keep these expert tips in mind for the best possible outcome:
Understand “Room Temperature” Ingredients: When a recipe calls for room temperature butter and cream cheese, it doesn’t mean soft or greasy. They should still be slightly cool to the touch. When you gently press them, they should make a slight indentation but not entirely yield. Ideally, their internal temperature should be between 65°F-67°F (18°C-19°C) – which is a bit cooler and firmer than many people assume. This precise temperature allows them to cream perfectly with sugar, creating an emulsion that holds air, leading to a light and fluffy texture.
The Golden Rule: Do Not Overbake! This is perhaps the most critical tip for soft and chewy cookie bars. Begin checking for doneness around the 17-minute mark. You want the edges to just barely turn a light golden brown. The center may still appear a touch soft or slightly underdone, but that’s perfectly normal and desired! The bars will continue to cook and set as they cool on the wire rack. Overbaking, even by just a couple of minutes, can quickly transform these tender bars into dry, crumbly hockey pucks. Trust the process and err on the side of slightly underbaked.
Precision Matters: Weigh Your Ingredients: For the most consistent and best results in baking, especially with flour, using a kitchen scale to weigh your ingredients is highly recommended. Measuring flour by volume (scooping or spooning into a cup) can lead to vastly different amounts each time, potentially adding too much flour and resulting in dry, dense bars, or too little, leading to greasy, spread-out bars. If you don’t have a scale, stir your flour first, then spoon it into the measuring cup without packing, and level the top with a straight edge.
Adding Sprinkles to the Dough: Incorporating sprinkles directly into the cookie bar dough can add a delightful pop of color. However, be aware that naturally dyed sprinkles, especially jimmies, tend to bleed their colors significantly into the dough, particularly if the dough is mixed extensively after their addition or if it’s too warm. Also, consider your color choices carefully. During testing, I found that silver and gold sprinkles sometimes lost their luster and could visually resemble mold once baked into the dough. Opt for good quality, vibrant nonpareils or sprinkles specifically designed for baking without bleeding if you’re concerned about color retention.
Cool Completely Before Frosting: Patience is a virtue in baking! It is absolutely essential that your cookie bars are completely cooled before you apply the frosting. If the bars are even slightly warm, the buttercream will melt, creating a messy, soupy disaster instead of a smooth, decadent topping. This often means waiting for at least an hour, sometimes two, depending on your kitchen’s ambient temperature.
Perfecting Your Frosting Consistency: If your frosting feels too stiff, add a tiny bit more heavy cream (1 teaspoon at a time) until it reaches a spreadable consistency. If it’s too thin, add a tablespoon or two of powdered sugar until it thickens up. Achieving the right consistency makes frosting the bars a breeze.
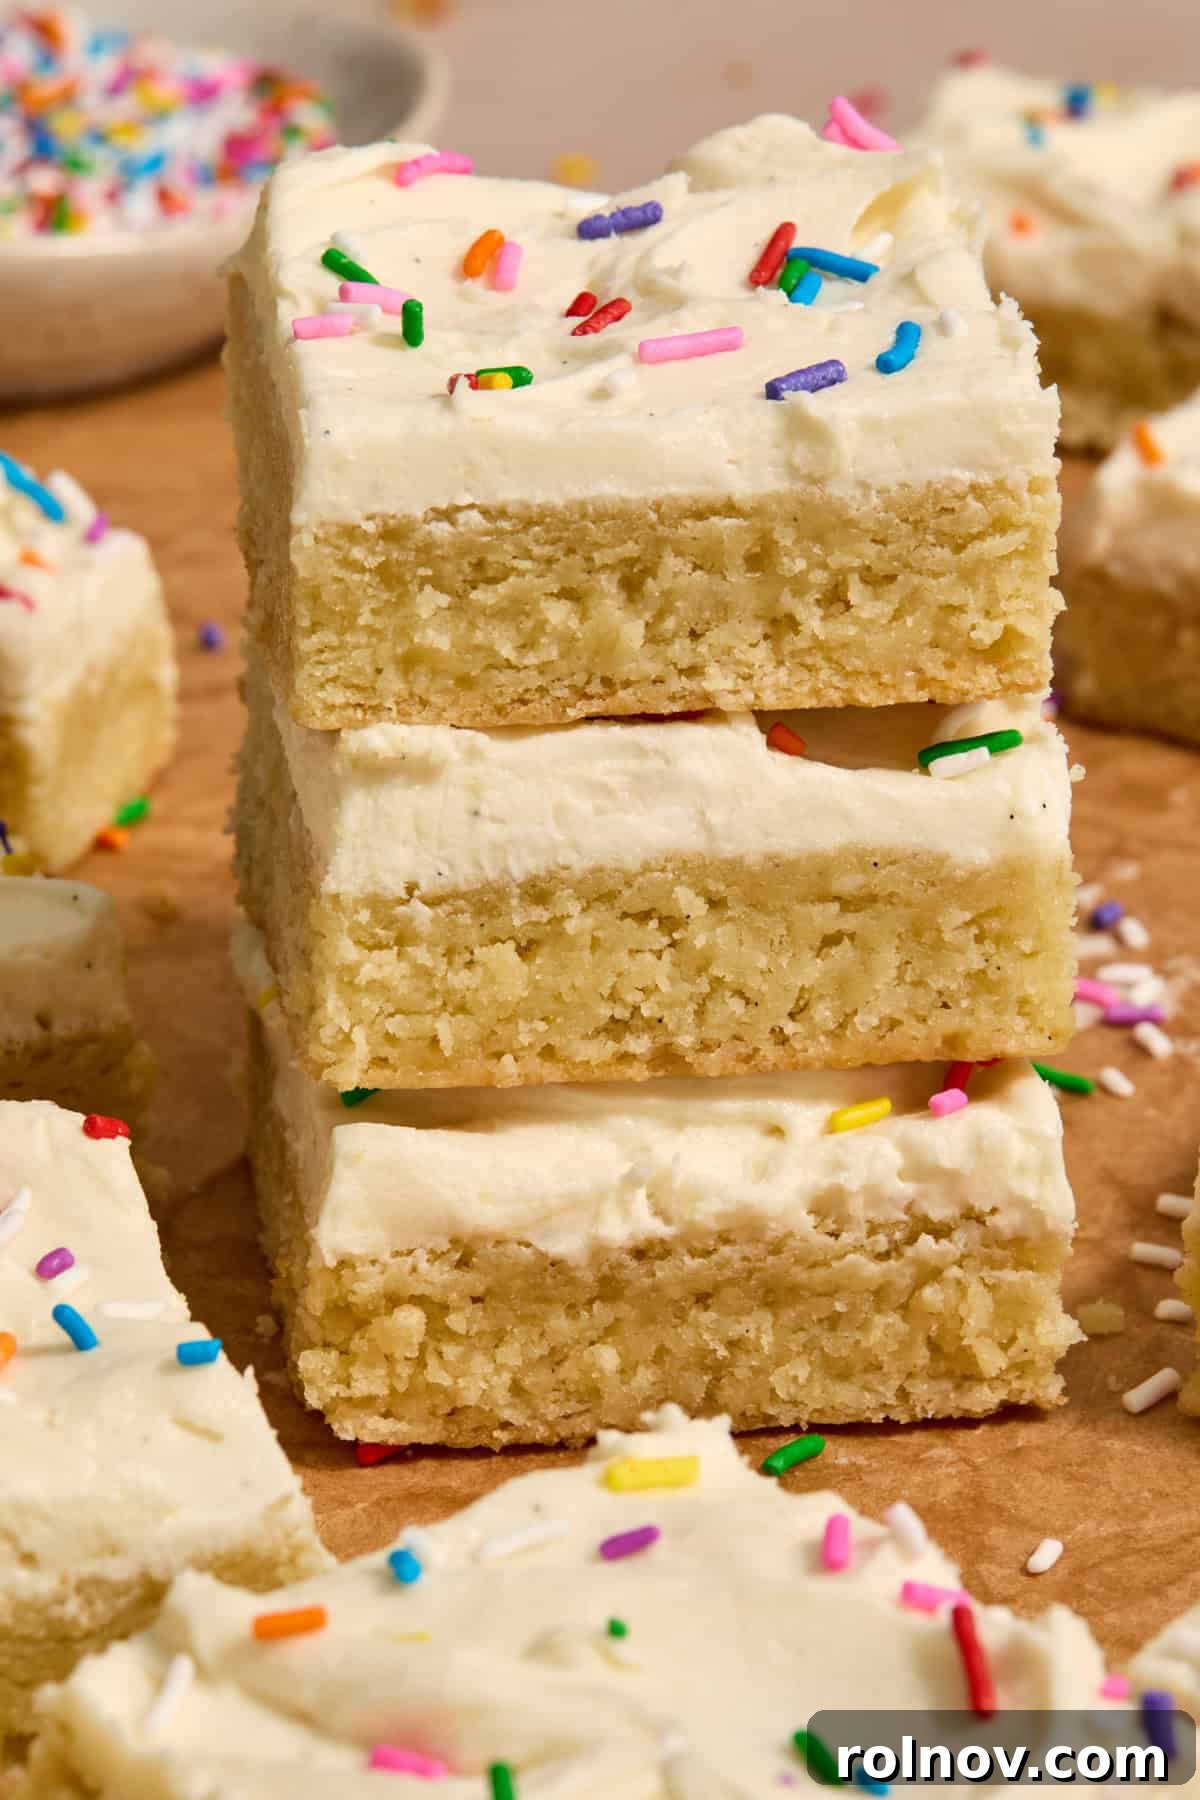
Storage and Freezing Tips for Freshness
Proper storage is key to keeping your Frosted Sugar Cookie Bars fresh and delicious for as long as possible. Here’s how to store them, whether you plan to enjoy them now or later:
Room Temperature Storage:
These sugar cookie bars store wonderfully at room temperature. Place them in an airtight container to prevent them from drying out. They will remain fresh and delicious for about 3-4 days. I’ve actually noticed they often become even softer and more tender on the second day, as the moisture from the frosting melds with the cookie bar base.
Refrigerated Storage:
If you prefer to extend their shelf life, you can refrigerate the frosted sugar cookie bars. Stored in an airtight container in the refrigerator, they will last approximately 5-6 days. However, for the best flavor and texture, allow them to sit out at room temperature for about 15 minutes before serving. This brings the butter in the frosting back to a softer, more enjoyable consistency.
Freezing Instructions:
Freezing is an excellent option for long-term storage, especially if you want to prepare a batch ahead of time.
Unfrosted Bars: For optimal results, it’s ideal to freeze the cookie bars unfrosted. Once the baked bars have completely cooled, slice them into individual portions or leave them as a whole slab. Wrap them tightly in plastic wrap, then place them in a freezer-safe airtight container or heavy-duty freezer bag. They will keep well for up to 3 months. When ready to serve, thaw them at room temperature and then proceed with making and applying the frosting.
Frosted Bars: If you need to freeze the bars after they’ve been frosted, you certainly can. To prevent the frosting from getting smushed or sticking, arrange the frosted bars in a single layer on a baking sheet lined with parchment paper. Freeze them for about an hour, or until the frosting is firm. Once firm, you can layer them in a freezer-safe airtight container, placing a piece of parchment paper between each layer to prevent sticking. They will last for about 2-3 months. Thaw them in the refrigerator overnight or at room temperature for a few hours before serving. The frosting texture might change slightly after freezing and thawing, but they will still be delicious.
Common Questions About Sugar Cookie Bars
Dry or crumbly cookie bars are typically a result of one of three common issues: improper measurement of flour, overmixing the dough after adding dry ingredients, or overbaking. The most accurate way to measure flour is by weight using a kitchen scale. If weighing isn’t an option, stir your flour in its container, then spoon it lightly into a measuring cup and level off the top with a straight edge. This method reduces the chance of compacting the flour and adding too much.
Overbaking is another major culprit. I recommend pulling the cookie bars from the oven as soon as the edges begin to show the slightest golden brown tint. Remember, they continue to cook a bit as they cool. My oven tends to run hot, so sometimes this means they’re ready as early as the 19-minute mark.
Lastly, after you’ve added the dry ingredients, mix only until they are just incorporated and no streaks of flour remain. Overmixing develops gluten, leading to a tough, dry texture.
Greasy cookie bars most often indicate that your butter was too warm or excessively soft at the beginning of the recipe. Butter that is too warm will not emulsify properly with the sugar, causing the fat to separate and creating a greasy texture. Another possible cause could be an under-measurement of the flour, which throws off the wet-to-dry ingredient ratio, leaving excess fat.
If your cookie bars have a tough or cake-like consistency, it’s highly likely due to overmixing the dough, especially after the dry ingredients have been added to the wet. Overmixing develops the gluten in the flour, resulting in a more bread-like, dense, and chewy (in a tough way) texture. It can also stem from an improper measurement of leavening agents (baking powder/soda), which can throw off the delicate balance required for a soft, tender crumb.
Absolutely! These cookie bars are a fantastic make-ahead dessert. You can bake the bars a day or two in advance, let them cool completely, and store them unfrosted in an airtight container at room temperature. Frost them on the day you plan to serve. Alternatively, you can freeze unfrosted bars for up to 3 months, thawing them before frosting. The frosting can also be made a day in advance and stored in the refrigerator; just let it come to room temperature and re-whip briefly before spreading.
For the frosting, rainbow jimmies or nonpareils are classic choices and add a wonderful pop of color and texture. If you’re adding sprinkles to the dough, consider high-quality sprinkles that are specifically marketed as “non-bleeding” to maintain crisp colors. For holiday themes, shaped sprinkles (like stars, hearts, or trees) can be a fun addition, but be aware that some novelty sprinkles can be harder or have less appealing texture when baked directly into the cookie. Generally, softer sprinkles like jimmies work best inside the dough.
Explore More Cookie and Bar Recipes
Cookies
Funfetti Birthday Cake Cookies
Desserts
Mini Egg Cheesecake Cookie Bars
Cookies
Lemon Sugar Cookies
Desserts
Gluten Free Blondies
HUNGRY FOR MORE? Don’t miss out on our latest recipes and baking inspiration! Subscribe to our newsletter for exclusive content delivered straight to your inbox. You can also follow us on Facebook, Instagram, and Pinterest for daily updates, behind-the-scenes glimpses, and delicious food ideas!
Frosted Sugar Cookie Bars
Ingredients
Cookie Bars:
- 2½ cups all-purpose flour, 312 g
- 1 tsp baking powder
- ½ tsp baking soda
- ¼ – ½ tsp sea salt
- 1 ⅓ cups granulated sugar, 267 g
- 1 cup unsalted butter, room temperature, 226 g
- 2 large eggs, room temperature
- 4 oz full-fat cream cheese, softened
- 1½ tsp vanilla bean paste, or vanilla extract
- ½ tsp almond extract
Vanilla Bean Buttercream Frosting:
- ½ cup unsalted butter, softened
- 2 cups powdered sugar
- 1 tsp vanilla bean paste, or vanilla extract
- ¼ tsp almond extract
- pinch of sea salt
- 1-2 Tbsp heavy cream, more as desired
- sprinkles for topping
Instructions
-
Preheat oven to 350°F (175°C). Line a 9×13 inch baking pan with parchment paper, leaving an overhang on the sides for easy removal.
-
Make the Cookie Bars: In a small bowl, whisk together the flour, baking powder, baking soda, and salt. Set aside.
-
In a large bowl, using an electric mixer, beat the softened butter and sugar on medium-high speed for 3-5 minutes until light and fluffy.
-
Add the eggs, vanilla bean paste (or extract), almond extract, and cream cheese. Beat until fully incorporated, scraping down the bowl as needed.
-
Slowly add the dry ingredients to the wet mixture and beat on low speed until just incorporated, ensuring no streaks of flour remain. Do not overmix. If adding sprinkles to the dough, fold them in gently with the last bit of dry ingredients.
-
Press the sticky cookie dough evenly into the prepared 9×13 inch baking pan. Lightly oil your hands or use a piece of parchment over the dough to help with pressing.
-
Bake for about 17-22 minutes, or until the edges are lightly golden brown and the center appears set. Remember, the center will continue to set as it cools. Remove from oven and allow to cool completely in the pan on a wire rack before frosting.
-
Make the Frosting: In a medium bowl, beat the softened butter until smooth and creamy. Add the vanilla bean paste (or extract), sea salt, and almond extract; mix to combine.
-
Gradually add the 2 cups of powdered sugar, beating on low speed until combined, then increasing to medium until smooth. Add the heavy cream one tablespoon at a time, beating until the frosting is creamy and fluffy.
-
Using an offset spatula or knife, frost the completely cooled cookie bars. Generously add your chosen sprinkles over the top. Allow the buttercream frosting to set for 15-30 minutes before cutting into desired bar sizes and serving.
Notes
Storage: Store these sugar cookie bars at room temperature in an airtight container for about 3-4 days. They actually become a bit softer and more tender on the second day. You can refrigerate them for extended freshness (5-6 days), but let them sit out for about 15 minutes before serving for optimal texture.
To freeze: For best results, freeze unfrosted bars in a freezer-safe container for up to 3 months. If freezing frosted bars, first freeze them in a single layer on a baking sheet for about an hour until the frosting is firm. Then, layer them in an airtight container with parchment paper between layers.
Room temperature butter and cream cheese is crucial. These ingredients should be slightly cool to the touch, not greasy or melted. A gentle press should make a slight impression but not completely squish. Aim for an internal temperature of 65°F-67°F (18-19°C) for ideal creaming and texture.
Weigh your ingredients for best results. Measuring flour by scooping can vary greatly. Weighing ensures accuracy, preventing dry or greasy bars due to incorrect flour amounts.
Adding sprinkles to the cookie bars: Be aware that naturally dyed sprinkles may bleed color into the dough, especially if overmixed or with certain colors. Choose your colors wisely, as some metallics (like silver) can appear unappetizing once baked into the dough.
Nutrition
Nutrition information is automatically calculated, so should only be used as an approximation.
Did you enjoy this recipe? Have a question?Leave a comment below!
Recommended Baking Essentials
Equip your kitchen with the right tools to make baking these cookie bars even easier and more enjoyable:
Hand Mixer
KitchenAid Stand Mixer
Mixing Bowls
Offset Spatula
Parchment Paper
Digital Kitchen Scale